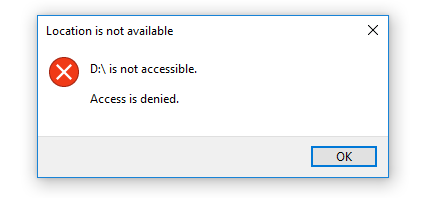
Are you coming across the “Access Denied” error message when you connect an external drive to your Windows 11 PC? In this guide, I have highlighted some troubleshooting tips that you can follow to resolve this issue easily.
The “Access Denied” error can show up if Windows 11 does not grant the required permissions to access the external hard drive. Usually, when you do not have admin access(on office/school computers) to connect any external devices, such error messages can appear.
Reasons for Access is Denied Error on Windows 11
Somehow, Windows 11 might not recognize you as the owner of the external hard drive connected to the current PC. Due to some technical issues like improper connection or any other hardware problem with the external drive, Windows denies recognizing the device upon connection.
If the file system on the external hard drive has become corrupted, Windows 11 might not allow access to the drive. Also, if the external hard drive is infected with malware, Windows OS will never allow you to access its content. Also, if the driver for the external hard drive is outdated, the external hard drive access denied error on Windows 11 will appear.
Best Ways to Fix External Hard Drive Access Denied on PC
Here are the various troubleshooting tips that will fix the “Access Denied” warning for any external hard drive you connect to your Windows 11 PC.
1. Enable Built-in Administrator
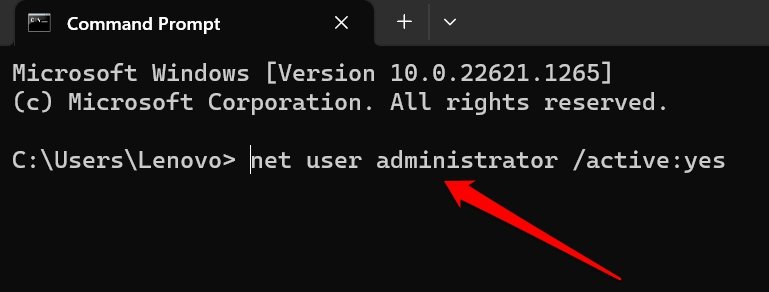
Windows OS comes with an administrator account. Enabling it can provide you with root access. This means you can access any file and folder on your PC. It can be done through a simple command via the command prompt.
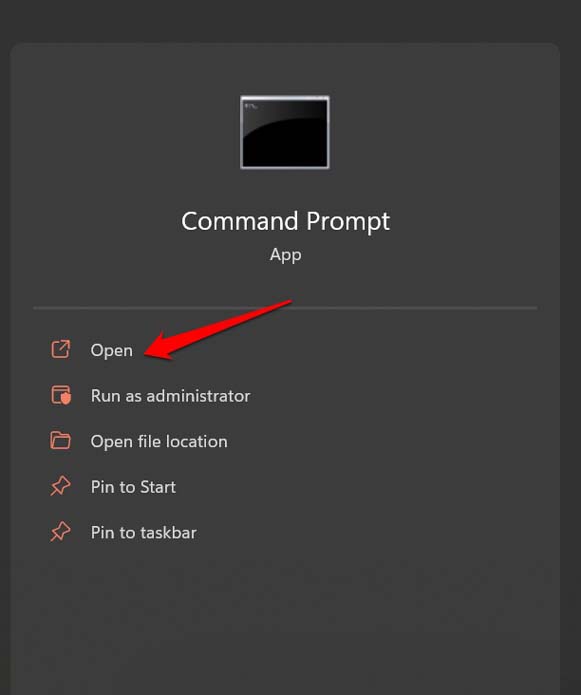
- Open the Command prompt by typing in cmd in the Windows + S search.
- Enter the following command.
net user administrator /active:yes

- Press enter to execute the command and then close the command prompt.
2. Reset User Permission Using Command Prompt
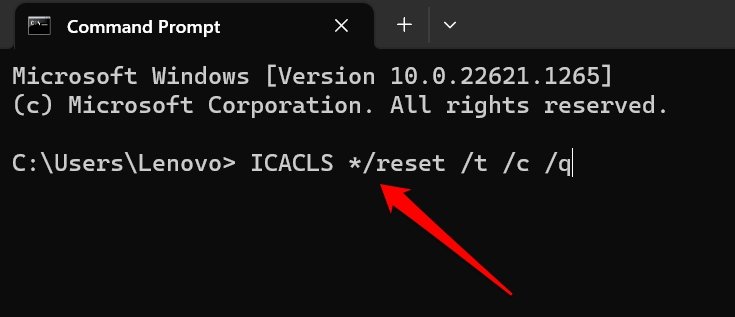
You need to execute a small command to reset the user permissions and make it easier for you to access any external hard drive you connect to Windows 11.
- Launch Command Prompt.

- Enter the following command
ICACLS */reset /t /c /q

- Close the command prompt and now reconnect the external hard drive to the PC.
3. Check for Any Errors with the External Hard Drive
Here is a simple tool to find the technical issues with the external drive and fix the same.
- Make sure the external hard drive is connected to the PC.
- Now, open File Explorer > click on This PC.
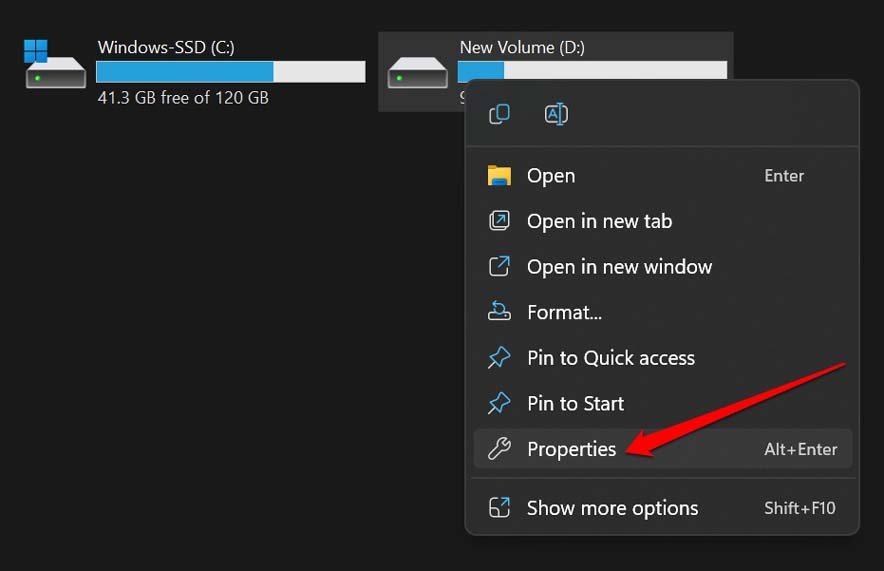
- Right-click on the external hard drive and select Properties.

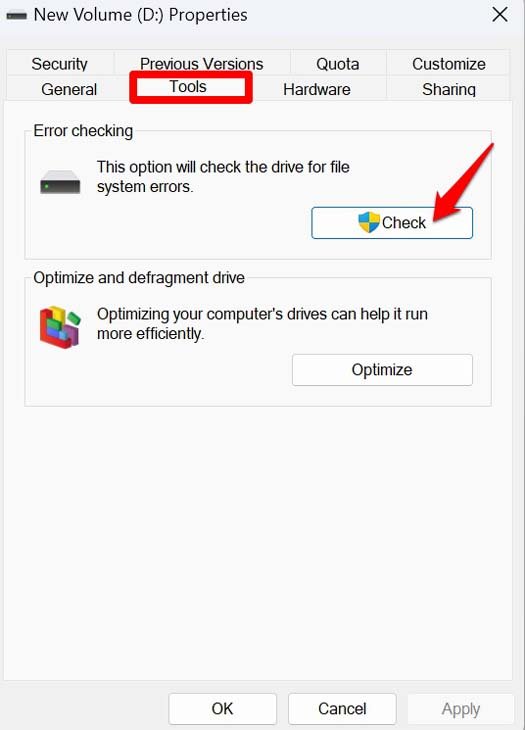
- From the Properties dialog box, click on Tools > Check.

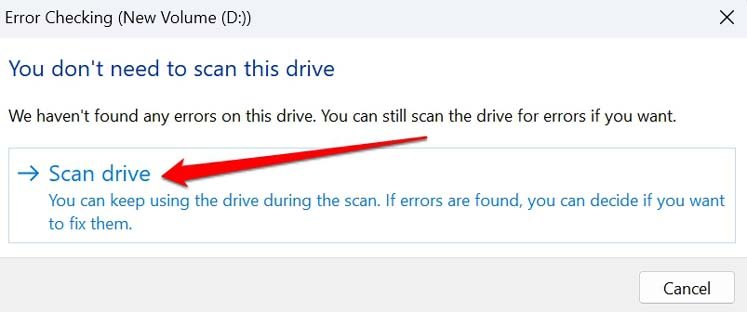
- In case, any errors are not found, a new pop-up named Error Checking will appear. Click the option Scan Drive, which you see on this pop-up box.

4. Change the Drive Letter for the External Hard Drive
You can access the Windows disk Management to change the pre-assigned letter for the disk drives. Especially, for the one assigned to the external hard drive.
- Press Windows + S to bring up the search.
- Type Disk Management.
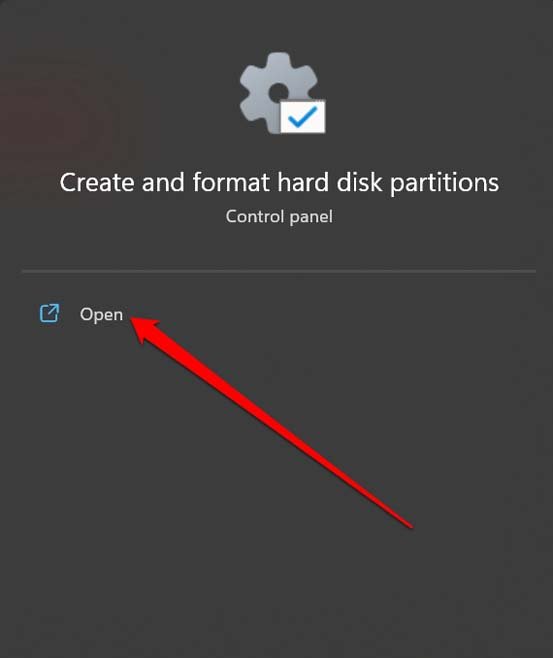
- Click Open when the search result shows up “Create and Format Hard Disk Partitions“.

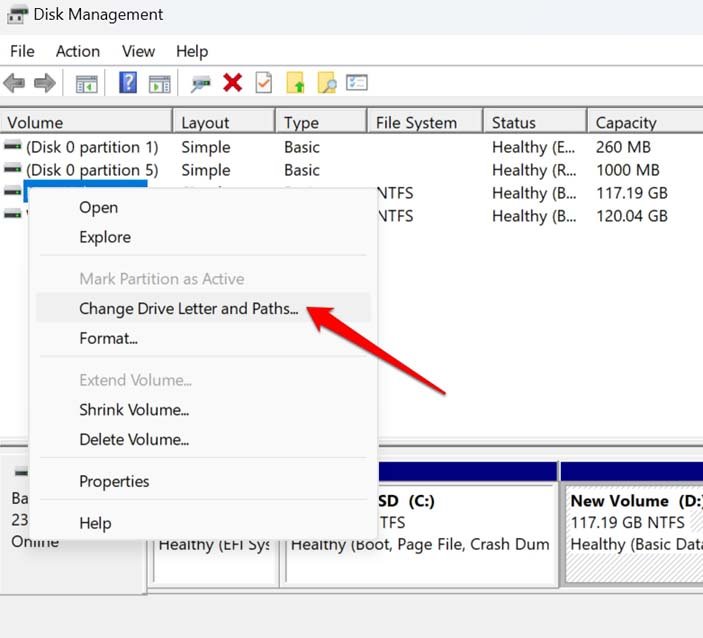
- Scroll to the external hard drive and right-click on it.
- From the menu, select Change Drive Letter and Paths. It will bring up a pop-up.

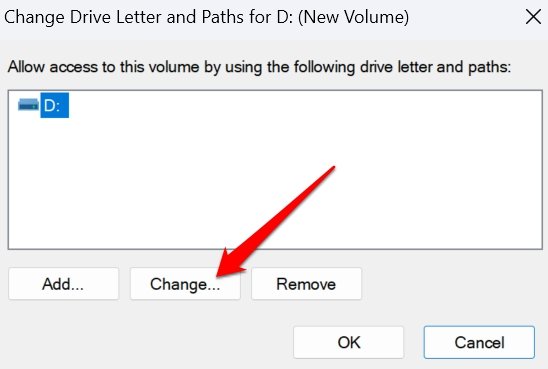
- Select the option Change from the pop-up.

- Another pop-up will appear in which you have to type in the new letter for the concerned external hard drive.
NOTE: Make sure that you are not changing the drive letter to an alphabet that is already being assigned to other prominent hard drives of your Windows computer.
5. Fix the Connectivity Issue
The connector on the external hard drive may have been damaged. That’s why you are seeing this access denied error. It happens when the connection is loose and unstable. On the other hand, the connector cable may be fine, but the USB port of your Windows PC may be damaged. If the slot is bent or broken then it cannot house the connector properly thus causing a loose connection.
So, get your gadgets to a nearby PC repair point. Take the help of the technicians to determine whether it is the cable connector of the external hard drive or the PC’s USB port that is at fault, causing you to see the “Access denied” error while connecting the external hard drive.
6. Claim Ownership of the External Hard Drive
You can set the permission to read, write or edit drive contents on the PC, including the external hard drive connected to the PC. Here is how you should go about it.
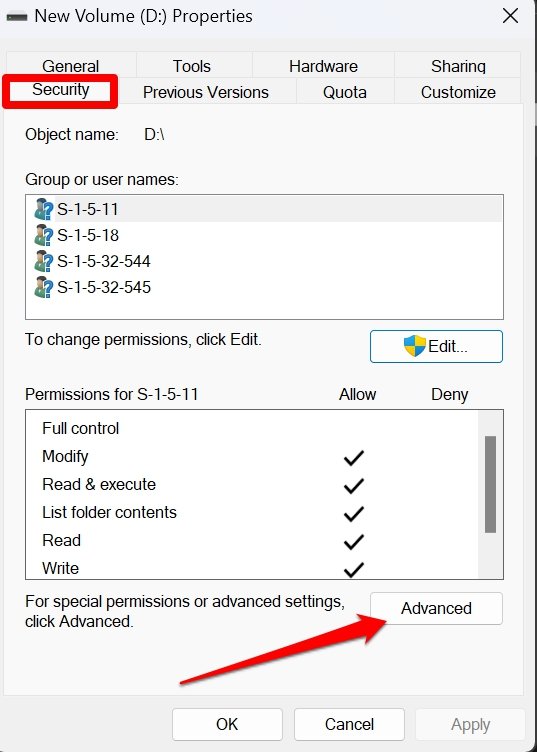
- In the file explorer, right-click on the external hard drive. Select Properties.

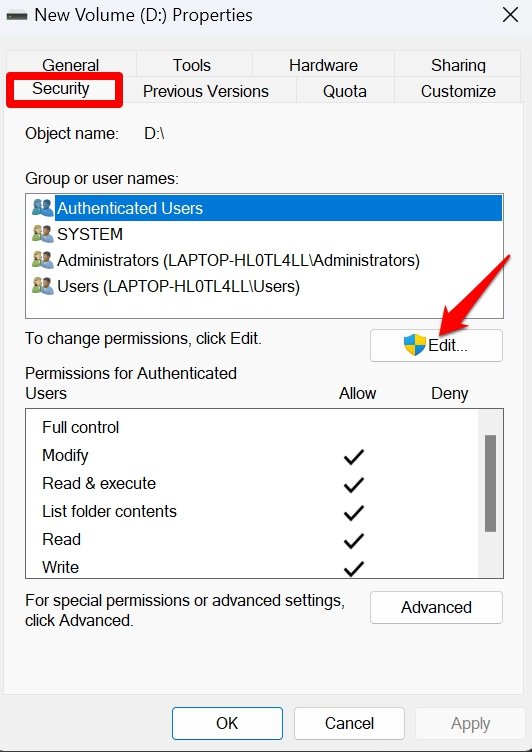
- Click on Security > Advanced.

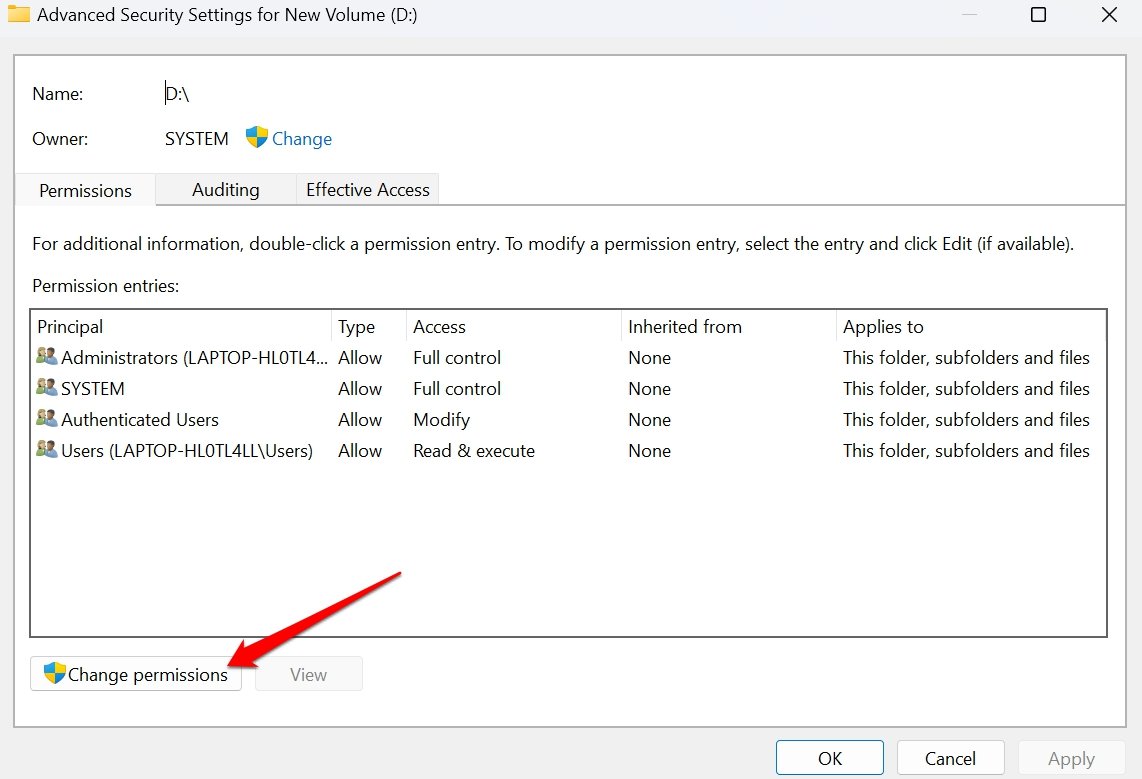
- Then click on Change Permissions.

- On the next dialog box, double-click on the username or account for which you want to edit the permission.
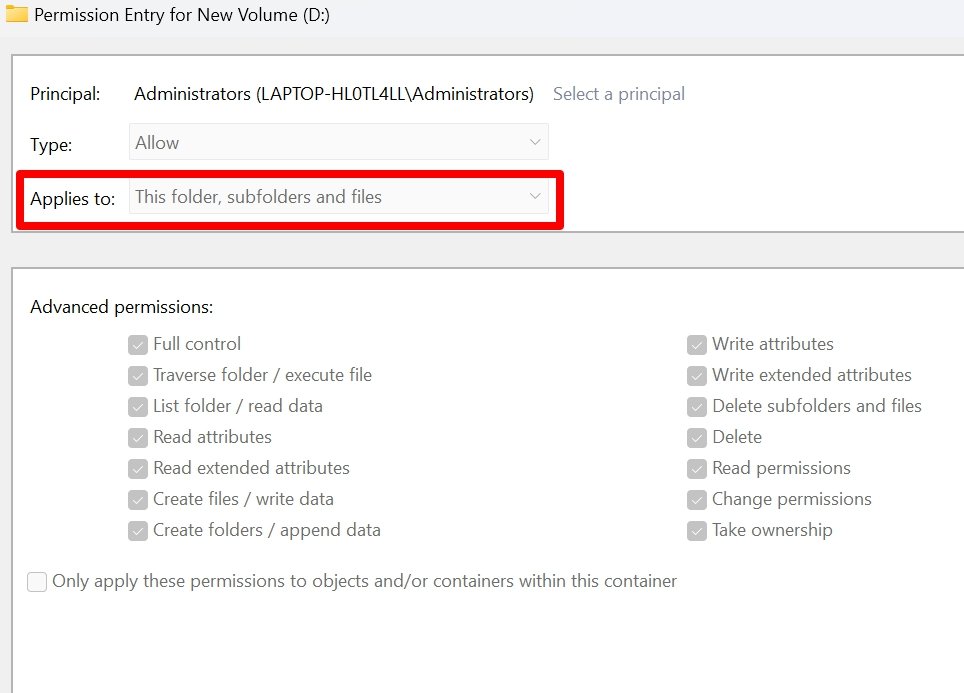
- Next, in the permission entry dialog box, select This folder, subfolders, and files from the dropdown beside Applies to.
- Click OK to save the changes.

Now, when you open the external hard drive, you won’t see the “access denied” error.
7. Allow Everyone to Access External Hard Drive
If nothing else works, then here is a trick to allow access to everyone to all the drives, folders, and files on the PC.
- Connect the external drive to the PC.
- Now, go to File Explorer > This PC.
- Right-click on the external hard drive > Select Properties from the menu.

- Click on Security > then click on Edit.

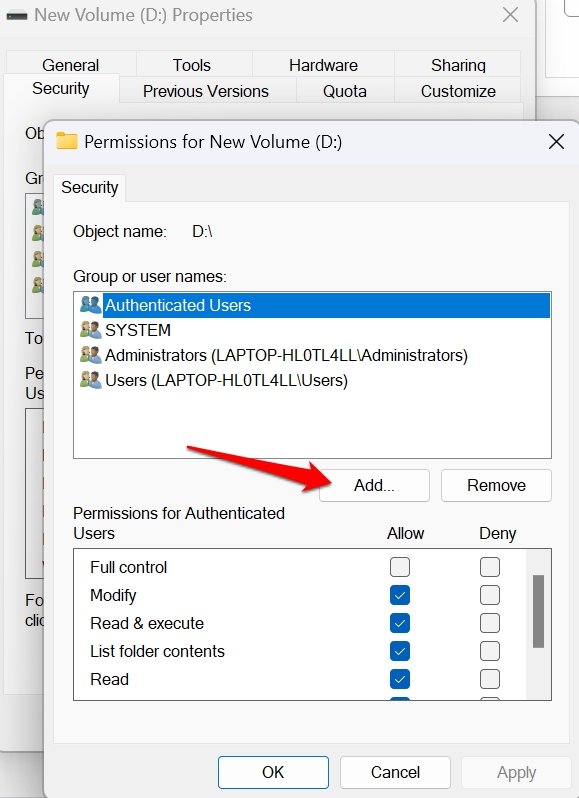
- Under the Permissions dialog box, click on Add.

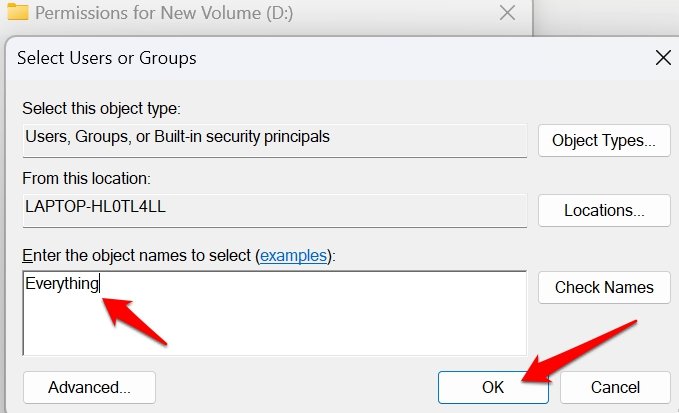
- Under Enter the Object Names to Select, type Everything.
- Click on OK to save the changes.

Conclusion
It can be troublesome if you have important data on the external hard drive and you cannot access it. So, to fix the access denied error, follow the troubleshooting tips explained in this guide. Most of the fixes will sort the issue out for you.
If you've any thoughts on How to Fix External Hard Drive Access Denied Error on Windows 11?, then feel free to drop in below comment box. Also, please subscribe to our DigitBin YouTube channel for videos tutorials. Cheers!
