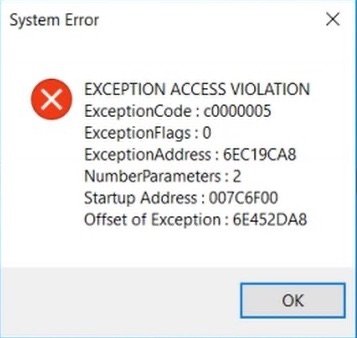
Are you facing the Exception Access Violation Error when you try to launch a program on Windows 11? In this guide, we will know about the necessary troubleshooting tips to resolve the problem. First, let us understand what is Exception Access Violation error is. It happens when a program installed on Windows 11 attempts to operate without authorization or tries accessing a memory that is not allocated to it.
At times, it has been observed that the Exception Access Violation error is accompanied by a blue screen of death (BSOD). The most common causes of the exception violation error on Windows 11 are hardware issues or outdated drivers, buggy software programs, any sort of corruption within the Windows registry, or any technical problem with Windows 11 itself.
Top Ways to Fix Exception Access Violation Error on PC
Here are the various tools, tricks, and tips you can use to fix the Exception Access violation error on Windows 11.
1. Turn Off the User Account Control
User Account Control (UAC) is a feature on Windows 11 that stops applications from making any changes to your computer system. User Account Control is the tool that causes the administrator permission pop-up to appear before you install any new program on your PC.
Without the user’s permission, no app is allowed to be installed or modify the system version. Here are the steps to temporarily turn off the User Account Control or UAC.
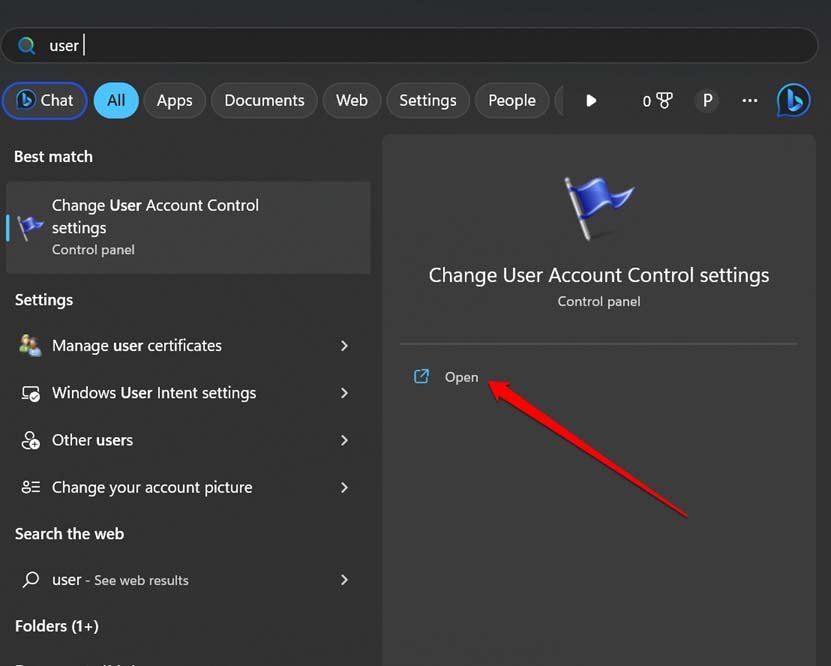
- Press Windows + S to bring up the search.
- Type User Account Control Settings in the search bar.
- Click Open when the concerned search result appears.

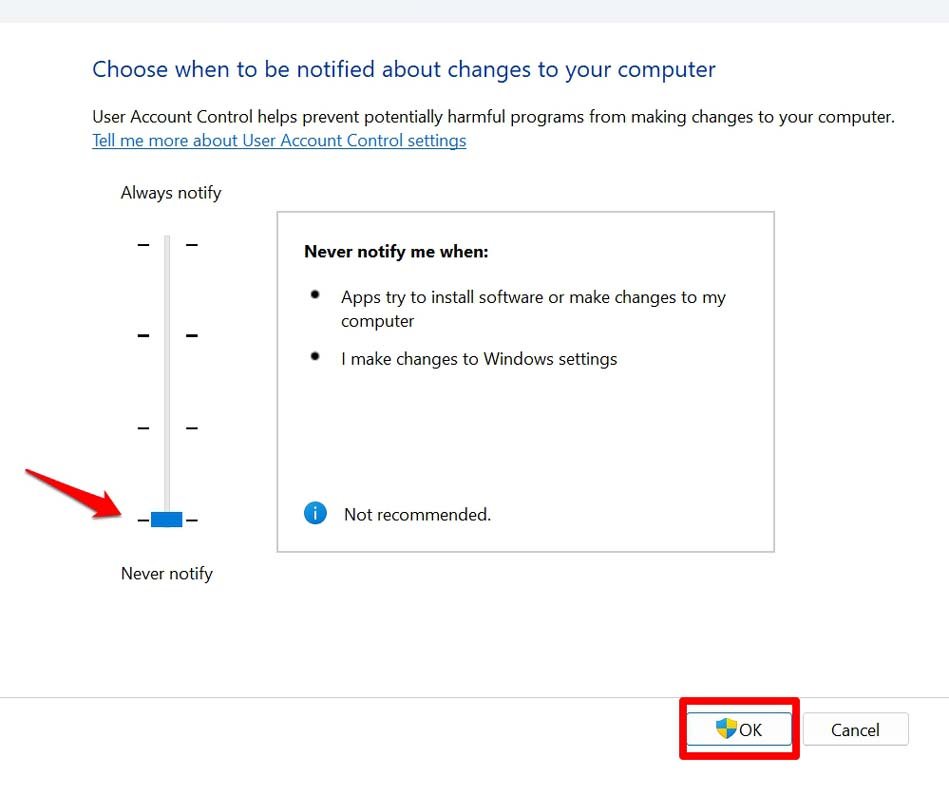
- Once the Change User Account Control Settings dialog box appears, drag the slider on the left to Never Notify.
- Click OK to confirm the changes you made.

2. Update Windows OS
To fix any bugs on the current version of Windows OS on your PC that may be causing one or more apps to show the Exception Access Violation error, upgrade the system build to a newer version.
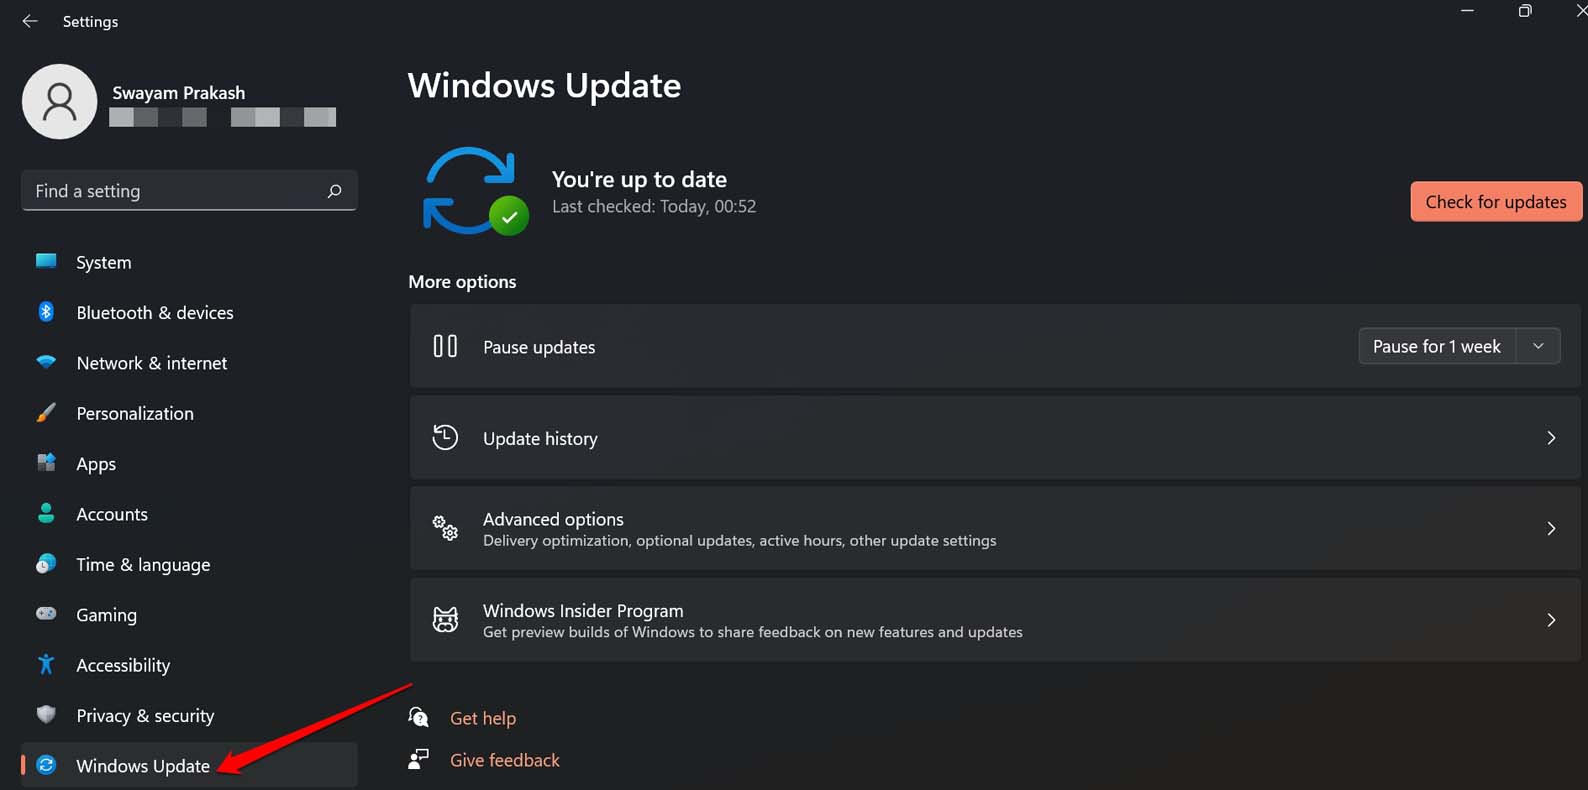
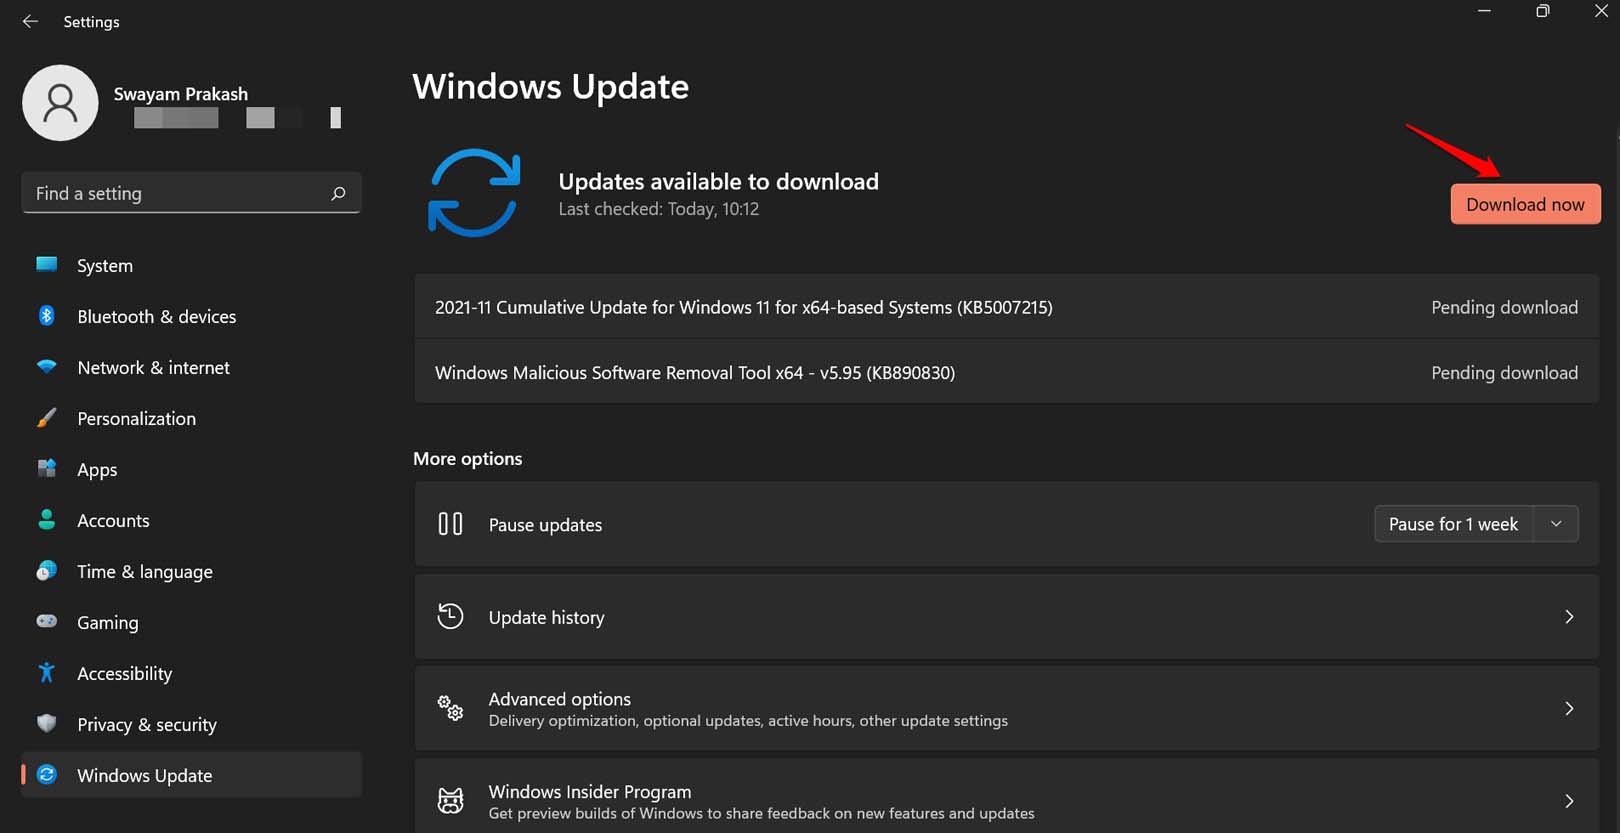
- Go to Windows OS settings by pressing Windows +I.
- Click on the Windows Update tab on the left-hand panel.

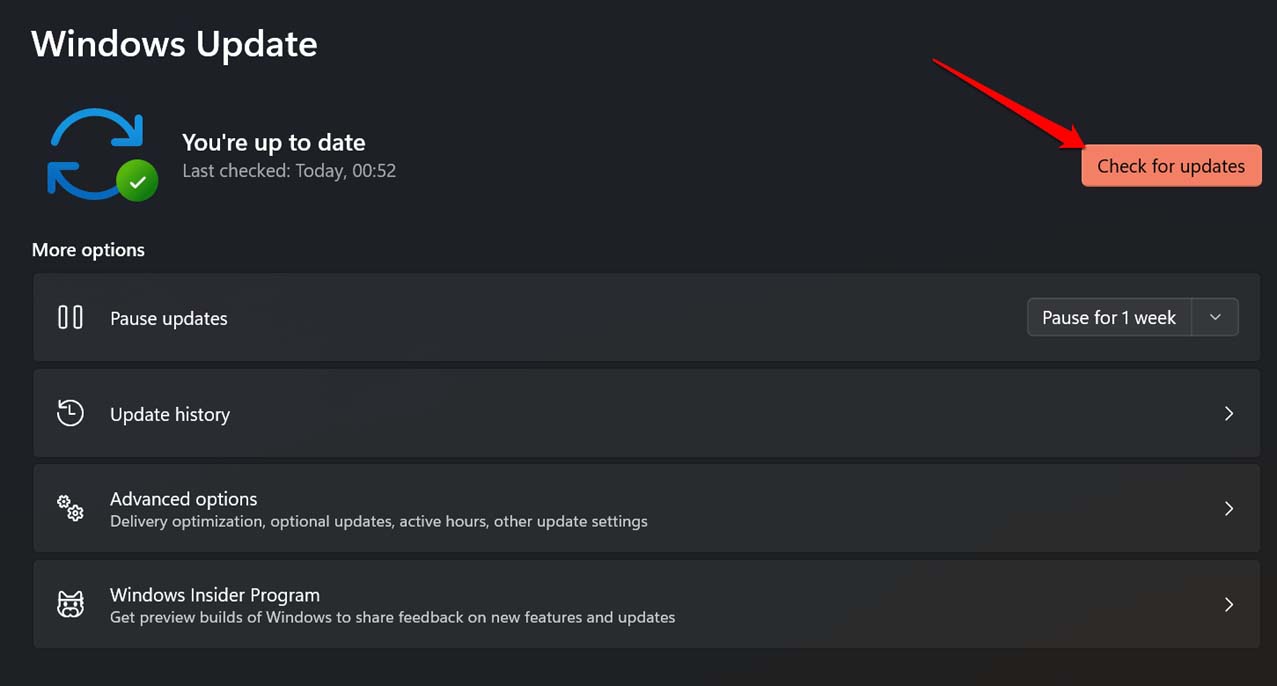
- Click on the button Check for Updates.

- If a new software update is found, click Download Now.

With a stable WiFi network connected to your PC, the installation process will swiftly integrate the new system version on your PC.
3. Use the Hardware and Device Troubleshooter
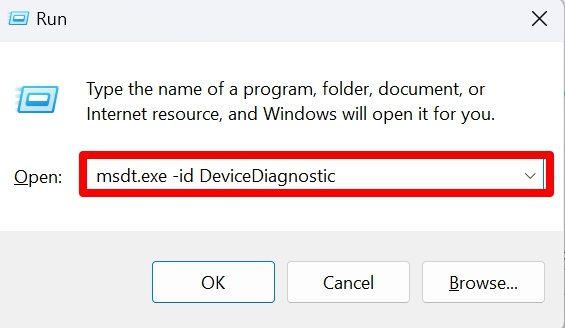
- Press Windows + R to invoke the Run box.
- Enter the term msdt.exe -id DeviceDiagnostic.
- Hit the enter key.

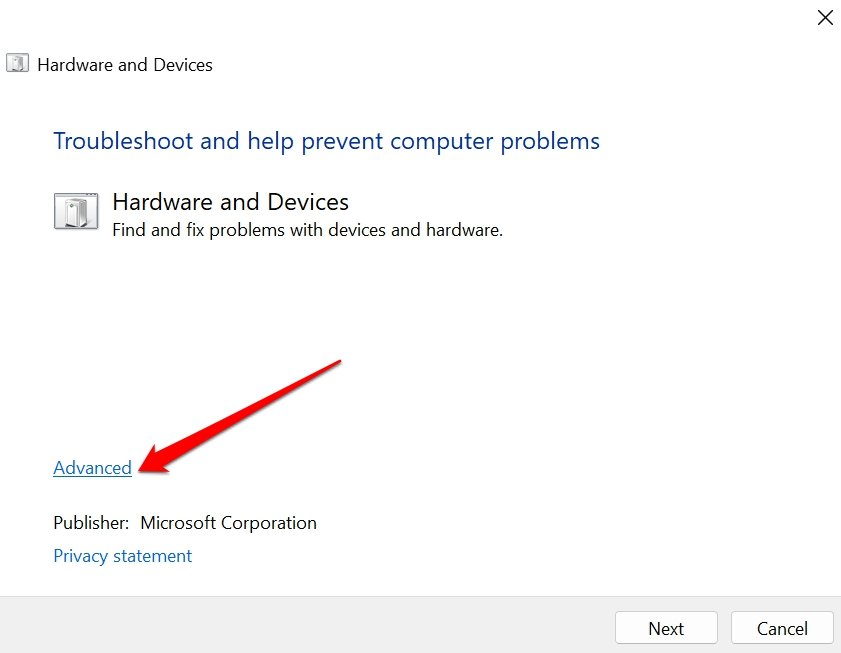
- When the Hardware and Devices dialog box shows up, click on Advanced.

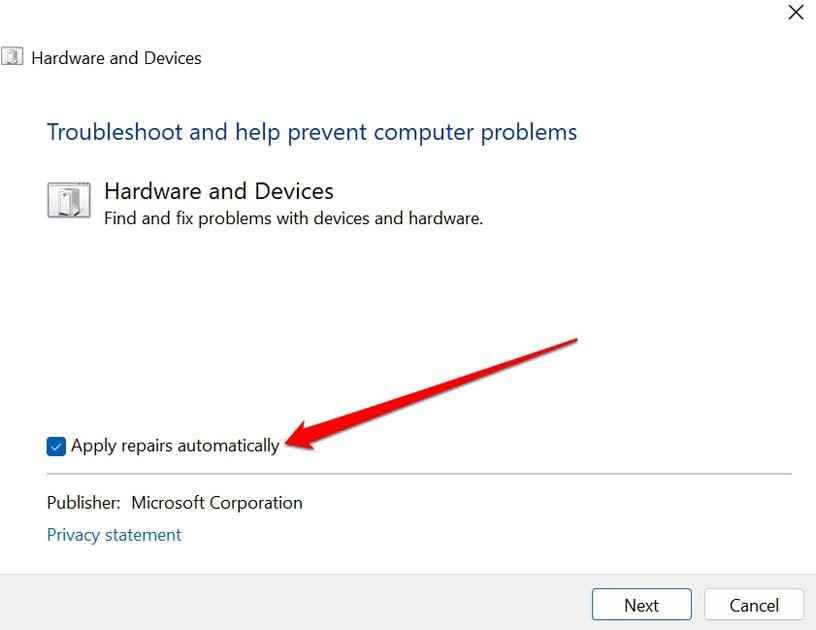
- Click on the checkbox beside Apply Repairs Automatically.

- Click on Next to start the troubleshooting process.
- If the tool discovers any problem and suggests some fix, to implement that, click on Apply This Fix.
4. Scan for Corrupt Files using SFC and DISM
To look for corrupt system files on your PC and remove them, you can use the command prompt to engage the SFC and DISM scans. They are very easy to perform. Here are the steps for you.
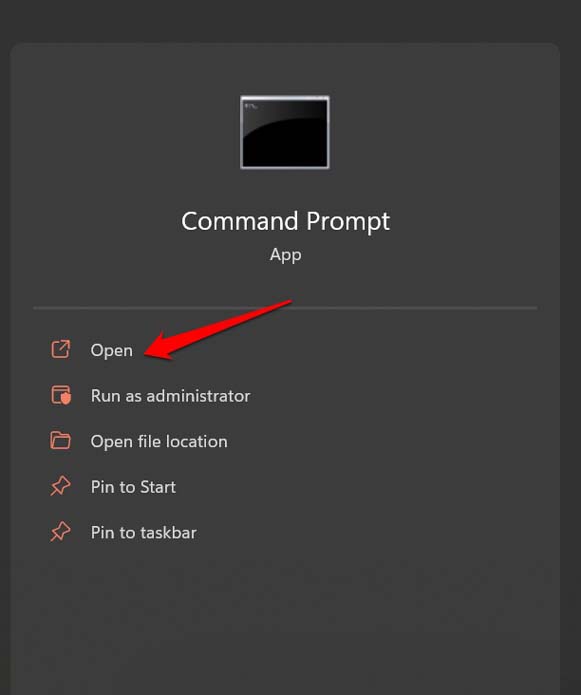
- Launch the Command Prompt.

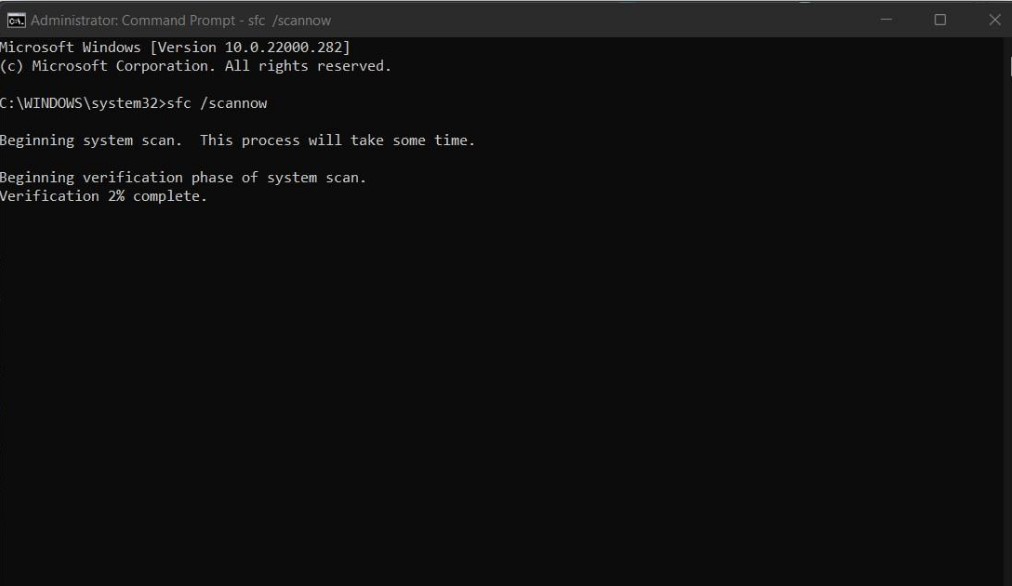
- Enter the command
sfc/scannow

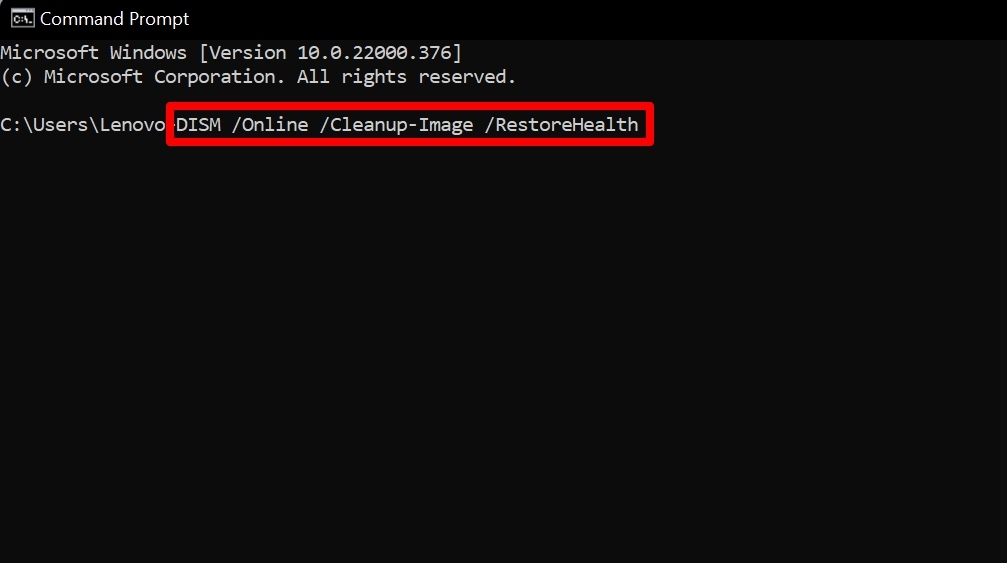
- For the DISM scan enter the following commands one by one and execute them.
 DISM.exe /Online /Cleanup-image /CheckHealth
 DISM.exe /Online /Cleanup-image /ScanHealth
 DISM.exe /Online /Cleanup-image /RestoreHealth

- These scans take some time to finish and fix the affected system files. Wait for it to complete and make sure not to interrupt while the scan is going on.
5. Disable Data Execution Prevention on Windows OS
Data Execution Prevention is a feature to stop malicious codes from executing and causing apps on your PC to malfunction. It is a very useful feature, but sometimes it may stop certain apps from launching even though the apps have no malicious codes hiding in them.
You can disable the Data Execution Prevention feature temporarily and get to run the app on Windows 11.
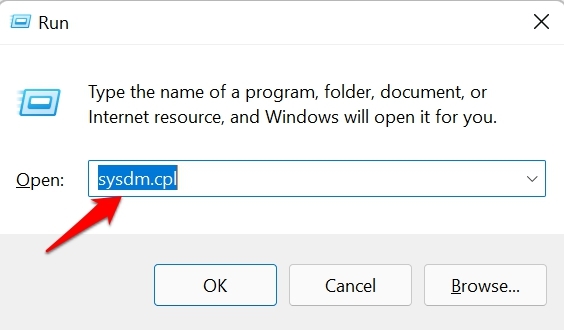
- Open the Run box by pressing Windows + R.
- Type sysdm.cpl and press enter.

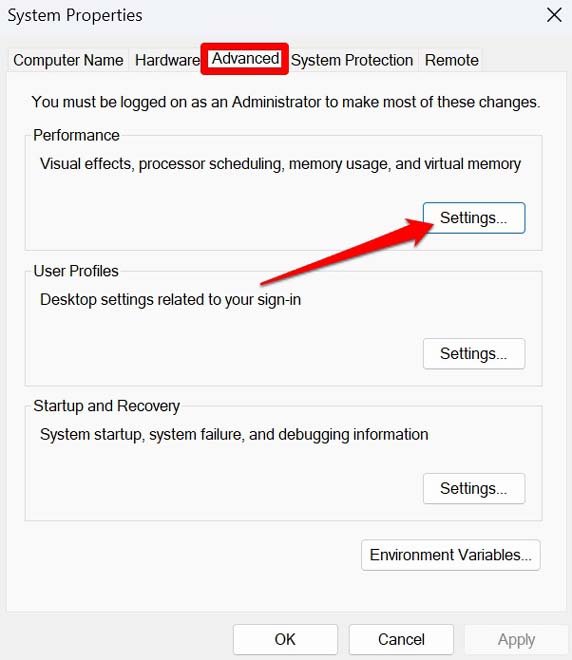
- Then on the System Properties dialog box, click on Advanced > Settings.

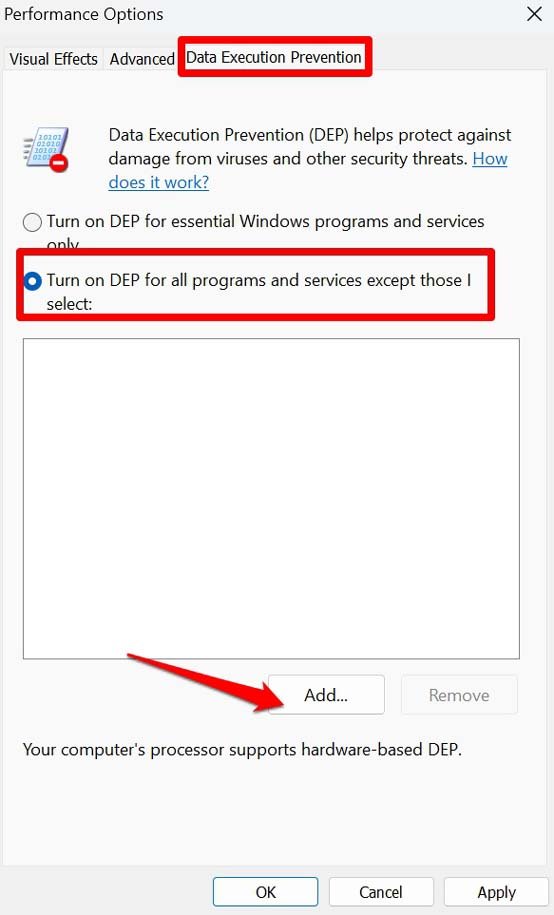
- On the Performance Options dialog box, click the Data Execution Prevention tab.
- Select the option Turn on DEP for all programs and services except those I select.
- Click on Add and select all the executable files that are not launching and showing the Exception Access Violation error.

- Finally, click Apply > OK to save the changes.
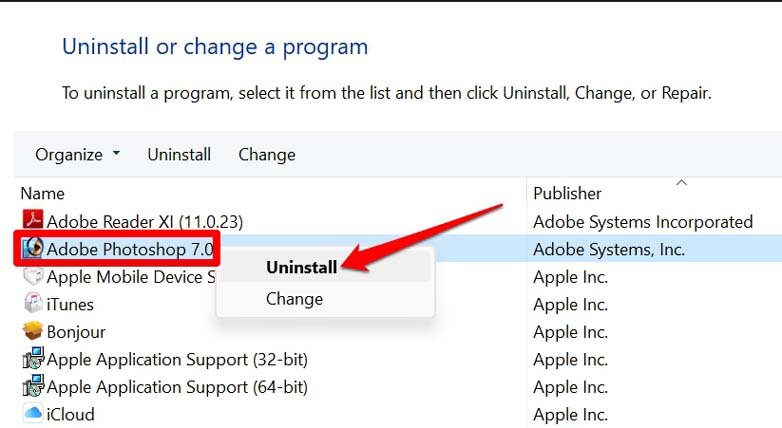
6. Uninstall and Reinstall the Program Affected by Exception Access Violation Error
One of the easiest ways to fix the Exception Access Violation Error on Windows 11 is to uninstall the program being affected by it. Of course, you have to reinstall it back again. I have often successfully resolved the exception access violation warning by simply removing the app and reinstalling it back once again.
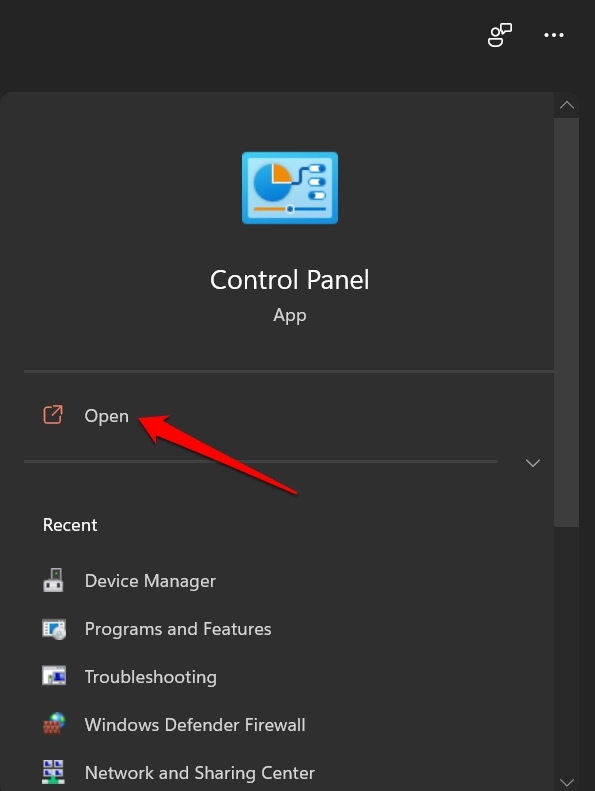
- Go to Control Panel.

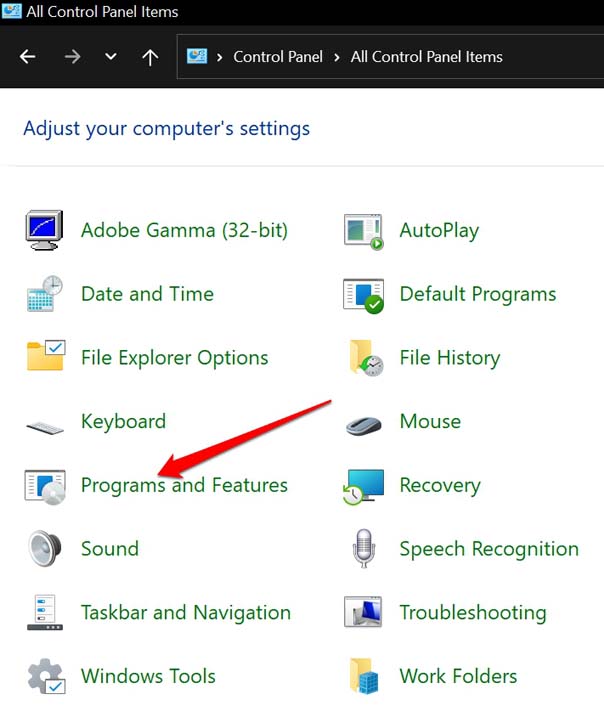
- Click on Programs and Features.

- Highlight the app you want to uninstall by clicking on it.
- Then right-click on the app and select Uninstall.

Follow the necessary instructions and completely remove the app and its data from your PC. Then go to the concerned website of the app and redownload/reinstall it or grab it from the Microsoft Store.
Conclusion
With these troubleshooting methods, you can now fix the Exception Access Violation error on Windows 11. You can then launch your program and run it without any error warnings. I hope this guide was useful.
If you've any thoughts on How to Fix Exception Access Violation Error on Windows 11?, then feel free to drop in below comment box. Also, please subscribe to our DigitBin YouTube channel for videos tutorials. Cheers!

