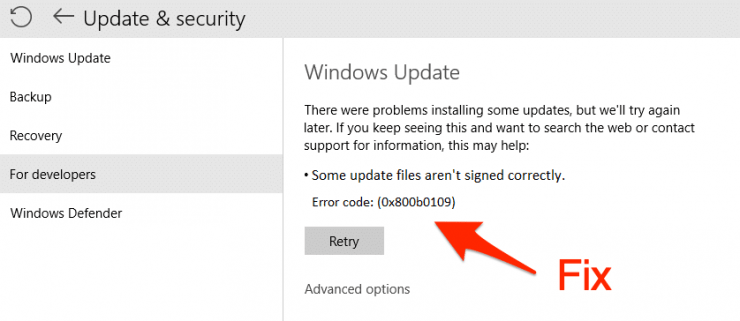
One of the common errors that a Windows 10 user comes across is Windows Update error 0x800b0109. This error prevents the users to update or upgrade the apps installed on their PC. Digging up some information about this error code reveals that this Windows Update error pops up when the system files get corrupted. You will get an error message that says, “Some update files aren’t signed correctly; Error Code 0x800b0109.”
Even though you restart your PC numerous times, the error 0x800b0109 will continue to pop up and the update will fail constantly. If you are also experiencing Windows Update 0x800b0109 error, and you are looking for solutions to fix this issue, then you are at the right place. Because, in this post, we will give you some effective methods to fix Windows Update error 0x800b0109. With that said, let us jump straight into the article itself.
7 Ways to Fix Error Code 0x800b0109 on Windows 10
Here are the Best Solution to Fix Windows Update Error Code 0x800b0109 on your Windows PC
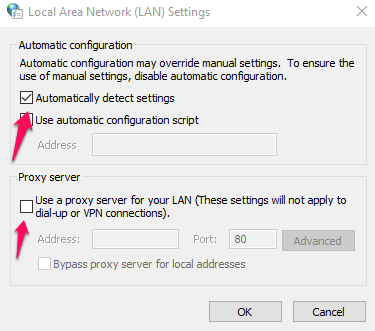
Disable Proxy Settings
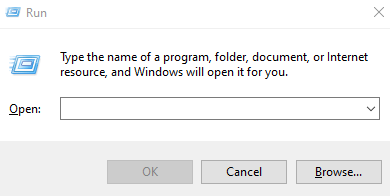
- Press Win+R to open the Run command.

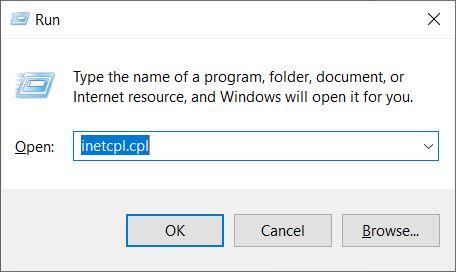
- Type in inetcpl.cpl and hit the Enter key.

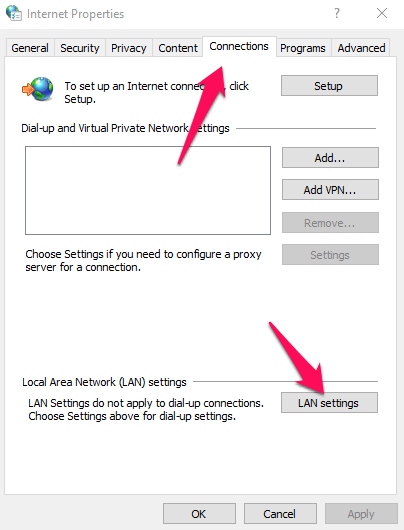
- Head to the Connections tab and press the LAN settings in Internet Properties.

- Here, ensure to uncheck the box “Use a proxy server for your LAN“. Also, check the Automatically detect settings box

- Hit the OK button and see if this fixes the issue.
Run the Update Troubleshooter
You can also fix this Windows Update error 0x800b0109 issue using the in-built Windows 10 update troubleshooter. This will look for any bugs in the system and will try to fix the issue. Here is how you can use it;
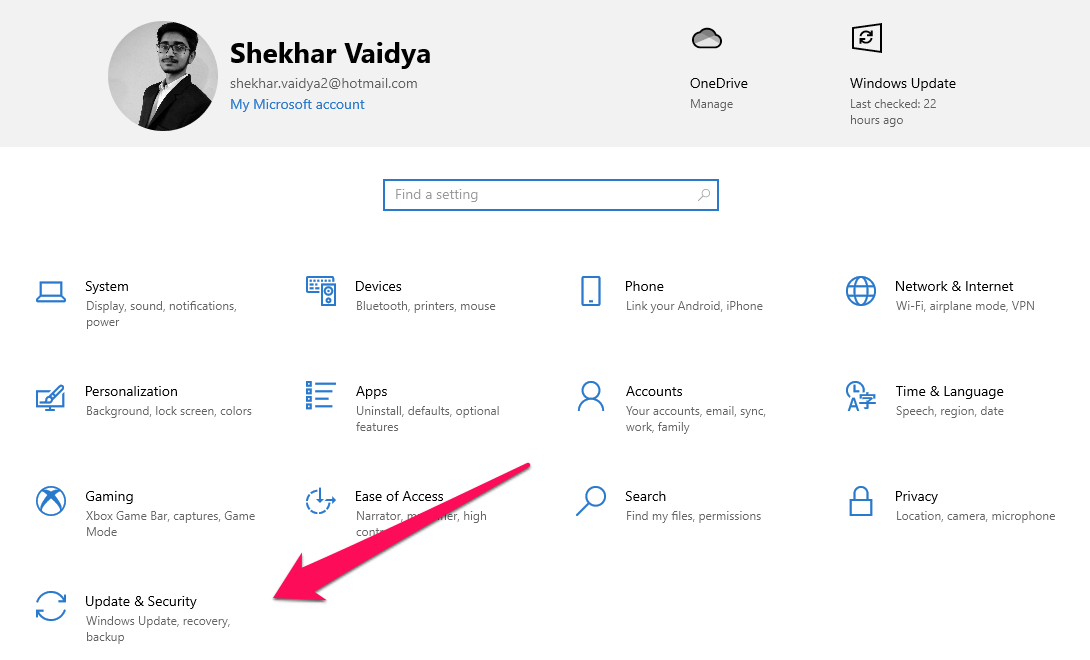
- Press the Win+I buttons on your keyboard to open the Settings menu.
- Select the Update & Security button.

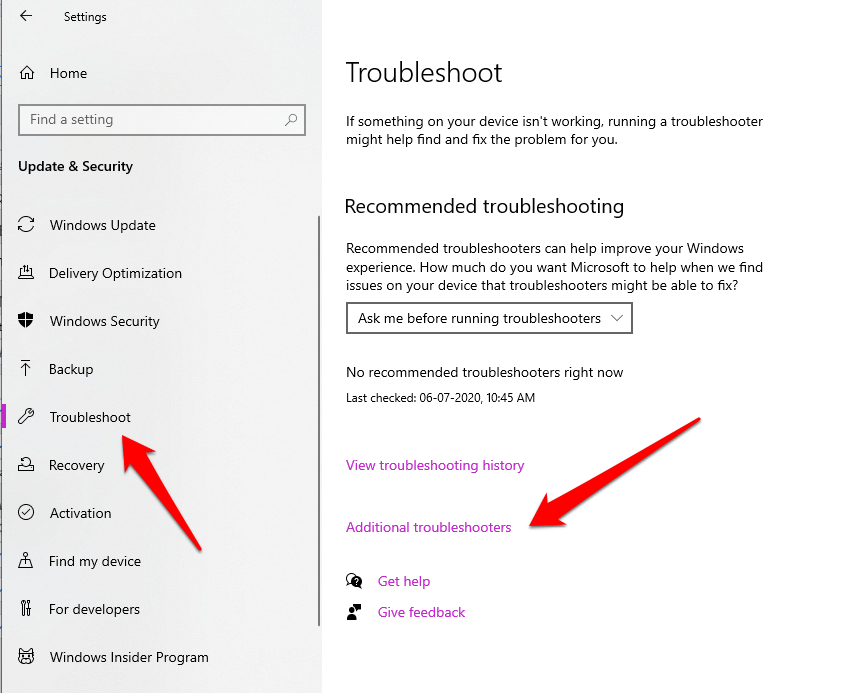
- Now, select the Troubleshoot option.

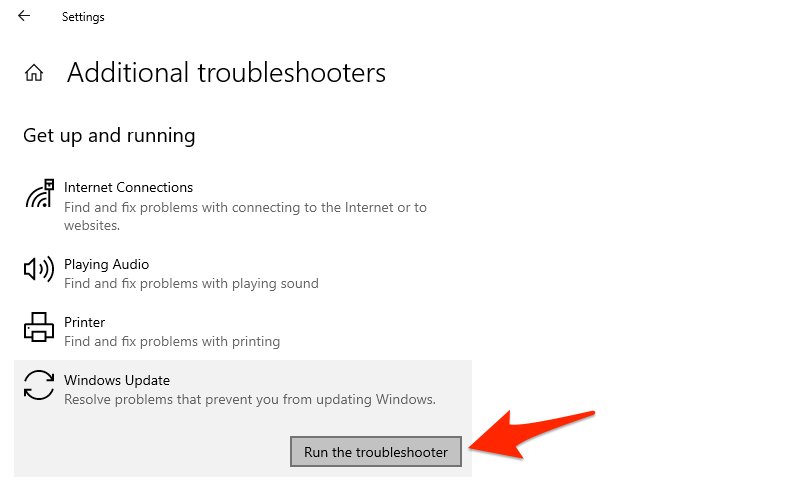
- Go to the right-pane and tap on the Windows Update Troubleshoot option.
- Hit the “Run the Troubleshooter” button.

- When you will be prompted, you have to click Apply this fix.
Use Registry Editor
Do note that you should back up the registry editor before you go ahead and tweak any settings.
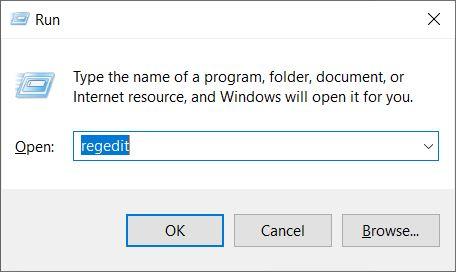
- Press Win+R keys on your keyboard. This will open the Run command.
- Enter the regedit command and hit the Enter button.

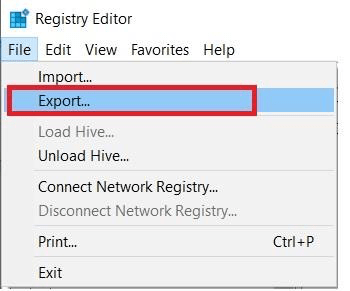
Note: Before we go ahead, you should create a backup of your current Registry values; click File → Export

- You need to go to the below-mentioned path:
HKEY_Local_Machine/Software/Policies/Microsoft/Windows/Windows Update
- Here you need to delete the Windows Update entry.
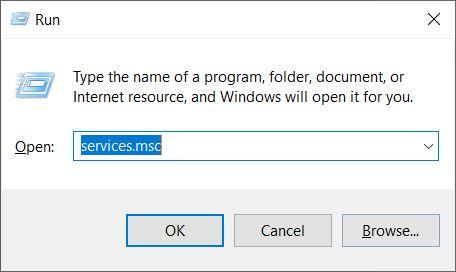
- Open the Run command once again.
- Type services.msc and hit the Enter key.

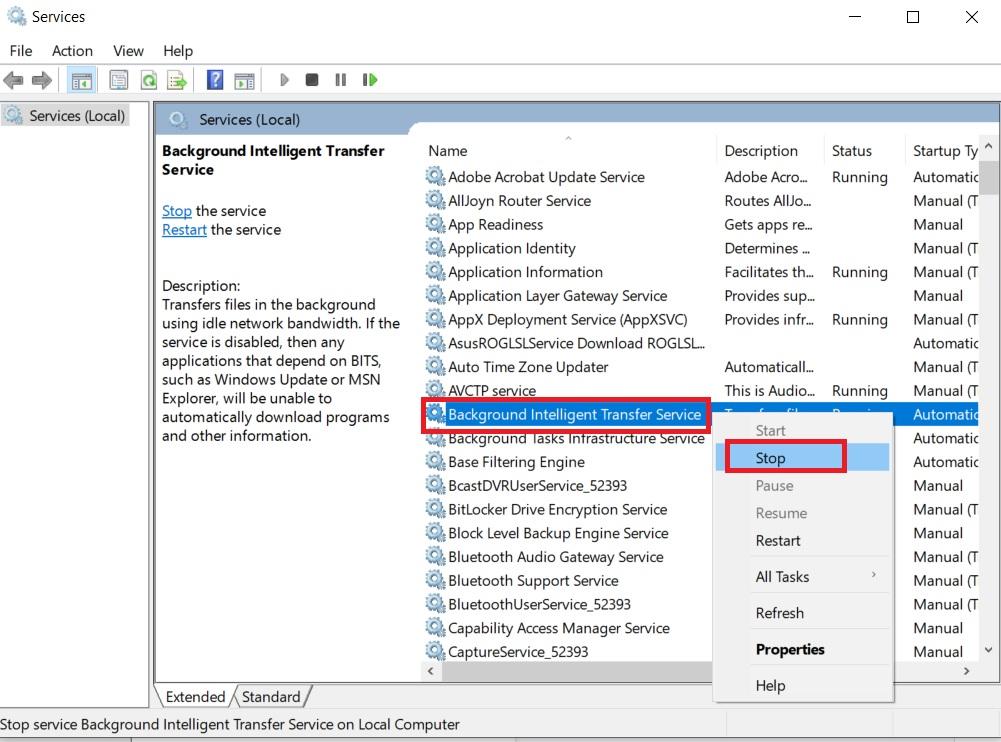
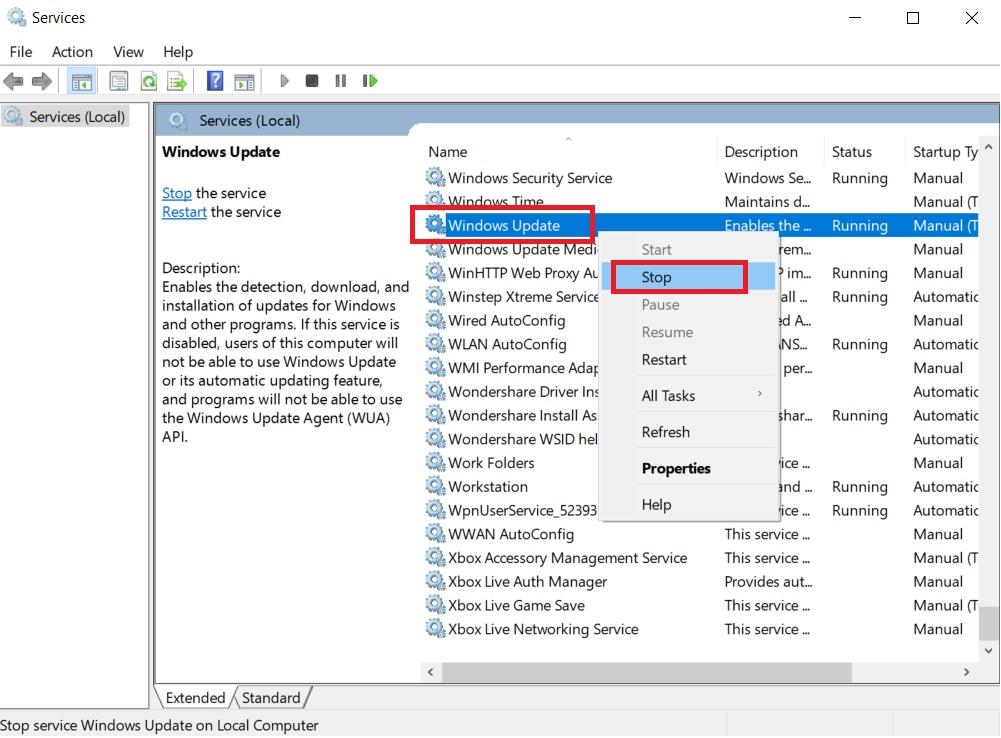
- Now, you need to locate and stop the “Background Intelligent Transfer”

- Also, stop “Windows Update” services.

- Once you have stopped both the service, now right-click on each one of them once again and Start the services.
- Close the Registry Editor and see if this fixes the Windows Update 0x800b0709 error.
Run Command Using Notepad
If you are still continuing to see the error code 0x800b0709 with Windows Update then, you can try this method. You can run the mentioned commands on a Notepad as a batch file.
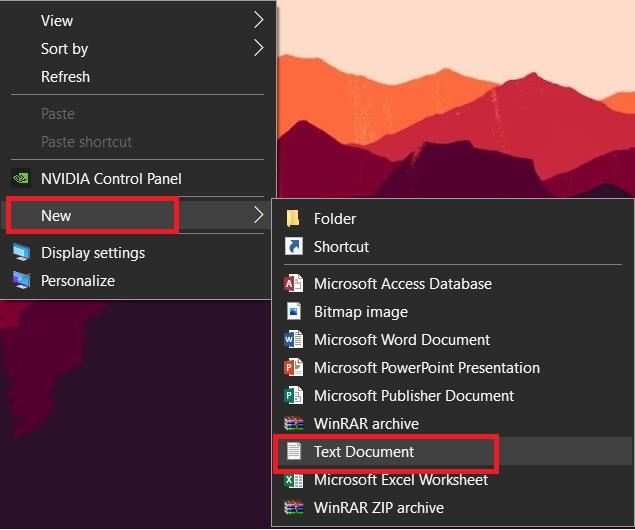
- Right-click on your empty desktop home screen space and click New → Text Document.

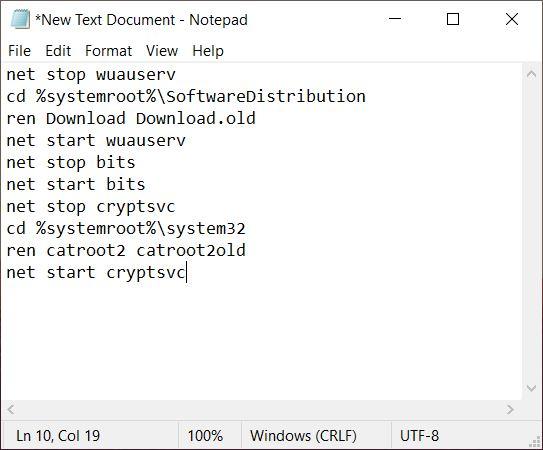
- Open the text document file and enter the below commands:
net stop wuauserv
cd %systemroot%\SoftwareDistribution
ren Download Download.old
net start wuauserv
net stop bits
net start bits
net stop cryptsvc
cd %systemroot%\system32
ren catroot2 catroot2old
net start
cryptsvc

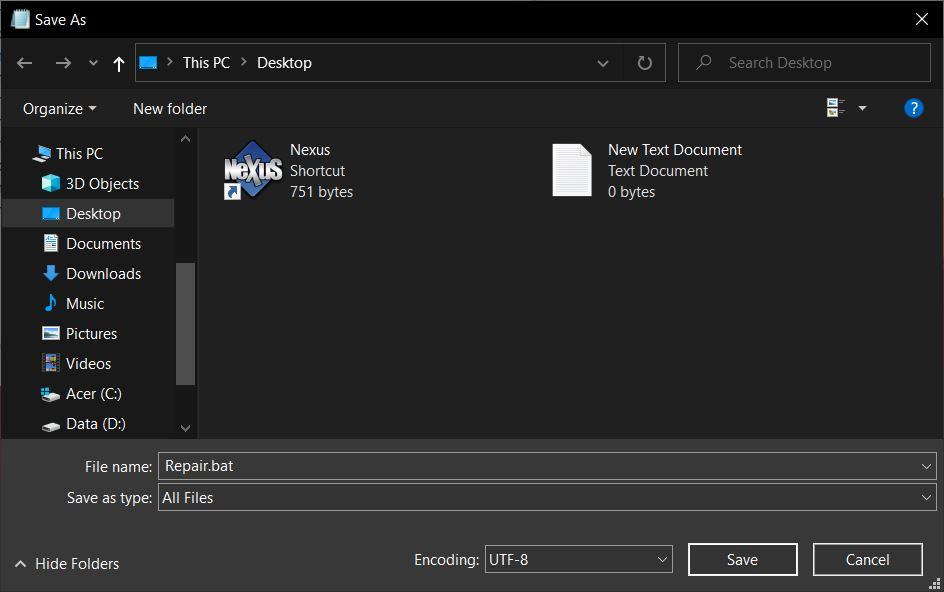
- Save this text document file.
- Keep the name of the file as Repair.bat and select “All Files” under the drop-down menu of File Type.
- Hit the Save button.

- Now, right-click on the batch file and run it as administrator to execute the commands pasted inside the text file.
- That’s it!
Run the DISM Tool
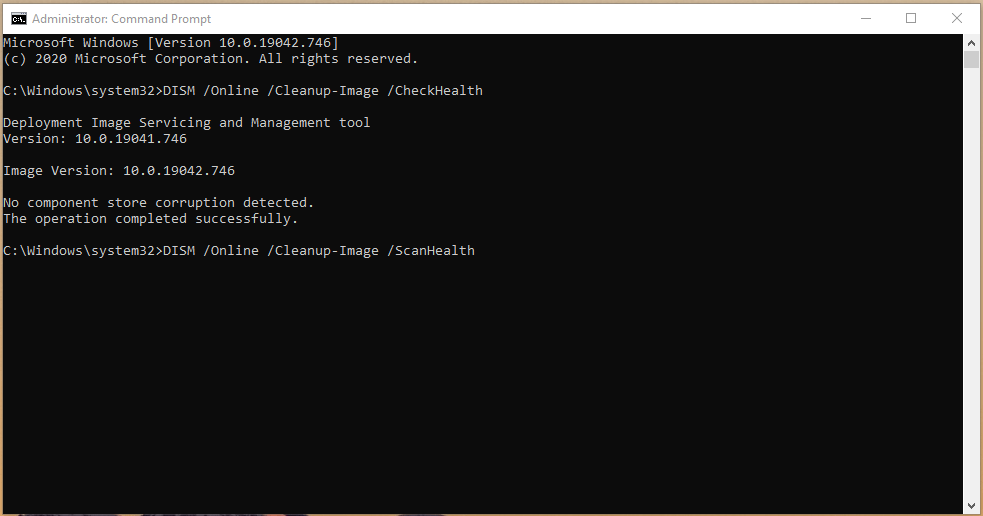
You can run the DISM tool to fix the internal error with the Windows Image file. These internal errors can cause issues with the Windows Updater. DISM tool is a command-line tool that is made to fix such bugs.
- Open the Start menu and search for Command Prompt. Make sure to open it as an administrator.
- Now in the CMD, enter the below command:
dism.exe /online /cleanup-image /scanhealth

dism.exe /online /cleanup-image /restorehealth

- Hit the Enter key and let the commands do their job.
- Once the command successfully completes its run, close the command prompt.
Install Windows Update manually
If none of the above-mentioned methods worked for you in fixing the Windows Update error code 0x800b0709 then, you can try to download Windows Update manually. Simply head over to Start > Settings > Select Update and Security > Click Windows Update tab > Click check for updates.
![]()
Allow Signed Update using Registry
To install signed updates, you need to make sure that you have enabled “Allow Signed Updates” on your Windows 10 machine.
- Open the Registry editor using either the Run command or by searching in the Start menu.
- Head to the below path on the Registry Editor:
HKEY_LOCAL_MACHINE \ Software \ Policies \ Microsoft \ Windows \ Windows Update
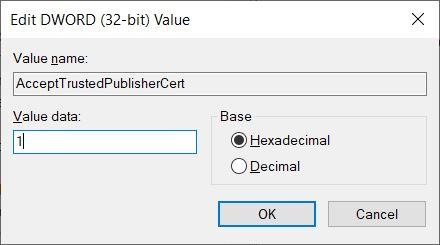
- On the Windows Update folder, you need to right-click and click on New >> DWORD (32-bit) value. Name this newly created key “AcceptTrustedPublisherCert”.

- Double click on AcceptTrustedPublisherCert.
- Now, ensure that the Base is set to Hexadecimal, and the value is set to 1.

- Close the Registry Editor and restart your machine.
- Run the Windows update app and see if this fixes the issue.
Conclusion: With the simple methods above you can fix your Windows 10 Update Error Code 0x800b0109. I hope the guide was helpful, do comment below for any assistance or support if needed.
If you've any thoughts on Fix Windows Update Error 0x800b0109, then feel free to drop in below comment box. Also, please subscribe to our DigitBin YouTube channel for videos tutorials. Cheers!





Hello Sagar N. Bhavsar: I did all the steps you said in this article up until the Install Windows Update Manually. Still no luck on running it manually. So i tried the Regedit command again, and went to the path you said, Windows Update” in the registry, and there is NO WINDOWS UPDATE LISTED! so what do i do now? I hit F5 to refresh the screen like 5x. Still no change in the registry. So obviously I cannot do the change to the “AcceptedTurstedPublishersCert”!! Ugh, so complicated this stuff, just to get rid of an error in Windows Update! Help me out here please! Thanks, Clifford Floyd