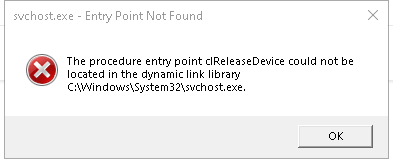
The “Entry Point Not Found” error occurs when a program tries but fails to locate a function or procedure in a DLL (Dynamic Link Library) file. This error message usually appears in the form of a pop-up dialogue box with the title “program.exe – Entry Point Not Found” and the message “The procedure entry point [function name] could not be located in the dynamic link library [DLL name].”
This error can have various effects on a user, depending on which program is affected. For example, if the error occurs in a program used at work or school, the user may be unable to complete important tasks or meet deadlines. When an error occurs in a program intended for entertainment or leisure, it can be irritating and prevent the user from fully enjoying the program. If you ever encounter this Entry Point Not Found error, don’t worry; you’re not the only one. This is one of the most common DLL file issues, and it’s usually not too difficult to fix.
What is an ‘Entry Point Not Found’ Error?
The “Entry Point Not Found” error is a common error message that shows up when you try to run a software application or program on a Windows operating system. It normally means that a required function or DLL file that the application is trying to access cannot be found or is not accessible due to some problem. When a program is launched, it may require a specific DLL file to operate properly. If that DLL file is missing or corrupt, the program will not start and will return an “Entry Point Not Found” error message.
DLL files are essential parts of many Windows programs and applications. They contain code and data that can be used by numerous programs at the same time, making them an essential component of the operating system.
Top Ways to Fix Entry Point Not Found Error on PC
Here are a few fixes that have proved beneficial to many Windows users. You don’t have to try them all; simply work your way down from the top until you find one that works for you. So let’s begin.
1. Scan with the System File Checker
The System File Checker (SFC) tool can be used to repair the “Entry Point Not Found” error on Windows. The SFC tool automatically scans your system for corrupt or missing system files and repairs them. To perform an SFC scan, follow these steps:
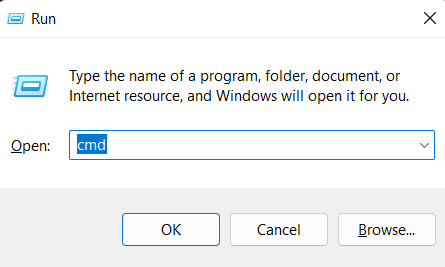
- To open the Run box, press the Windows + R keys on your keyboard.

- To run Command Prompt as an administrator, type cmd and press Ctrl+Shift+Enter.
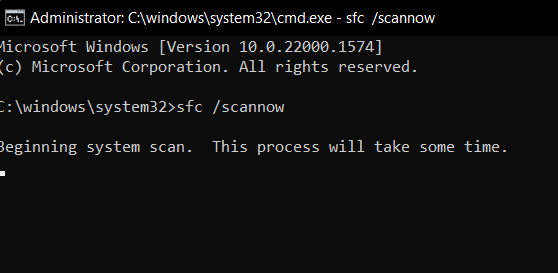
- Enter “sfc /scannow” in the Command Prompt window.

- SFC will now scan your system files for errors and corrupt files. This procedure may take some time, so please be patient and wait for the scan to finish.
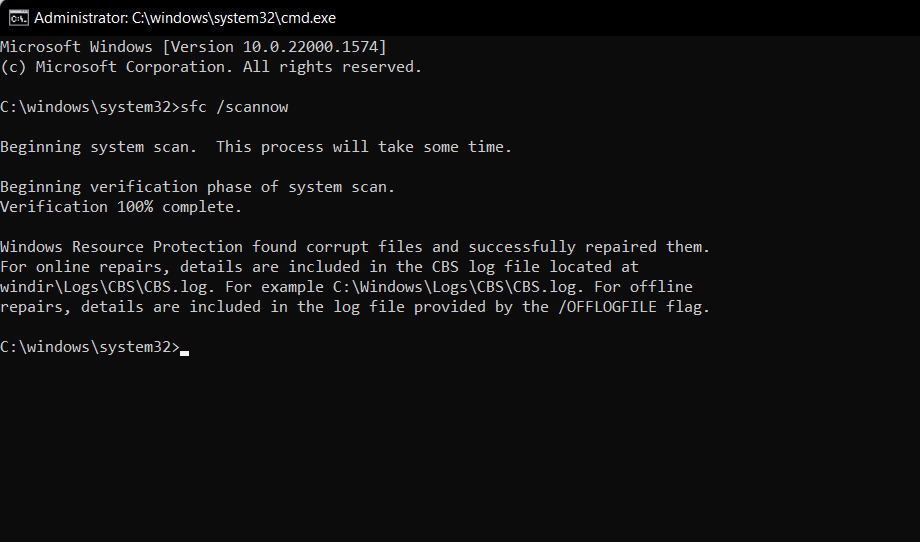
- When the scan is finished, the SFC tool will display a message indicating whether or not any errors were discovered and fixed.

- Restart your computer and try again to see if the “Entry Point Not Found” error has been fixed.
If you are still getting the Entry Point Not Found error, please try the next solution listed below.
2. Install the latest Visual C++ Redistributable Package
Installing the most recent version of the Visual C++ Redistributable package can also assist in resolving the “Entry Point Not Found” error. The Visual C++ Redistributable package contains the DLLs required to run Visual C++ programs.
You can install the most recent Visual C++ Redistributable package by following these steps:
- Go to the Microsoft Download Center and look for “Microsoft Visual C++ Redistributable Downloads.”

- Download the most recent version of the package that corresponds to your operating system and architecture (32-bit or 64-bit).
x86: vc_redist.x86.exe and x64: vc_redist.x64.exe

- When the download is finished, double-click the downloaded file to begin the installation process.
- To complete the installation, follow the on-screen instructions.
After the installation is finished, restart your computer and try again to run the program or application that was causing the “Entry Point Not Found” error. If the error was caused by an out-of-date or missing Visual C++ DLL file, it should be resolved after installing the most recent redistributable package.
3. Restore your PC to a Previous Restore Point
Restoring your computer to a previous restore point can sometimes resolve the “Entry Point Not Found” error, especially if the error was caused by the latest system change or update. System Restore allows you to restore your computer to a previous point in time when it was functioning properly.
- To open the Search Box, press the Windows + S keys on your keyboard and type “System Restore” in the search bar.
- Select “Create a restore point” from the search results.
- Click the “System Restore” button in the System Properties window.

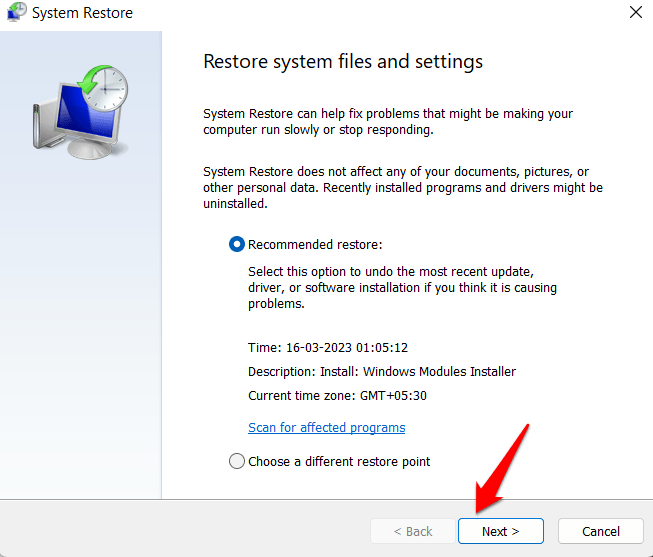
- Choose the restore point you want to use and click “Next.”

- Select Show more restore points to view additional restore points. To find out which programs and drivers will be affected after the restoration, highlight a restore point and then click Scan for affected programs.

- When you’ve decided which restore point to use, click Next.

- After you have confirmed your restore point, click Finish.
- Close all open apps and save any unsaved work. When you’re ready, press the Yes button.

When the restoration process is complete, your computer will be restored to the state it was in when the restore point was created. If the Entry Point Not Found error was caused by the last several software installations or software updates, it should be fixed after the restore process. However, if the error is caused by a different problem, this method may not be effective in resolving it.
4. Use Media Creation Tool
If the Entry Point error is caused by corrupted or missing system files on your Windows operating system, using the Media Creation Tool may help. The Media Creation Tool is a Microsoft utility that lets you create installation media for Windows 10, which you can use to do a clean installation or repair your current installation.
Follow these steps to use the Media Creation Tool:
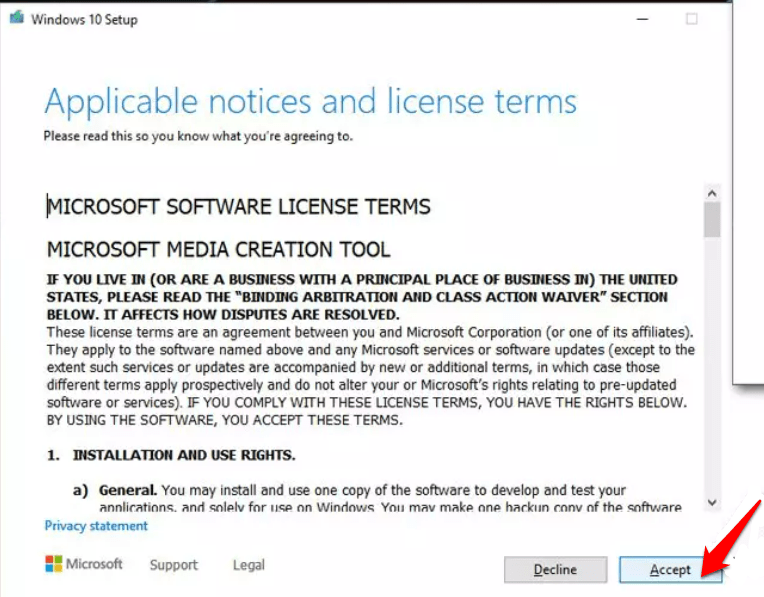
- Download the Media Creation Tool from the Microsoft website.
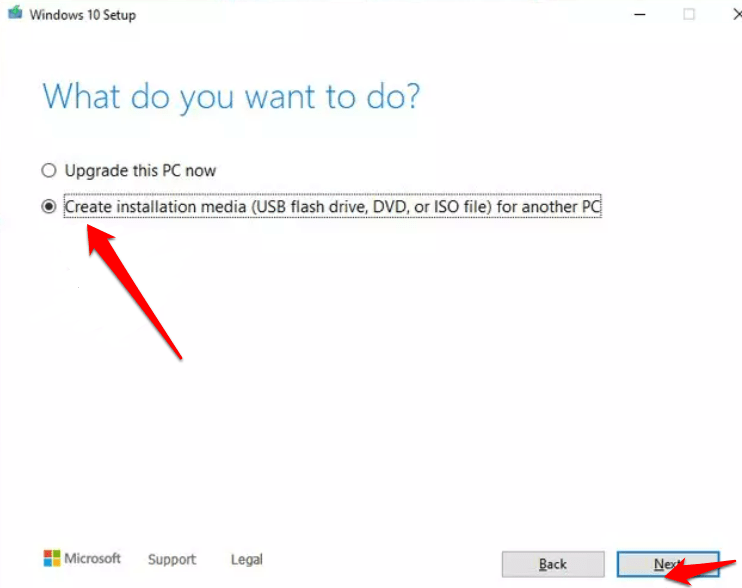
- Start the Media Creation Tool and select “Create installation media for another PC.”
- Choose your Windows language, edition, and architecture.
- Choose the media that you want to use (USB flash, drive, DVD, or ISO file) for another PC.

- Now, click Next.

- Now, follow the on-screen instructions, and when the option to select a partition style appears, select UEFI.
- Follow the on-screen instructions to finish the process.
- After that, double-click the “Ready to install” option.
- Select Keep personal files and wait for the process to finish.
OR
You can Run a Full Scan with Windows Defender
After the installation has finished, your PC should have a fresh copy of Windows installed, which should repair any corrupted or missing system files that were causing the Entry Point error. However, remember that using the Media Creation Tool to reinstall Windows will erase all data and programs on your computer, so make a backup of your important files before proceeding.
5. Scan for Viruses and Malware
Scanning for viruses and malware also can resolve the “Entry Point Not Found” error, especially if the error is caused by a virus or malware infection. Viruses and malware can change or delete DLL files, resulting in errors when running software applications.
To scan for viruses and malware, follow these steps:
- Open your antivirus software and make sure it is up-to-date.
- Run a full system scan to check your computer for viruses or malware.
- If any viruses or malware are detected, follow the removal instructions provided by your antivirus software.
- Restart your computer once the scan is finished and any threats have been removed.
- Restart the program or application that was causing the “Entry Point Not Found” error to see if the problem has been resolved.
OR
You Can Run a Full Scan with Windows Defender
- Press the Window + I key to open Windows Settings.
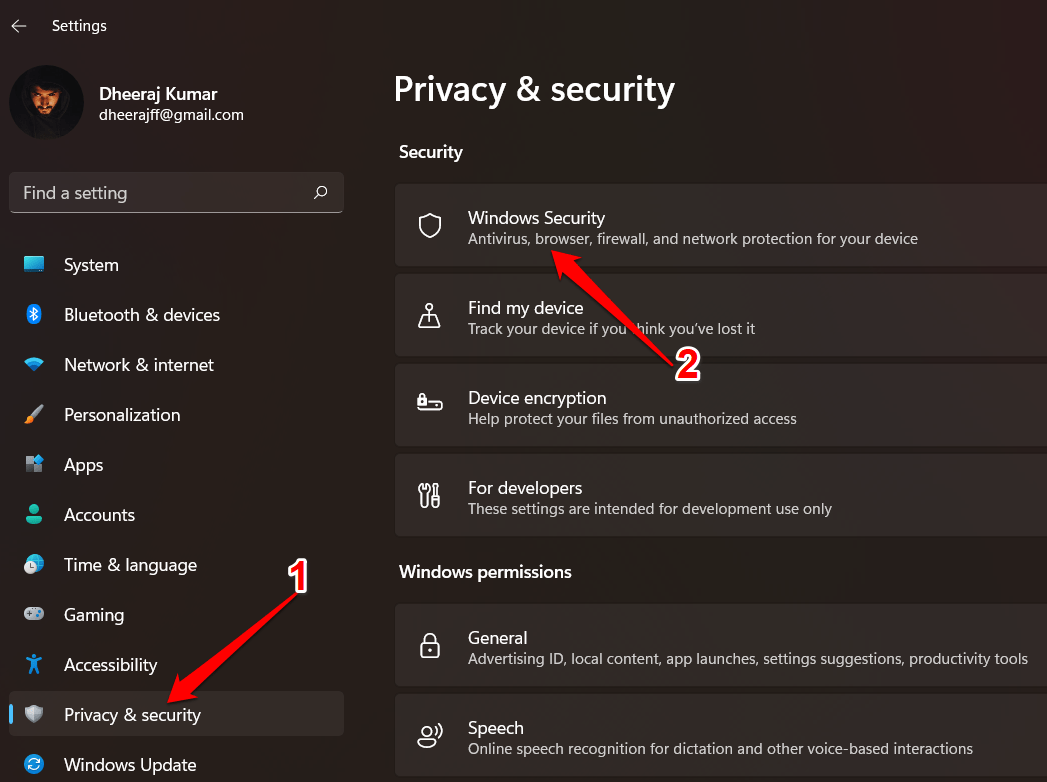
- In the Settings app, select “Privacy & Security.”
- Click “Windows Security” in the left-hand menu.

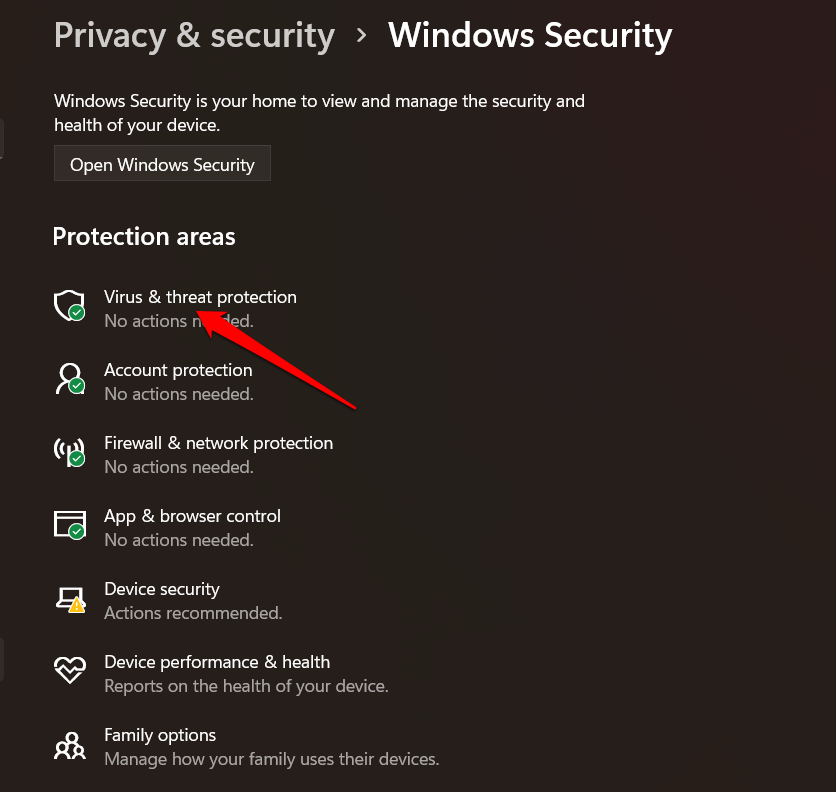
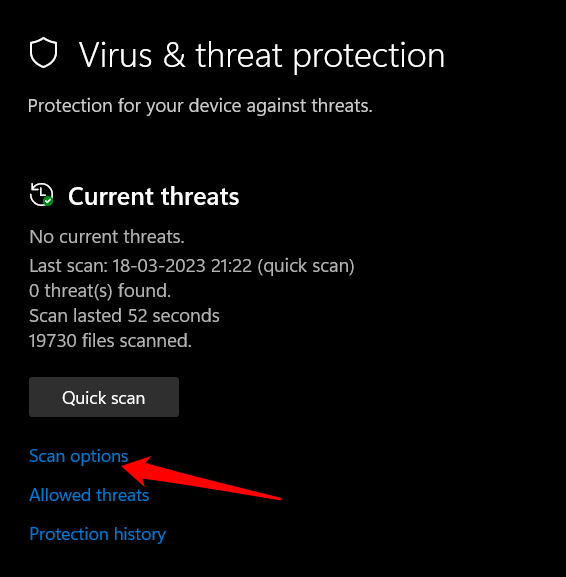
- Click on “Virus and threat protection” in the Windows Security window.

- Click on “Scan Options” in the “Current Threats” section.

- Select “Full scan” and then click “Scan now.”

Windows Defender will now perform a virus and malware scan on your computer. If a virus or malware infection caused the “Entry Point Not Found” error, scanning for and removing the infection should resolve the problem.
Conclusion
The “Entry Point Not Found” error on Windows can easily be fixed by just following the abovementioned troubleshooting methods we mentioned. Hopefully, this post has assisted you in resolving the error. Please leave a comment if you have any further questions or ideas. You are also welcome to share any other useful solutions with us. Thank you for reading!
If you've any thoughts on How to Fix ‘Entry Point Not Found’ Error on Windows?, then feel free to drop in below comment box. Also, please subscribe to our DigitBin YouTube channel for videos tutorials. Cheers!

