Windows 10 users often face different types of problems, and network problems are very common. One of the networks is that while using the internet, the user gets a pop-up saying ‘Default Gateway is Not Available’. This doesn’t halt users not to use the internet but it stops many internal functions within the system whose functionality totally depends upon internet connectivity.

The symptoms include dropping of internet every now and then, or limited internet connection, or no internet connectivity at all. Well, there is nothing to worry about, in this article, we are going to discuss all the possible methods to resolve this issue.
Fix ‘Default Gateway is Not Available’ Error
Here are Few Solutions to Solve Default Gateway is Not Available Error on Windows 10 PC
Remove Third-Party Antivirus (McAfee)
This has been reported by users quite several times that the McAfee antivirus is creating problems with the default gateway of the Windows 10 system, so our first approach is to remove it completely from the system if you have it in your system.
Now, a program can only be installed from the control panel in the older version of windows but in the newer version of Windows 10, it can be uninstalled from the new App & features settings as well. We are going to show both the methods, use the one which you feel the easiest.
Using Control Panel
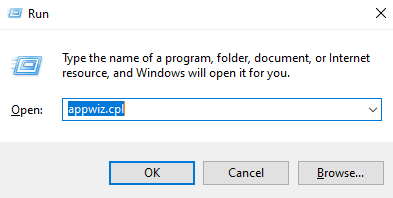
Press Windows Key + R simultaneously to open the RUN window. After opening, type ‘appwiz.cpl’ in the text bar and hit enter to execute it.
On executing, the Uninstall or change a program window will appear. Scroll down and search for McAfee and uninstall it from your system.
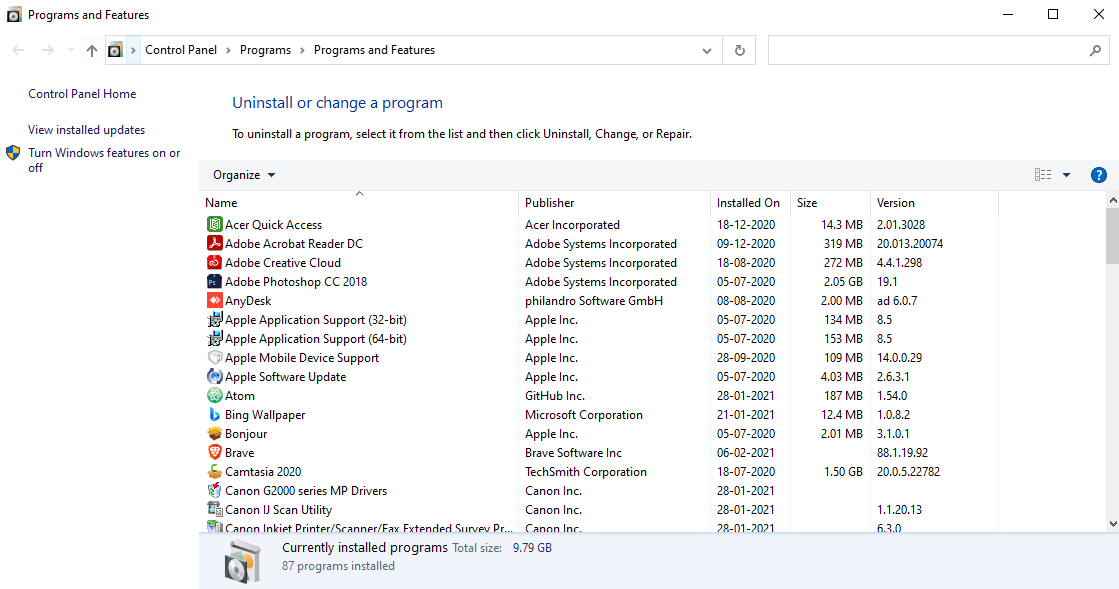
After the uninstallation, restart your system and check whether you are still getting the error or not.
Using App & features Setting
This is the new section in the Windows 10 settings which allows you to uninstall or manage the installed programs in the system.
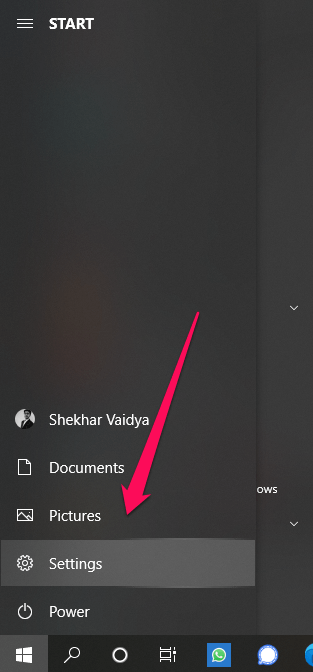
Open the Setting app from the Start menu.
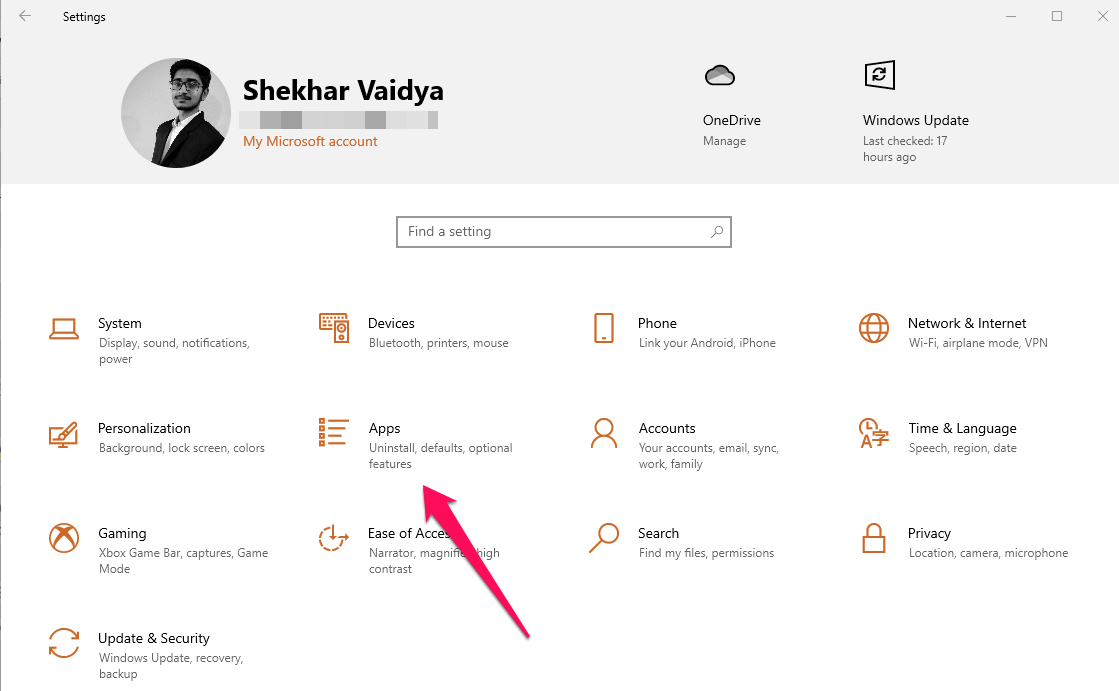
Now, go to the Apps sections.
After opening, you will see the list of all the installed apps on the right side of the window.
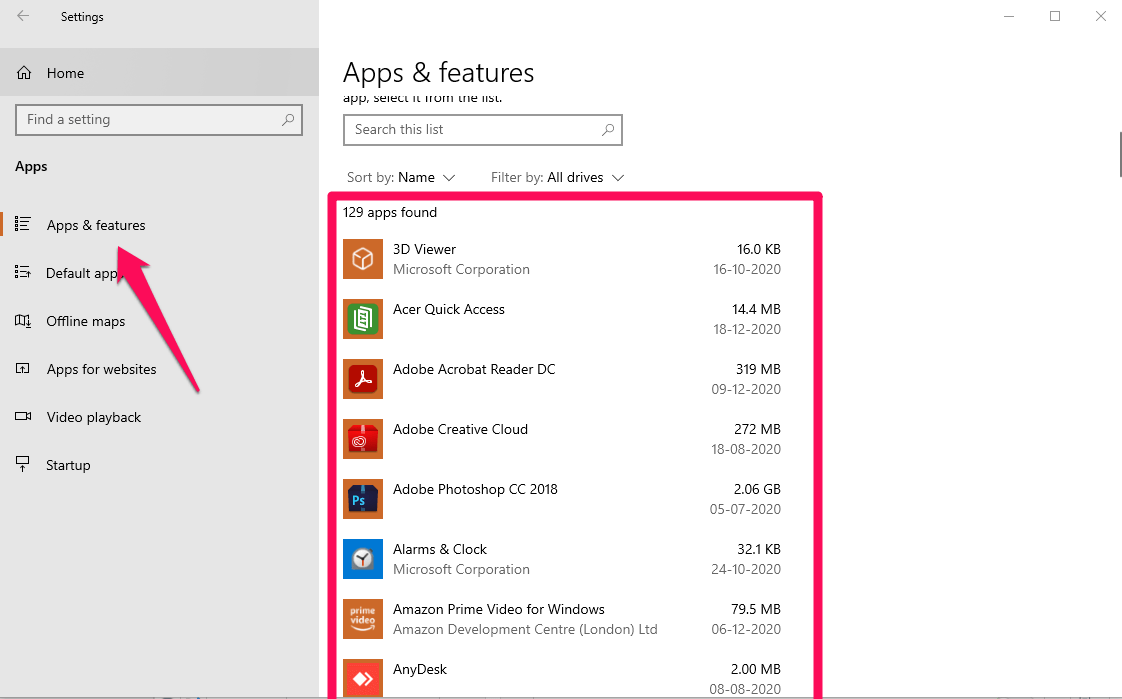
Scroll down to McAfee, click on it and click on the Uninstall button and follow the on-screen instructions to remove it completely from the system. After the uninstallation, restart your system and check whether you are still getting the error or not.
Change Router Frequency
These days modern router uses the new 5 GHz frequency but an older network adapter might not support it, so go through the manual provided by your router company and check how to change network frequency.
Once you get to know about the procedure, change the frequency from 5 GHz to 2.4 GHz and check whether it is working properly or not.
Change Wireless Mode
In this method, we are going to change the wireless mode from default to 800.11g. For doing it, follow the below steps properly.
Open the Settings app from the Start menu.

Now, go to Network & Internet.
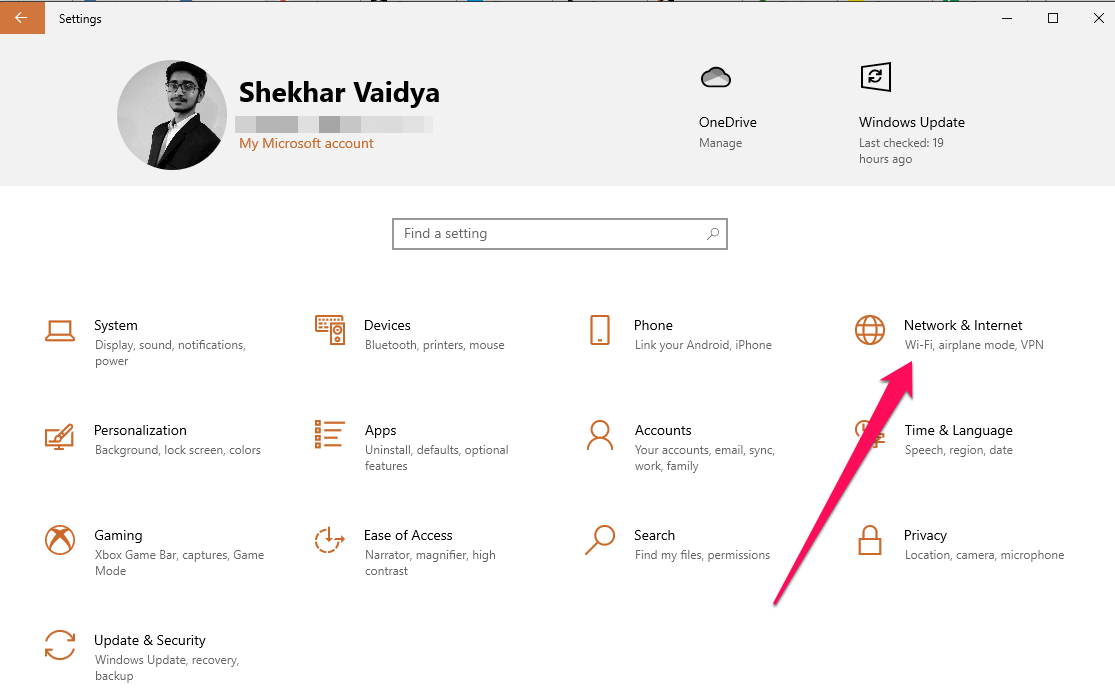
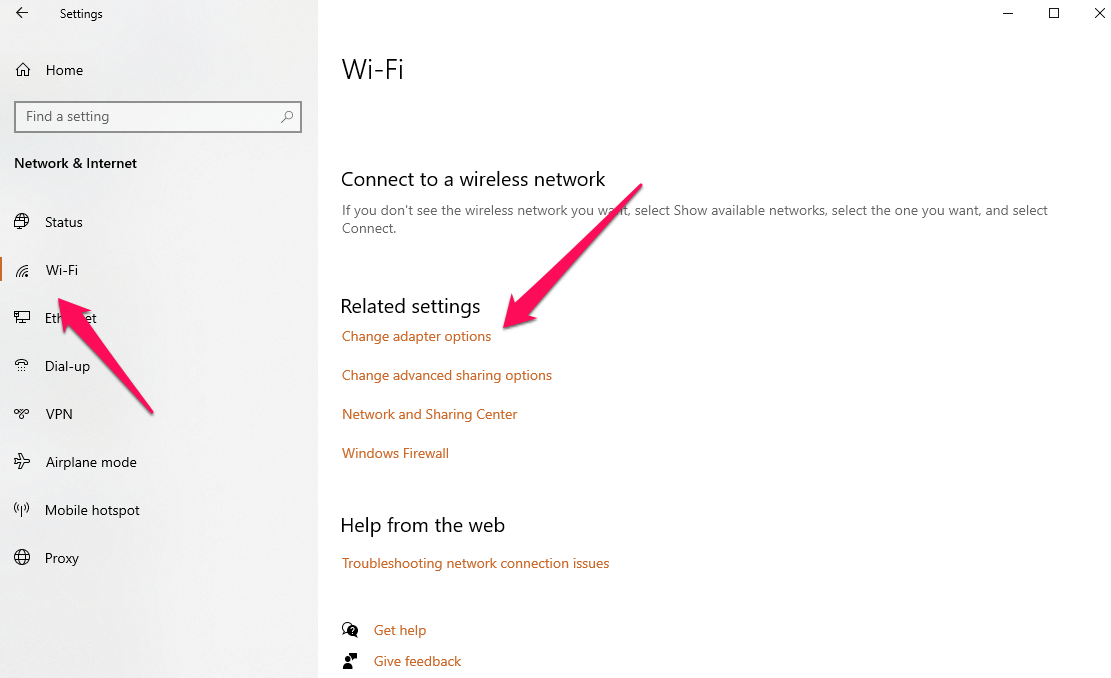
After opening the Network Setting, go to WiFi and then click ‘Change Adapter Options‘.
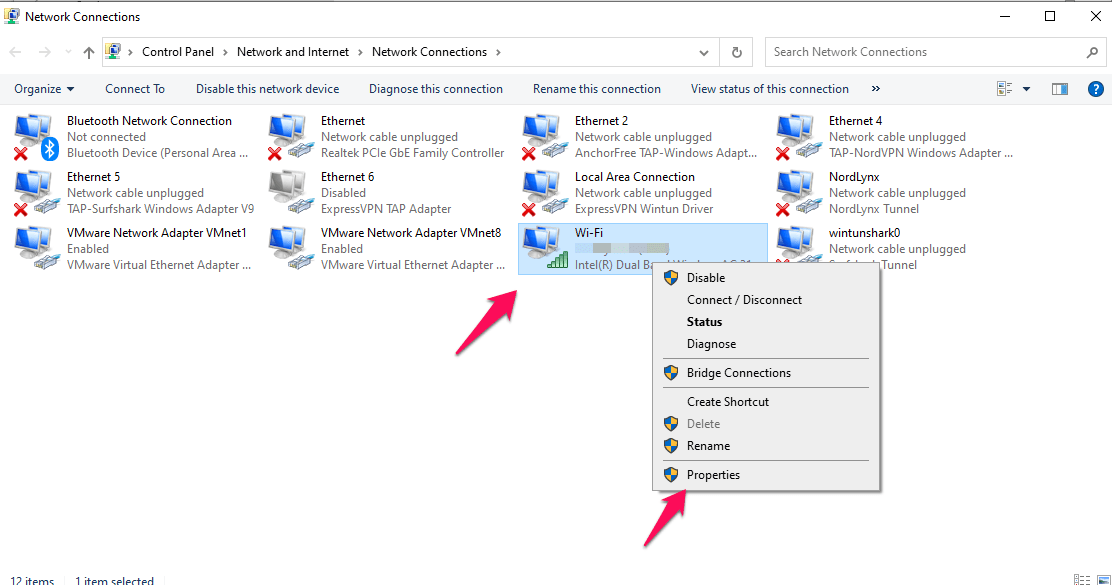
Now, locate your wireless network adapter and right-click it, and then click on Properties.
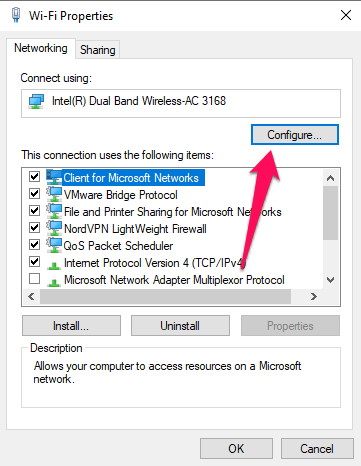
Now, click on the Configure button.
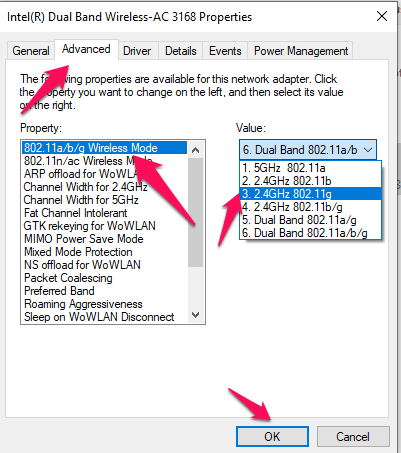
Now, go to the Advanced tab and change the value to 802.11g and click on the OK button to save the changes.
Update Network Adapter Driver
The issue might be arising due to the outdated network adapter driver, so in this method, we are going to update the Network Adapter Driver manually to resolve the issue. Follow the below steps carefully to update the driver manually,
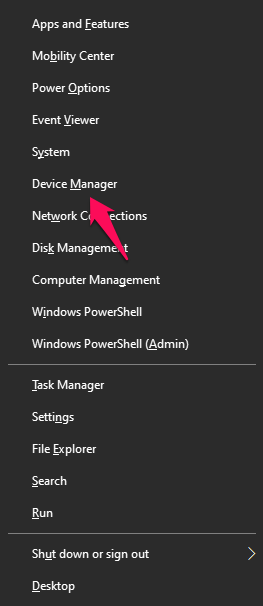
Open Power User Menu, either by clicking Windows Key + X or right-clicking on the Windows icon located at the taskbar.
Now, click on the ‘Device Manager‘ label or press the M key from the keyboard.
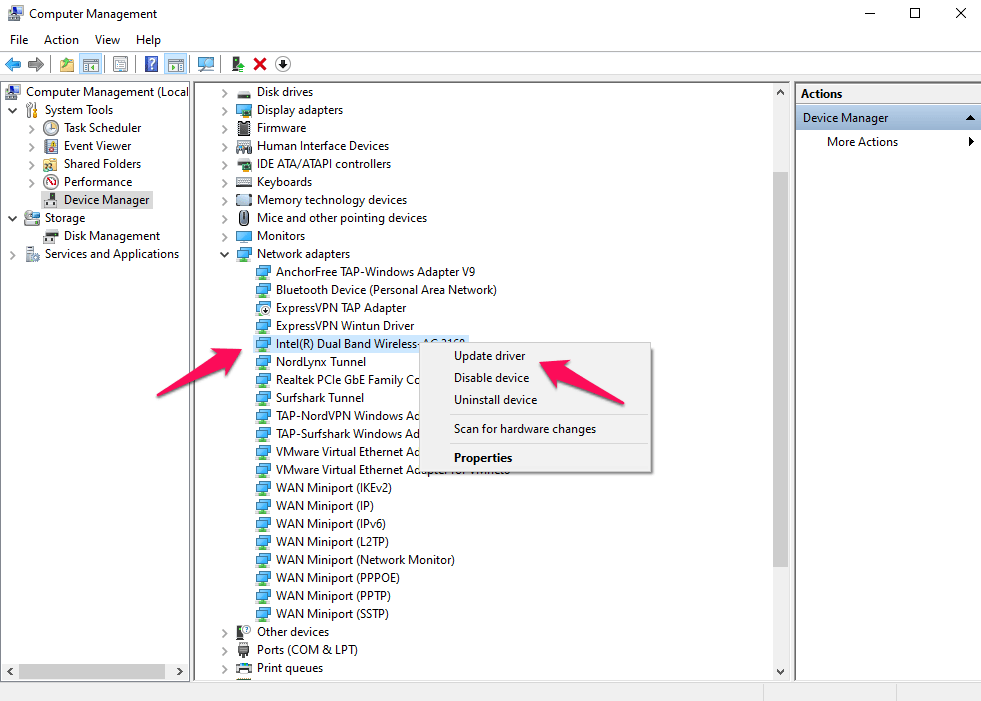
Now, navigate to the Network Adapters drop-down menu, and right-click on the Driver. And click on the ‘Update driver‘ option.
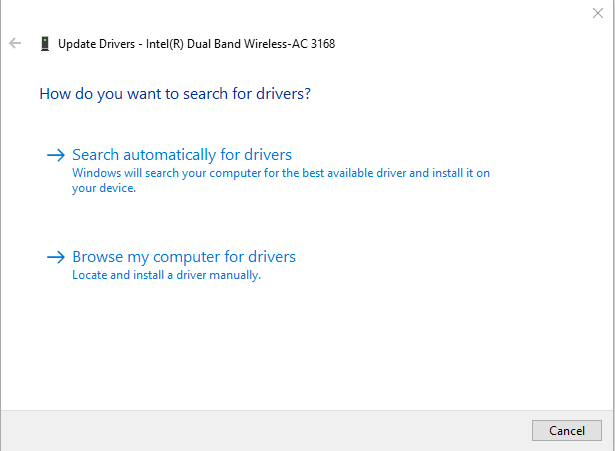
Finally, click on the ‘Search automatically for drivers‘ button, and the system will download the new driver automatically and then install it for you.
After that, restart your system and check whether you are still getting the error or not.
Change Power Management Settings of the Network Driver
Sometimes due to the power saving settings, it blocks these network settings to save more power. We are going to bypass the power management setting of the network driver so that it can take as much power it needs.
Open Power User Menu, either by clicking Windows Key + X or right-clicking on the Windows icon located at the taskbar.
Now, click on the ‘Device Manager‘ label or press the M key from the keyboard.

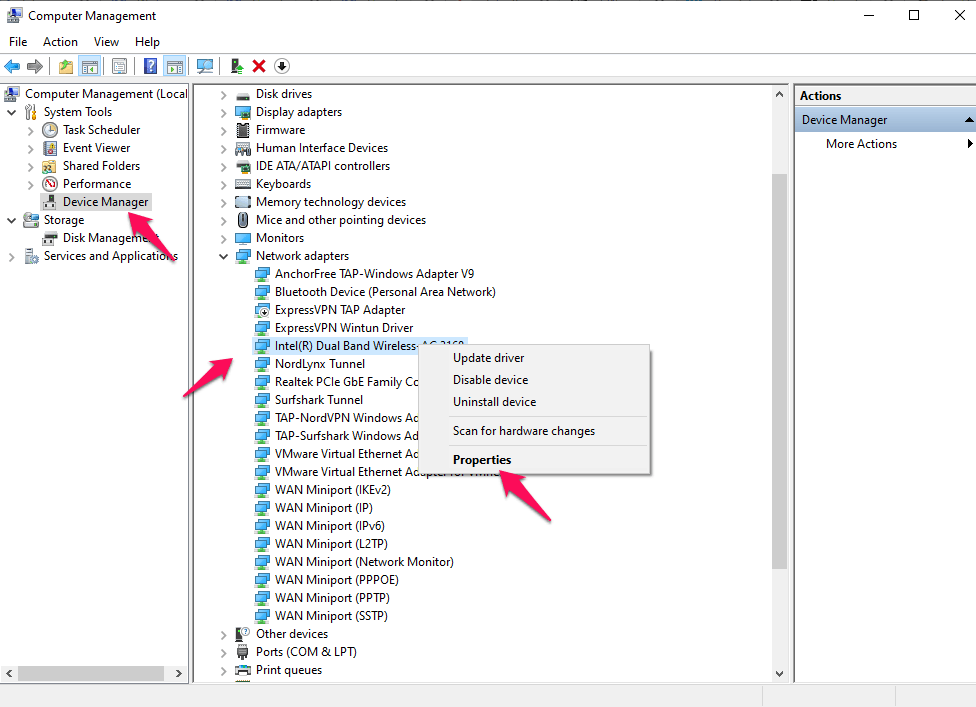
Now, navigate to the Network Adapters drop-down menu, and right-click on the Driver. And click on the ‘Properties‘ option.
Now, go to Power Management and uncheck the ‘All the computer to turn off this device to save power‘ option and then click on the OK button to save it.
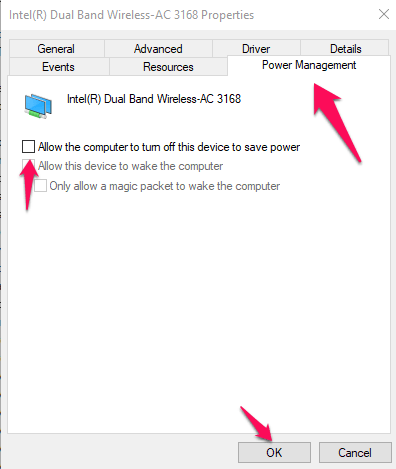
After that, restart your system and check whether you are still getting the error or not.
Reset TCP/IP via CMD
In this method, we are going to reset the TCP/IP to resolve the default gateway unavailability issue. To reset the TCP/IP, we are going to using the administrative version of CMD. To do so, follow the below steps carefully,
Press the Search icon located at the taskbar.
![]()
Now, search for ‘CMD‘ and press the Run as administrator button. On clicking the button, UAC might appear and ask you for administrative permission, press the Yes button when asked for.
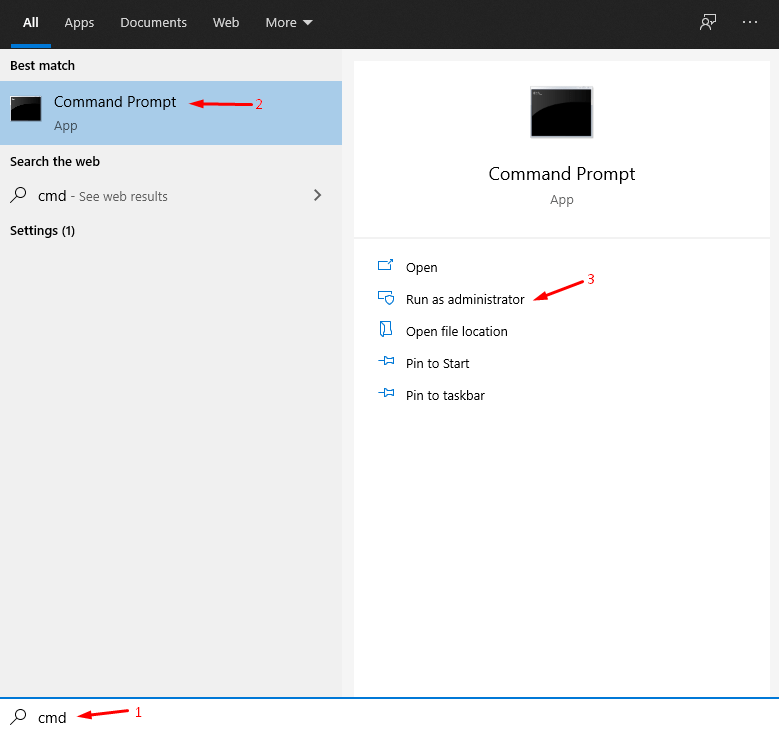
Now, type the following command and hit enter to execute it.
netsh int ip reset
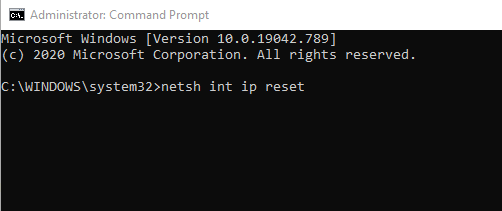
After execution, restart your system and check whether you are still getting the error or not.
Reinstall Network Adapter Driver
This is the last method we are going to try, in this method, we are going to uninstall the driver and then let Windows 10 install the latest driver for the Network Adapter.
Open Power User Menu, either by clicking Windows Key + X or right-clicking on the Windows icon located at the taskbar.
Now, click on the ‘Device Manager‘ label or press the M key from the keyboard.

Now, navigate to the Network Adapters drop-down menu, and right-click on the Driver. And click on the ‘Uninstall Device’ option.
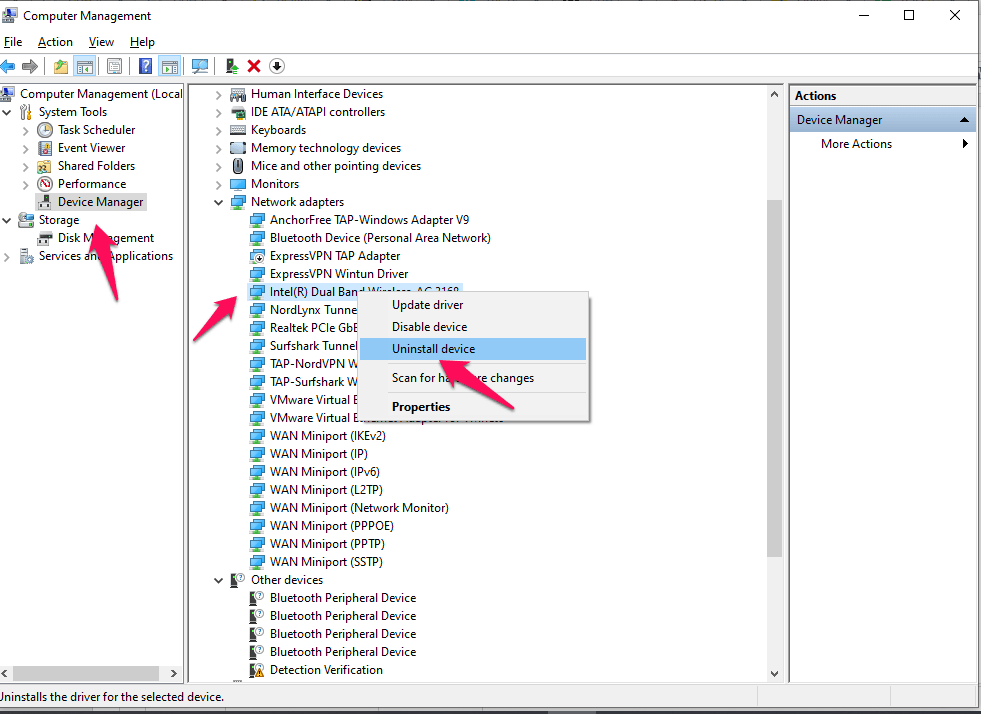
A pop will appear asking for your permission to uninstall the driver, and also there will be a check box as well asking ‘Delete the driver software for this device‘. Check that and finally click on the ‘Uninstall’ button.
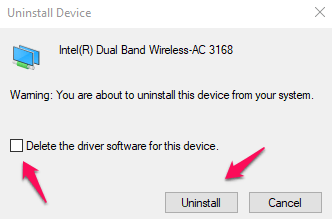
After the uninstallation, restart the system and wait for Windows 10 to detect the missing driver, and let Windows 10 automatically install the driver for you.
If you've any thoughts on How to Fix ‘Default Gateway is Not Available’ Error on Windows?, then feel free to drop in below comment box. Also, please subscribe to our DigitBin YouTube channel for videos tutorials. Cheers!
