Do you encounter an error on Windows 11 notifying you that the Recycle Bin is corrupted? This error appears when you access the recycle bin or try emptying the trashed content. You cannot restore the deleted files or clear the recycle bin.
This problem in the recycle bin can occur due to data in the hard disk getting corrupted. It has been observed that saving malware-infected files on the hard drive can also lead to the “Recycle Bin is corrupted” notification.
If one or more system files have become corrupt, it can cause other errors including the “Recycle Bin is corrupted”. Bugs on the Windows OS build can cause such errors with system components. I have compiled some troubleshooting tips in this guide to fix the corrupted Recycle Bin error.

Top Ways to Fix Corrupted Recycle Bin on Windows
Go through these troubleshooting methods and implement them to fix the “Recycle Bin is Corrupted” issue. Regain access to Recycle Bin to restore or permanently delete the files in it.
1. Restart the Computer
Begin with the basic troubleshooting. If the “Recycle Bin is Corrupted” error is appearing randomly, give your computer a restart.
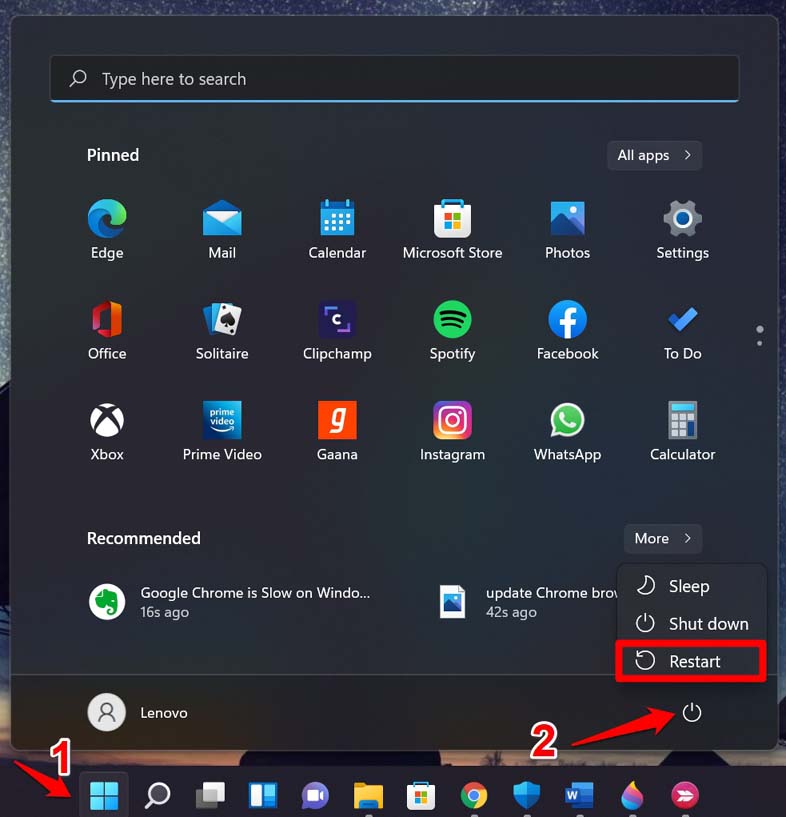
- Press the Windows key.
- Click the Power icon on the search console.
- Select Restart.
2. Use the CHKDSK Command to Fix Corrupted File System
CHKDSK is an inbuilt tool in the Windows OS to check within the hard disk and locate any error in the file system. It will also fix those corrupt file systems. Here is how to use the CHKDSK utility.
- Launch the Command Prompt using the Run box (Windows + R and type cmd)
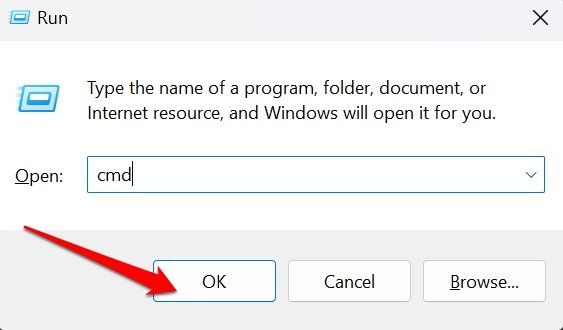
- Give the following command.
chkdsk C: /r /scan /perf
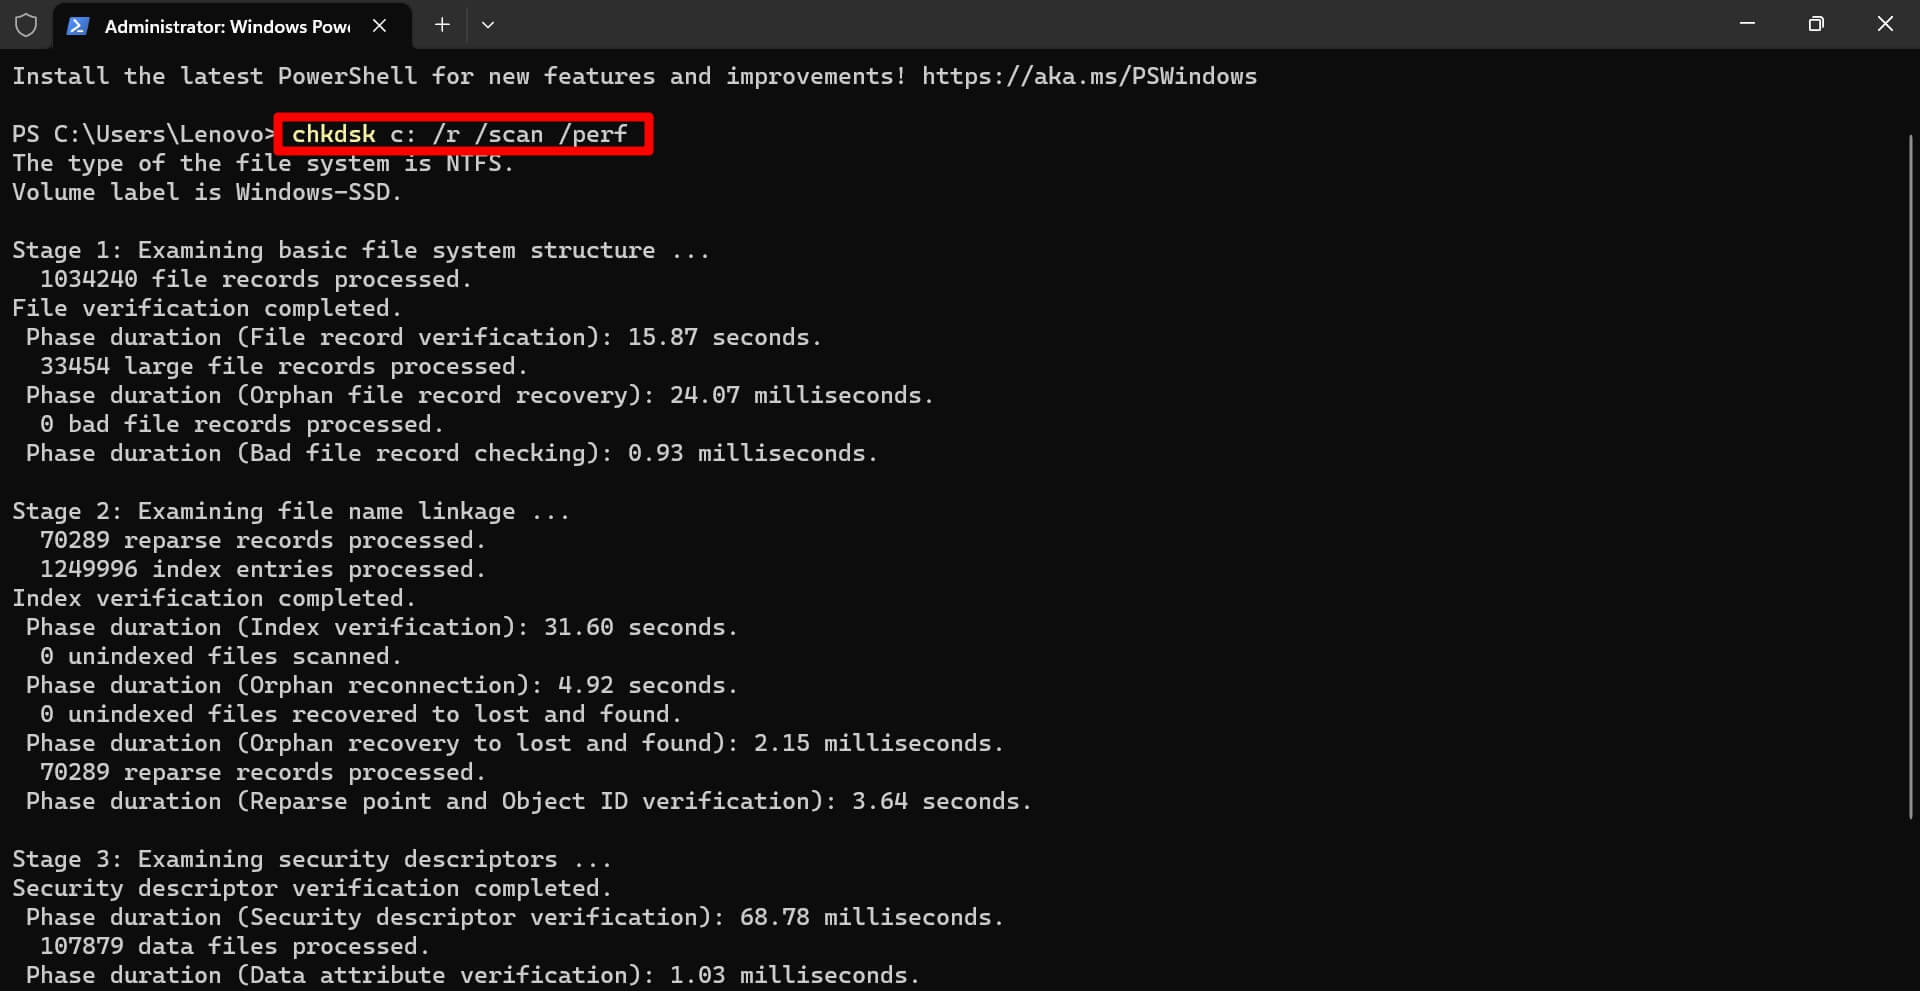
- Do not interrupt the process while the tool is checking and fixing the corrupt file system.
- Once the process is over, restart the PC.
- Access Recycle Bin.
NOTE: In Step 2, C: is the drive name in which Recycle Bin is usually present. It may differ on your PC depending on how you have set your hard drive partition.
3. Fix the Corrupt System Files
You can use the Command Prompt to scan for corrupt system files and replace them.
- Press the Windows key.
- Type cmd in the search console and click Open when the search result appears.
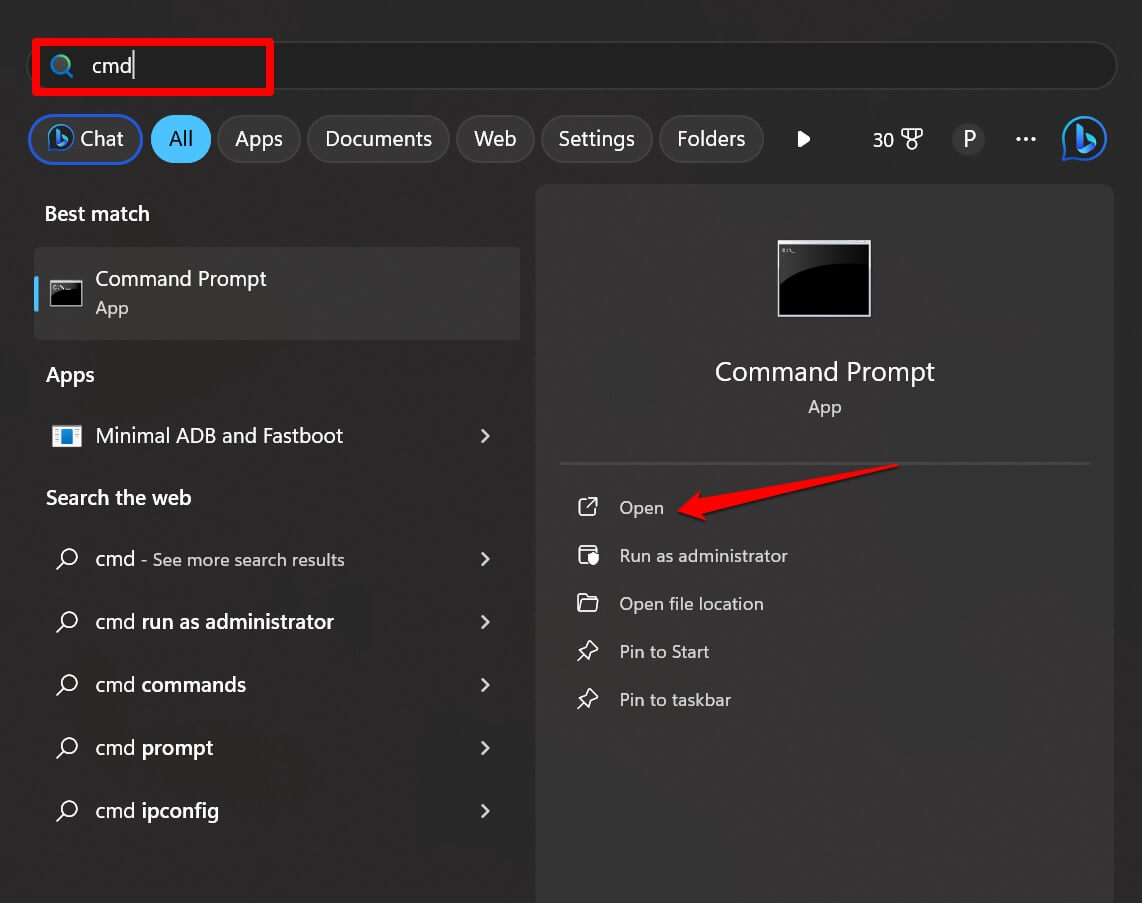
- Enter the command.
sfc/scannow
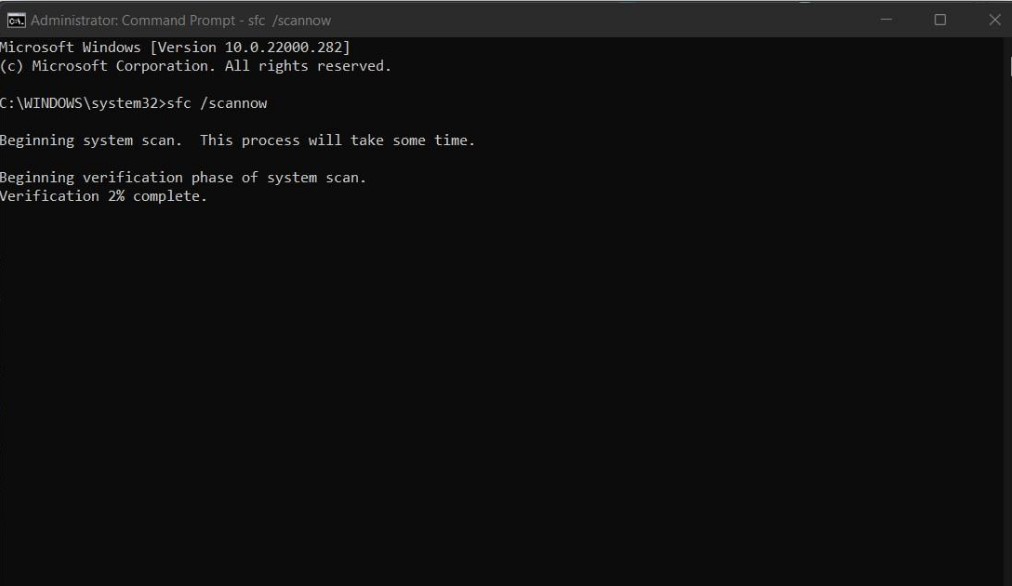
- Press the enter key.
Once the scanning and fixing of corrupt system files is complete, exit the command prompt and restart the PC. Launch Recycle Bin and try deleting the files from it.
4. Reset Recycle Bin
If you find no error using the CHKDSK tool, reset the Recycle Bin to fix the error.
- Press Windows + R to bring up the Run box.
- Type cmd and press enter.

- Enter this command to reset the Recycle Bin.
rd /s /q C:\$Recycle.bin
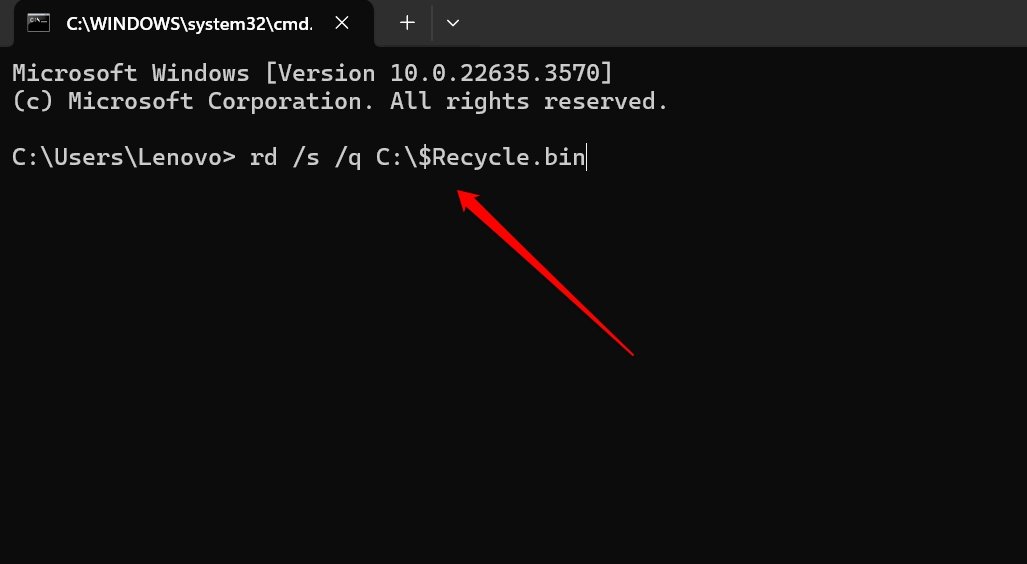
- Press the enter key to execute the command.
- Exit the Command Prompt.
- Reboot the computer.
Now, try to access the deleted files within the Recycle Bin.
5. Re-enable Recycle Bin on Windows 11
You can access the hidden files in the Recycle Bin from File Explorer and remove them permanently. Then through the Windows personalization settings, re-enable the Recycle Bin on your PC. Here are the complete steps.
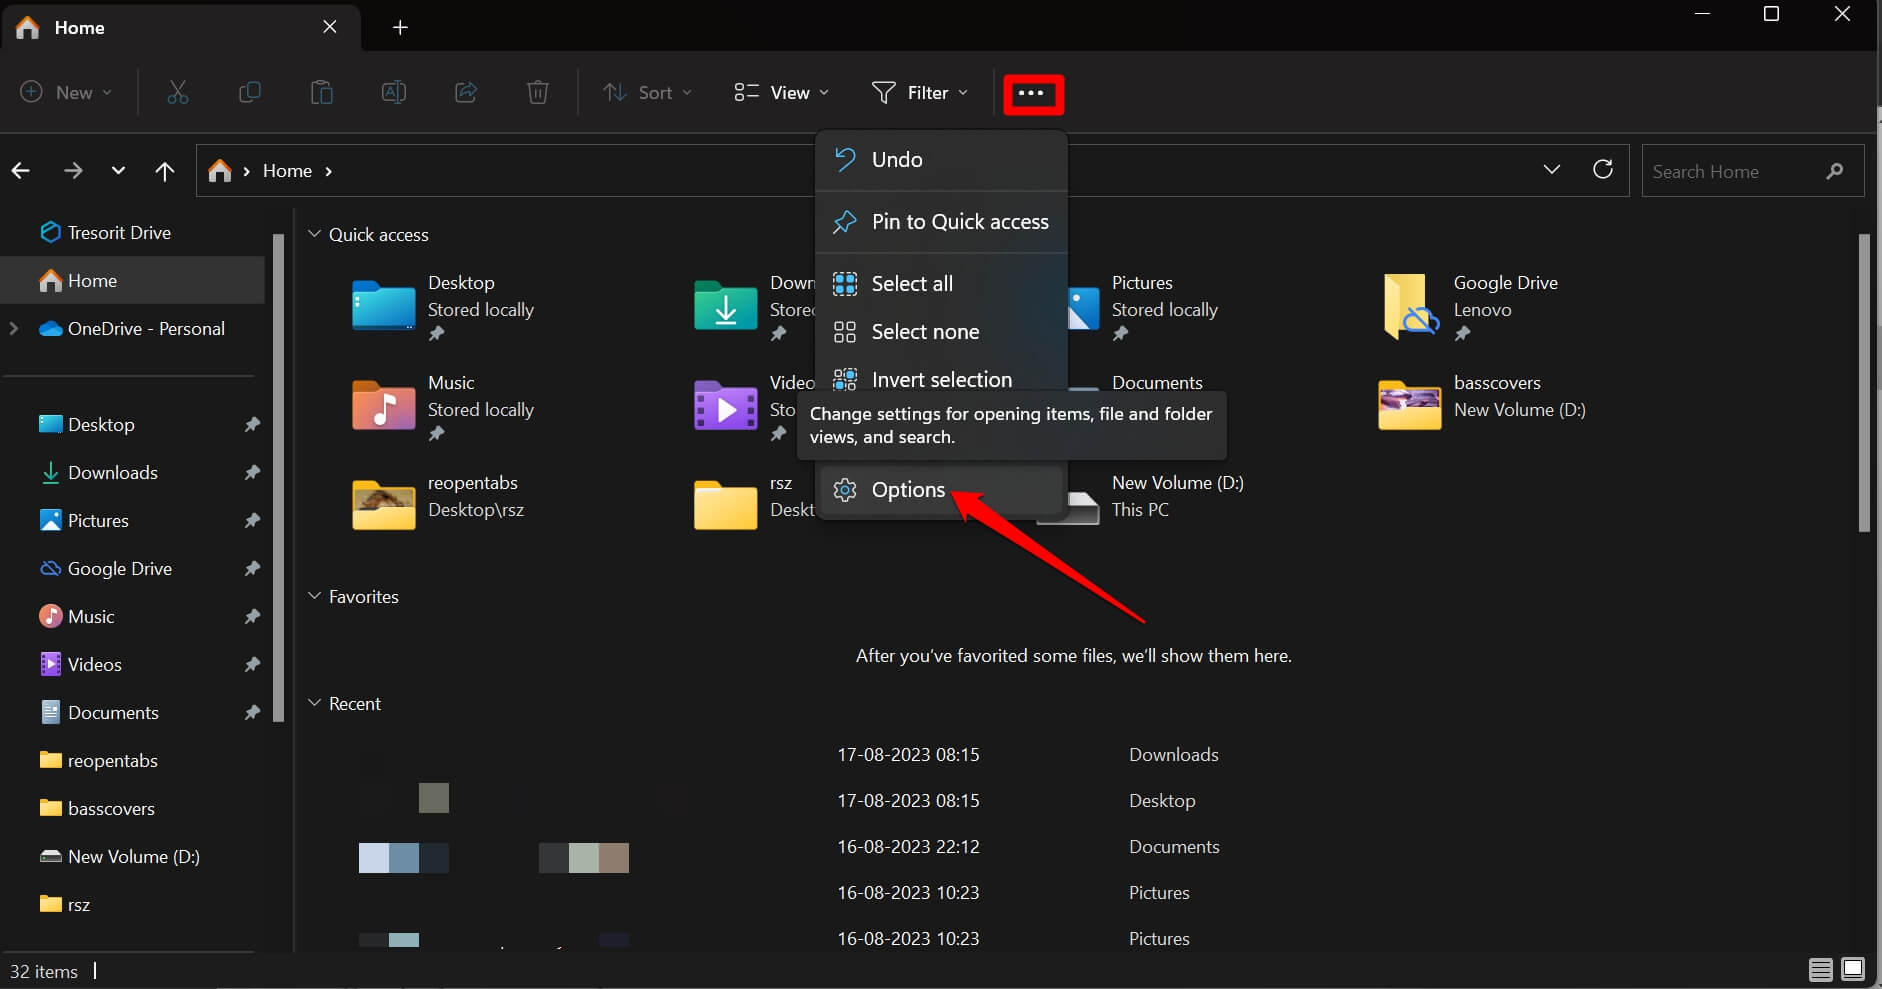
- Press Windows + E to access the File Explorer.
- Click the 3-dot menu icon and select Options.
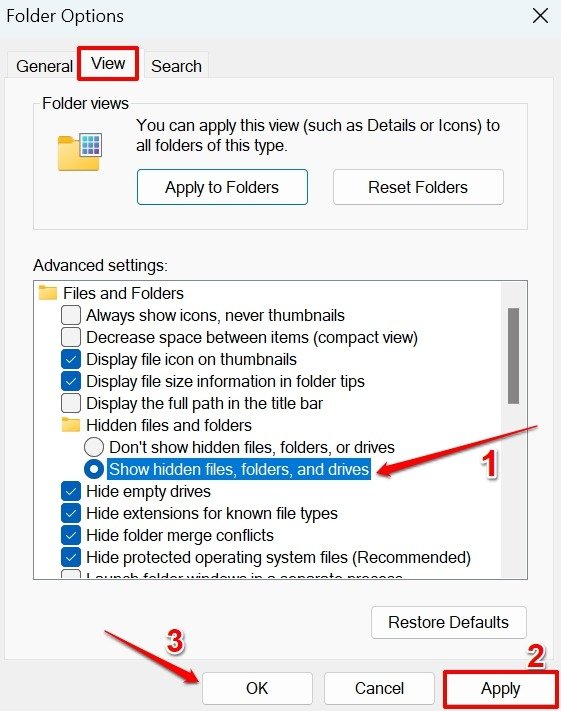
- On the Folder Options dialog box, select View.
- Click the radio button beside Show Hidden Files, Folders, and Drives.
- Press Apply > OK.
To access the hidden files and folders in the Recycle Bin,
- Enter the path in the File Explorer address bar.
C:\$Recycle.Bin
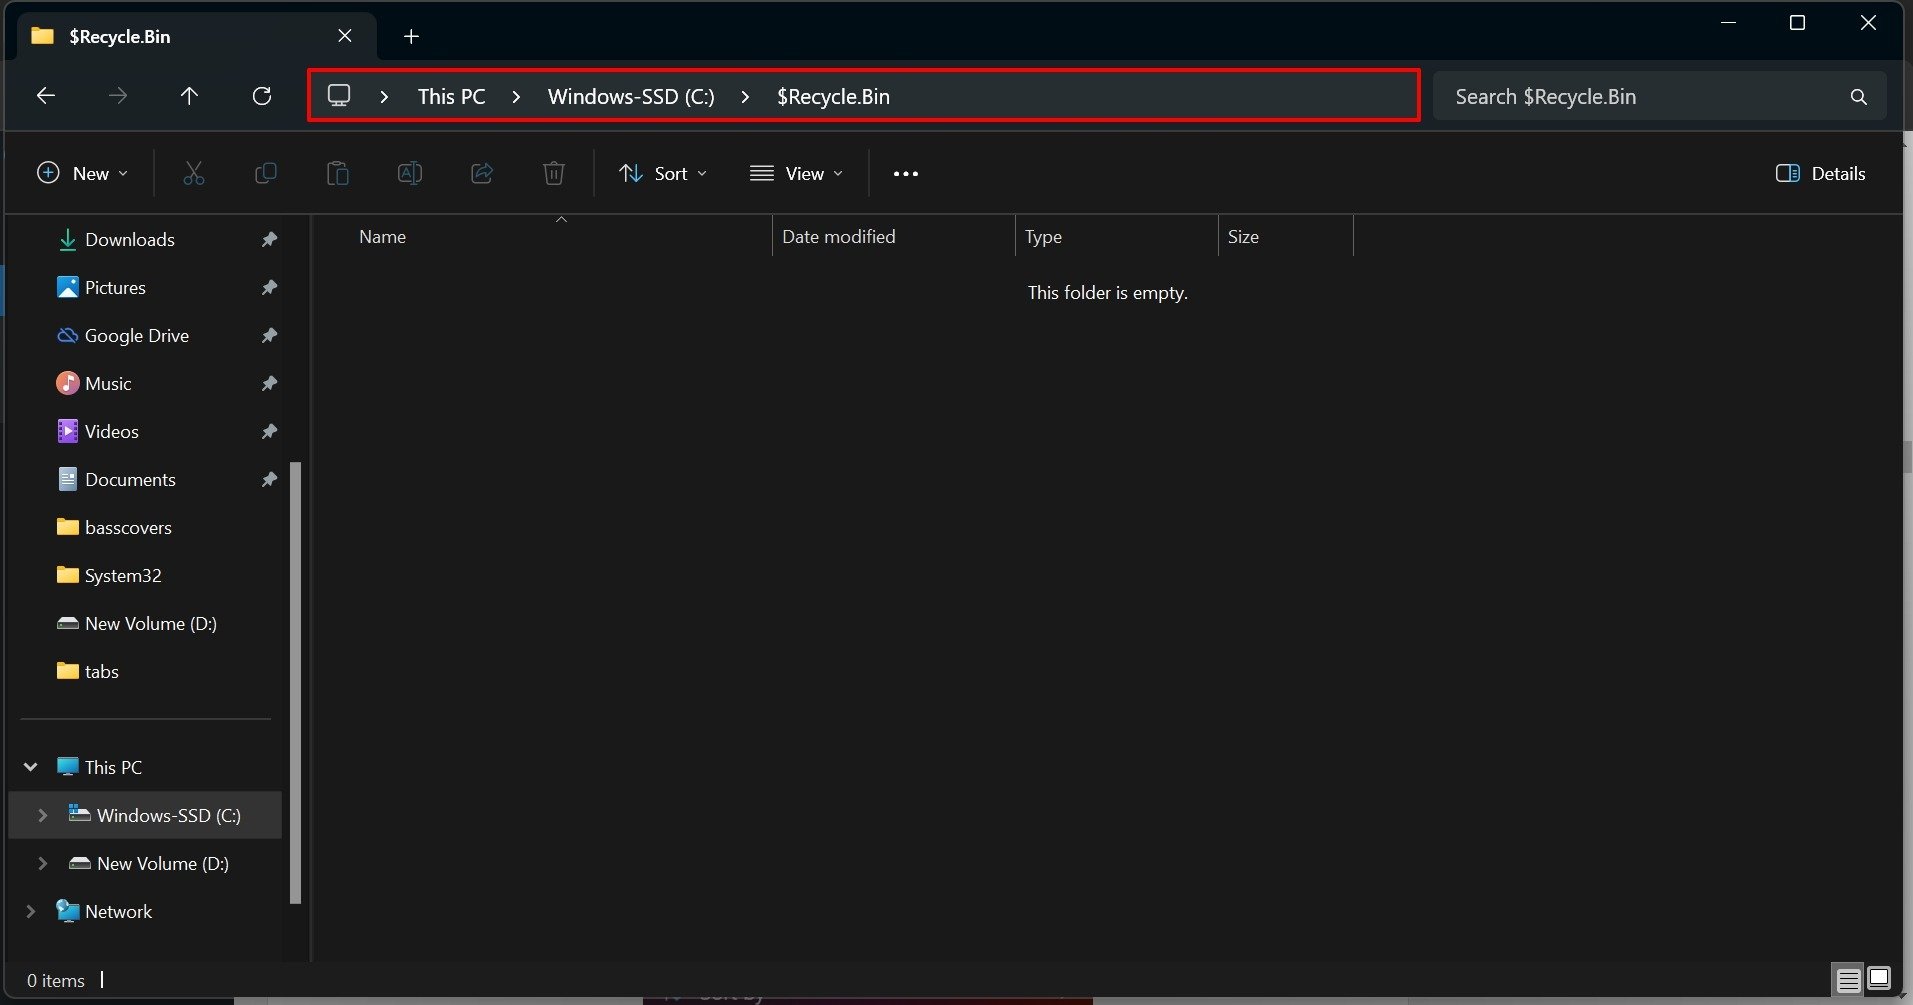
- If you see any hidden files or folders, select them all and delete them.
Follow these steps to re-enable the Recycle Bin on your desktop.
- Right-click on your desktop and select Personalize.
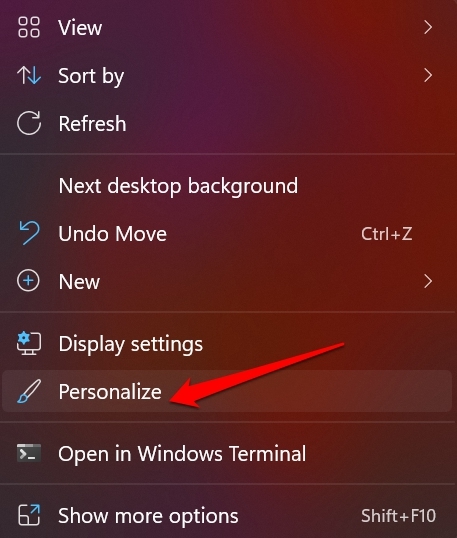
- Go to Themes.
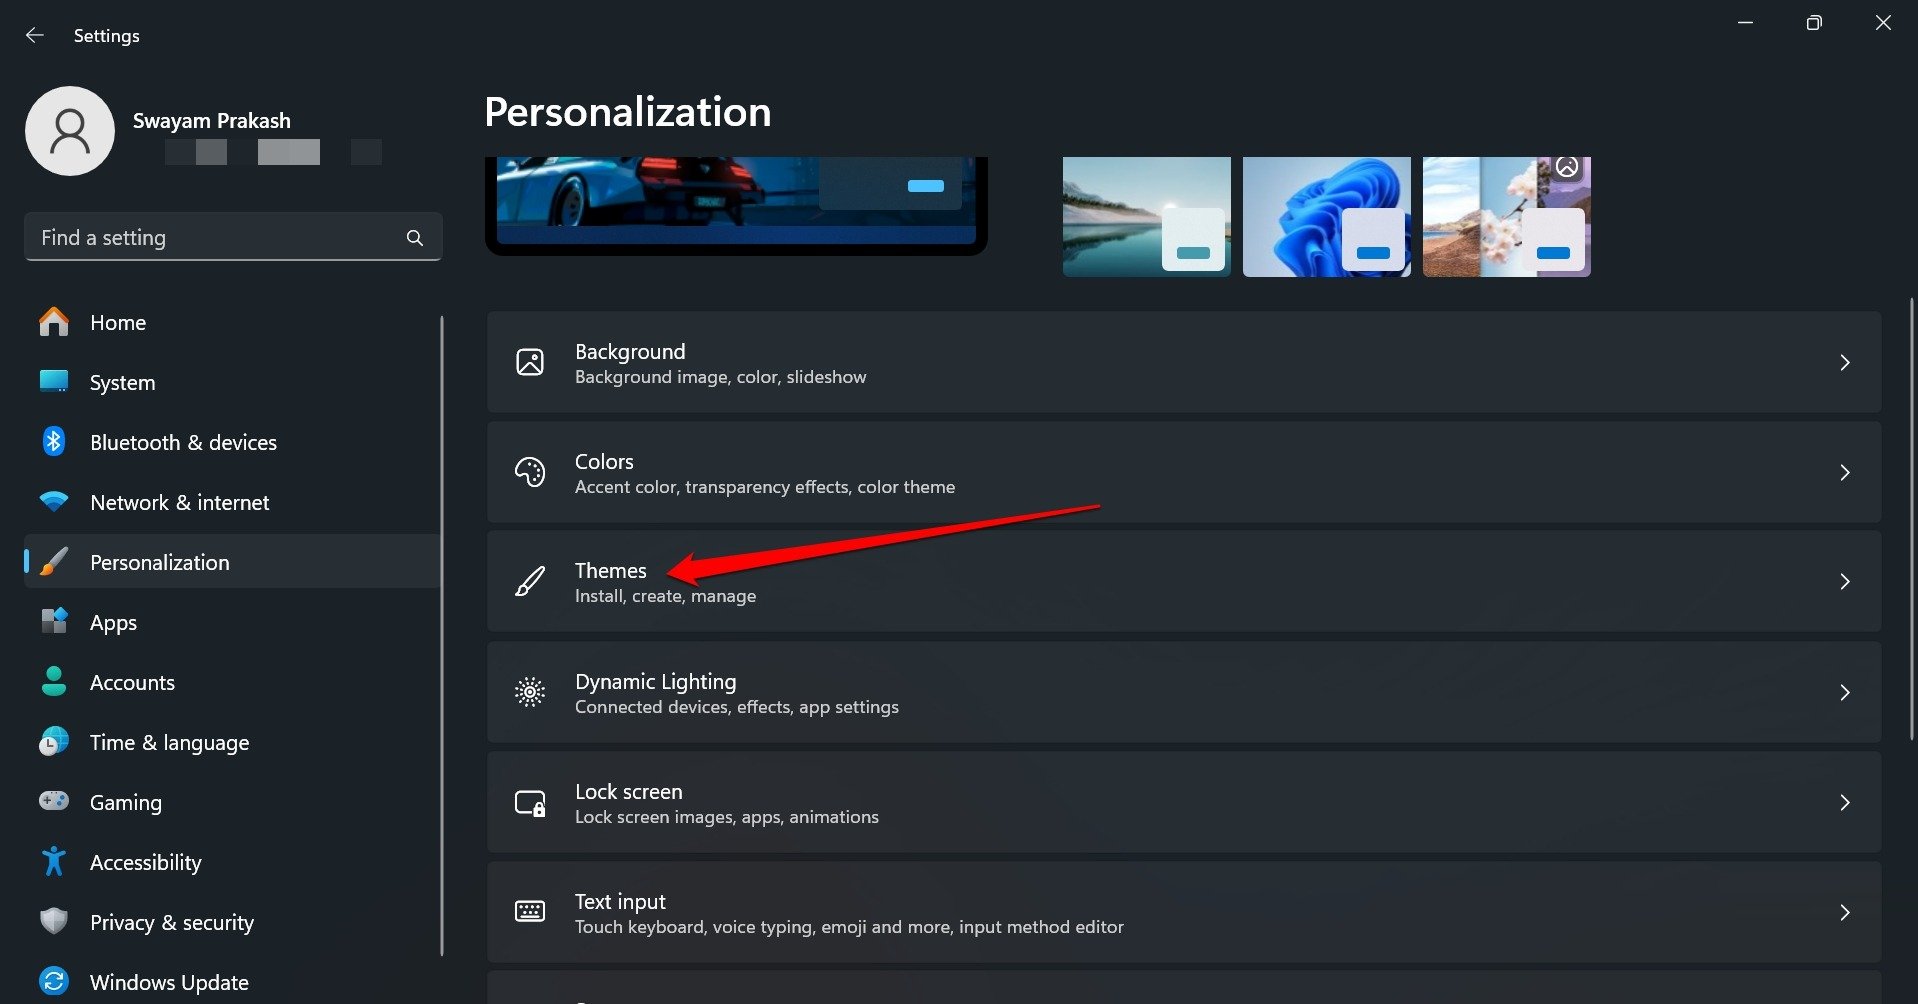
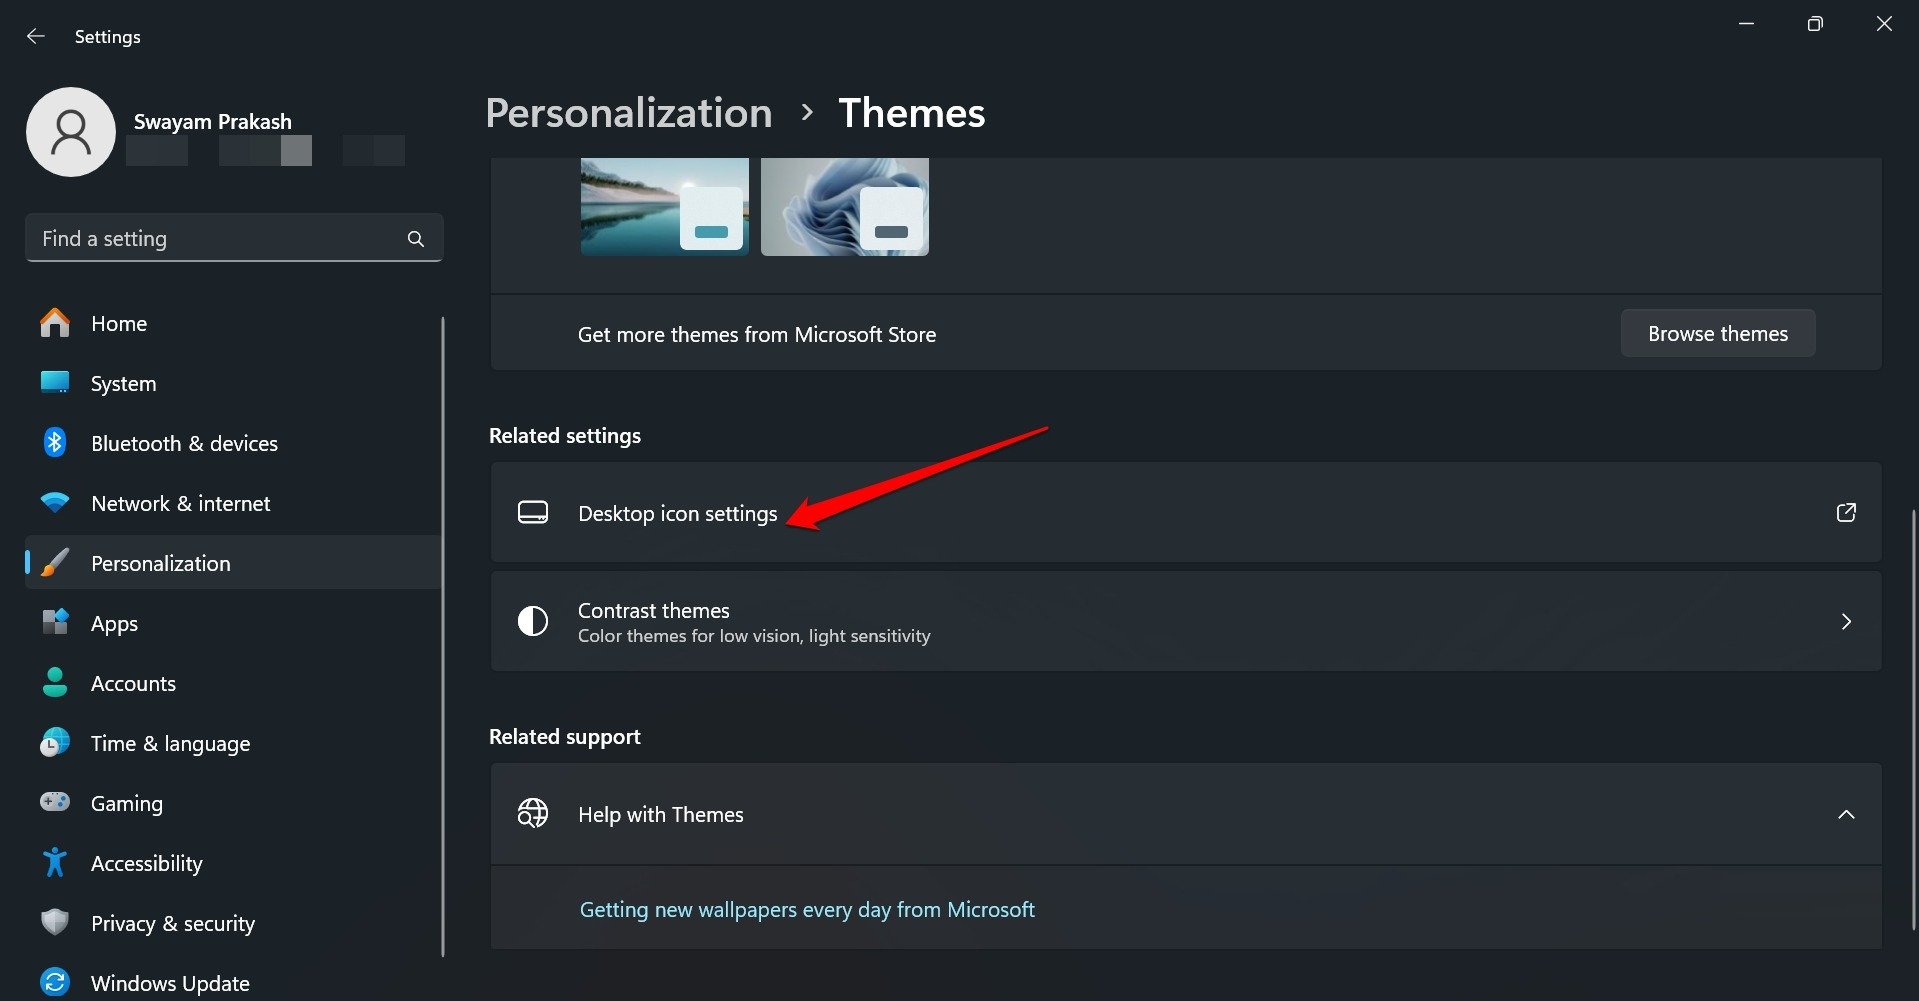
- Click on Desktop Icon Settings.
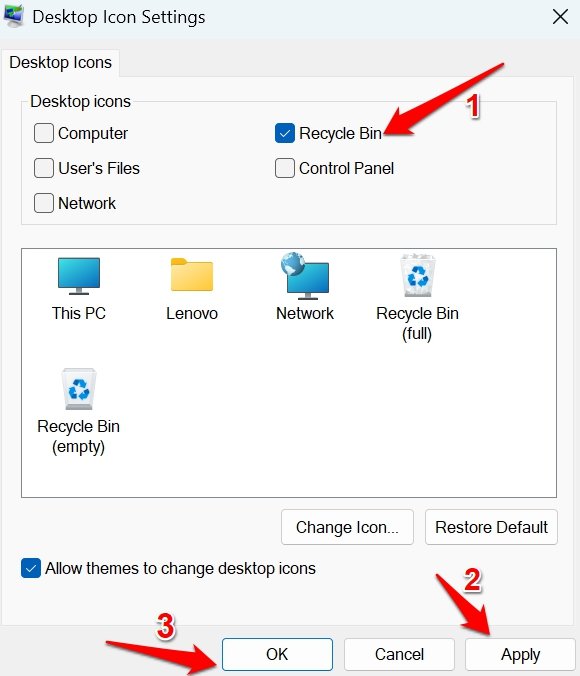
- Under the Desktop Icon tab, click the checkbox next to Recycle Bin to enable it.
- Click Apply > OK to save the changes.
- Now, double-click the Recycle Bin icon to access its content.
6. Perform a Malware Scan
To eliminate any possible malware threat on your PC hard drive invoke the Windows Defender service.
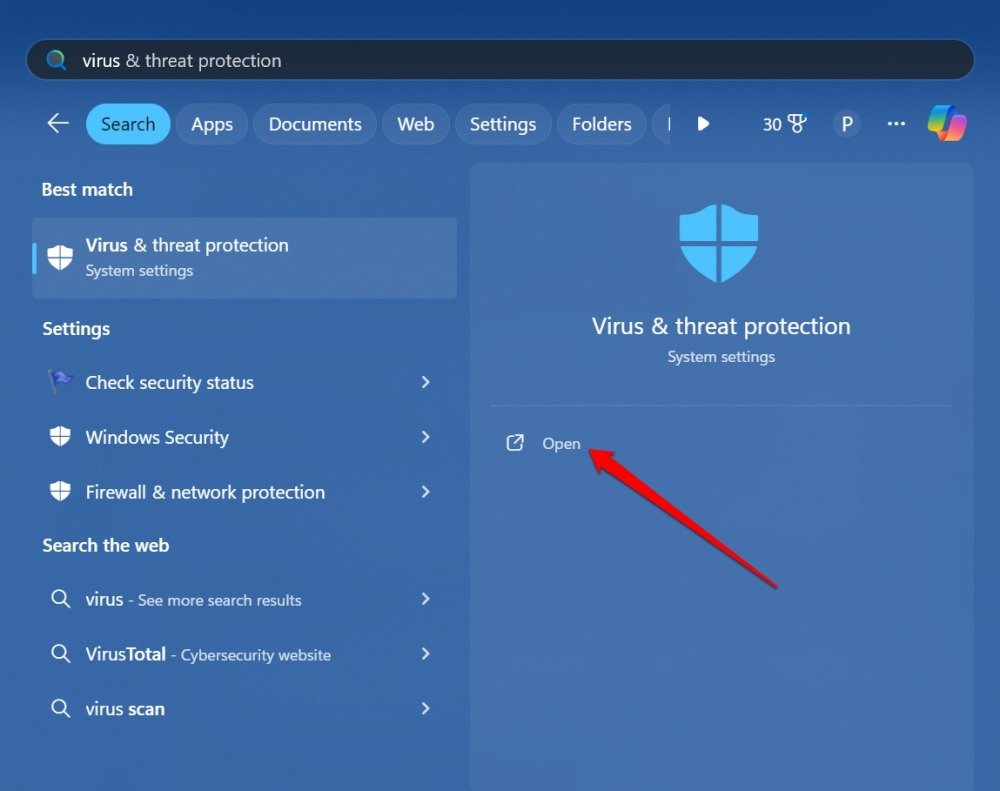
- Press the hotkeys Windows + S to bring up the search.
- Type Virus and Threat Protection and click Open.
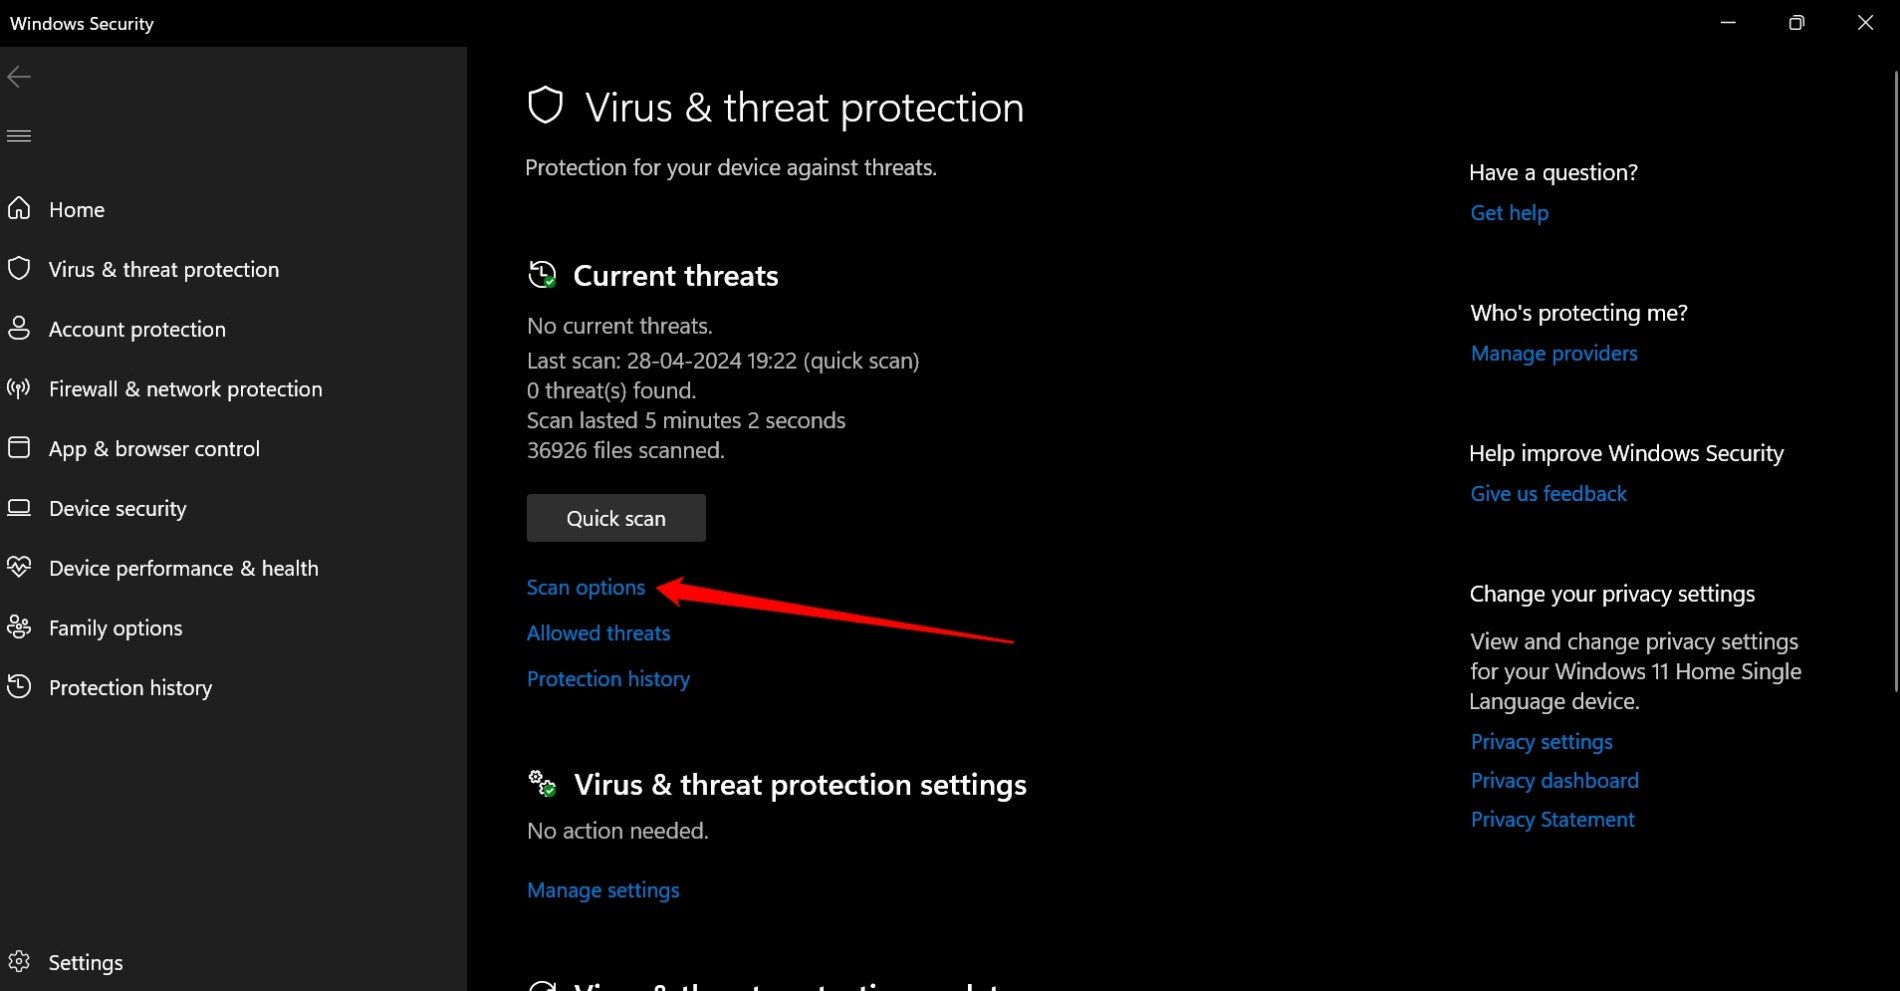
- Go to Scan Options.
- Select Full Scan and press Scan Now.
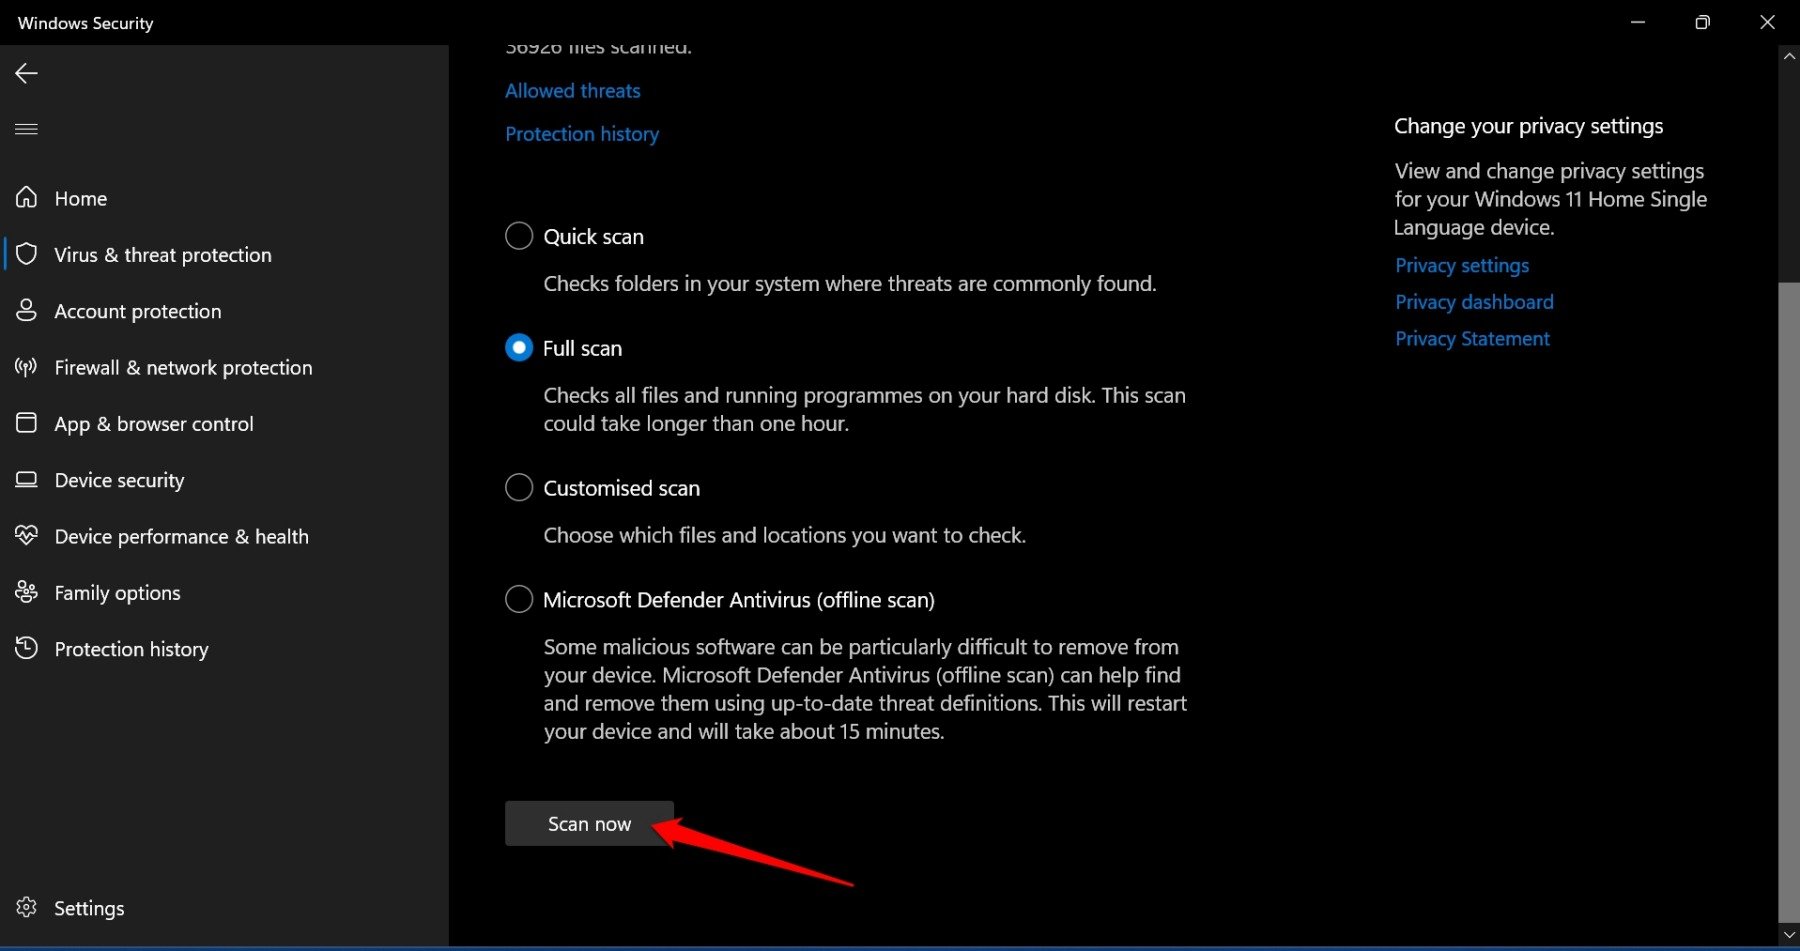
Depending on the volume of files you have on the PC, the malware scan may take some time to finish. If any infected file or folder is found, follow the Windows Defender’s instructions to remove the items.
After removing the malware on your PC, you should be able to launch Recycle Bin and access files on it.
7. Install Windows Update
If implementing other troubleshooting tips did not fix the “Recycle Bin is Corrupted” error, the problem may lie with the Windows OS.
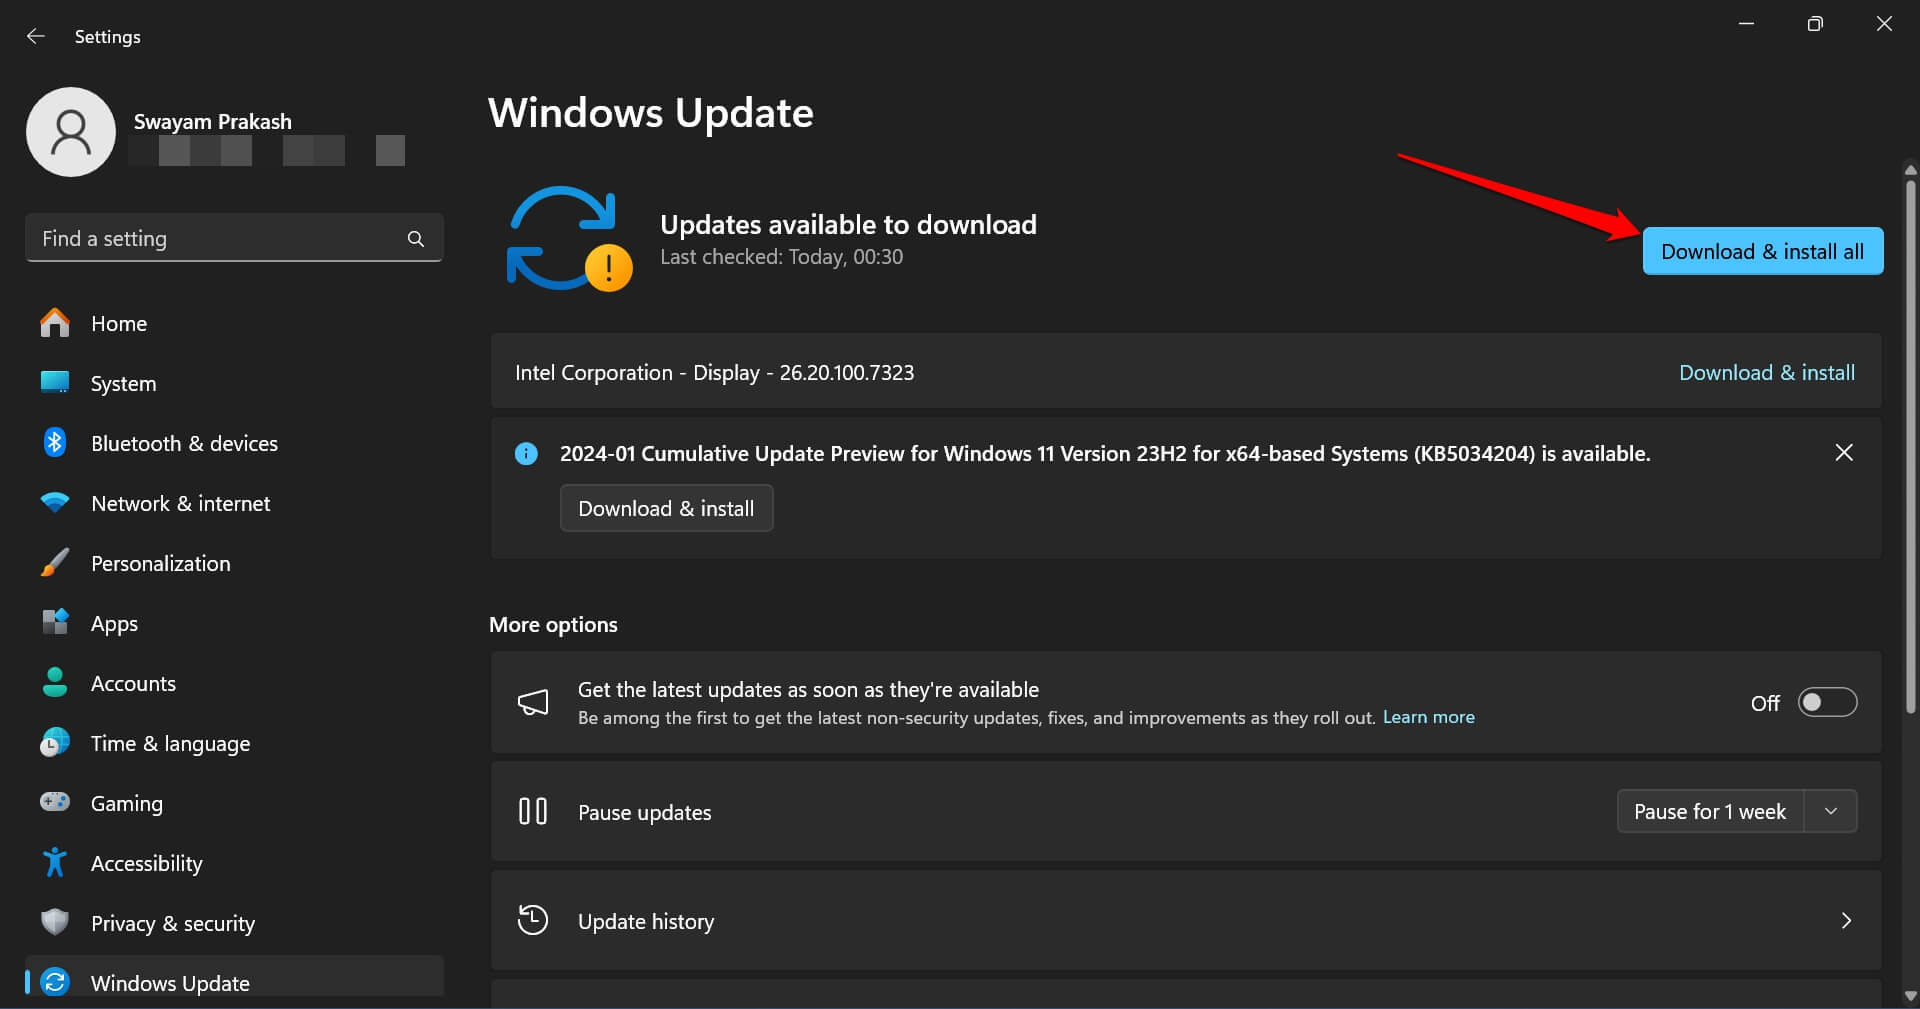
Check for new Windows 11 update that may be available and install it.
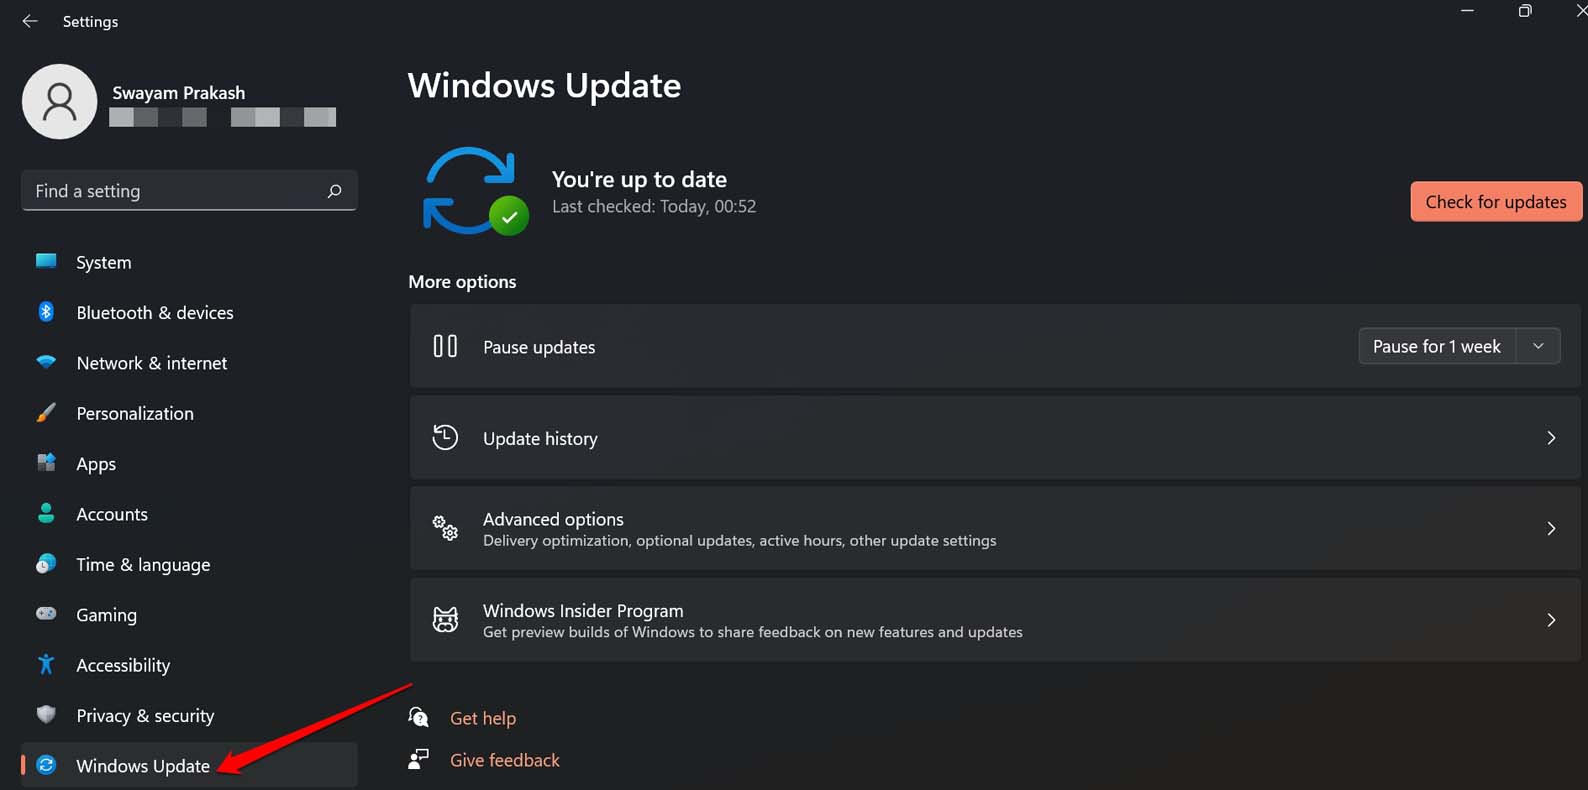
- Press Windows + I to open the Settings.
- Click on Windows Update.
- If any new Windows system build is available, click on Download and Install All.
- Restart the PC after installing the software update.

- Access Recycle Bin.
8. Restore the System
Are you unable to fix the “Recycle Bin is corrupted” error using other troubleshooting methods? You can restore the system to a previous timeline when the Recycle Bin was functional without any error.
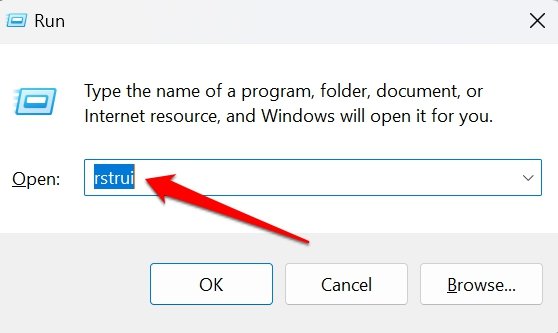
- Press Windows + R to launch the Run box.
- Type rstrui and press enter.
- Select the Restore Point and click Next.
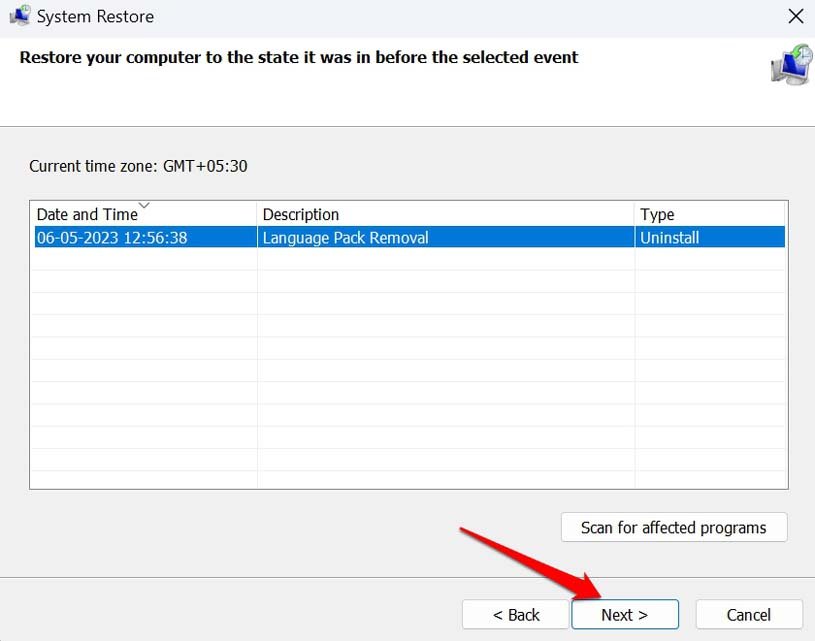
- Click Finish to revert the system to an older timeline.
Bottom Line
The Recycle Bin is an essential system component of Windows OS. It is necessary to fix the errors associated with the Recycle Bin to enable your access to the deleted files present in it. The troubleshooting tips shared in the guide should resolve the issue for good.
If you've any thoughts on How to Fix Corrupted Recycle Bin Error on Windows 11, then feel free to drop in below comment box. Also, please subscribe to our DigitBin YouTube channel for videos tutorials. Cheers!
