Google Chrome is one of the preferred web browsers for people using the Windows operating system. With the new Windows 11 operating system, Google has introduced some new design elements, available via a flag that matches the Windows 11 menu styles. Though this isn’t anything huge, such small elements give symmetry to the overall aesthetics of the OS.
One of the reasons people choose Google Chrome over other chromium browsers is its excellent performance. However, if you have recently updated to Windows 11 and face some issues with Google Chrome, you aren’t alone. Several users have taken to different platforms to report Chrome not working in Windows 11 issue.
Thankfully, in this guide, we will share with you some solutions that you can apply to fix this problem and get Chrome back working smoothly on your Windows 11 device. Let us take a look at the fixes.
1. Restart Your PC
Well, one of the best solutions that not only could help you fix the Chrome problem in your Windows 11 PC, but could help fix a wide range of issues on your PC is to restart your PC simply. Restarting the PC allows all the system files to reload successfully.
In fact, all the temporary files and cache files are also reset, once you restart your PC. So, if you are having issues with Chrome on your Windows 11 machine, then simply turn OFF your PC, and wait for about 10 seconds before powering it back ON.
2. Close Google Chrome Processes
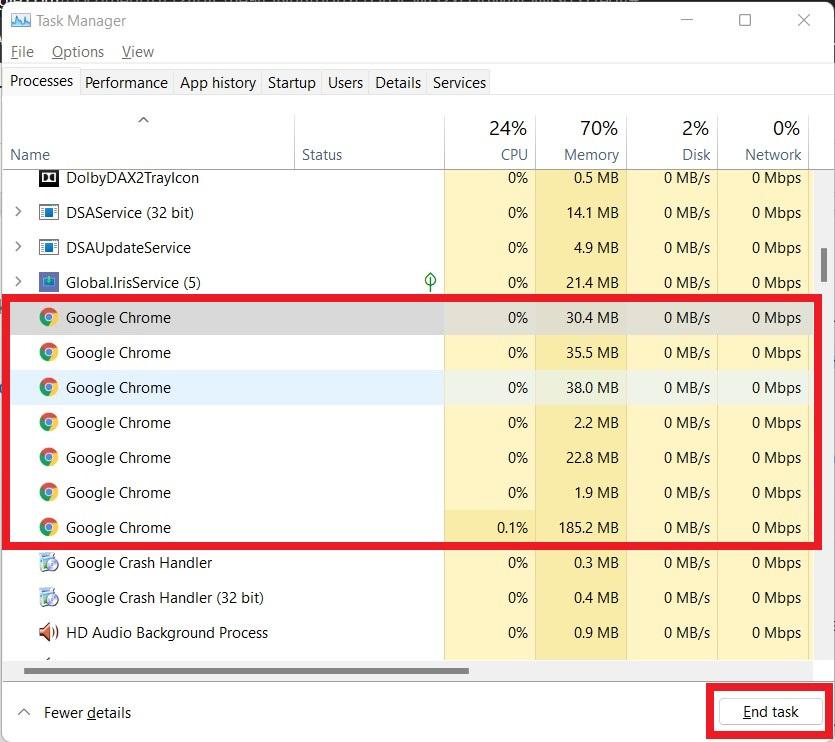
If Google is continuously crashing on Windows 11, and you cannot open the browser, you should close all google chrome processes. You can do this by using the Windows Task Manager tool. Here are the steps that you need to follow.
- On your Windows 11 home screen, press the Ctrl+Alt+Del buttons together.
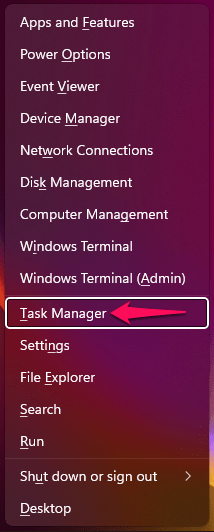
- Select Task Manager from the list of options that appear. Alternatively, you can also right-click on the Windows Start menu on the taskbar and select Task Manager from the list of options that appear.

- Then in Task Manager, end all the Google Chrome processes.

- After ending all Chrome tasks, again try opening the Google Chrome browser and see if this fixes the issue or not.
3. Update Google Chrome
An unsupported version of the application can also be why it does not work smoothly or not work at all on an operating system. This can be easily fixed by updating the app. The same is the case with Google Chrome. You need to make sure that you have installed the latest version of Google Chrome on your Windows 11 OS to prevent compatibility issues.
Here are the steps that you need to follow to update or check for new updates on Google Chrome.
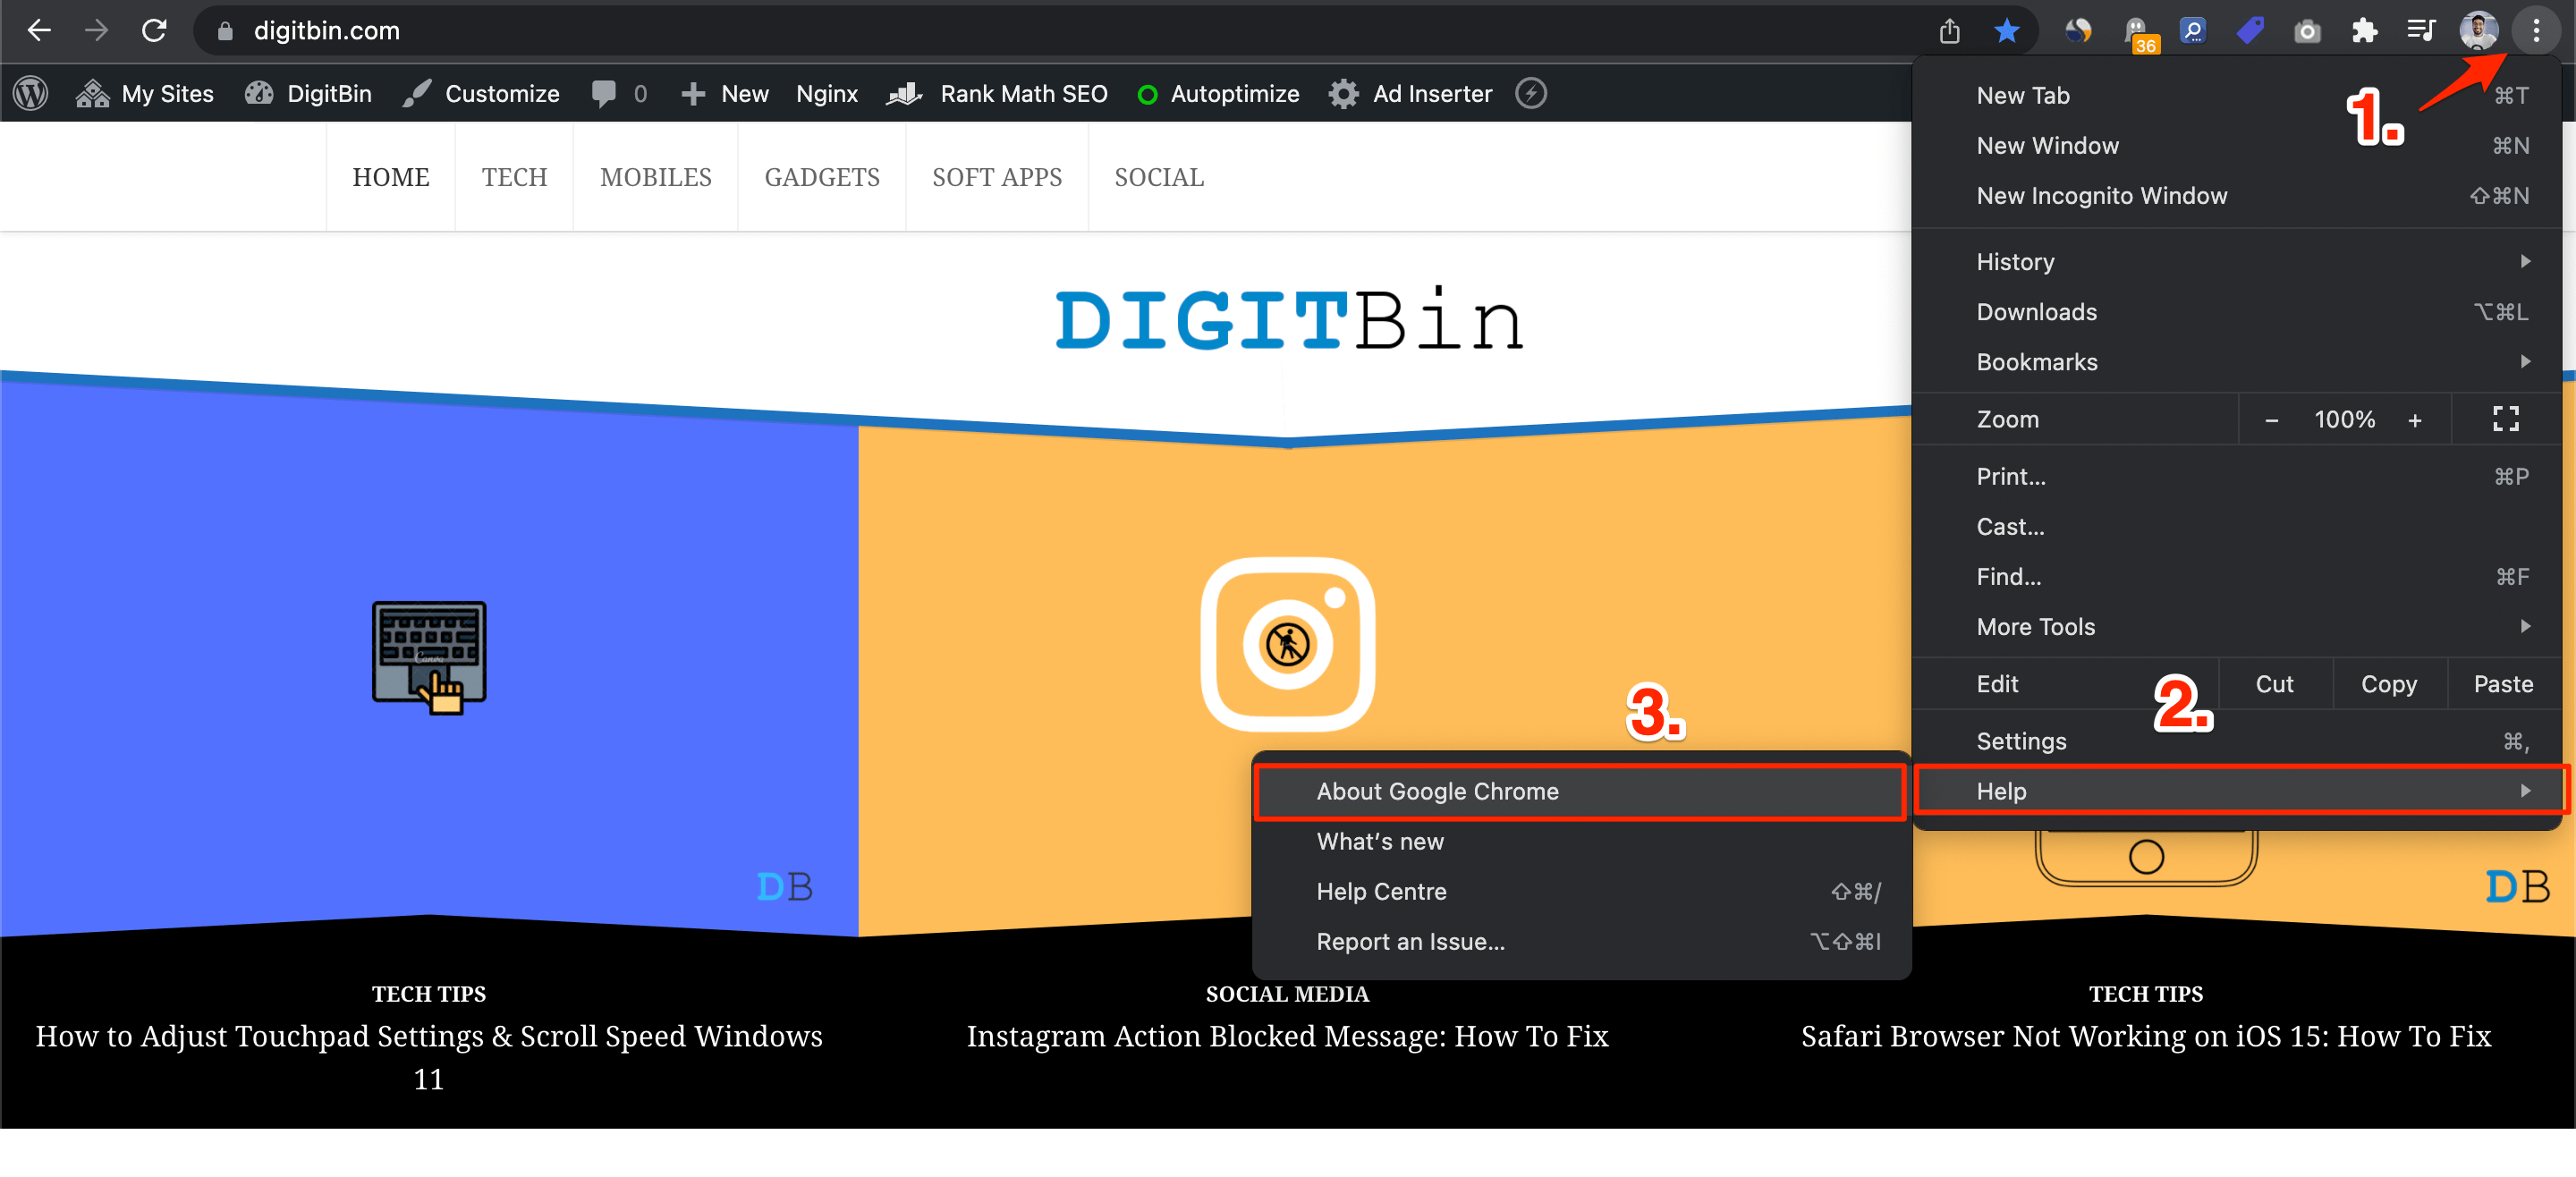
- If Google Chrome is partially working on your PC before crashing, you can open a Chrome tab, click on the 3-dot menu icon, and select Help > About Google Chrome.

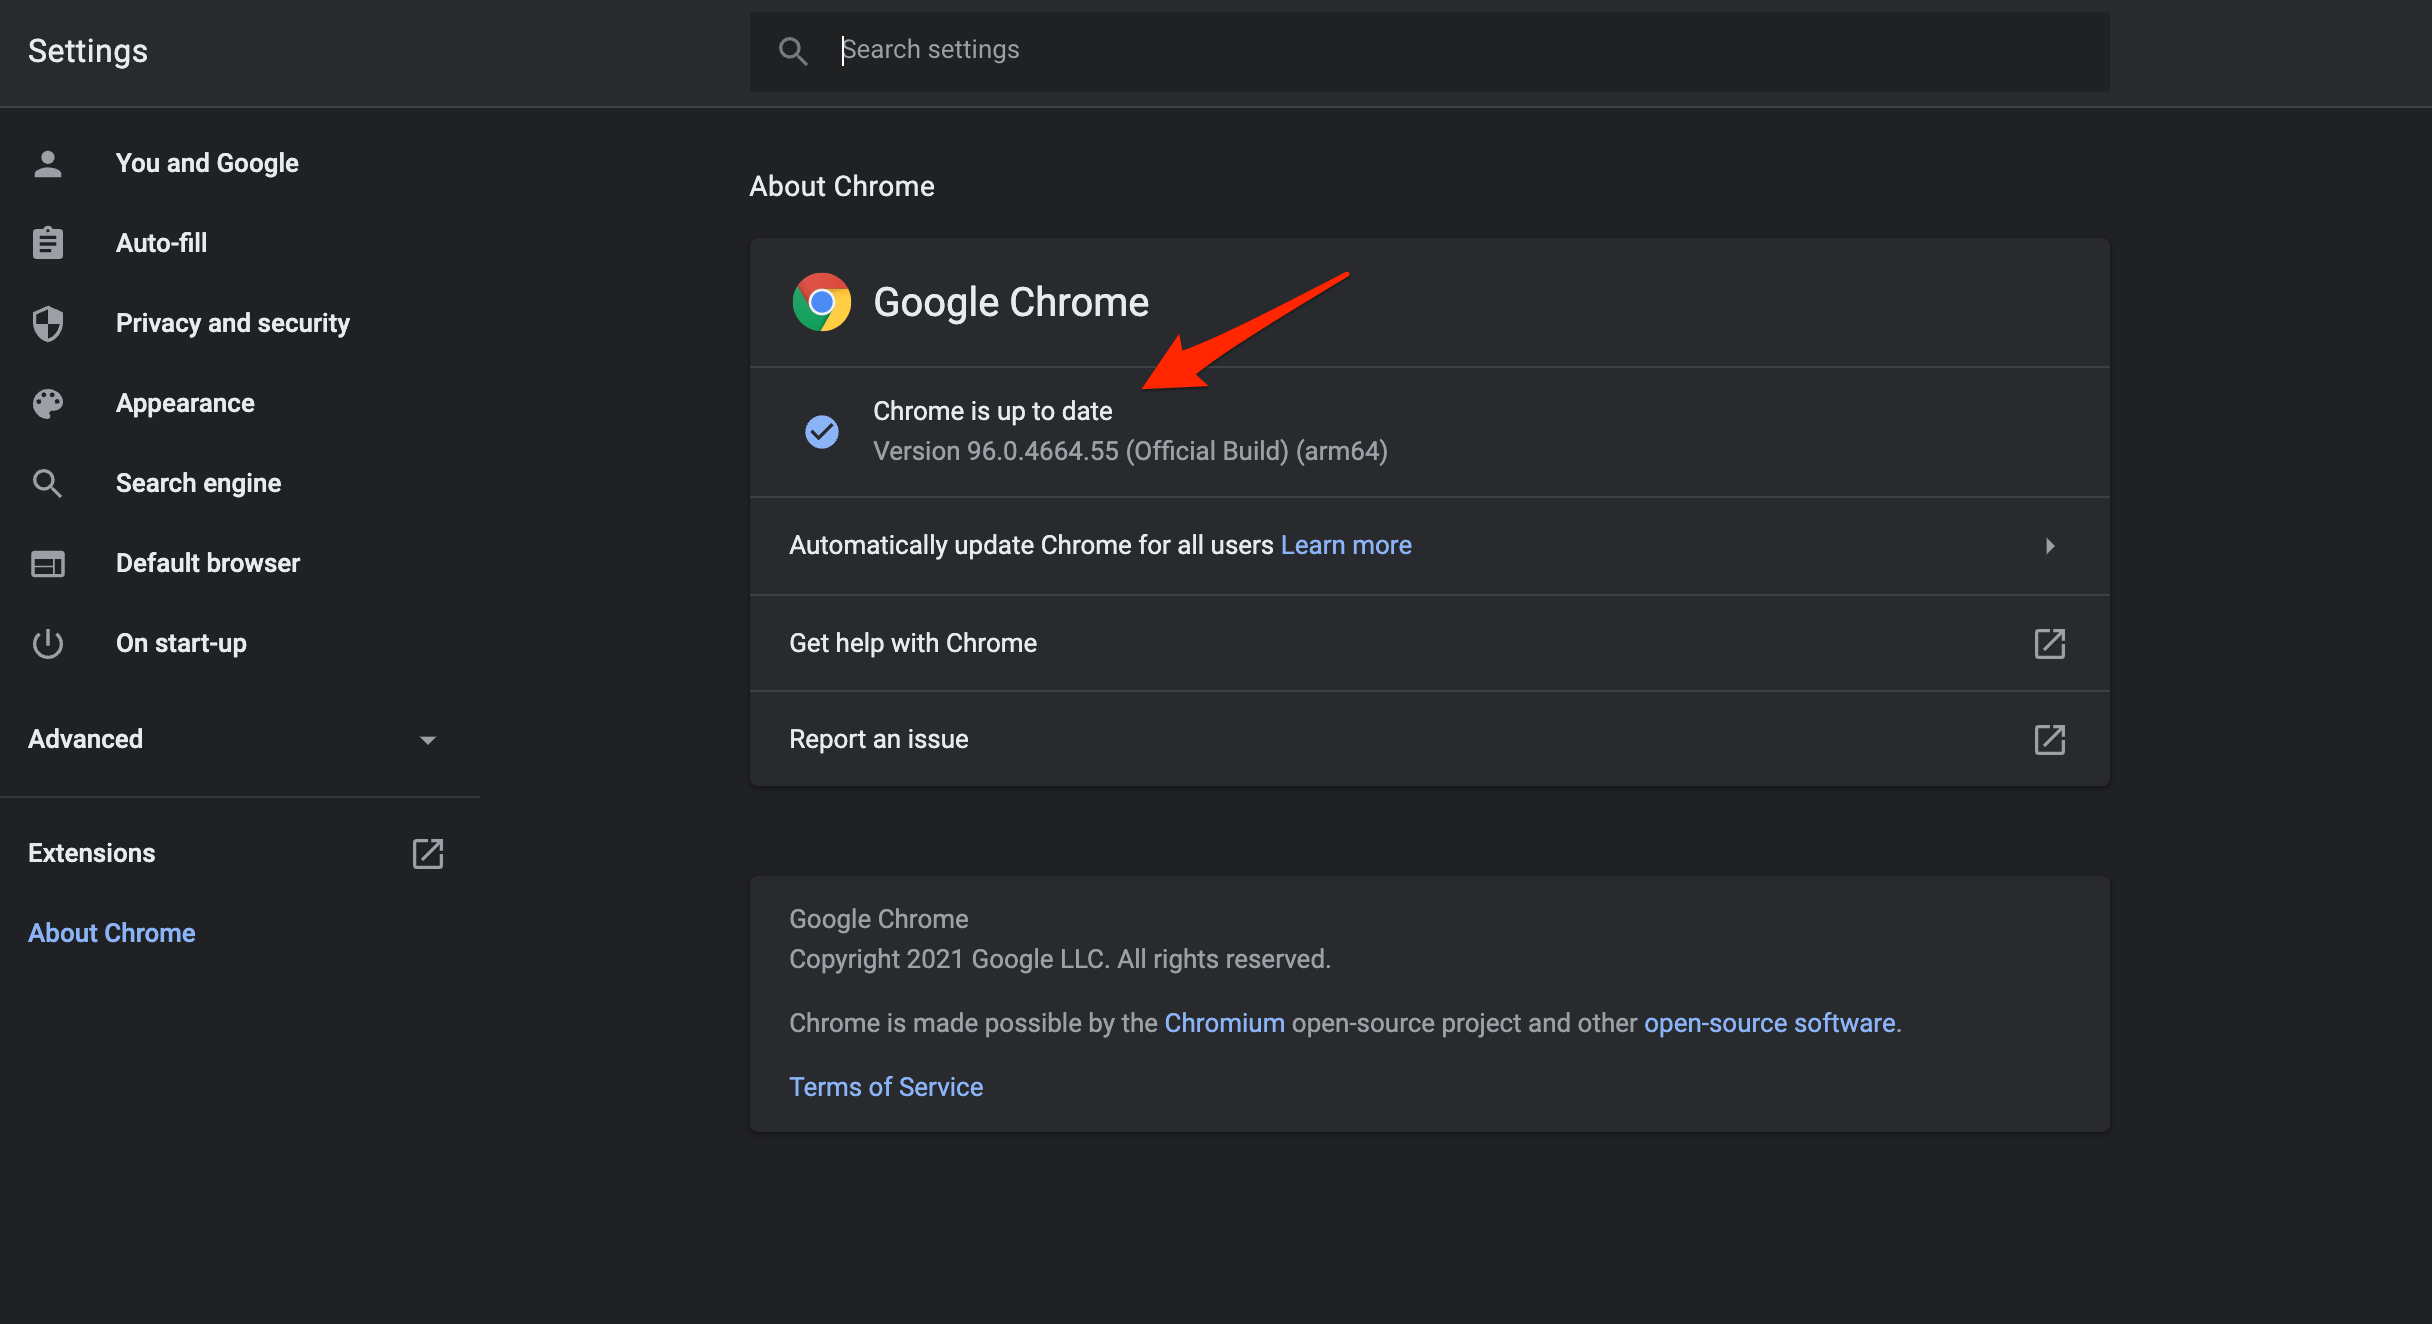
- A new Settings page will open. Here, you need to click on the Refresh button or press F5 on your keyboard to reload the page. As soon as you refresh this page, Chrome will look for updates.
- If a new update is available, you can tap on the Update button to install the latest update available.

- If Google Chrome isn’t working at all on your PC, you can visit this link to update it.
4. Reset The Network Settings
In simple words, resetting the network settings means that you are flushing the DNS and resetting the TCP/IP settings on your PC. To do this,
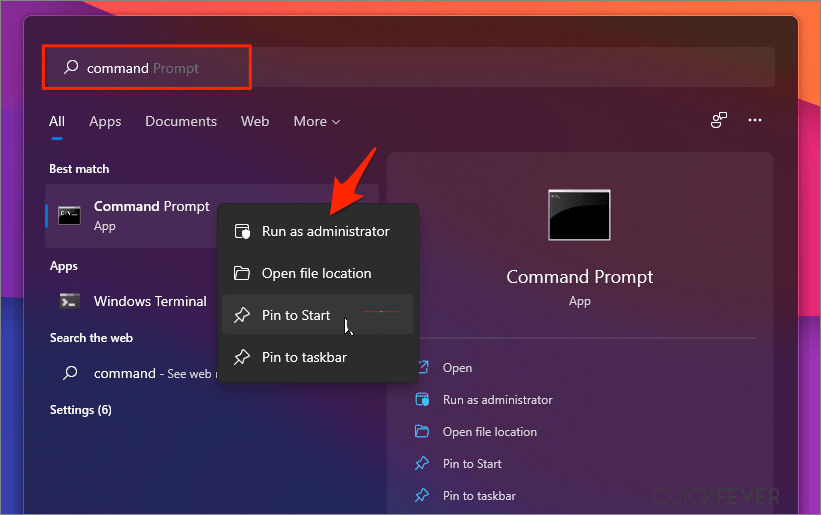
- Search Command Prompt in the Start menu.
- Open cmd as an administrator.

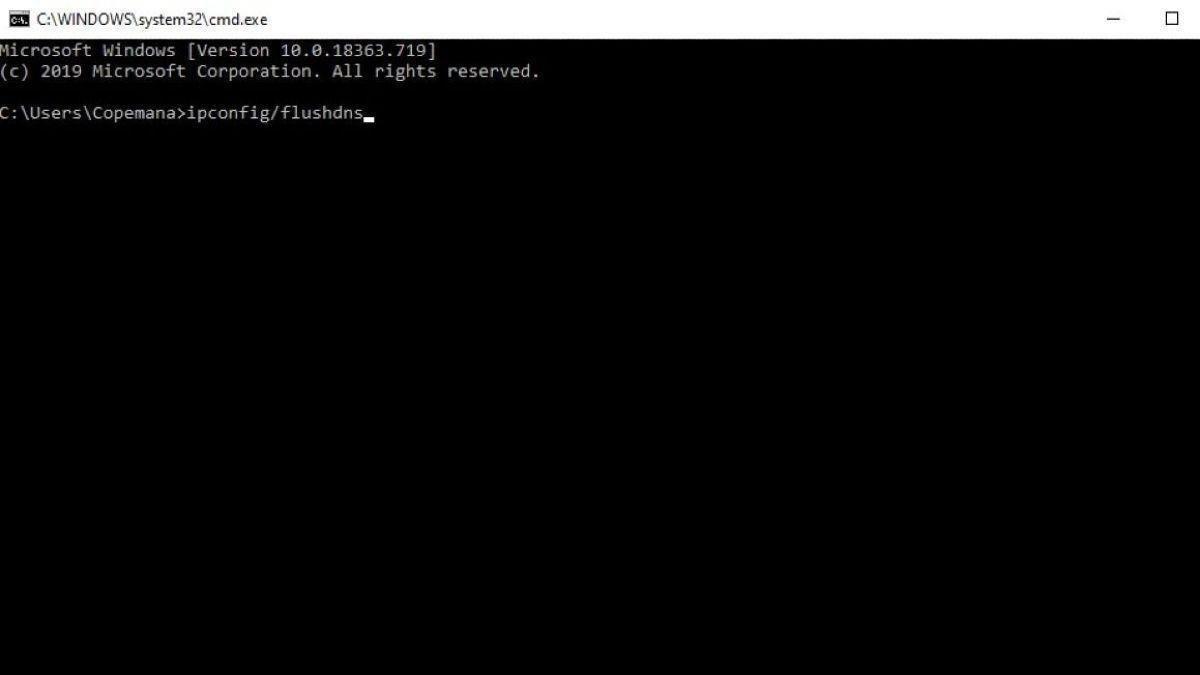
- Run the below-mentioned command and hit Enter:
Ipconfig /flushdns

- Now, enter the below command and again press Enter:
netsh winsock reset
- After executing all the commands, you need to restart your PC and open Chrome again to see if this works or not.
5. Change DNS
If Google Chrome is not loading pages, I recommend you change the DNS in your Windows 11 Network Settings. This should fix the page loading issues on Windows PC.
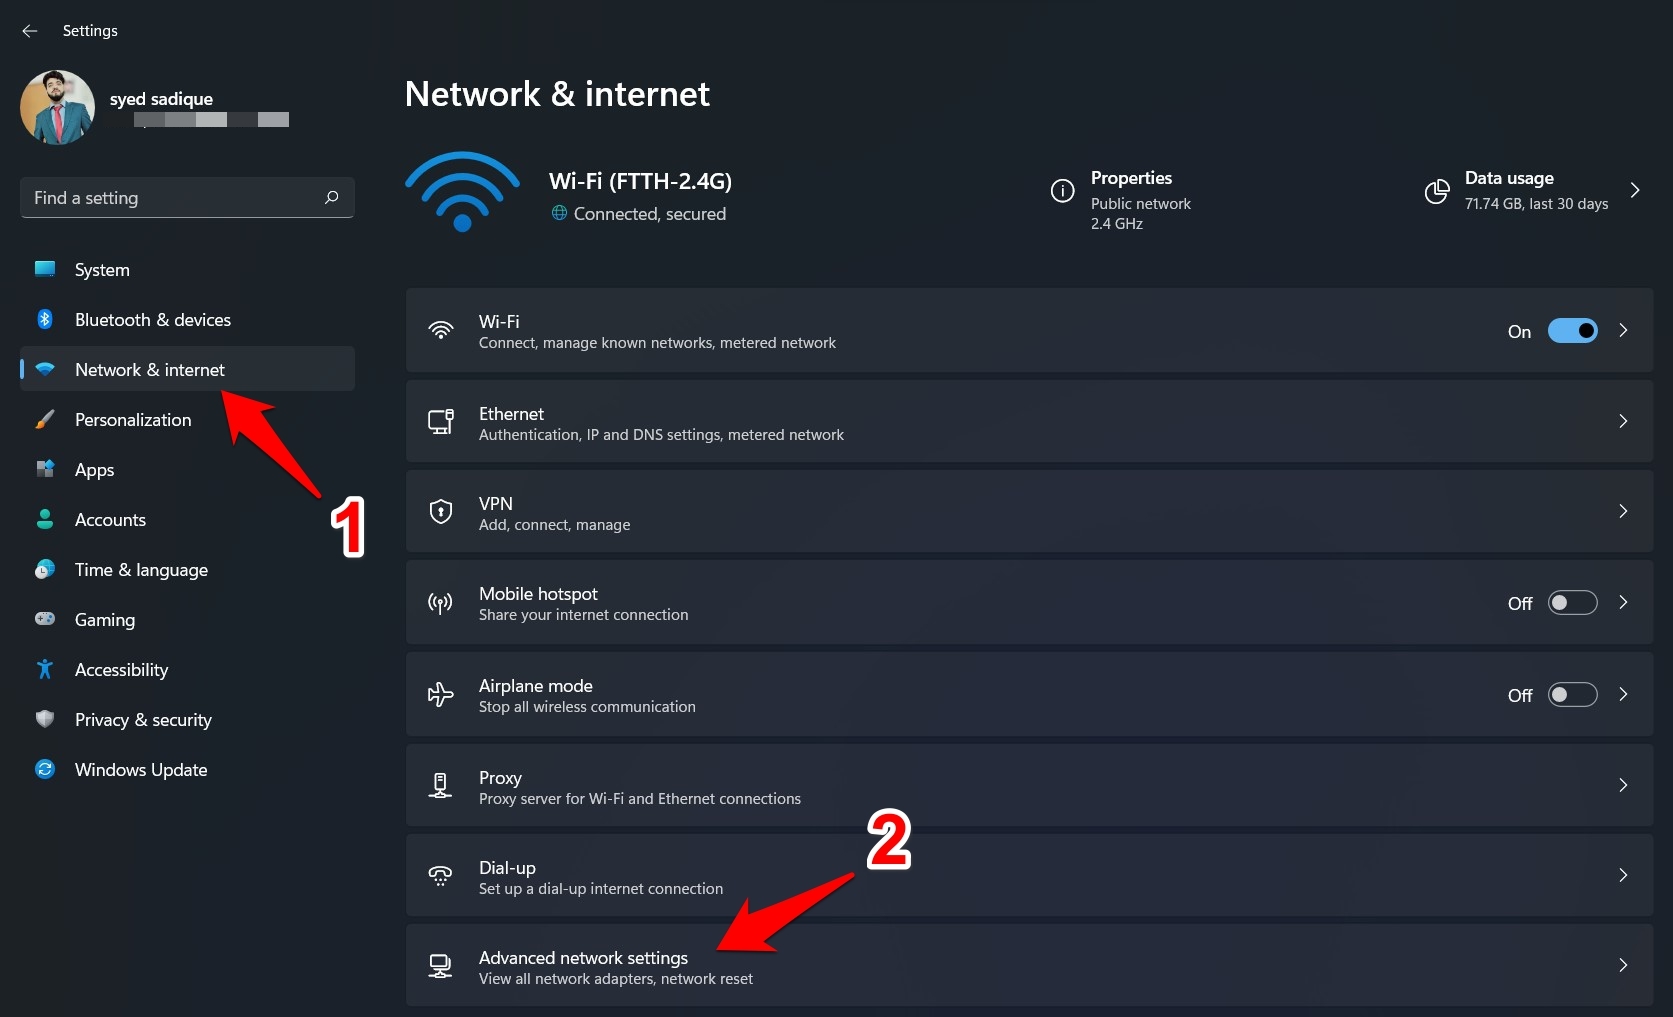
- Open Settings on your Windows 11 by pressing Windows Key + I shortcut.
- Then select Network & Internet from the left menu bar and go to the Advanced network settings.

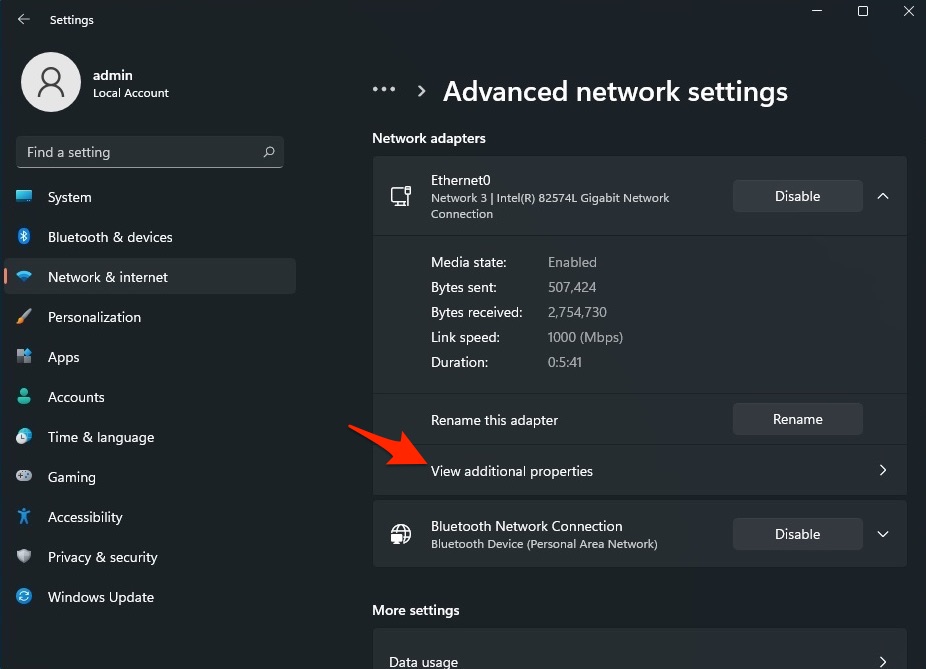
- Now select the network you are using for the internet, like Wi-Fi or Ethernet.
- Click on View Additional Properties.

- Click on Edit.

- Change the DNS to Google DNS or any other DNS protocol listed below.

You can also change the DNS in Chrome settings, by following the simple steps below.
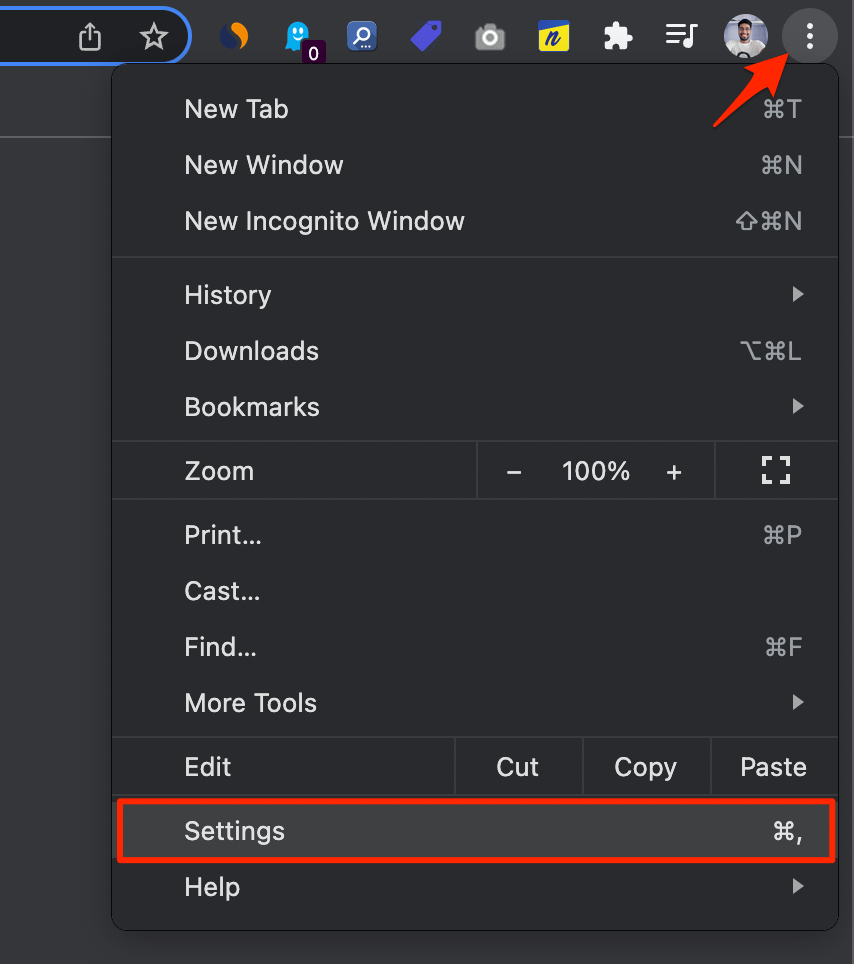
- Open Chrome Settings.

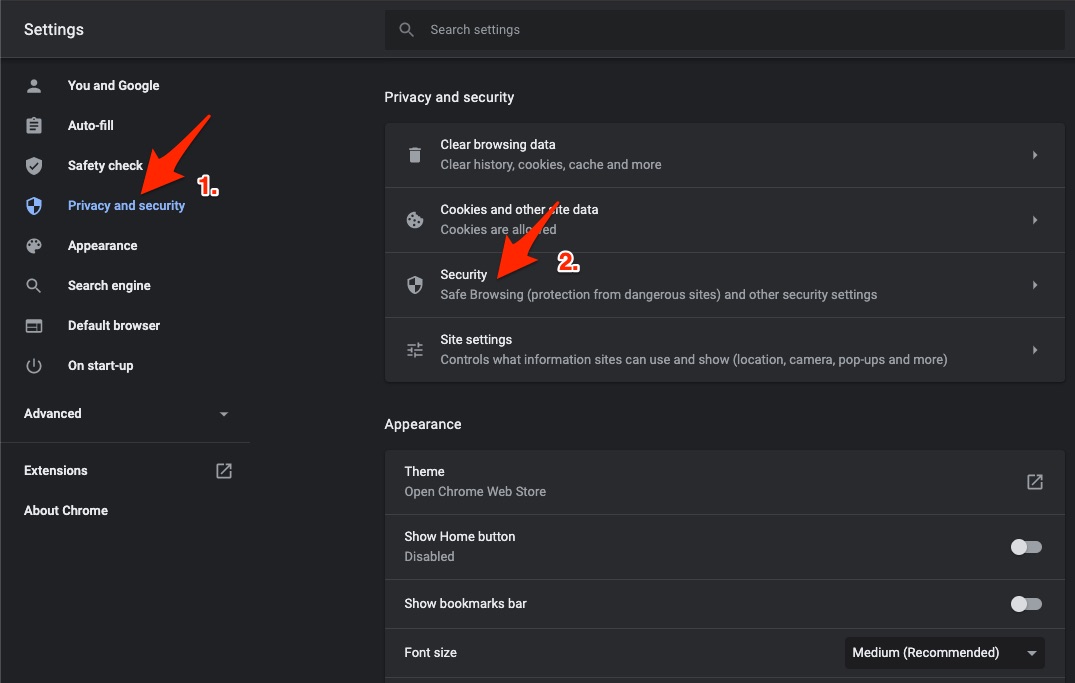
- Click on Security and Privacy.
- Click on the Security option.

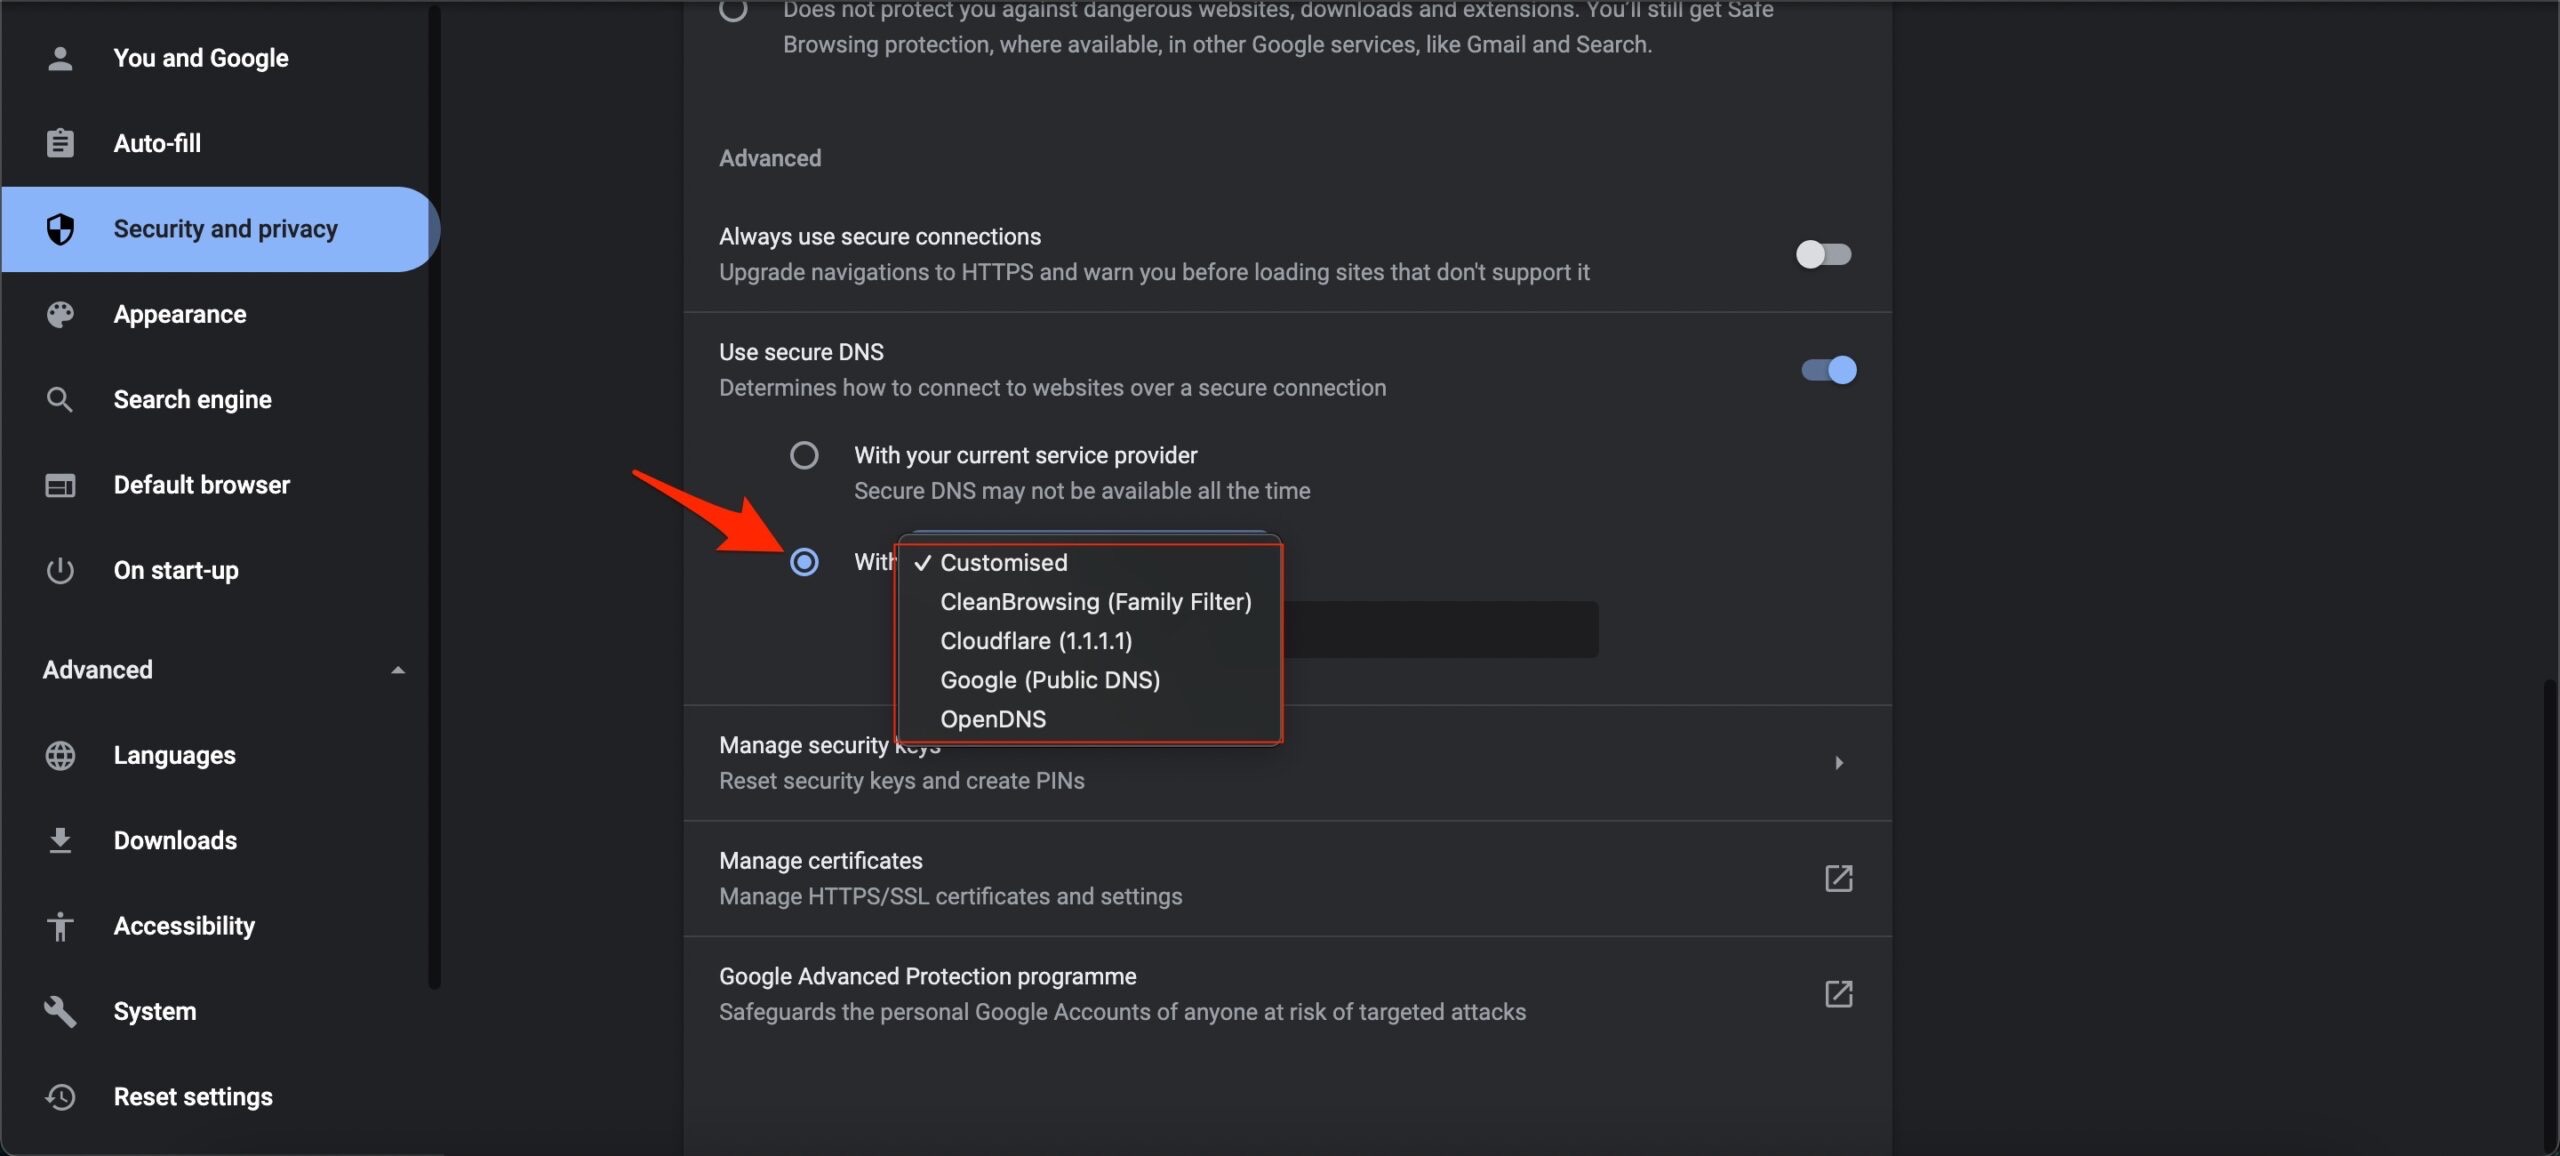
- Select customized DNS. You can add custom DNS or use any listed DNS from the dropdown menu.

| DNS Server | DNS 1 | DNS 2 |
|---|---|---|
| Google Public DNS | 8.8.8.8 | 8.8.4.4 |
| Cloudflare DNS | 1.1.1.1 | 1.0.0.1 |
| Quad9 DNS (IPv4) | 9.9.9.9 | 149.112.112.112 |
| Quad9 DNS (IPv6) | 2620:fe::fe | 2620:fe::9 |
| OpenDNS | 208.67.222.222 | 208.67.220.220 |
6. Delete Temporary Files
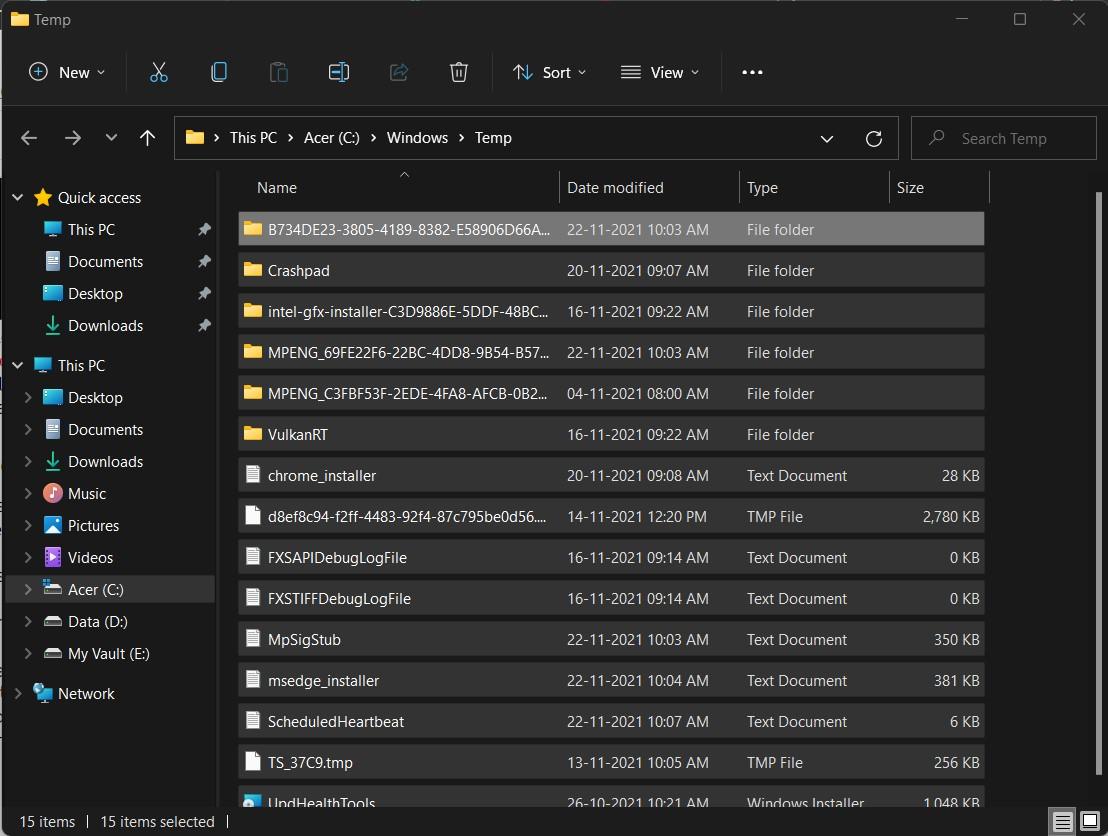
Clearing temporary files may not seem a lucrative solution for fixing such problems, but sometimes these easy solutions do wonders. If you haven’t cleared temporary files on your PC for a good amount of time, then it is advised that you go ahead and clear those. For that, simply follow the steps below.
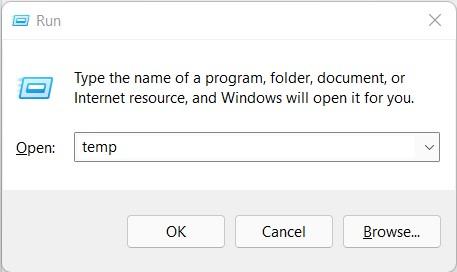
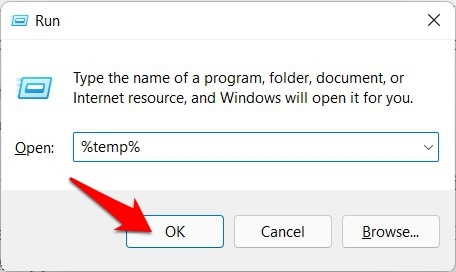
- Open the RUN command by pressing the Win+R keys together.
- Type in temp and hit Enter.

- Clear the temp files and close the window.

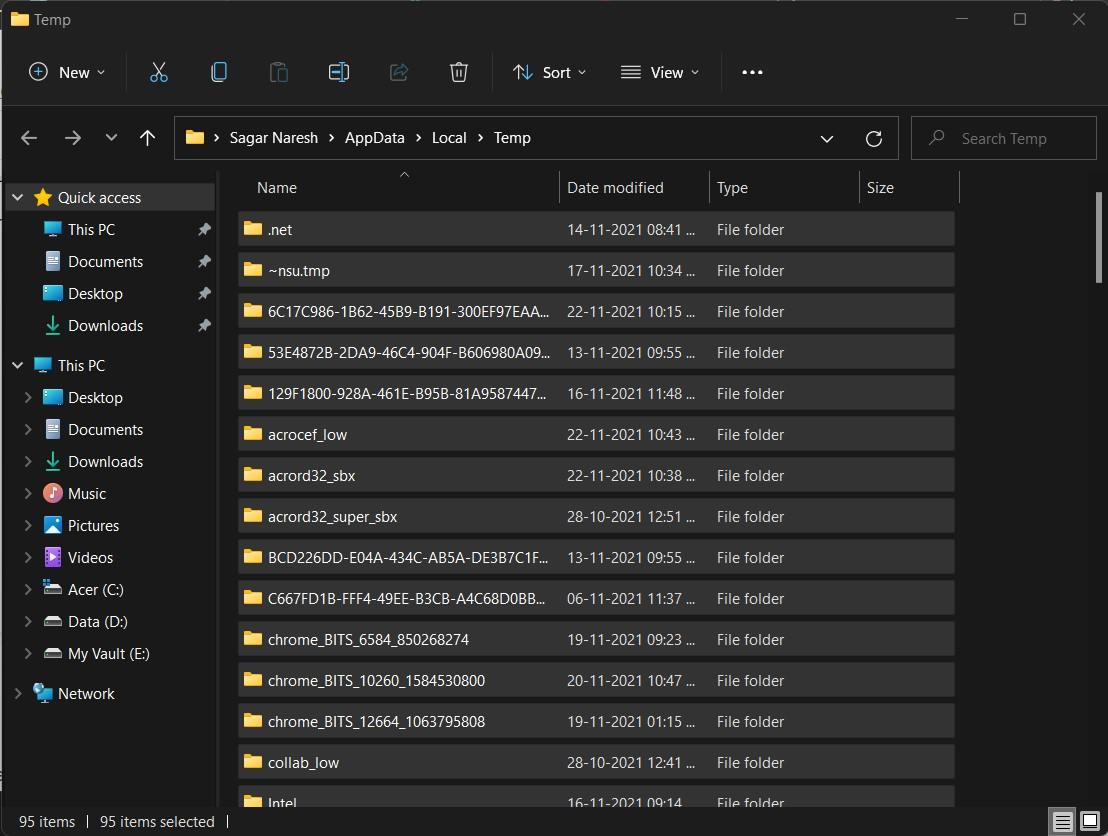
- Then again, open the RUN command and type in %temp%, and press Enter.

- Clear the temporary files here as well and close the window.

- Once done, restart your PC and see if this fixes the issue or not.
7. Clear Google Chrome Cache
Clearing the cache of the Chrome browser will disperse the junk files, thus clearing up a lot of memory.
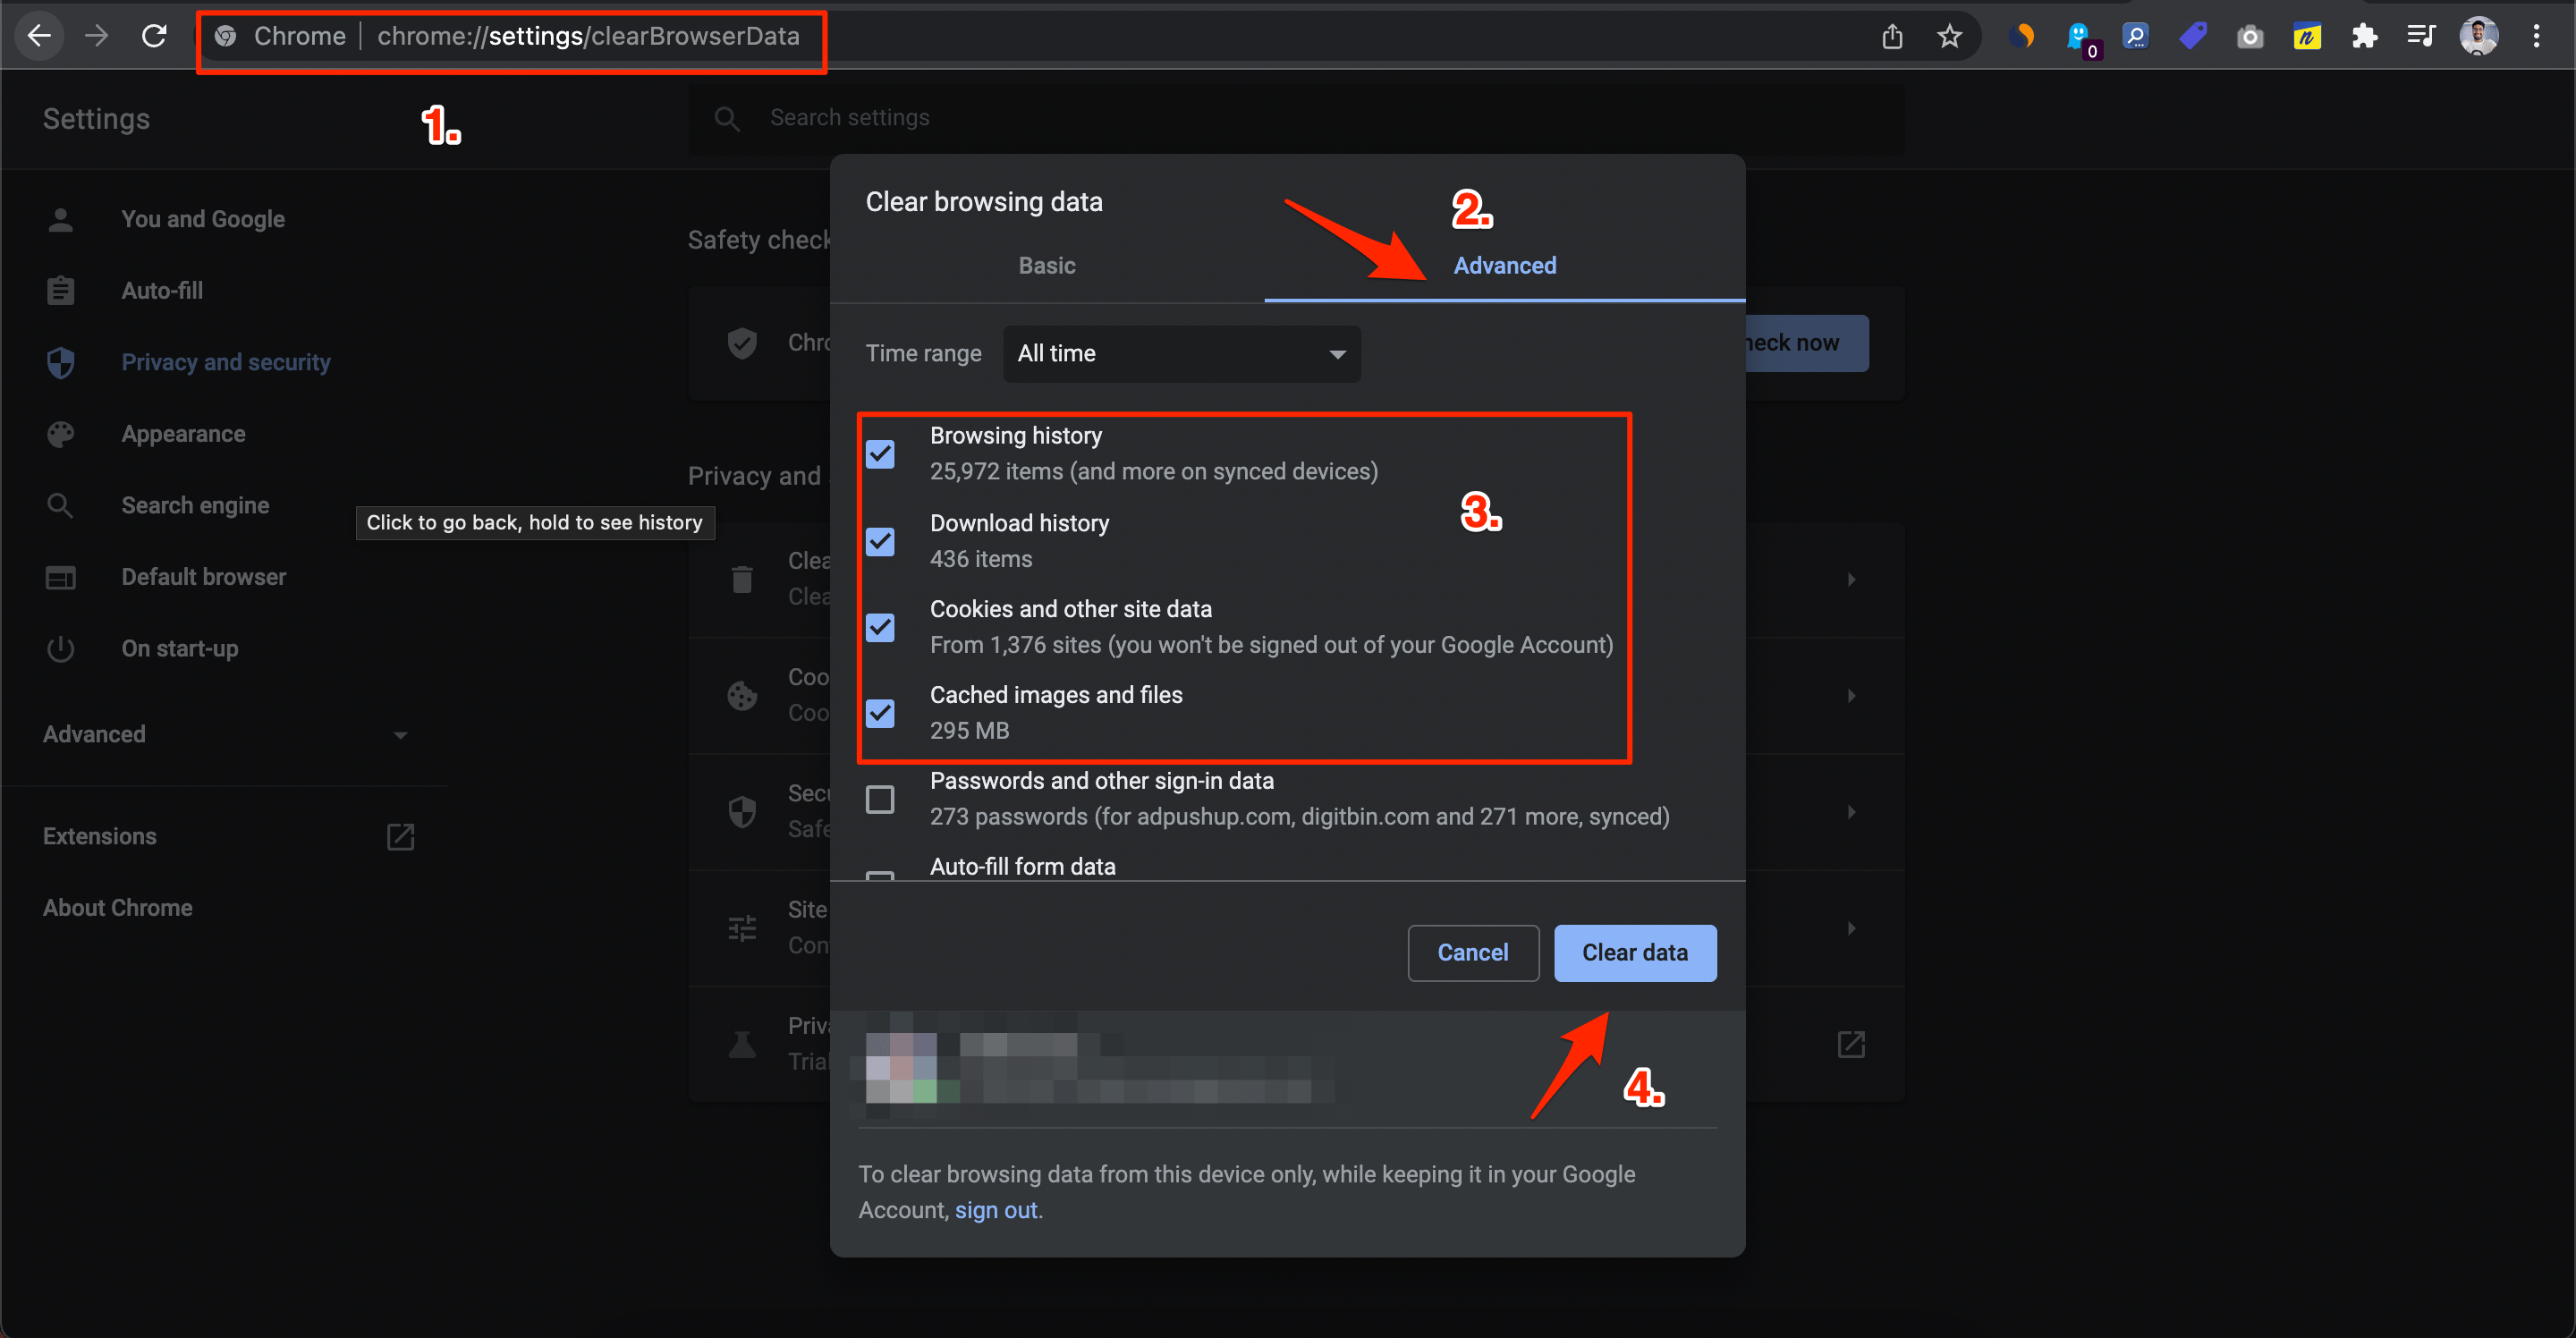
- While the Chrome browser is open, press Ctrl + Shift + Delete key combinations or type in chrome://settings/clearBrowserData in the URL Box.
- Clear Browsing Data dialog box will show up.
- Click on the Advanced tab.
- By default, cookies and other site data, cached images & files will bear a checkmark. If not, manually select these two options.
- There is no need to select the Password/Sign-in Data; otherwise, the passwords you have saved to Chrome will be removed.
- Once done, click on Clear Data.

8. Disable Extension
In some instances, third-party add-ons conflict with the proper working of the browser.
While identifying the culprit could prove to be quite a difficult task, what you could do is disable all the extensions and then re-enable them one at a time, until you are able to recreate the issue.
Once that happens, uninstall the last enabled extension, and this should fix the underlying error.
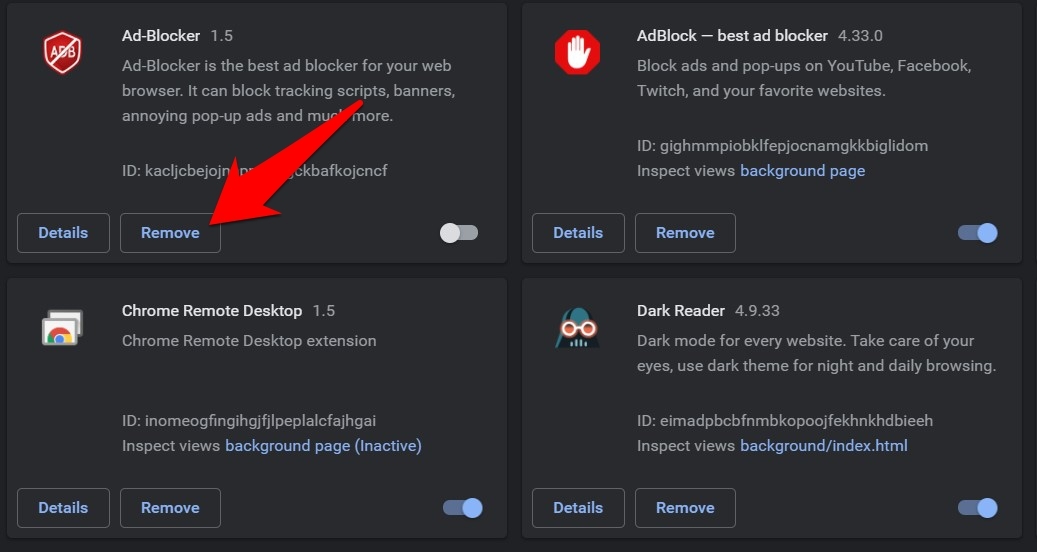
- So launch Chrome and head over to the chrome://extensions/ page.
- Then disable all the extensions and then try to identify the issue causing one.
- Once you get hold of the same, it’s recommended to hit the Remove button next to it.
- Then restart the browser and see if it could fix Chrome not working on Windows 11.
9. Reinstall Google Chrome
If the problem still exists, even after trying all of the above methods, then it is probably due to a missing file. To fix this, you need to first uninstall the Chrome browser from your PC. Then, install it again from the official website. This time around, follow all the steps as asked to avoid any errors. Once the installation is complete, see if this fixes the issue or not.
10. Use Other Web Browsers
As a last resort, you can opt for other browsers if you are experiencing issues with Google Chrome. This might be due to a bug in Chrome, which could be addressed in a new update. You can go ahead with other browsers such as Microsoft Edge, Opera, and others until that time. You can check out our dedicated guide for a complete list of the best web browsers for Windows 11.
If you've any thoughts on 9 Fixes: Google Chrome Not working in Windows 11, then feel free to drop in below comment box. Also, please subscribe to our DigitBin YouTube channel for videos tutorials. Cheers!

