Windows 11 has a built-in feature that lets you connect to the cellular network automatically. However, several users who depend on cellular data access for their laptops or tablets may find the missing cellular option in Windows 11 irritating. This can happen due to several reasons, such as outdated or problematic driver issues, software bugs, or misconfigured Windows 11 settings.
Windows 11’s cellular option enables users to access the internet using a SIM card and a cellular data subscription when Wi-Fi or Ethernet connections are unavailable. Here are some measures you can take to resolve the problem of a missing cellular option in Windows 11.
Ways to Fix Missing Cellular Option in Windows 11
Here are some methods you should implement in order to bring the missing cellular option back.
1. Enable the Cellular Option using the Settings app
The cellular option will not be available if the option has been disabled from the settings app. Enable the Cellular option from the Settings app as described below:
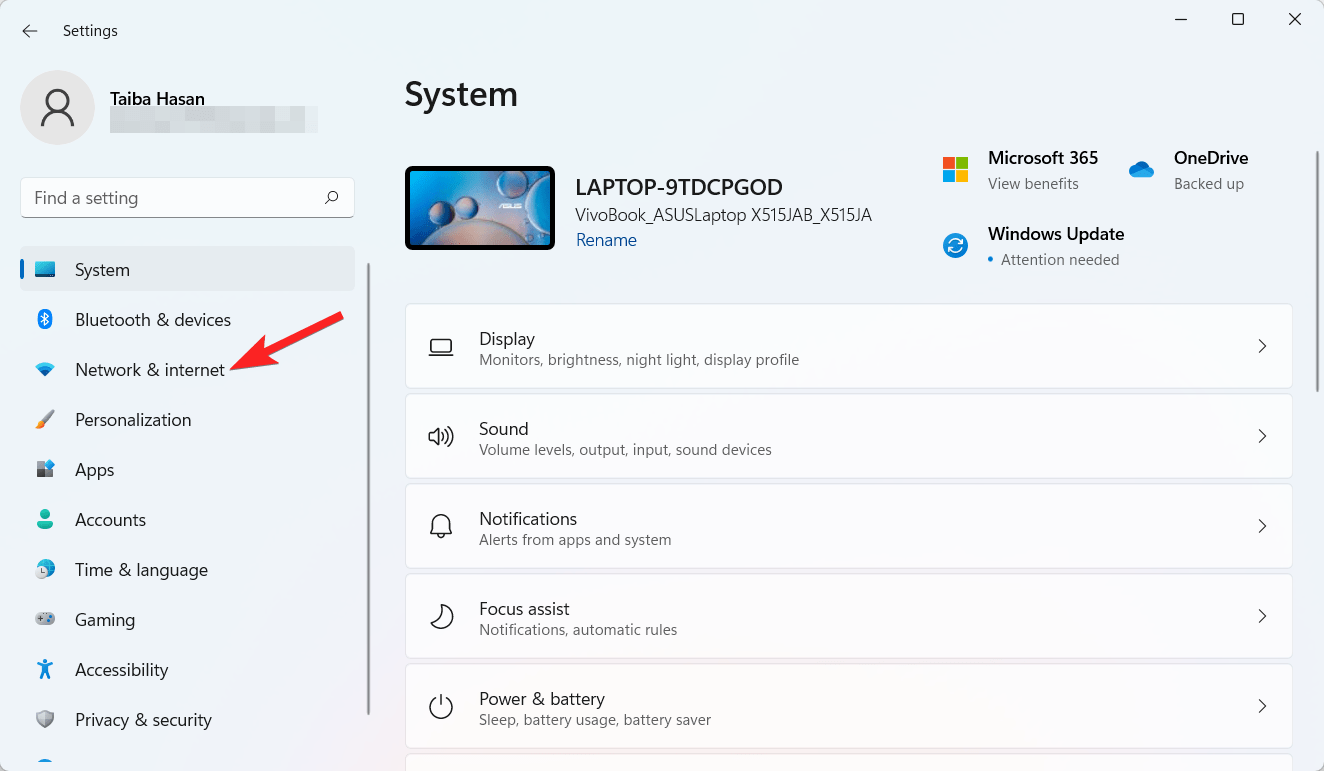
- Launch the Windows 11 Settings app with the Windows + I shortcut.
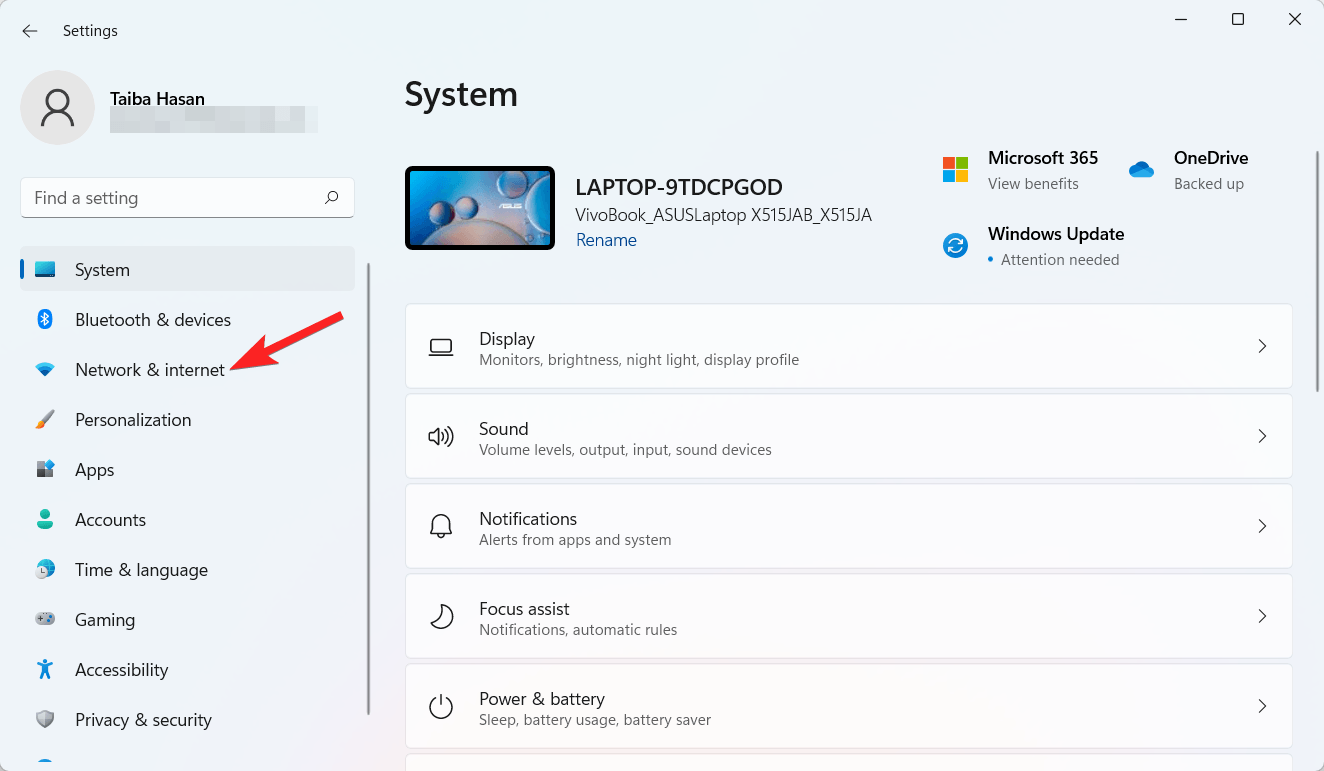
- Choose the Network & Internet option from the left navigation menu.

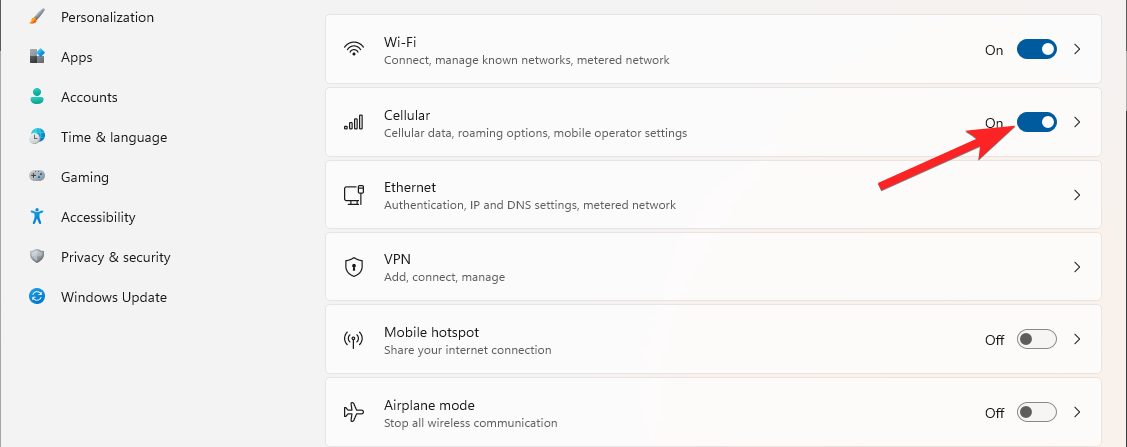
- Activate the toggle next to the Cellular option.

2. Enable the Cellular option using the Quick Settings Panel
You can also enable the cellular option directly from the Quick Settings panel on the left. Here are the steps for it.
- Click the Network, Volume, or Battery icon in the taskbar system tray to open the Quick Settings panel.

- To activate it, click the Cellular Quick Setting icon.
- To connect to a cellular data network, join an existing profile or create a new one.
- You may disable or turn it off using the same Cellular Quick setting.
3. Enable the Cellular option using the Airplane mode Settings
To launch the Settings app, right-click the Start button and choose the Settings option.
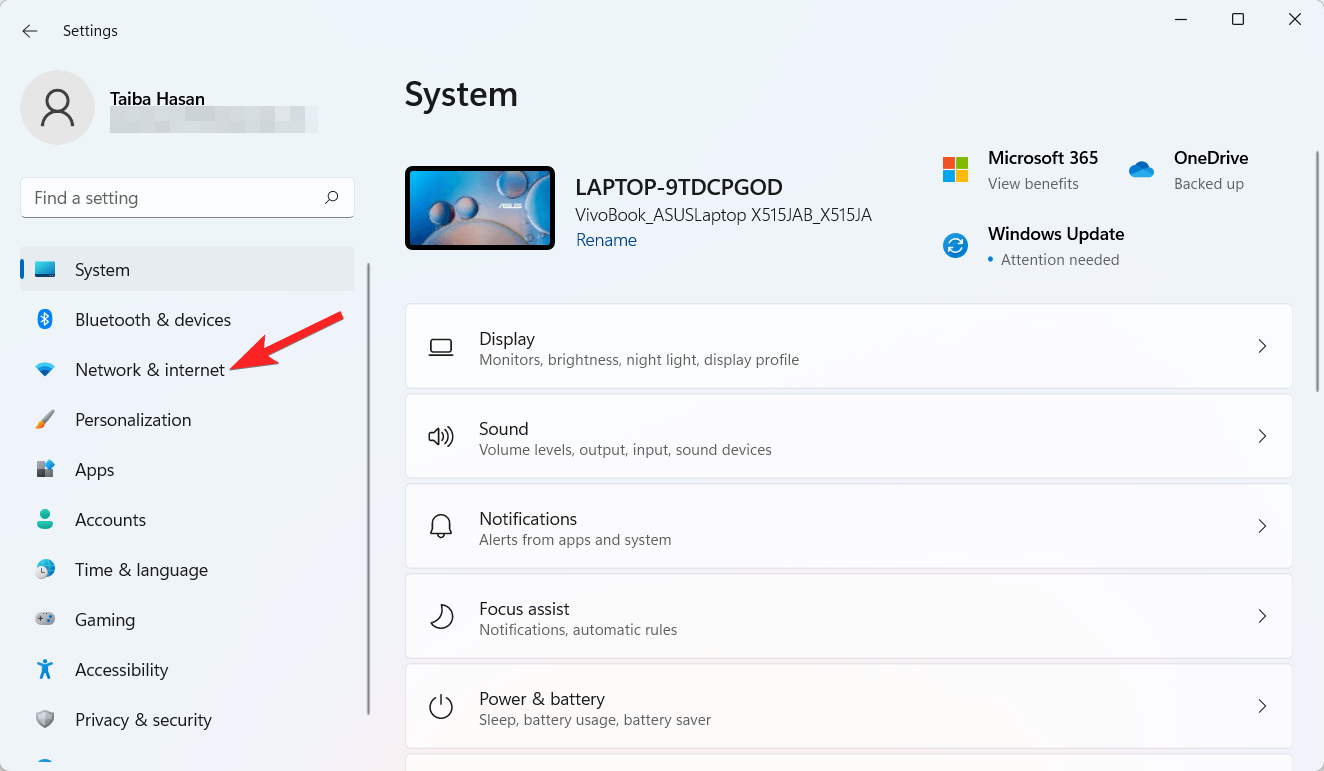
- Go to the Internet & Networks category from the left navigation panel.

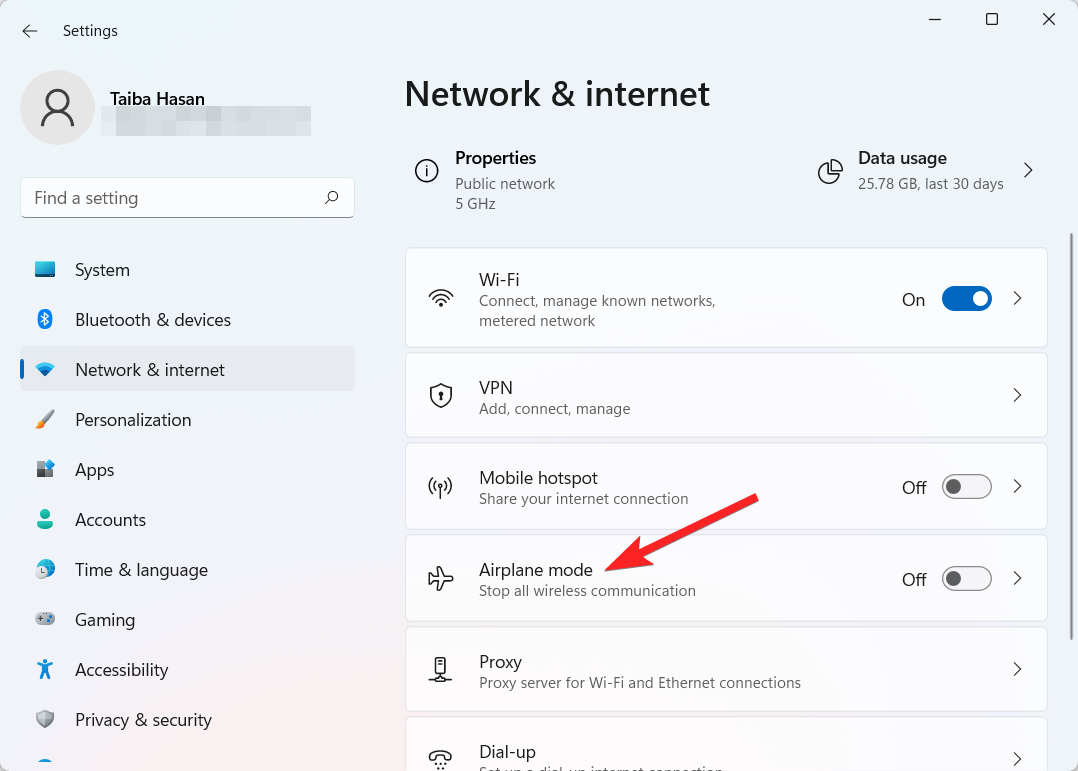
- Choose Airplane mode settings on the right side. Do not activate the Airplane mode. Access it instead.

- Toggle it on or off using the Cellular toggle (in the Wireless Devices section).
4. Run the Windows 11 Network Troubleshooter
Windows 11 includes a built-in Network Troubleshooter tool designed to help pinpoint and resolve network-related issues on your computer. This tool scans your system for problems and guides you in fixing them. Follow the steps below to utilize this utility:
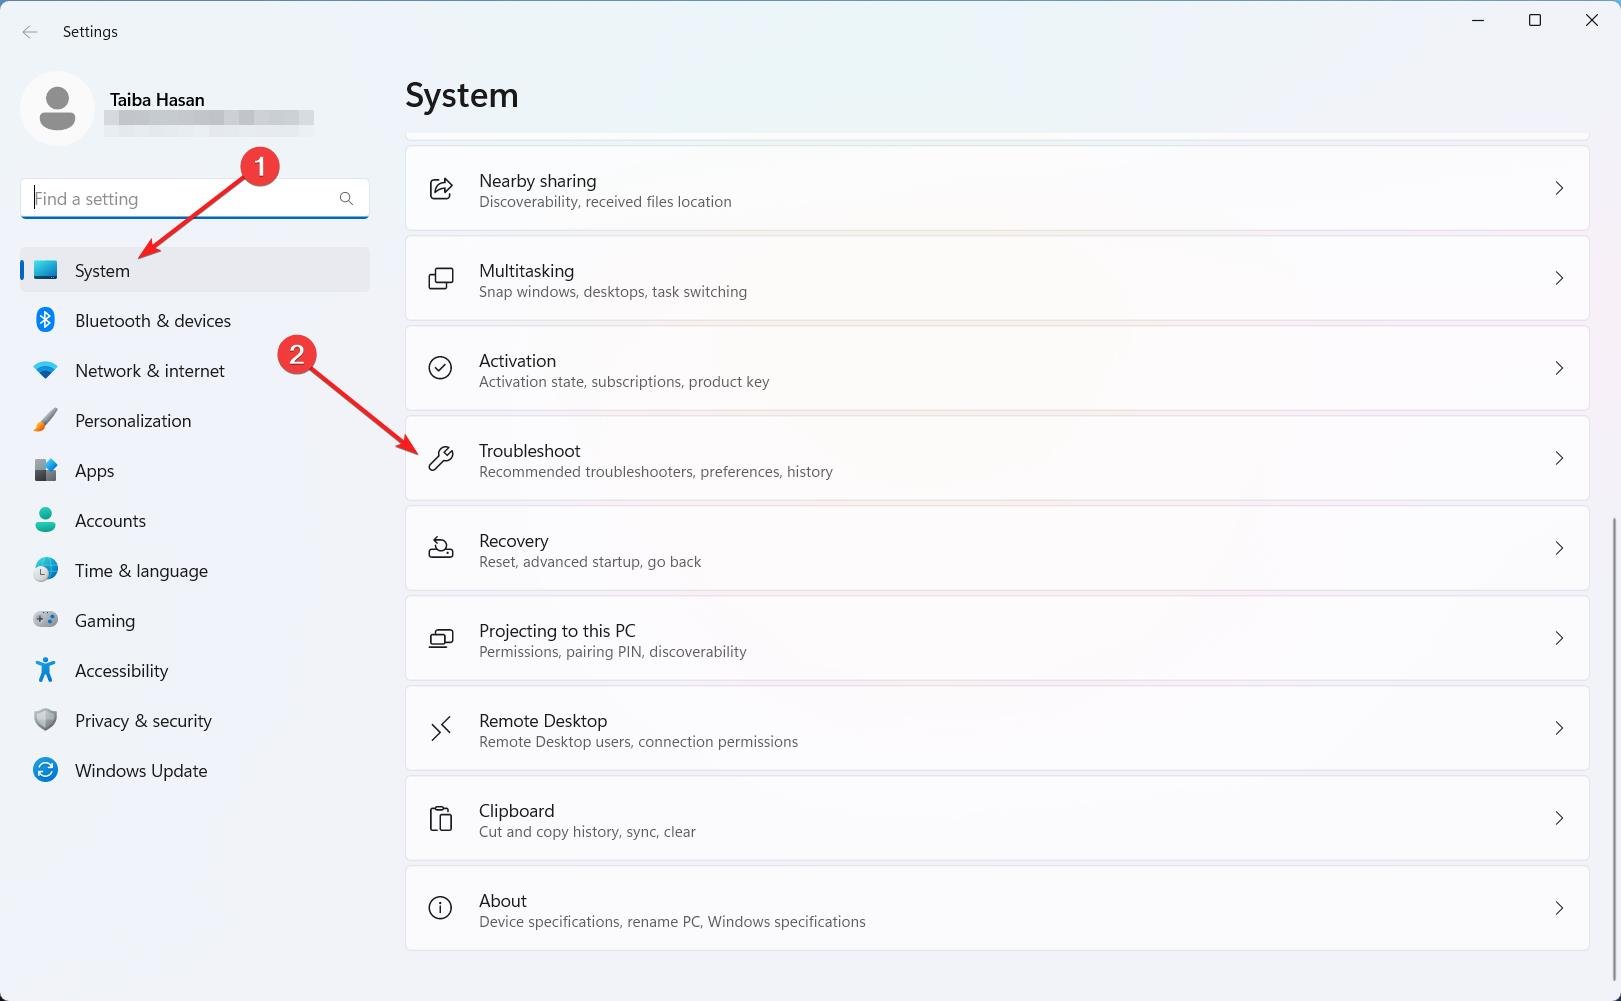
- To begin, press the Windows + I keys simultaneously to open the Settings application.
- Within the Settings app, navigate to the right-hand pane and click the Troubleshoot option.

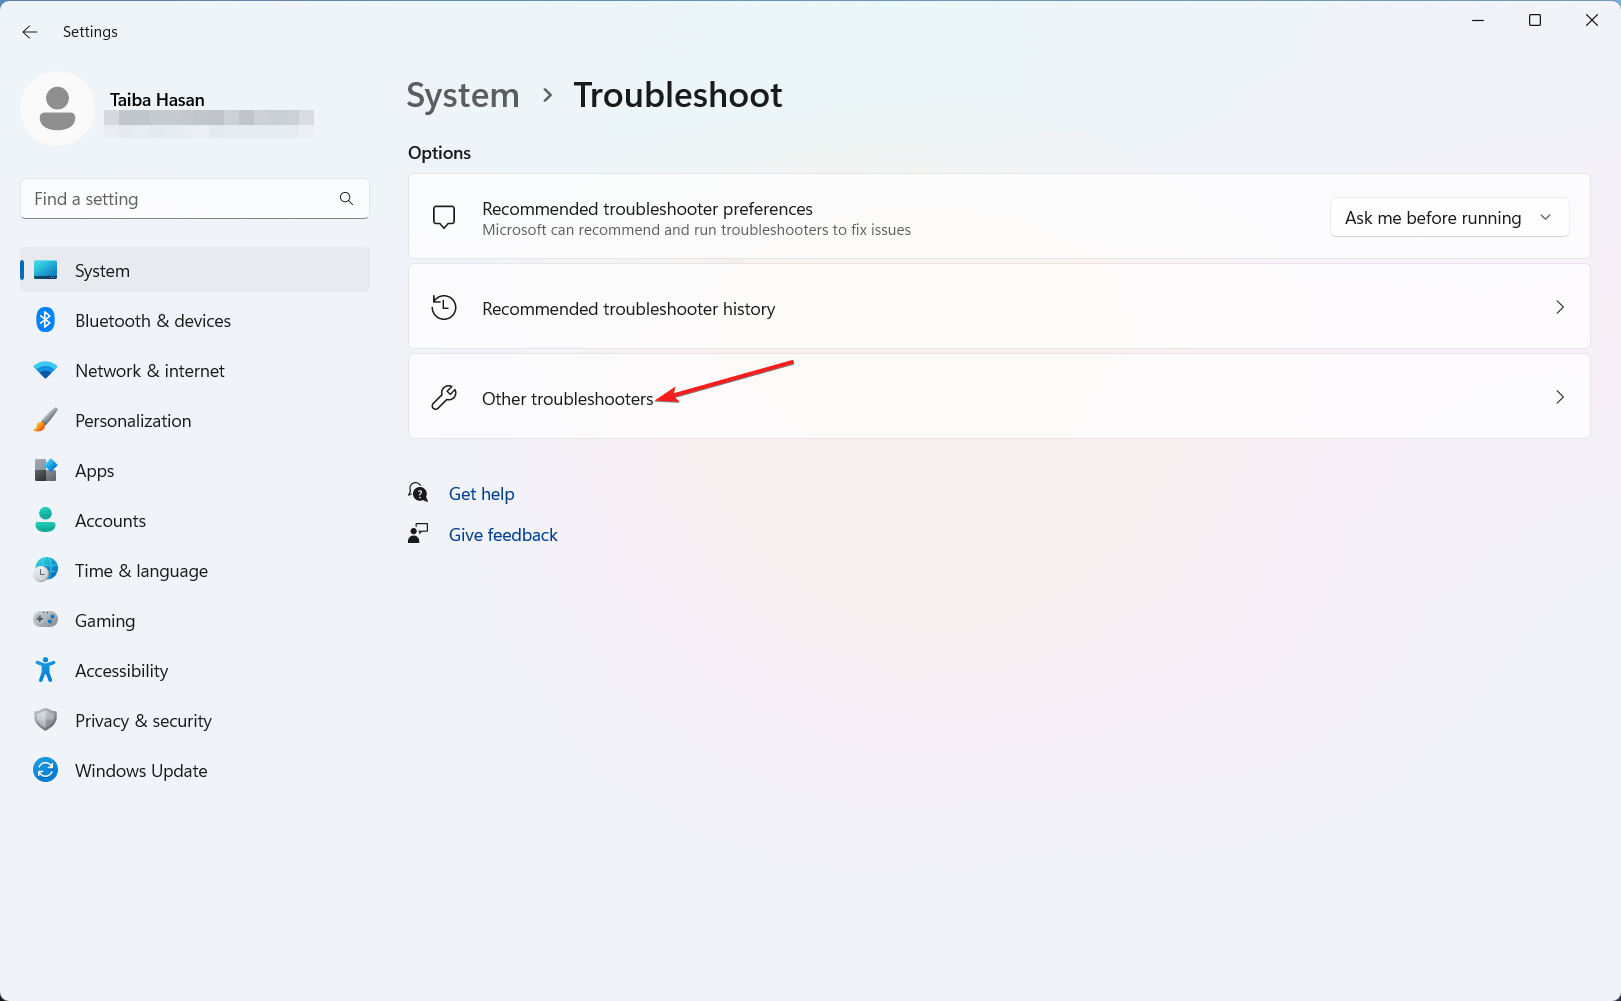
- Next, choose Other troubleshooters from the available options.

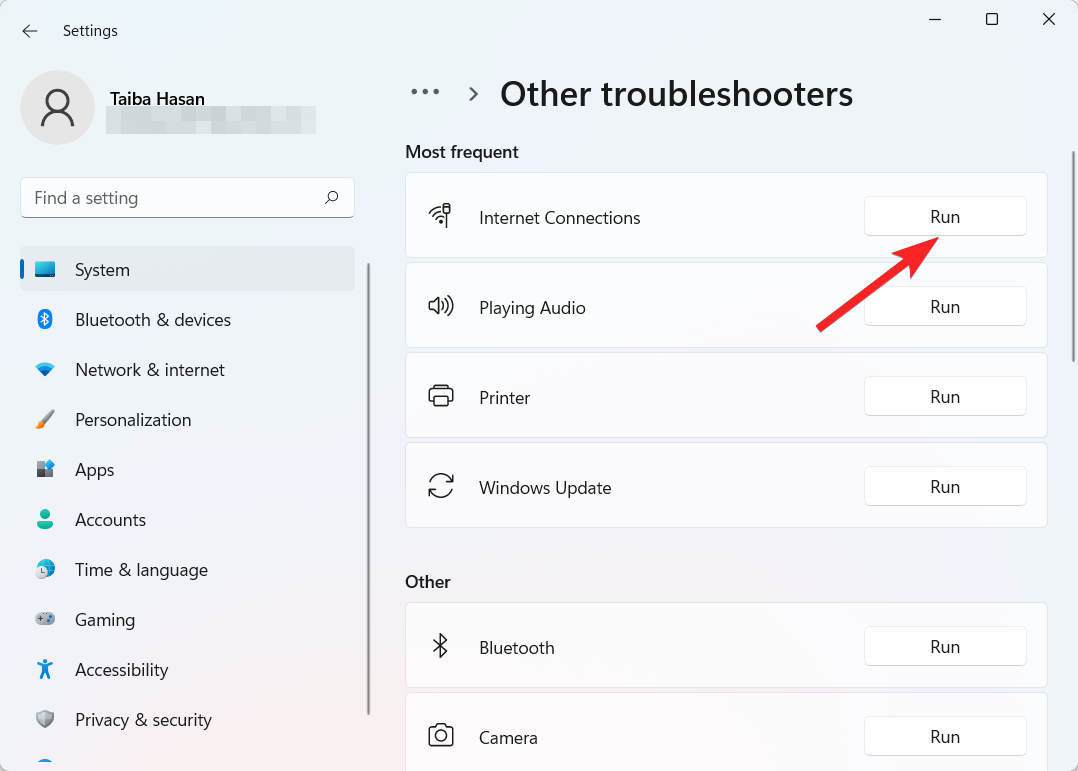
- Locate the Internet Connections troubleshooter and click on the associated Run button.

Allow the troubleshooter to analyze your system; if any issues are detected, it will either automatically fix them or provide recommendations on how to resolve them.
5. Enable the Cellular Adapter
It’s crucial to ensure this feature is enabled when attempting to establish an internet connection via cellular. In many cases where issues arise, you may have overlooked activating this setting, rendering the feature non-functional.
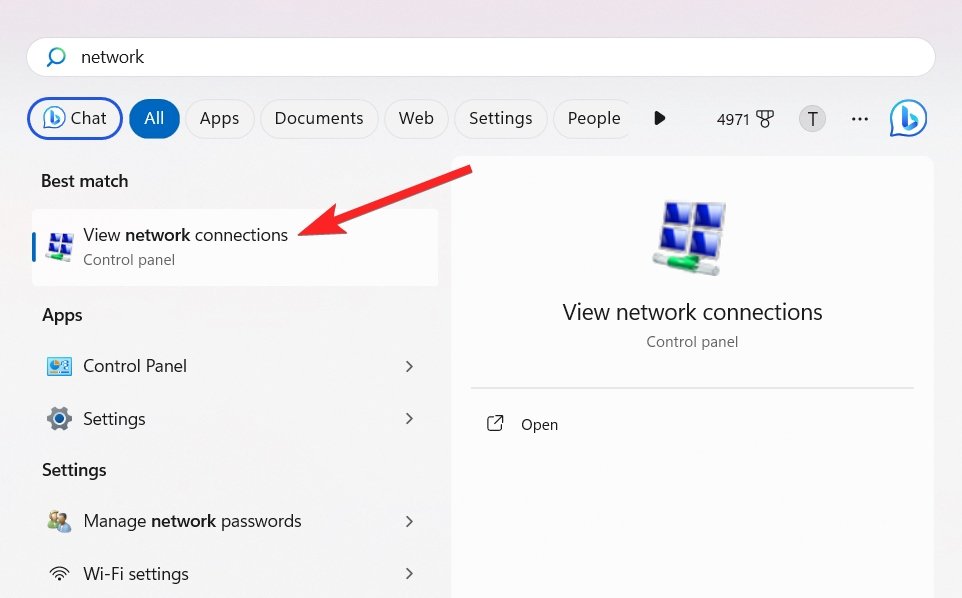
- First, press the Windows icon. Type Network Connections in the search bar on top, and select the View Network Connections option from the search results.

- Subsequently, right-click on your cellular adapter and choose the Enable option in the context menu.
If it’s already enabled, and you don’t find this option, you may need to explore alternative solutions to resolve the issue as discussed under.
6. Update Cellular Adapter Drivers
Drivers play a crucial role in bridging the gap between hardware and software in the Windows operating system. When these drivers become outdated, you may encounter various issues. For instance, an outdated Network Adapter driver can lead to the disappearance of the cellular option in Windows 11.
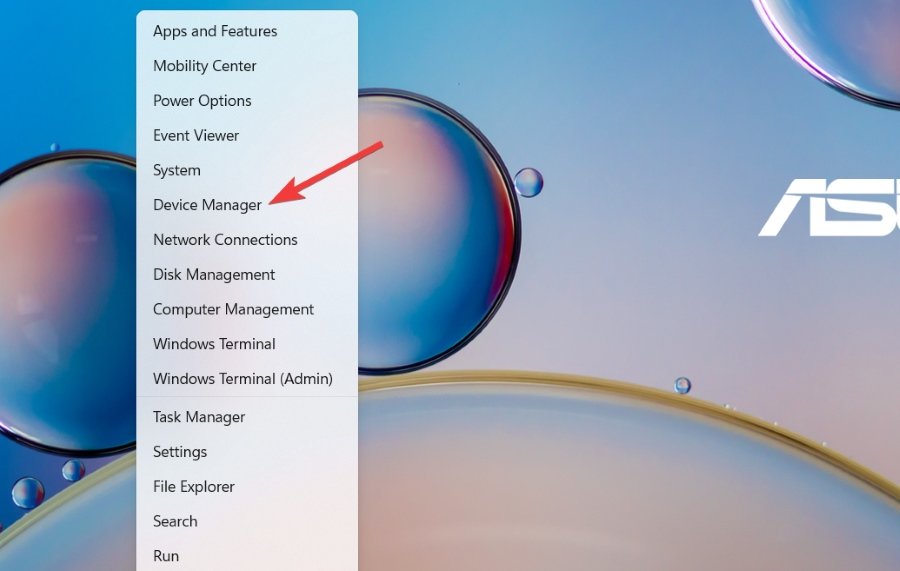
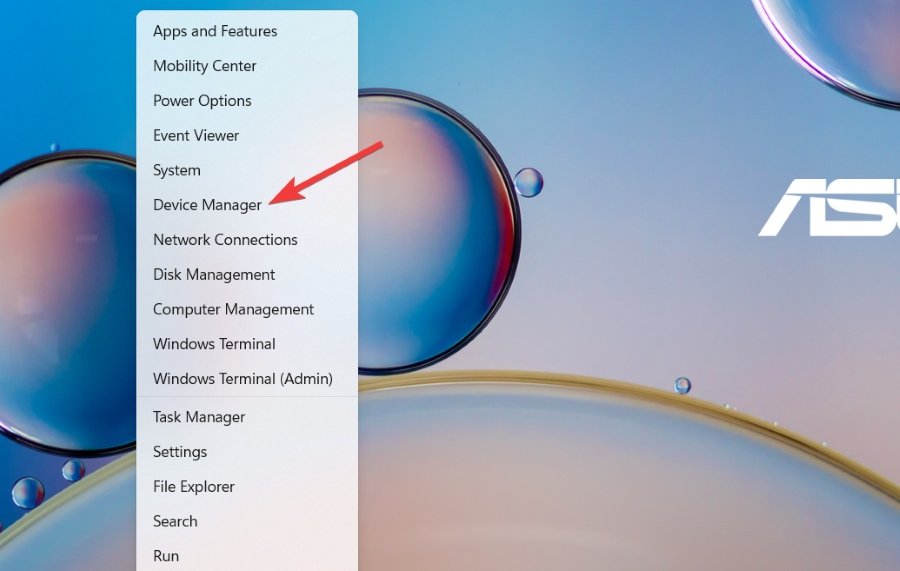
- Right-click the Start icon in the taskbar and choose the Device Manager option from the context menu.

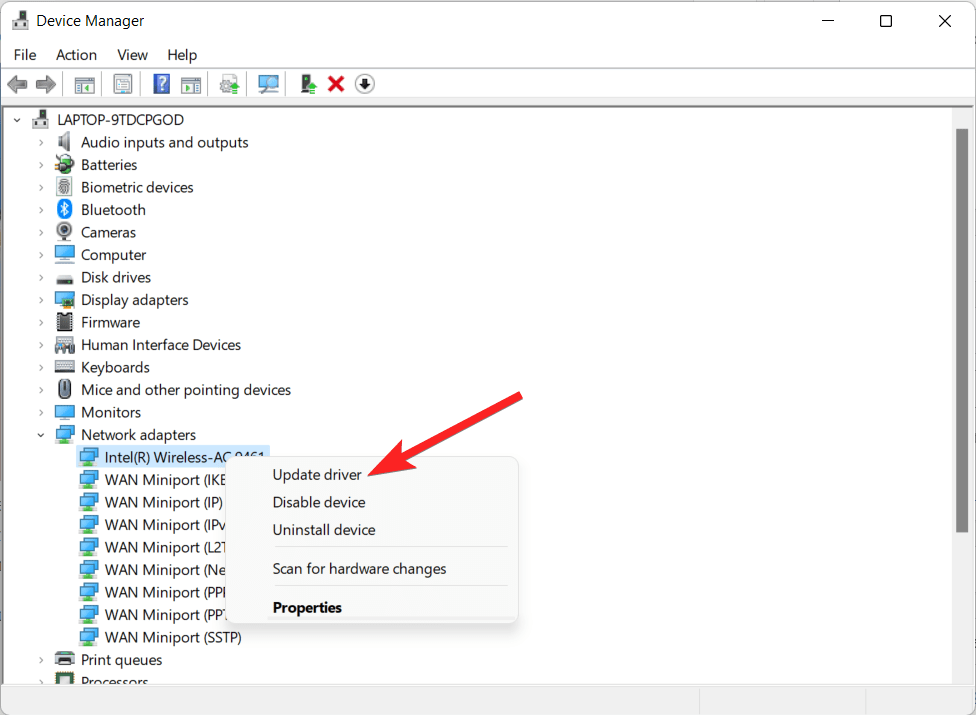
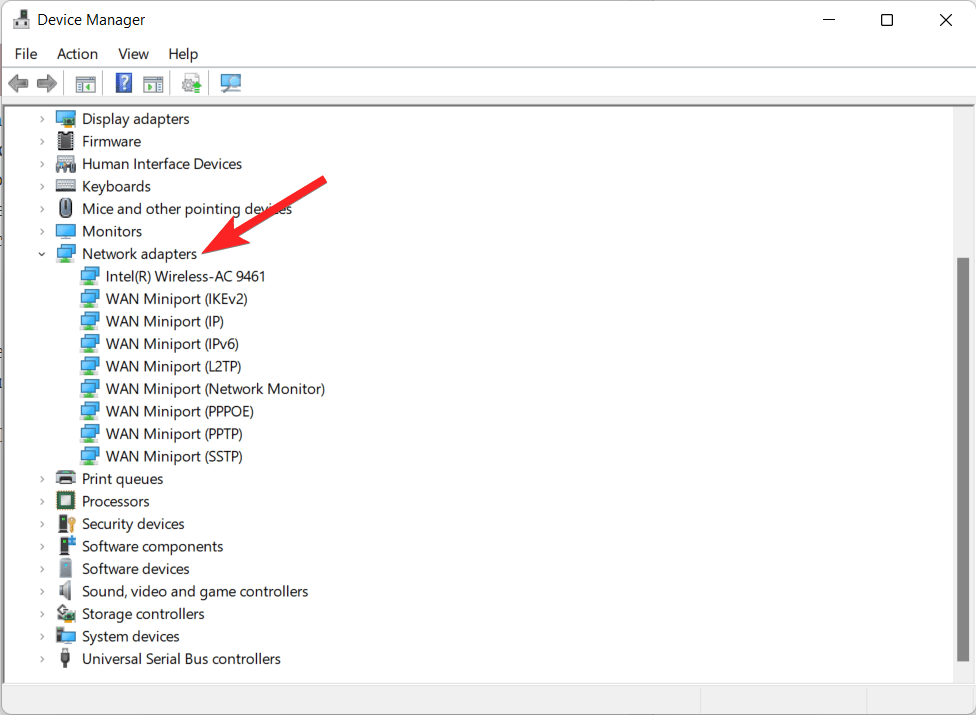
- Locate and expand the Network adapters category in Device Manager.
- Next, choose the Update driver option by right-clicking the network adapter.

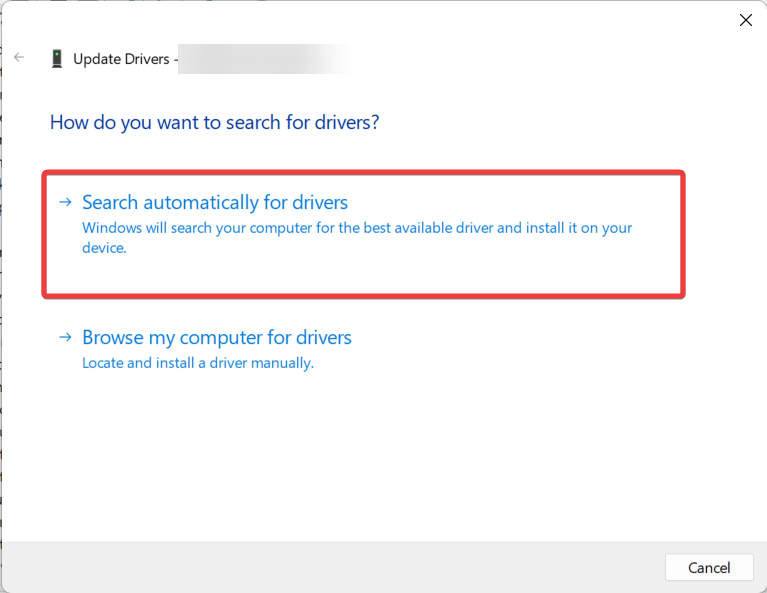
- Choose Search automatically for the driver‘s option from the next popup that opens.

This will force Windows to find and install the most recent driver for your network card.
7. Reset Network Settings
Resetting your network settings will resolve any problems such as the missing cellular option in Windows 11 which was triggered by corrupt or misconfigured network settings. Windows performs this process by wiping out all previously saved configurations and returning them to their default settings.
- Begin by pressing the Windows key, and I key simultaneously to open the Settings app.
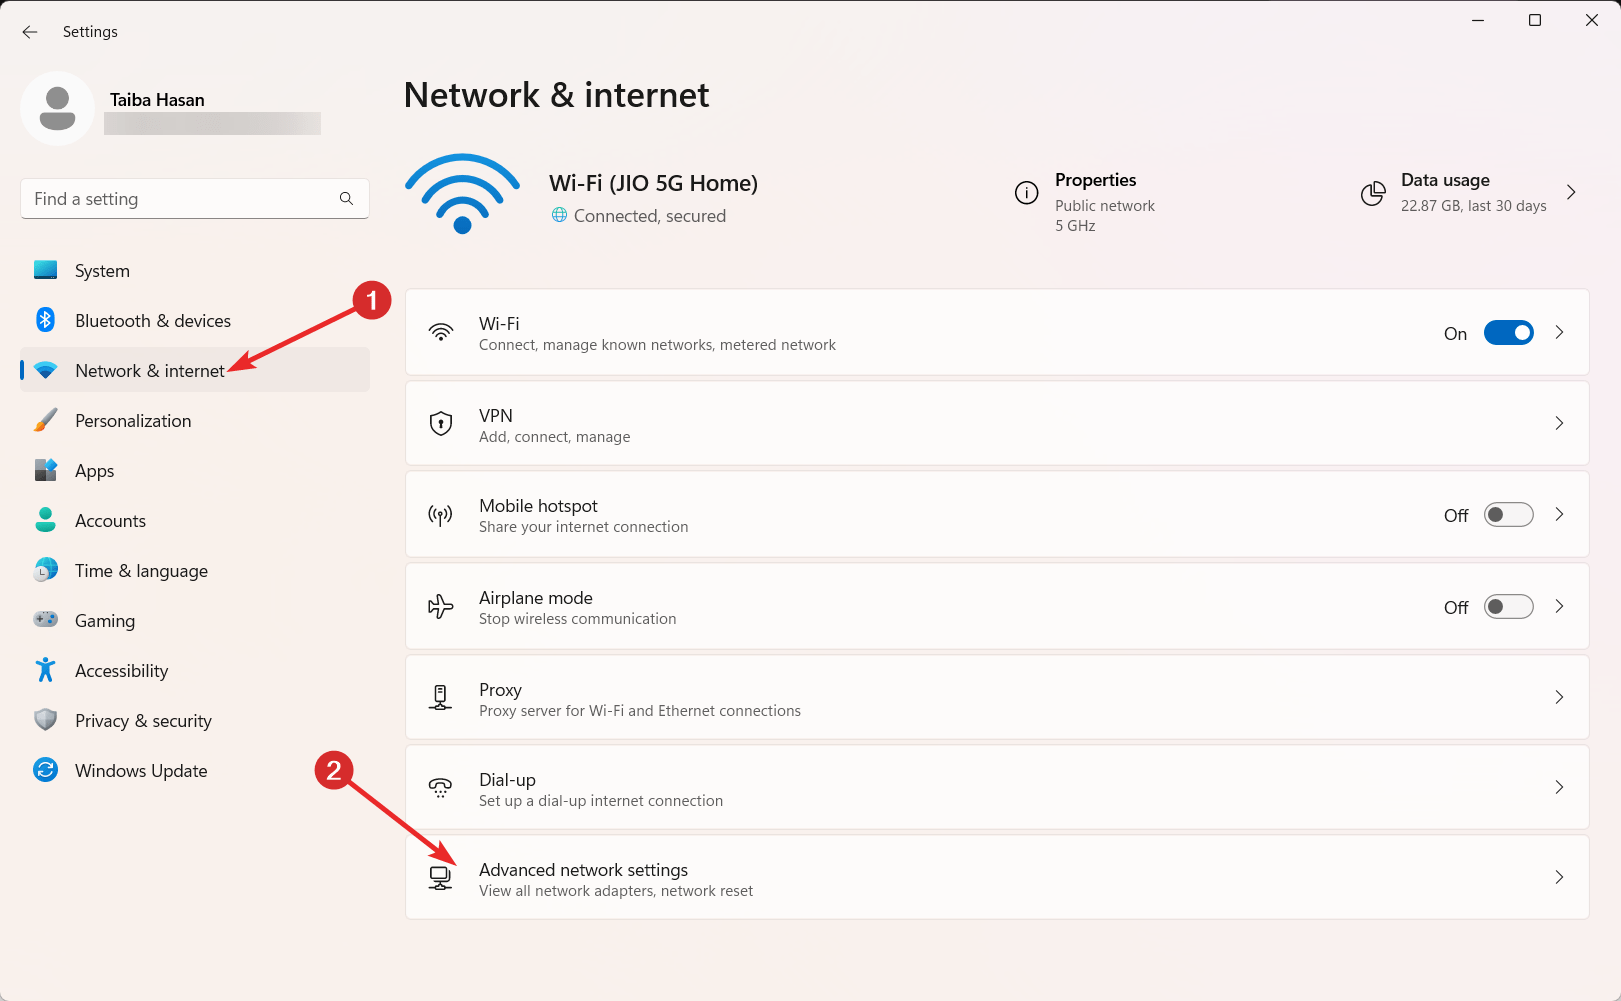
- Next, navigate to the Network & Internet section on the left-hand side of the Settings window.

- In the Network & Internet section, locate and click Advanced Network Settings on the right.

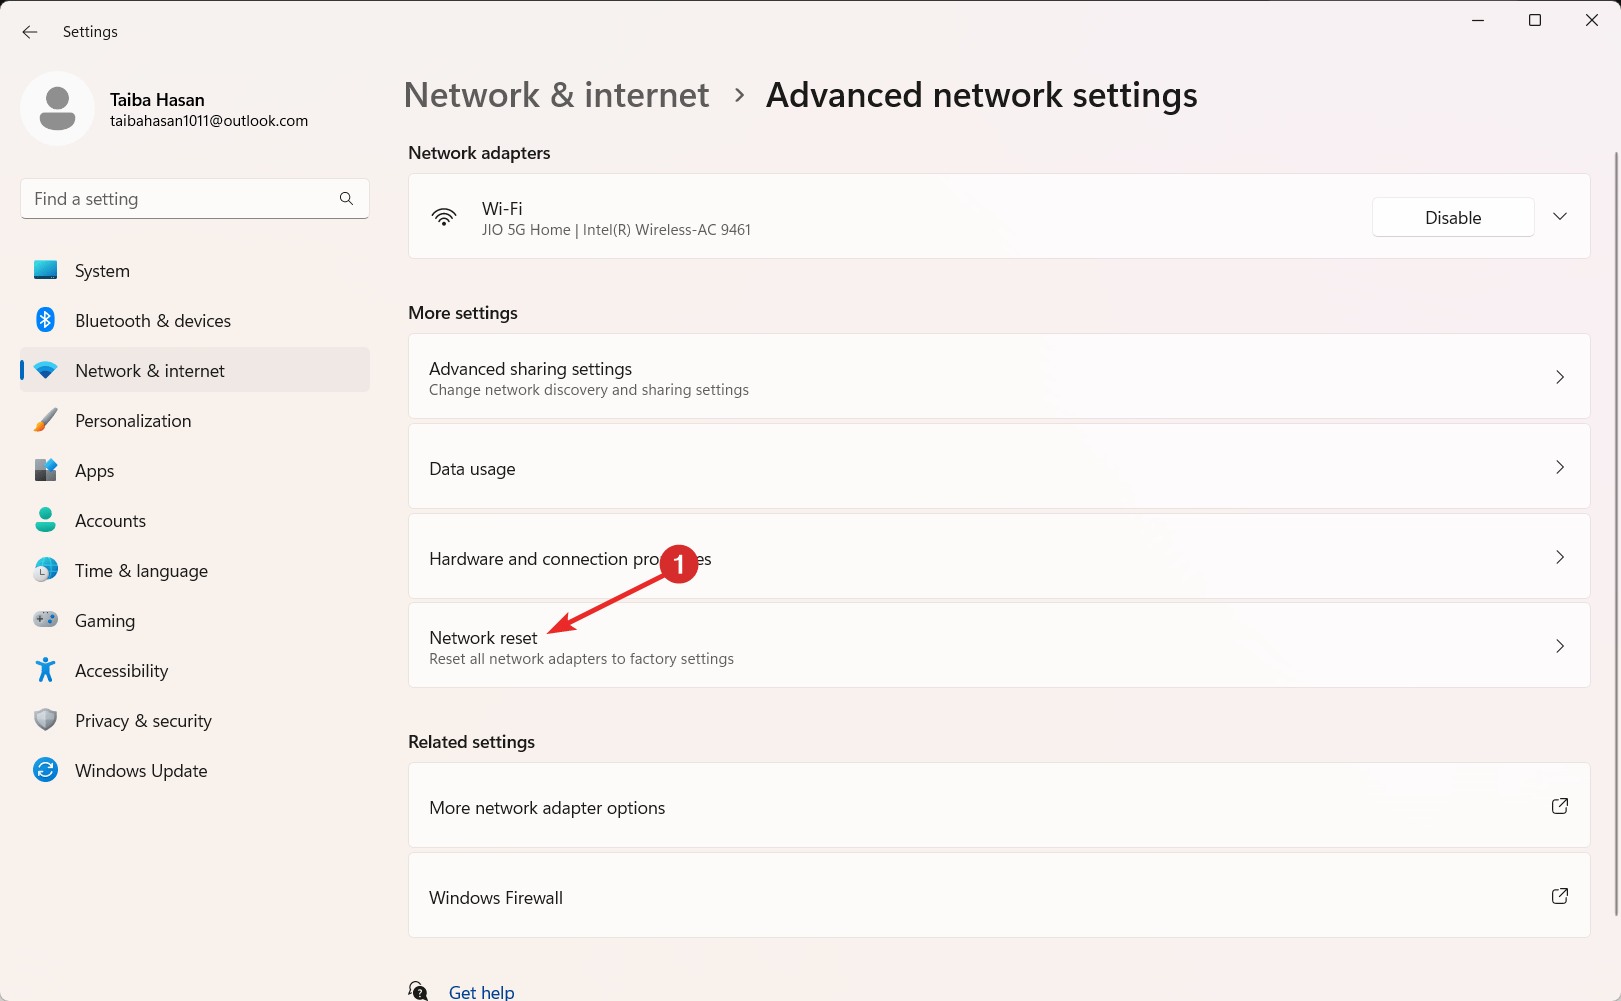
- Scroll down within the Advanced Network Settings menu until you find the Network Reset option.

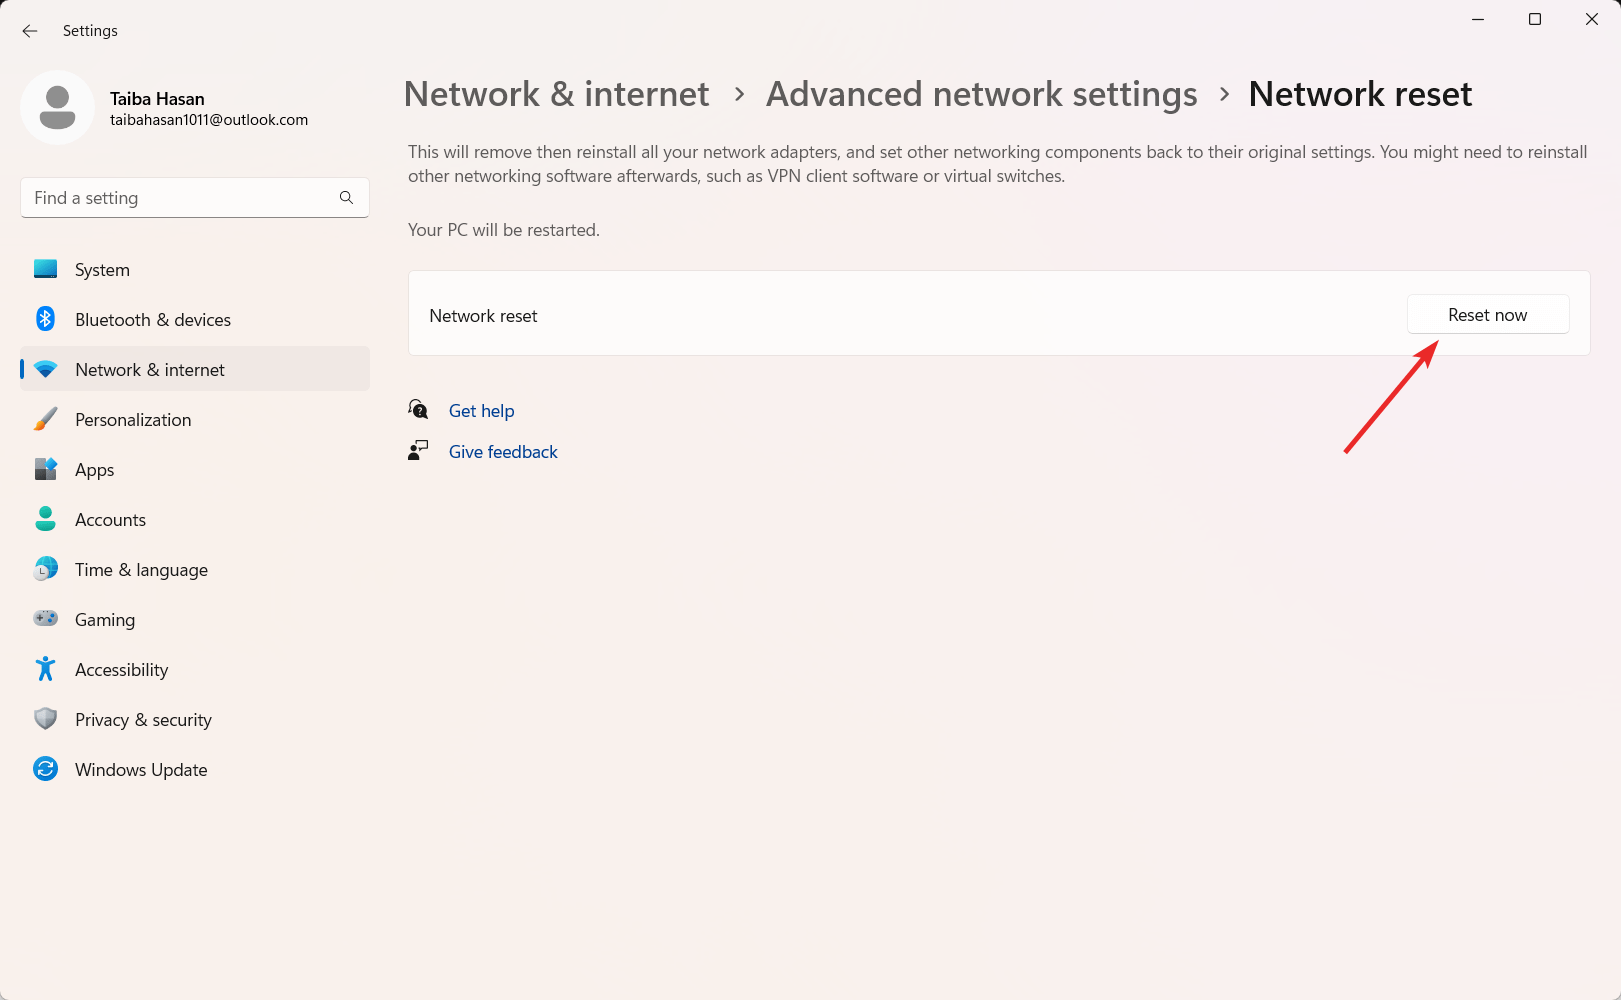
- Finally, click on Reset now and confirm your choice. This action will initiate the network reset process, restoring your network settings to their default configurations.

8. Uninstall and Reinstall Cellular Adapter Drivers
Having a corrupt cellular adapter driver may be the reason why the cellular option is missing in Windows 11. If this is the case, uninstalling and reinstalling the cellular network drivers will do the trick. Follow these steps:
- Click the Windows icon on the taskbar and choose the Device Manager option from the context menu.

- Expand the Network Adapters category in the device manager window to view the related drivers.

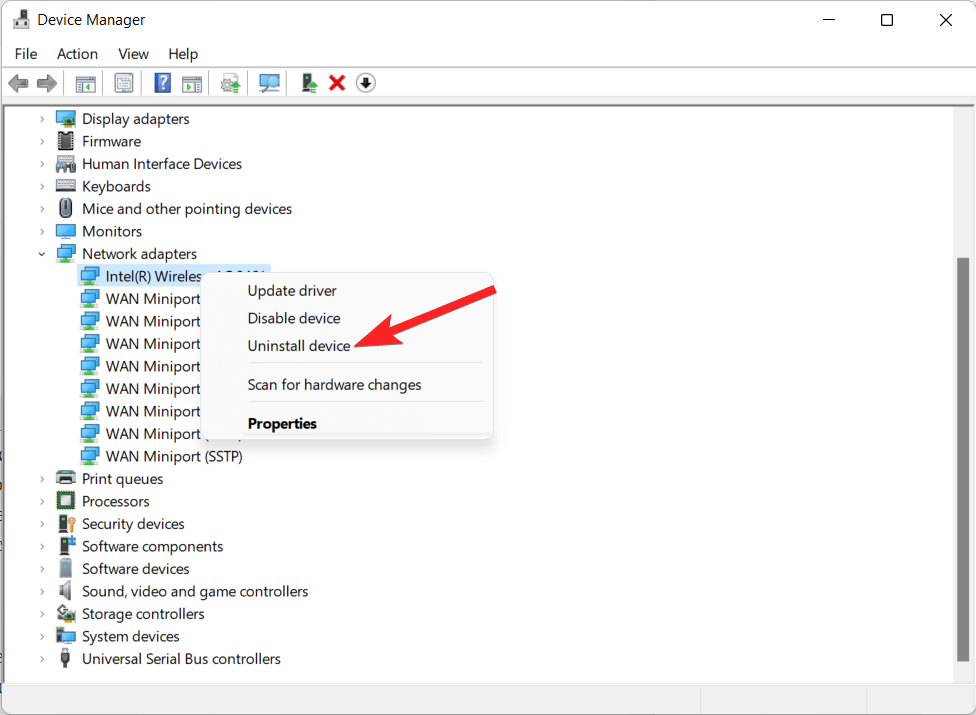
- Right-click the driver related to the cellular option and choose the Uninstall Device option from the context menu.

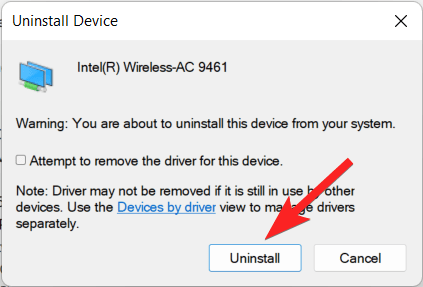
- A confirmation prompt will appear. Click the Uninstall button to confirm your choice.

- Next, reopen Device Manager and click the Check for Hardware Changes icon located on the top.

- This action will prompt Windows to install the latest version of the driver automatically. Then restart your PC to apply your changes.
9. Clean boot Windows PC
You can initiate a clean boot in Windows to troubleshoot issues by minimizing the number of active apps, processes, and drivers. This will help identify the root cause of why the cellular option is missing in Windows 11. Here is the step-by-step process of the same.
- Use the Windows key + R shortcut combination to launch the Run dialog box. Type msconfig in the search bar on top and press Enter to execute it.

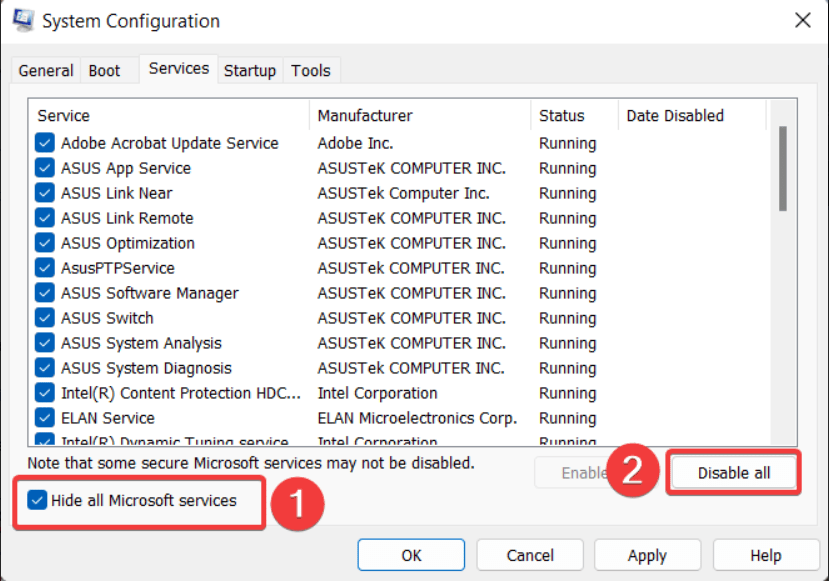
- In the System Configuration window, navigate to the Services tab.
- Select the Disable All option after selecting the Hide All Microsoft services checkbox.

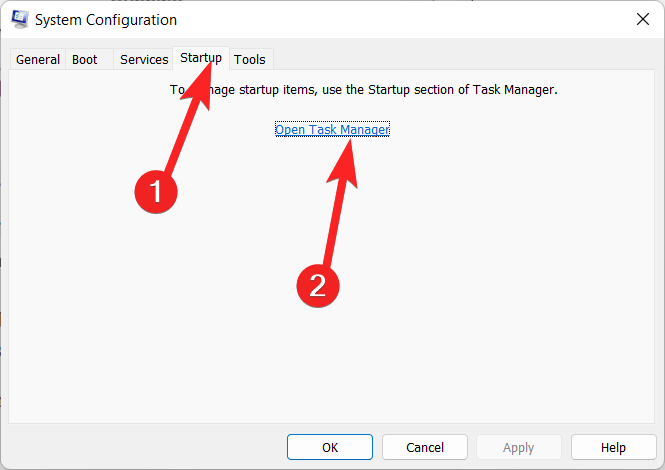
- Now switch to the Startup tab and click the Open Task Manager button.

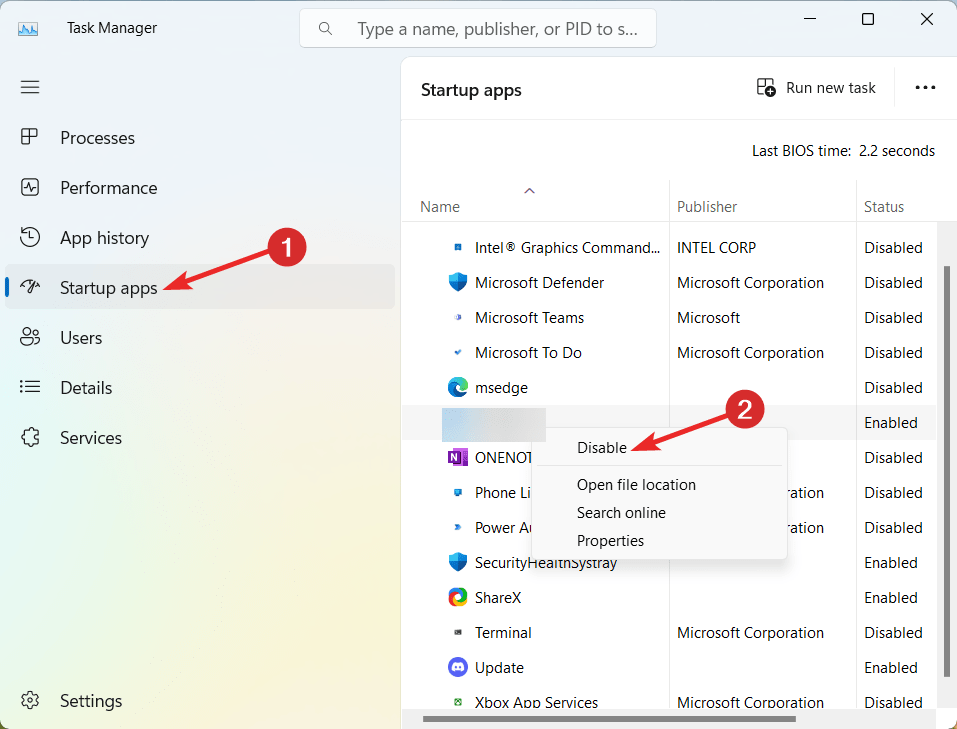
- In Task Manager, choose a startup app and click the Disable button.

- Perform this process for any other startup apps you wish to disable.
- Return to the System Configuration screen and click OK to save the changes.
You can now gradually re-enable individual apps to pinpoint which one might be causing the issue with missing cellular options in Windows 11.
Conclusion
That’s all in this guide! The solutions presented in this article should assist in resolving Windows 11’s missing cellular option.
It’s important to remember that not all of these solutions will function in every circumstance. Depending on the precise problem-causing factor, the efficacy of each remedy may differ. But one of these approaches ought to work to fix the problem.
Which of these tricks worked for you? Do let us know in the comments section below.
If you've any thoughts on How to Fix Missing Cellular Option in Windows 11?, then feel free to drop in below comment box. Also, please subscribe to our DigitBin YouTube channel for videos tutorials. Cheers!

