Are you a Mac user excited to dive into your favorite Android games with BlueStacks X, only to be met with frustration when it refuses to work? You’re not alone – this issue can be a real buzzkill. Compatibility problems and other factors often lead to ‘BlueStacks X’ not working on Mac.
But fear not; in this guide, we’ll explore the solutions to get your Android gaming experience back on track. Let’s dive in and conquer this challenge together!
BlueStacks X and Its Compatibility for macOS
At its core, BlueStacks is an Android emulator that lets you run Android apps and games on your computer. BlueStacks 4, a recent version of this emulator, was limited to older macOS systems (below High Sierra 10.13) and required an Intel Core processor.
To cater to a broader audience, BlueStacks introduced BlueStacks X. This version is designed for macOS users to enjoy popular Android games via cloud streaming, thereby expanding gaming possibilities on macOS.
However, note that you can only access BlueStacks X for macOS in particular regions at the moment.
Compatibility
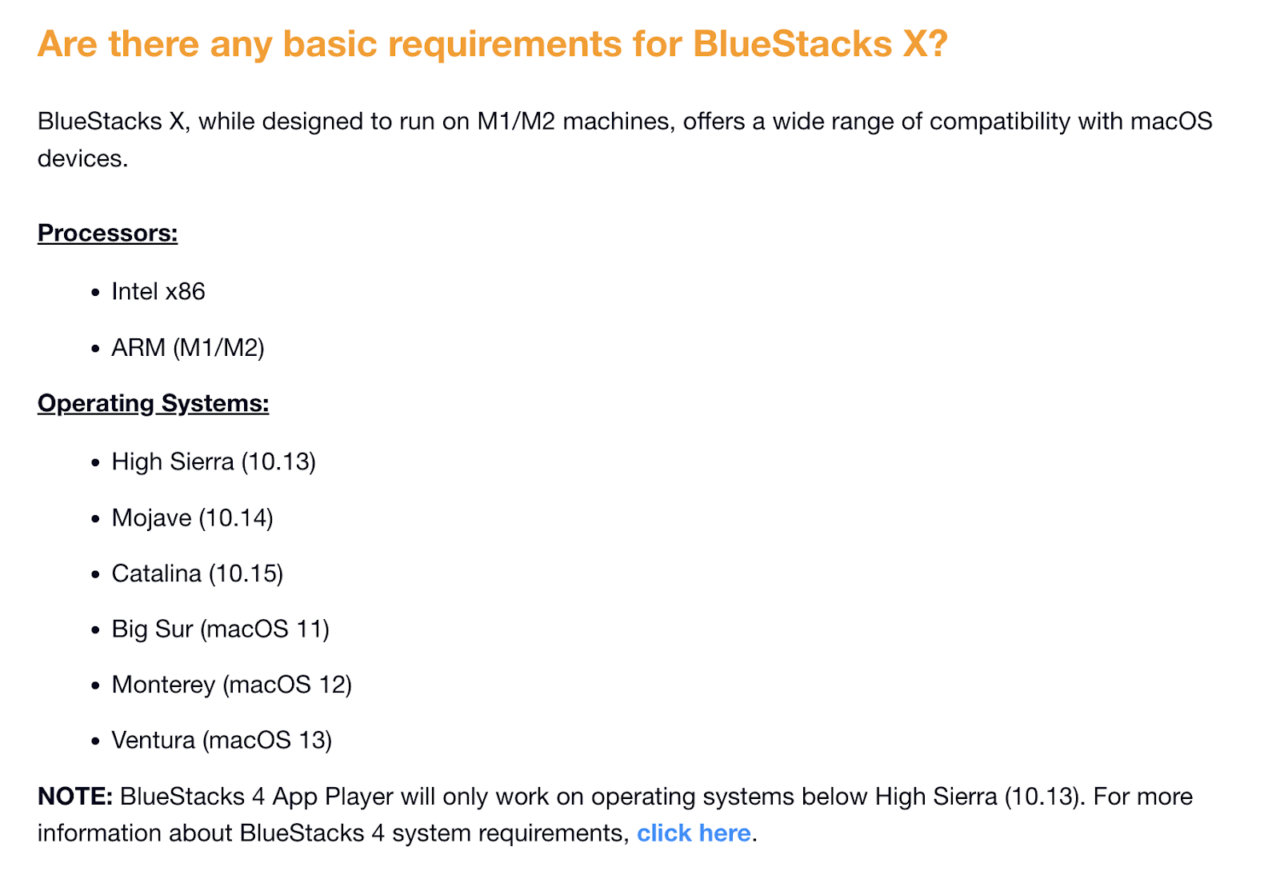
BlueStacks X boasts a versatile compatibility matrix for macOS devices. It’s optimally designed for M1 and M2 machines with ARM chips (M1/M2) but it also supports various Intel-based Macs with Intel x86 processors.
In terms of operating systems, it smoothly operates on macOS versions ranging from High Sierra (10.13) to the latest Monterey (macOS 13), including Mojave, Catalina, Big Sur, and Ventura.
Preliminary Fixes
Before exploring the step-by-step ways to fix BlueStacks X not working on your Mac, try these preliminary fixes:
- Download From the Right Source: When downloading BlueStacks X on your Mac, be sure you use a trusted and effective source. I’d recommend downloading from the official website of BlueStacks. But be sure you download BlueStacks X, not BlueStacks 5 or another version.
- Ensure Your Mac is Supported: BlueStacks X only works with particular Macs so before trying to run it on your device, make sure your Mac is supported. Generally speaking, it helps if you have an M1 or M2 Mac with a recent macOS version.
- See if It’s Available in Your Region: BlueStacks X was only rolled out for particular regions. If it’s not working on your Mac, there’s a chance the app does not support your region at this moment. Simply view the BlueStacks download page and see if you get the option to download BlueStacks X on your Mac (avoid using a VPN).
Ways to Fix BlueStacks X Not Working on Your Mac
Here we’ll explore how to fix BlueStacks X not working on Mac in detail.
1. Update BlueStacks X
If BlueStacks X isn’t working on your macOS due to recent changes, updating it should solve the problem. The developers have likely already addressed this issue in the latest BlueStacks update. To do this:
- Visit the provided link to download the latest BlueStacks X version.
- Install the new version on your Mac.

- Check if the update resolves the problem, allowing BlueStacks X to work smoothly on your Mac.
Tip: Always keep your BlueStacks X up-to-date for optimal performance.
2. Give Permission to BlueStacks X to Run
You might need to give it permission to make BlueStacks X work on your macOS. Here’s how:
- When you open BlueStacks, a security popup might block it. Click “Open Security & Privacy.”

- Click the lock icon, enter your username and password, and click “Unlock.”
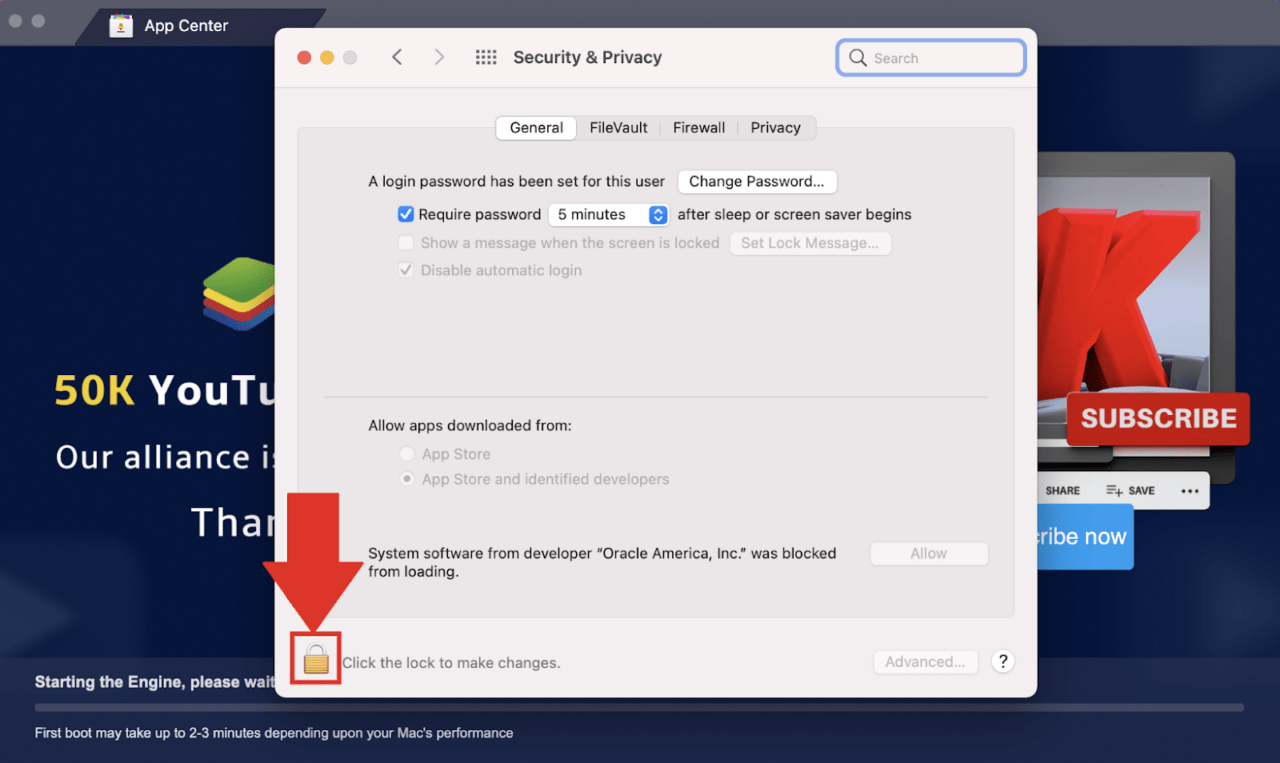
- Click “Allow” and then “Restart.” Now, BlueStacks should work on your Mac.
For macOS 10.15 Catalina and below, the steps are similar. Just click “Open Security & Privacy” and follow the on-screen instructions to finish. This allows BlueStacks X to run smoothly on your Mac.
3. Reinstall BlueStacks X
Another simple way to get BlueStacks X to work on your Mac is by reinstalling BlueStacks X and VirtualBox. Simply carry out these steps:
- Find your BlueStacks X installation and move it to the Trash (Bin).
- Similarly, uninstall VirtualBox.
- Download the latest version of BlueStacks X.
- Place the installation file on your desktop and run it from there.
Tip: Sometimes, uninstalling VirtualBox first and then installing the latest BlueStacks version does the trick.
Final Words
When ‘BlueStacks X’ throws a wrench into your Android gaming plans on your Mac, don’t give up. You can almost always overcome compatibility issues and other hurdles with the right solutions. In this guide, we’ve explored various fixes for BlueStacks X not working on Mac to help you continue your uninterrupted gaming journey. Happy Android gaming on your Mac!
If you've any thoughts on How to Fix BlueStacks X Not Working on Mac?, then feel free to drop in below comment box. Also, please subscribe to our DigitBin YouTube channel for videos tutorials. Cheers!


