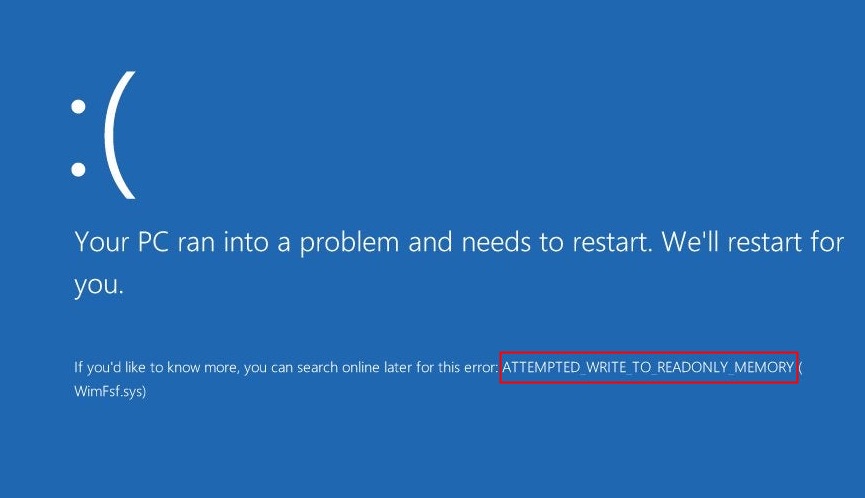
Thousands have reported the ATTEMPTED_WRITE_TO_READONLY_MEMORY error in Windows 1Step 1. Brand new computer users have upgraded the software from Windows 10 to the latest Windows 1Step 1. The PC is crashing multiple times, even when the update progress has reached 100%, and it’s not booting into the Lock Screen. The Blue Screen of Death BSOD could be the reason for kernel memory dump, and the drivers might be faulty, which is leading the machine to crash again and again.
What causes ATTEMPTED_WRITE_TO_READONLY_MEMORY in Windows 11?
The error code 0x000000BE or ATTEMPTED_WRITE_TO_READONLY_MEMORY is caused by a driver. The system driver is writing on a read-only segment in the RAM (Random-Access Memory). Windows 11 is a few months old and released on October 5, 202Step 1. The manufacturers are aware of the component’s failure and they are working to release new updates, so you should check the official site. Let me give you a few valid reasons why Windows 11 is crashing with a 0x000000BE error code.
Faulty Component Driver – The installed driver in the system is faulty, and it is contributing to the system crash. I have shown you how to find updated drivers for laptops and desktops from the official manufacturer’s site.
Outdated Drivers – My PC crashed with an ATTEMPTED_WRITE_TO_READONLY_MEMORY error on the display. I upgraded the system from Windows 10, and the latest software was running on the old drivers. I had to reinstall the operating system and install compatible drivers to resolve the issue.
Faulty Hardware – I wouldn’t eliminate the hardware failure in the list, and one of the internal components may be faulty.
Incorrect BIOS Settings – I will explain the BIOS setting’s involvement in the latter part.
Overclocking Components – The latest Win 11 encouraged the users to overclock the core components, so they can get extra performance out of the old hardware.
Do not get invested in the third-party tools and focus on applying the official solutions. Consult a certified engineer to look at the machine, if the internal components are faulty.
1. Restart PC
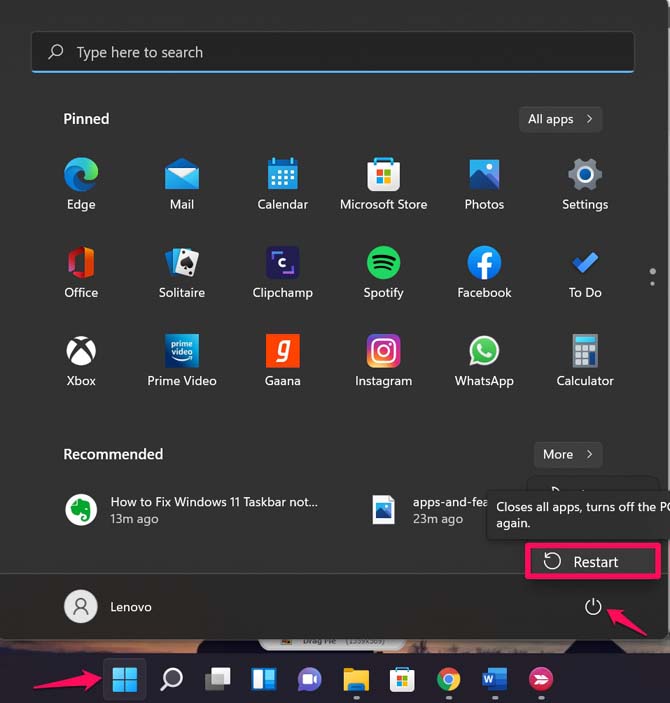
Restating the machine is the fastest way to resolve the error 0x000000BE code. Of course, rebooting is a temporary fix, and it doesn’t address the core issue.
All desktops have a dedicated reset button located below the power button.
None of the laptops have a dedicated reset button.
You have to press the laptop power button for five seconds, and it will turn off automatically.
Reboot your machine, and it will load the system into the Lock Screen. I have shown you multiple solutions below, apply them to resolve the ATTEMPTED_WRITE_TO_READONLY_MEMORY error.
2. Boot in Safe Mode
Most of the solutions that I have suggested below require the PC to boot in safe mode. It’s a good opportunity to learn to boot the system into safe mode, so you don’t have to worry about it later.
Note: Those who are not able to get into Windows can boot into safe mode, so follow the tutorial.
Step 1. Press Windows Key, and I key to open Settings.
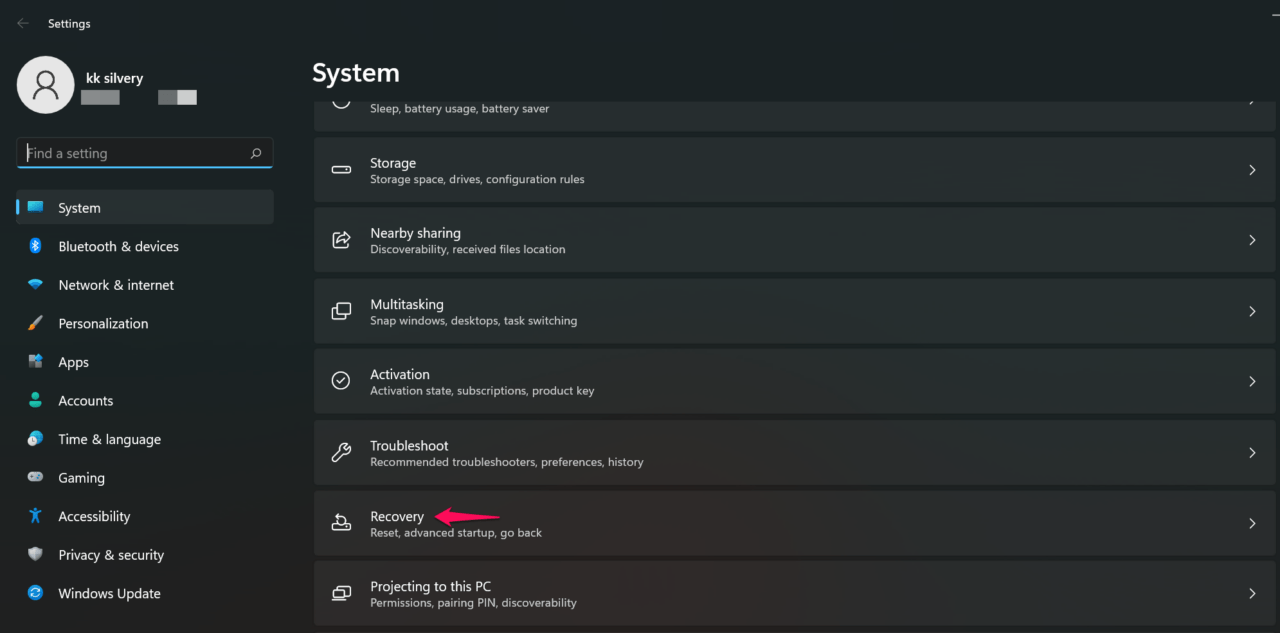
Step 2. Choose “System” then click on the “Recovery” option.
Step 3. Click on the “Restart” button.
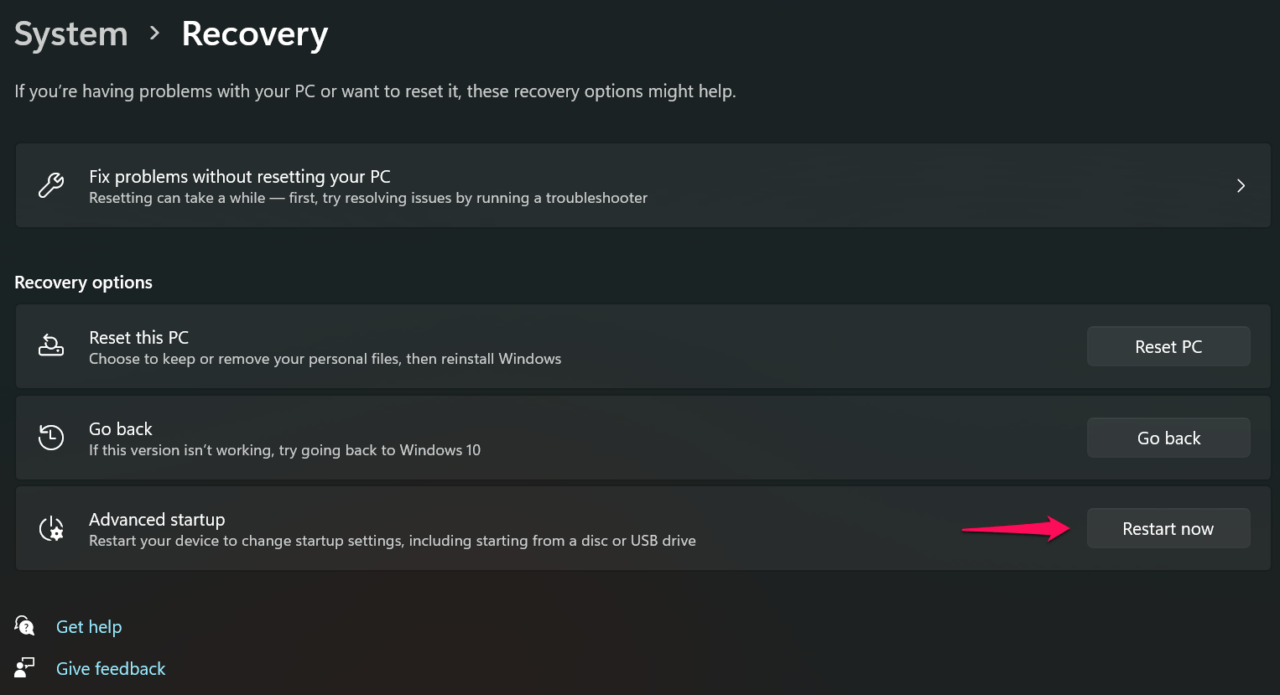
Step 4. Click on the “Restart now” button.
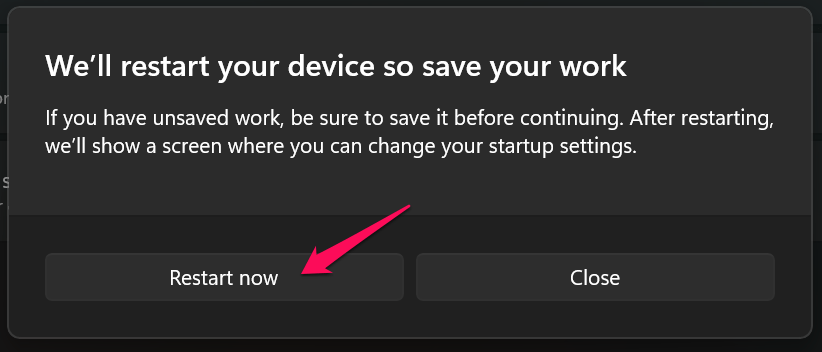
Note Your system boots into recovery mode, and this is where you can access the safe mode option even the PC doesn’t boot into the system.
Step 5. Select the “Troubleshoot” option.

Step 6. Go to “Advanced Options” to reveal more options.

Step 7. Select “Startup settings” to access advanced options.
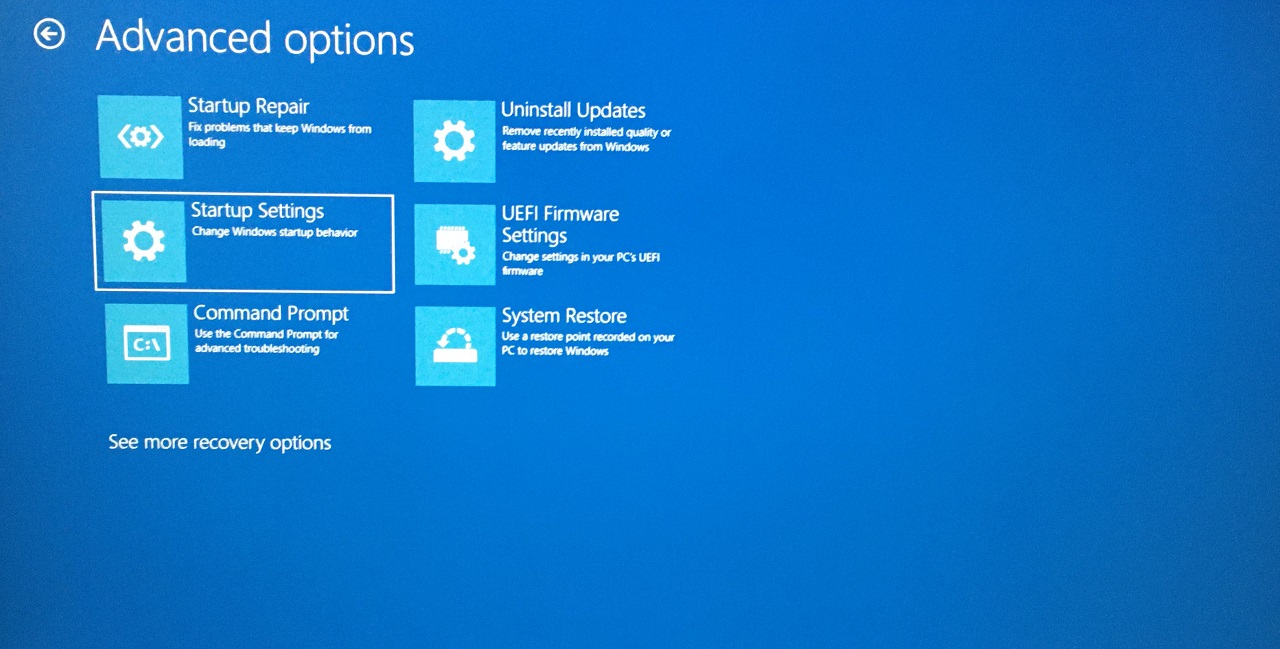
Step 8. Click “Restart” or you can press the Enter key.
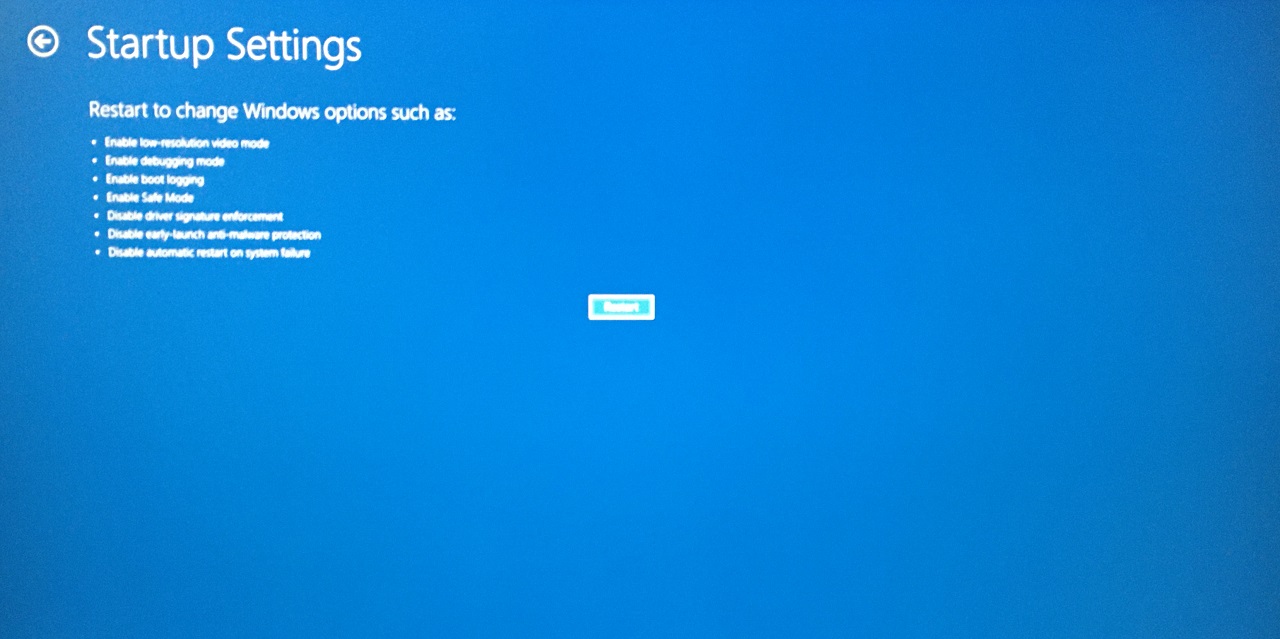
Your PC restarts, so do not panic.
Step 9. Press the 4 in the Numpad to boot in safe mode.
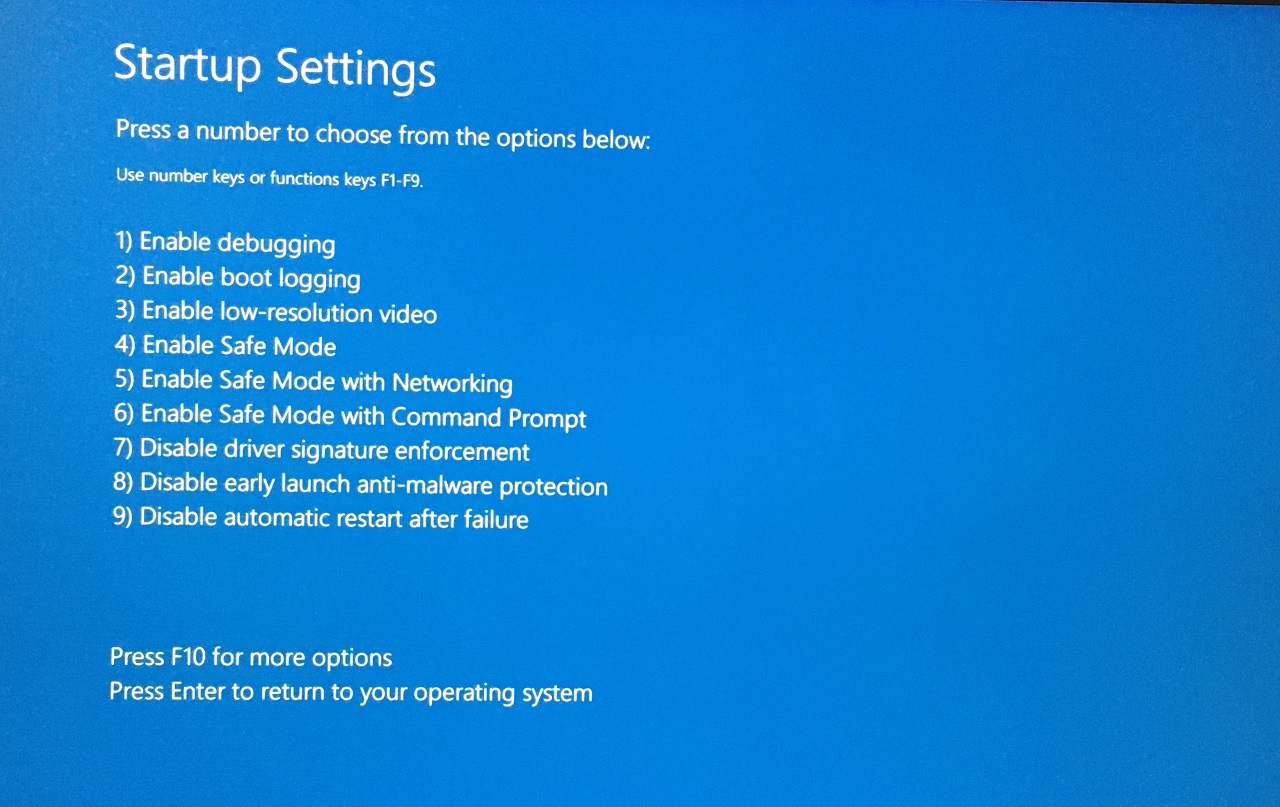
You can press 4 from the top section of the keyboard if the laptop or keyboard doesn’t have a Numpad.
Step 10. Windows boots in safe mode.
Restart the Windows 11 machine to get out of safe mode and that’s all you have to do. Safe mode doesn’t harm the software or hardware, so do not conclude that it harms the system.
3. Download Manufacturer Suggested Drivers
The manufacturers have set up dedicated engineers who have tested the latest drivers on the hardware. They take time to test the driver’s stability and compatibility on the laptop, desktop, and specific components. You should download the manufacturer suggested drivers, and they will provide maximum performance without issues. Uninstall the drivers running on compatibility mode, and they are creating the issues.
Let me show you how to find the supported drivers on the official manufacturer site.
Note: Create a system restore point and I learned it the hard way.
Laptop:
I own realme Book Slim, and it’s a Chinese manufacturer, who is following a different approach.
Step 1. Open browser.
Step 2. Type the laptop model number ending with “Drivers”.

Example:
“realme book slim drivers”
“Acer Aspire ES1 521 drivers”
Choose “Software Update” since the Chinese manufacturer took a different approach for the task.
Step 3. Select “Laptop”, if you are on the same laptop.

Step 4. Select the variant and I purchased Core i3 11th gen.
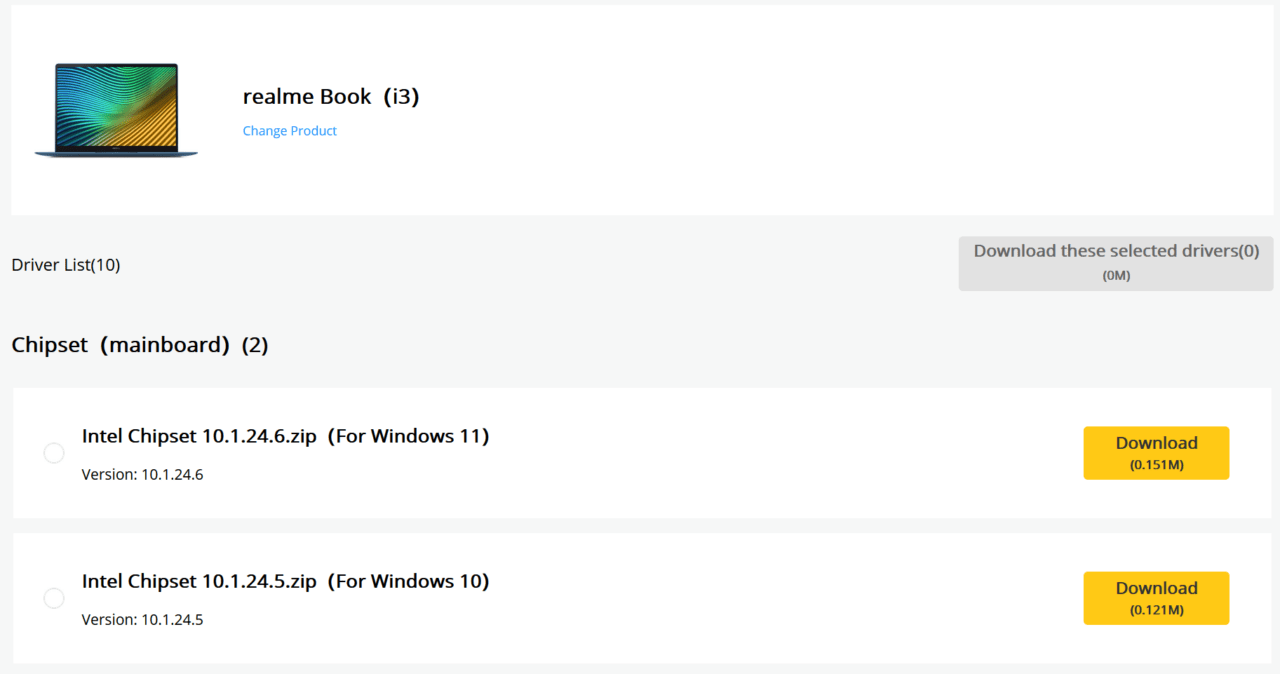
Start downloading the Windows 11 specific drivers for the laptop. I’m asking you again to create a system restore point, so you can revert the changes later on.
Desktop:
I build the gaming machine by choosing the components myself and assembling them.
Step 1. Find the motherboard box and note down the model number.
Step 2. Search for the motherboard drivers in the search engine and open the official web page.
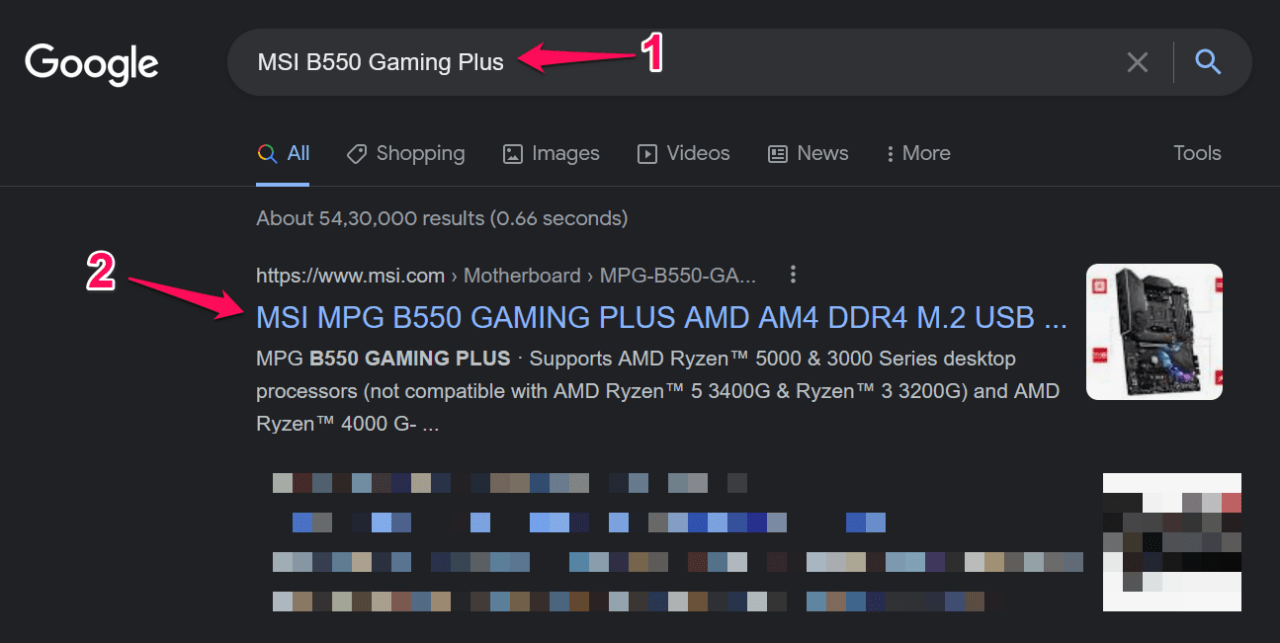
Example:
“MSI B550 Gaming Plus”
“Gigabyte B450M DS3H”
Step 3. Click on the “Support” link.

Step 4. Click on the “Driver” option.

Step 5. Choose the operating system and download the supported drivers.

Make sure to uninstall the drivers individually and install the suggested drivers in the system. Do not ignore my warning and create a restore point because that will save you if things don’t work out.
4. Check Memory Health
The driver is writing the information on the memory module, and the failure resulted in the system crash. The RAM stick might be faulty, and there is a way to find out the module health. Microsoft added an inbuilt tool long back to test the hardware memory component. You can take a coffee break because I own a mid-range Ryzen 5 PC, and it took forty-five minutes and up to an hour on older machines.
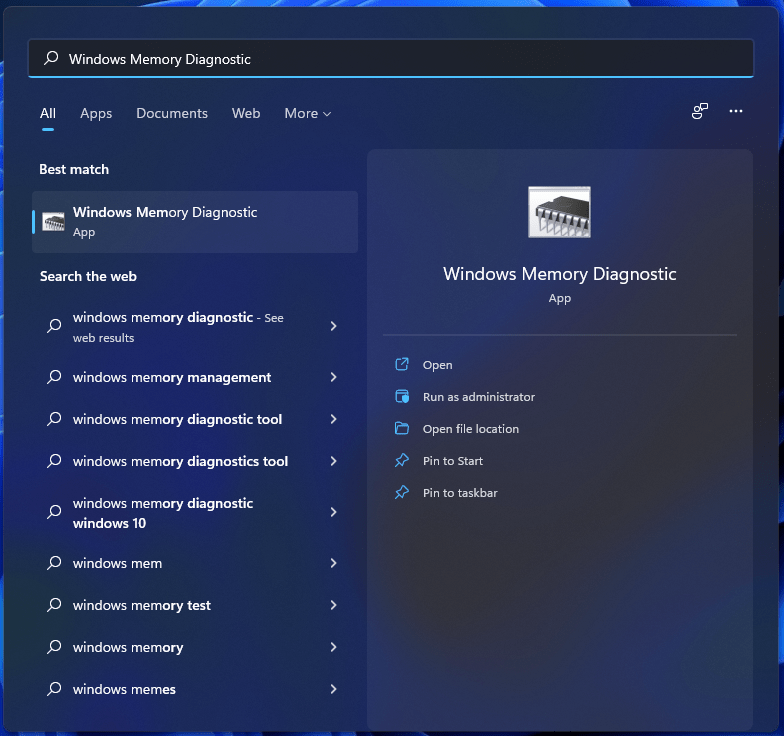
Step 1. Open the “Windows Memory Diagnostic” tool as administrator.
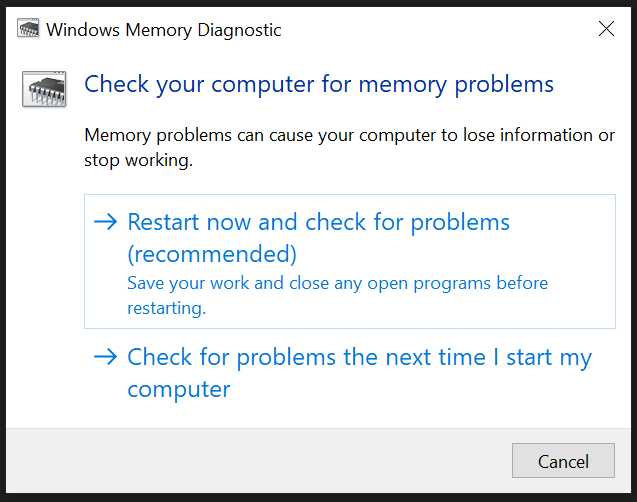
Step 2. A new window shows up on the screen, and click on the “Restart now and check for problems (Recommend)” option.
Step 3. Windows restarts, and the first testing phase begins.
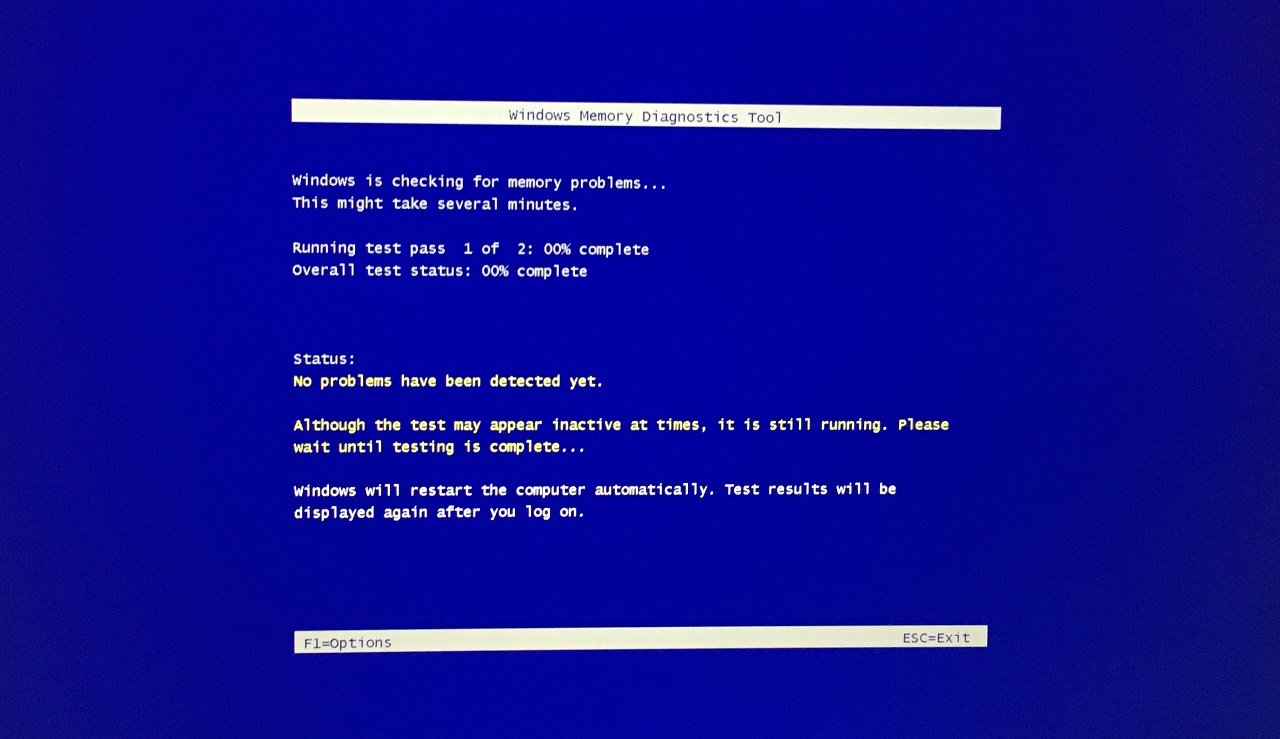
Step 4. The second test started after twenty minutes.
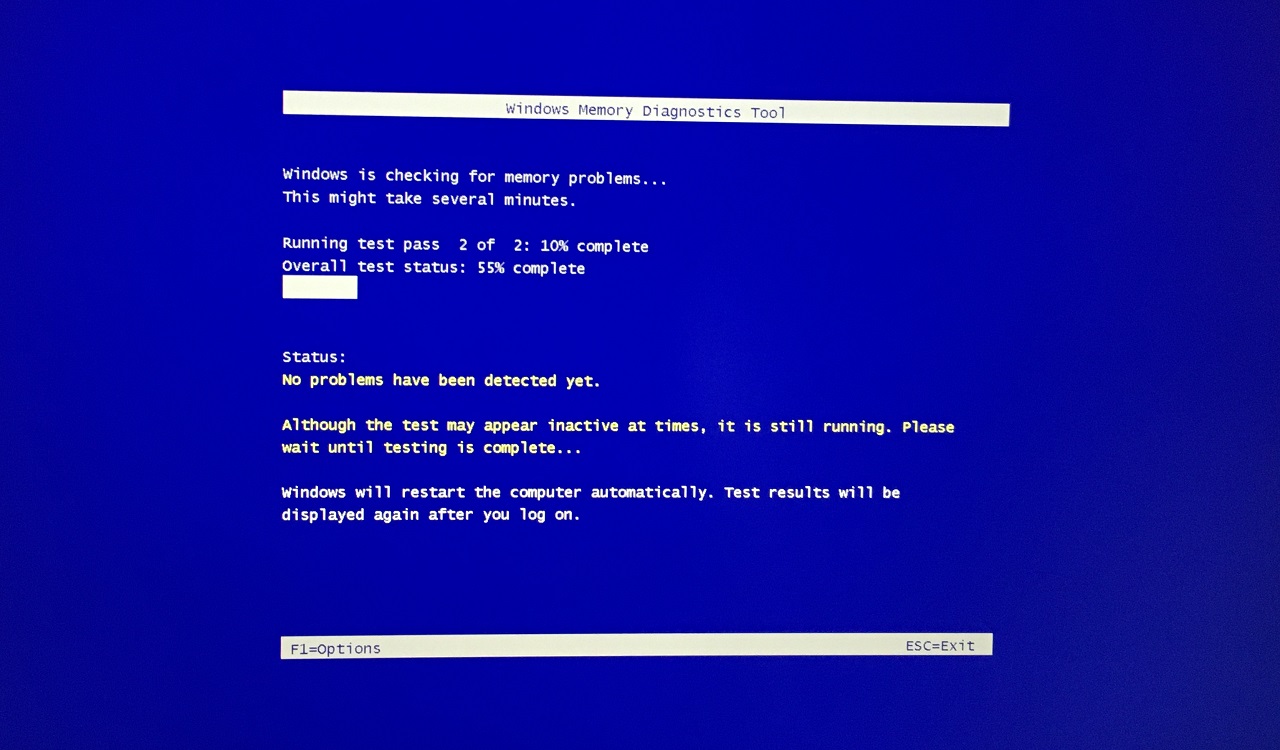
You can monitor the number of problems under the “Status” section. Do not force shut down the machine, even if the system appears to be inactive. The software restarts automatically after the testing process finishes.
5. Uninstall Recently Installed Update
Microsoft’s latest features and quality updates might have affected the system’s performance and functionality. You can uninstall the core updates from the software and I will show you how to do it. Windows Update reminds you of the latest quality and feature update in the system, so don’t worry about losing anything here.
Step 1. Open Settings in Windows 1Step 1.
Step 2. Select “Recovery” in the system.
Step 3. Click on the “Restart now” button, and your PC will reboot.
Note: Save unsaved work in the background and make sure to close the programs.
Step 4. Choose the “Troubleshoot” option.
Step 5. Select “Advanced options” in the next window.
Step 6. Select “Uninstall updates” in the second row.
Step 7. Select one option.
- Uninstall latest quality update
- Uninstall latest feature update
Step 8. Click on the “Uninstall” button.
The recovery system removes the latest quality & feature updates from the machine. You can boot back to Windows PC, and it won’t crash with the ATTEMPTED_WRITE_TO_READONLY_MEMORY error. Of course, you have to pause the Windows Update for the time being until you figure out the problematic driver.
6. Avoid Overclocking Components
CPU overclocking was a popular topic in the 3rd gen computing era, and we have come a long way. Now, you can overclock GPU, RAM, monitor, and what else. Many Windows 10 users have overclocked the components, and it is stable in the environment. Uses have continued the overclock configuration in the 11th edition, and it doesn’t follow in the same wave.
Step 1. Open Settings in Windows 1Step 1.
Step 2. Select “Recovery” in the system.
Step 3. Click on the “Restart now” button, and your PC will reboot.
Note: Save unsaved work in the background and make sure to close the programs.
Step 4. Choose the “Troubleshoot” option.
Step 5. Select “Advanced options” in the next window.
Step 6. Select “UEFI Firmware Settings” from the options.
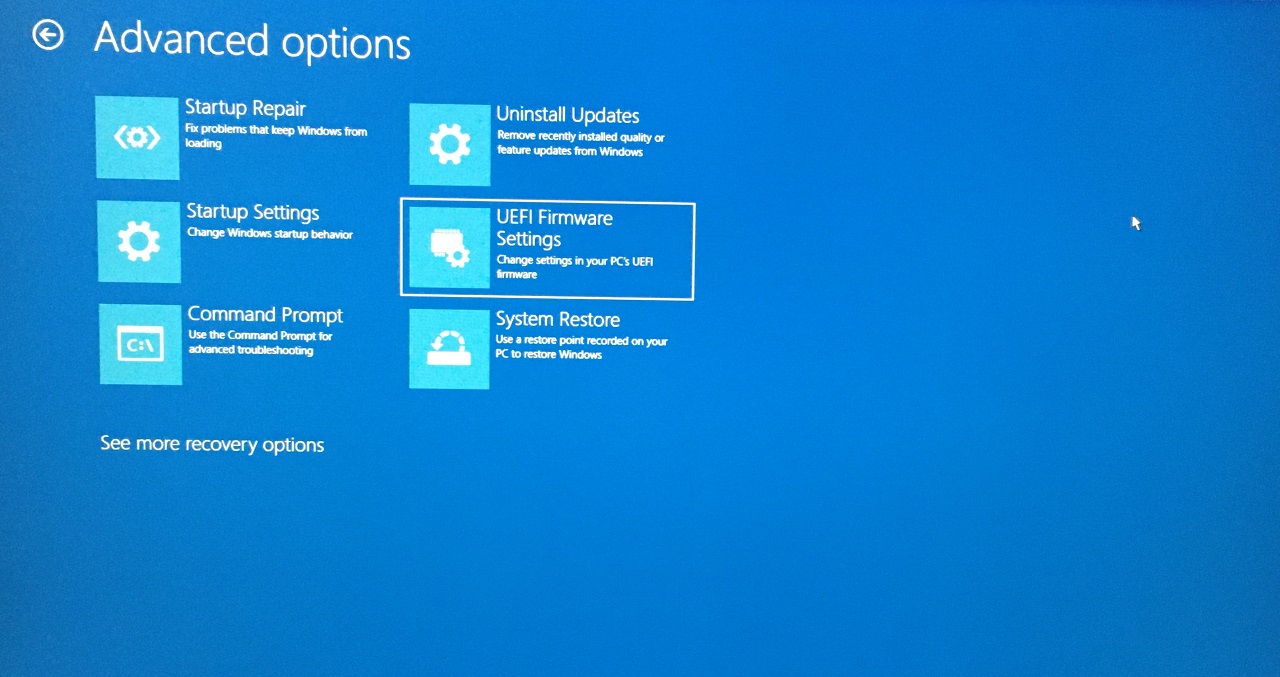
Step 7. Click on the “Restart” button.
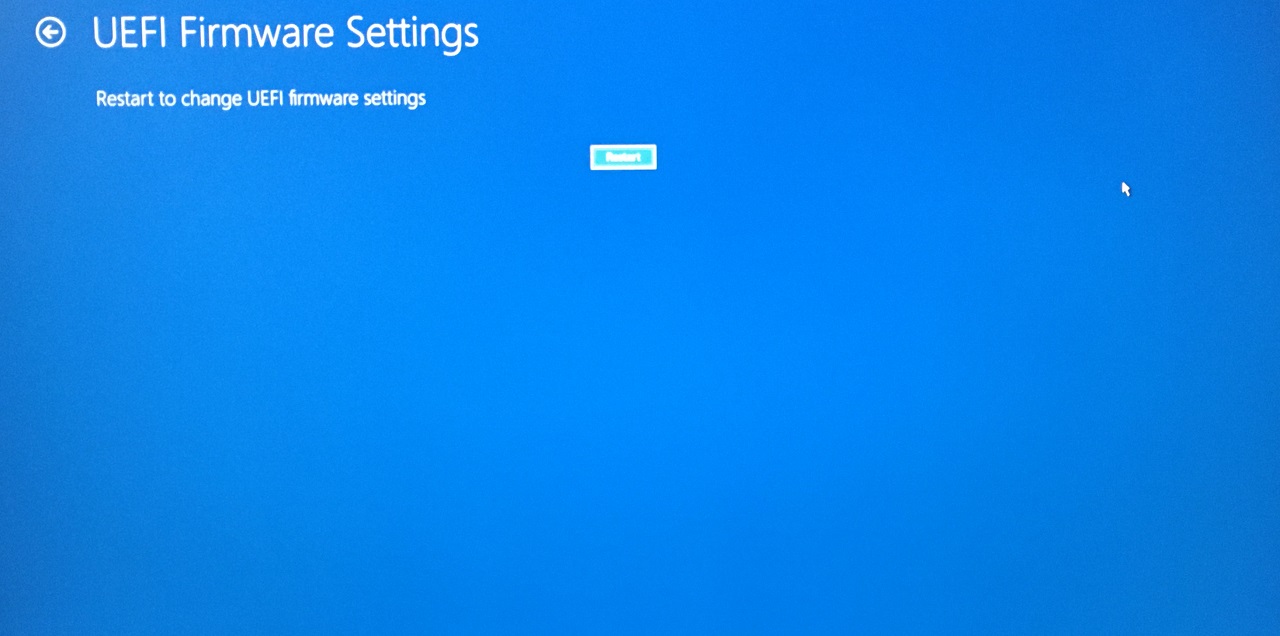
Step 8. The system booted in the BIOS and select “Overclocking” from the main menu.
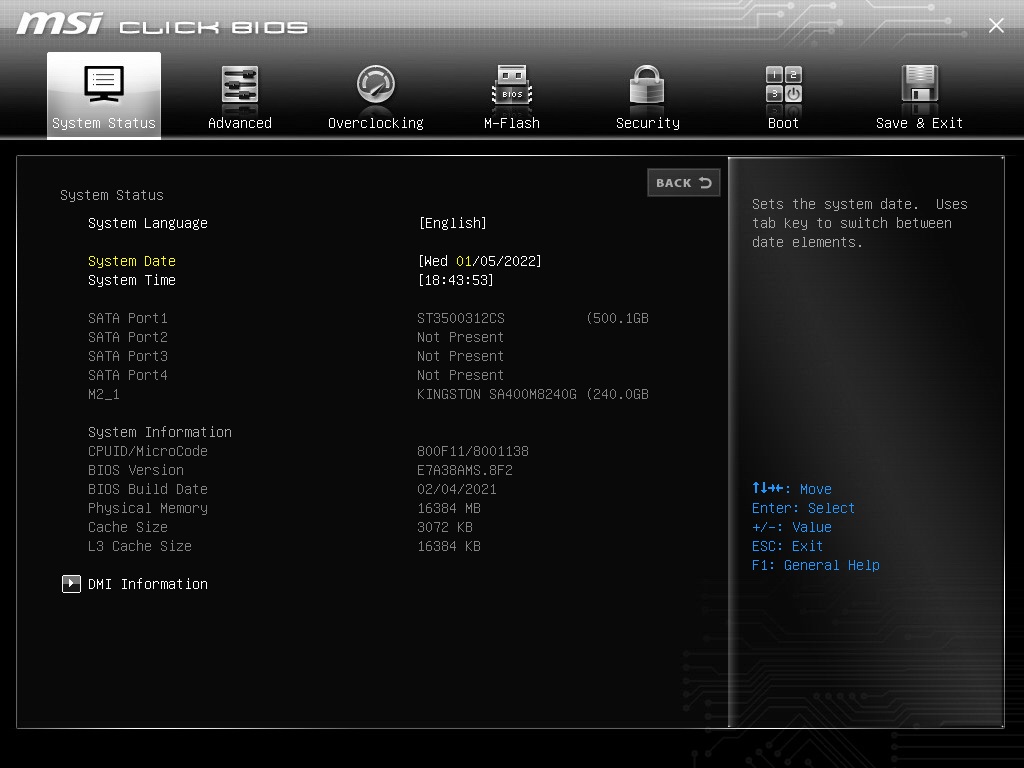
Step 9. Disable OC from the BIOS.
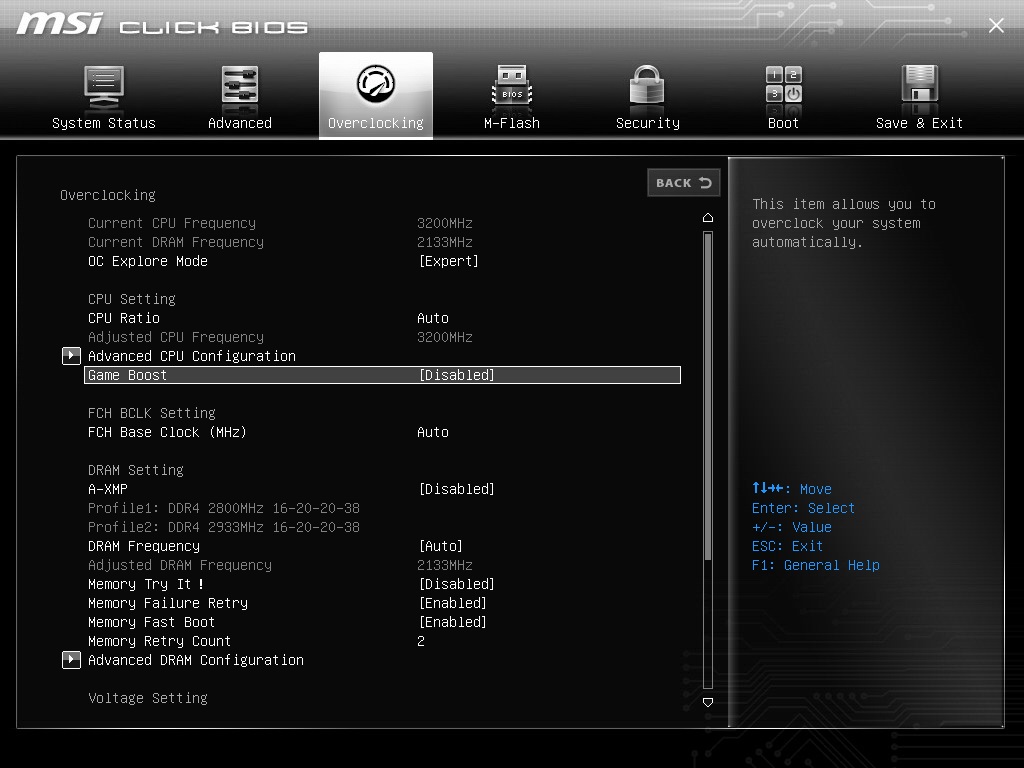
Move back to stock clocks in the system, if you have used MSI Afterburner or AMD Radeon Software overclocking features. You have to go back to stock clocks and figure out what configuration works with Windows 1Step 1.
8. Reset BIOS
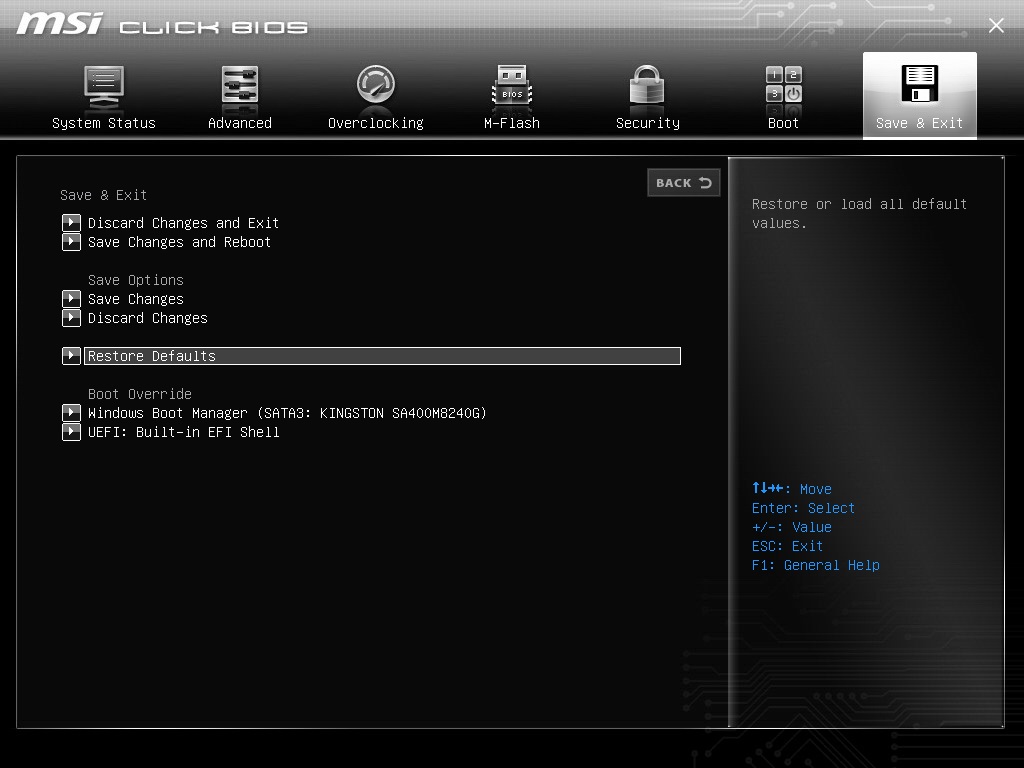
Administrators can customize the BIOS settings. Reset the BIOS, if you don’t know how to revert the OC config.
Note: You shouldn’t mess with the BIOS settings and it may hamper with TPM Step 2. 0 & Secure Boot settings.
I started with Pentium 4 (November 20, 2000) Windows XP machine and I have hands-on experience working with the BIOS. You should consult with an acquaintance or a friend, who is aware of the technical side of it. Resetting BIOS configuration doesn’t harm the computer in any way and I have performed the “Restore defaults” many times in the past.
Bottom Line
I won’t recommend you to perform a system restore to resolve the ATTEMPTED_WRITE_TO_READONLY_MEMORY error in Windows 1Step 1. You should focus on uninstalling the drivers running on compatibility mode and installing the Windows 11 compatible drivers instead. Do not force your Windows machine to run on incompatible drivers and you can always switch to Microsoft basic drivers. Let us know how you solved the 0x000000BE error code in the comment section below.
If you've any thoughts on How to Fix ATTEMPTED_WRITE_TO_READONLY_MEMORY in Windows 11?, then feel free to drop in below comment box. Also, please subscribe to our DigitBin YouTube channel for videos tutorials. Cheers!
