In this guide, we will make you aware of the steps to find the file or folder that is currently in use in Windows 11. Most of the bugs and issues that you might face usually come with an underlying error message as well. This makes it really easy to understand the root cause of that issue, and more importantly, it helps us in chalking out the best fix accordingly.
But not all errors fall in this category. Recently, I was trying to delete a folder but instead got greeted with this error message: ‘Folder in Use, The action can’t be completed because the folder or a file in it is open in another program.’
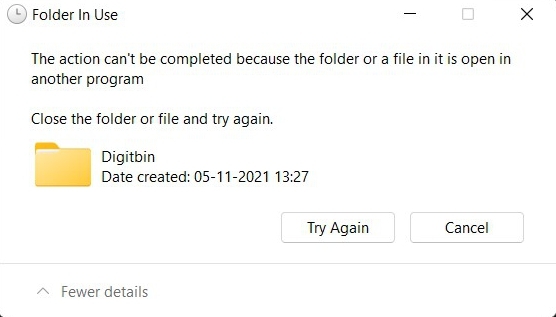
While the error message does notify us of the reason behind this issue, but it ends up missing the most important part- the name of the app that is currently using this file or folder. And with a plethora of apps running in the background, it is nearly an impossible task to manually find the app that has taken control over that file/folder.
Fortunately, there exists a nifty method through which you could find the file or folder that is currently in use in Windows 11 without exerting any manual efforts as such. And this guide shall make you aware of just that. So without any further ado, let’s get started.
Steps to Find the File or Folder that is Currently in Use in Windows 11
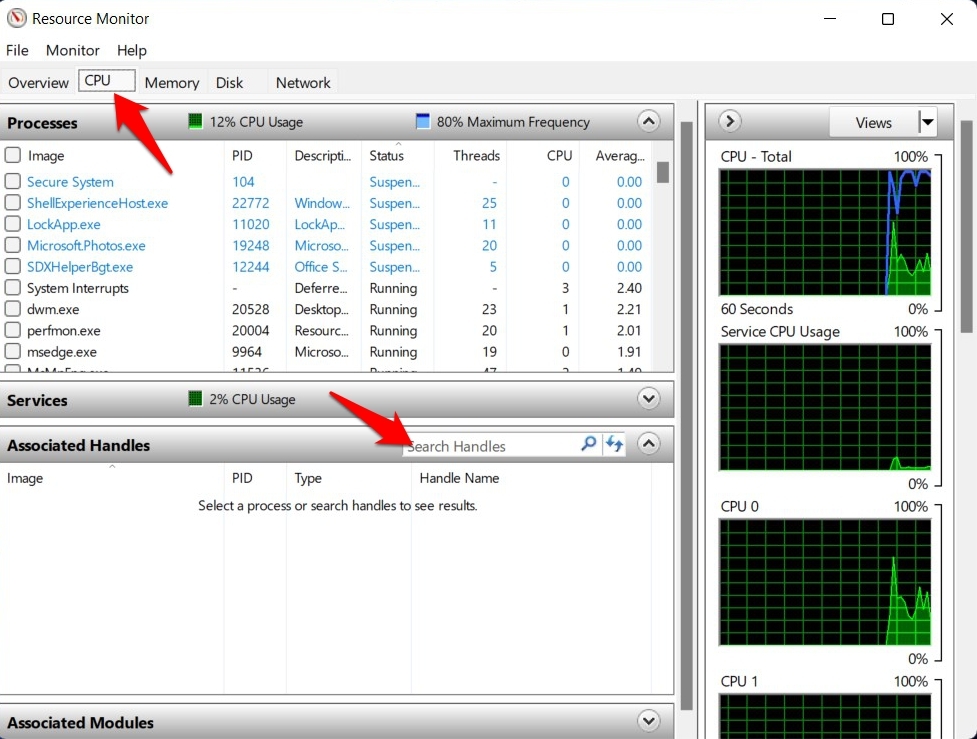
- To begin with, head over to the Start menu, search Resource Monitor and open it.
- Then switch over to its CPU tab and go to the Associate Handles section.

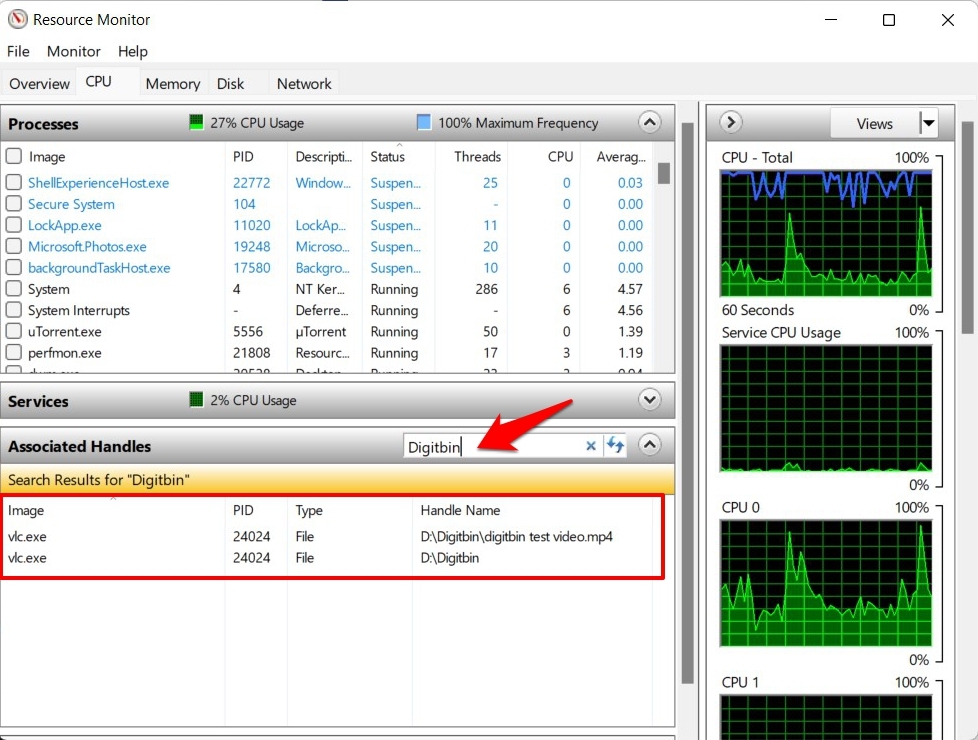
- Now go to its search bar and type in the name of the file or folder that this currently showing this error message.
- The Resource Monitor will now perform a scan and will let you know the app or program that is currently using your file or folder.

- You could get a hold of that app’s name via the Image column. As you could see from the above image, it is the VLC media player that is in control of the folder in our case.
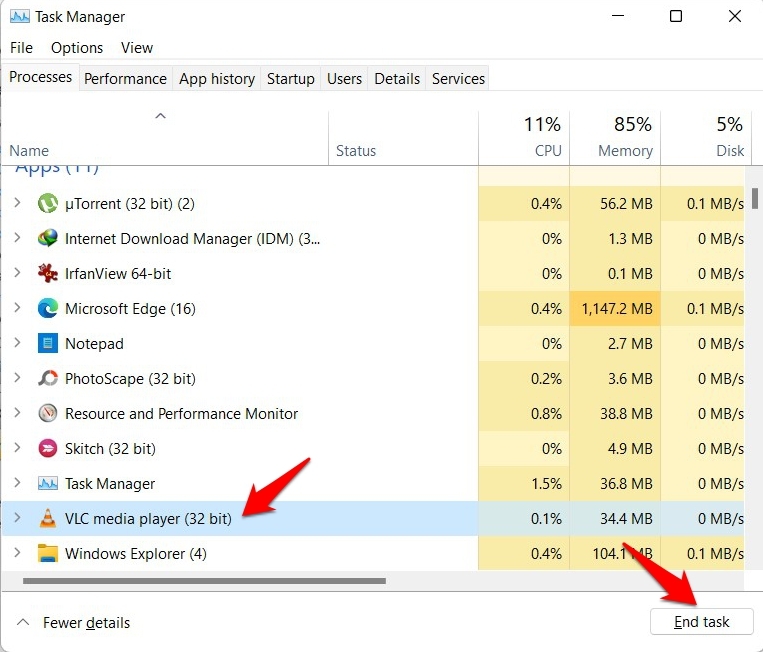
- So your next course of action should be to end the process of that app that currently has control over your file.
- To do so, use the Ctrl+Shift+Esc shortcut keys to open the Task Manager. Then select the app from the list and hit End Task.

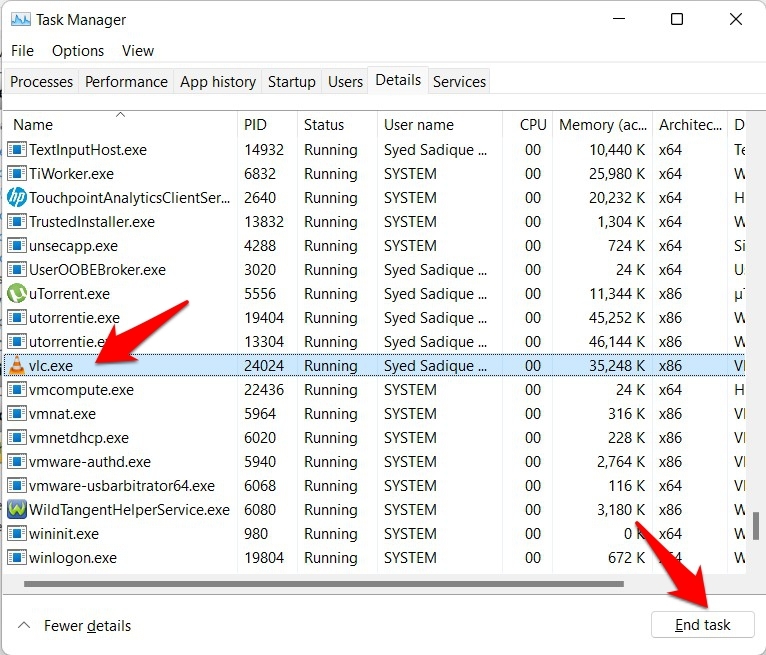
- However, if you aren’t able to find the name of the app associated with that process, then there’s an alternate way out as well.
- Just head over to the Details tab of the Task Manager, and you should now be able to directly find the process name that was displayed in the Resource Monitor.

- So select that process and click on the End Task button situated at the bottom right.
- That’s it. That app is no longer in control of your file or folder, and you may now proceed ahead and carry out the desired modifications.
So with this, we round off the guide on how you could find the file or folder currently in use in Windows 11. If you have any queries concerning the aforementioned steps, then do let us know in the comments section below.
If you've any thoughts on How to Find the File or Folder that is Currently in Use in Windows 11?, then feel free to drop in below comment box. Also, please subscribe to our DigitBin YouTube channel for videos tutorials. Cheers!
