You can preload your most commonly used apps with Superfetch, an advanced Windows feature. Service Host Superfetch speeds up your PC by loading these programs in advance. As of Windows Vista in 2007, Superfetch has been built into every version of Windows since then.
With SuperFetch, apps are preloaded based on the patterns you use to open them. In Windows 11, SuperFetch is found to consume a lot of resources, so many have considered disabling it. But, in case you don’t know how to disable the Superfetch (SysMain) in Windows 11.
What is Superfetch (SysMain) in Windows 11?
As the official description indicates, Superfetch is intended to improve and maintain the system’s performance over time, previously known as SysMain. This feature preloads apps beforehand to the memory based on the way you open apps. The Superfetch will automatically load a particular program every time you open it at a specific time.
Moreover, by using only unused memory, Superfetch will free up RAM if your computer runs out of it. Nevertheless, there have been reports that enabling Superfetch in Windows 11 causes a lot of performance issues, and some users want to disable it. You can also easily resolve this problem using the methods we have mentioned further.
Best Methods To Disable The Superfetch (SysMain) in Windows 11 PC
There are a few tricks available using which you can easily disable the Superfetch (SysMain) on your Windows 11 PC. So, let’s have a look at those methods:
Method 1: Via Command Prompt
Initially, you must try disabling this feature using the command prompt as it is the most effective method that will surely work in any condition. So, in case you don’t know how to do this, make sure to perform these steps:
- Firstly, open the cmd or power shell using admin privileges.
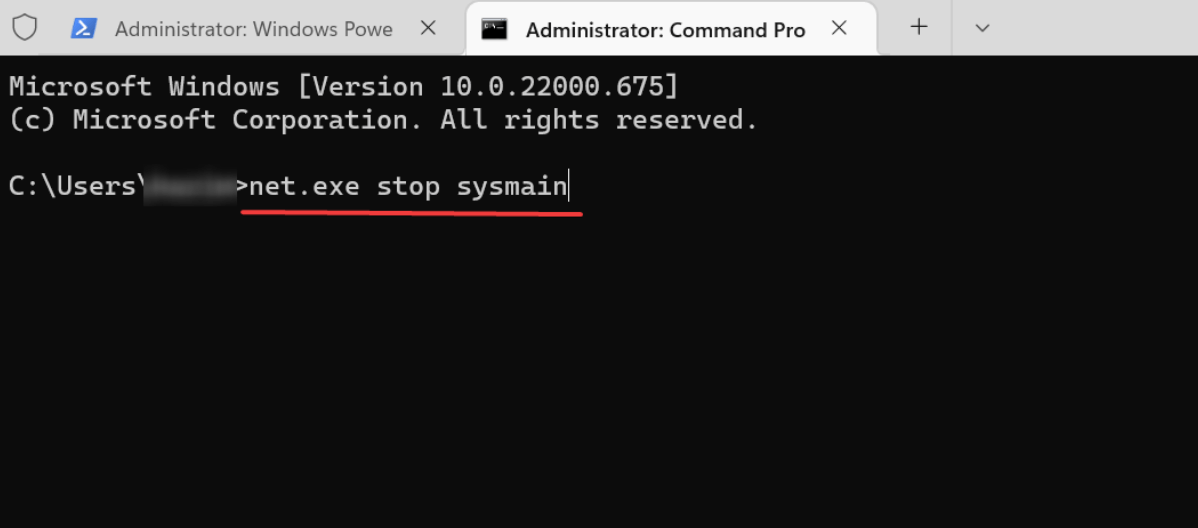
- Afterwards, execute the command:
net.exe stop sysmain
- Once done, run this command:
sc config sysmain start=disabled

That’s it. Now, wait until the process gets completed. Once done, you will find that the Superfetch (SysMain) in Windows 11 gets disabled.
Method 2: Via Services App
You can also use the Services app in order to disable Superfetch on your Windows 11 PC. So, to do this, let’s check out the steps:
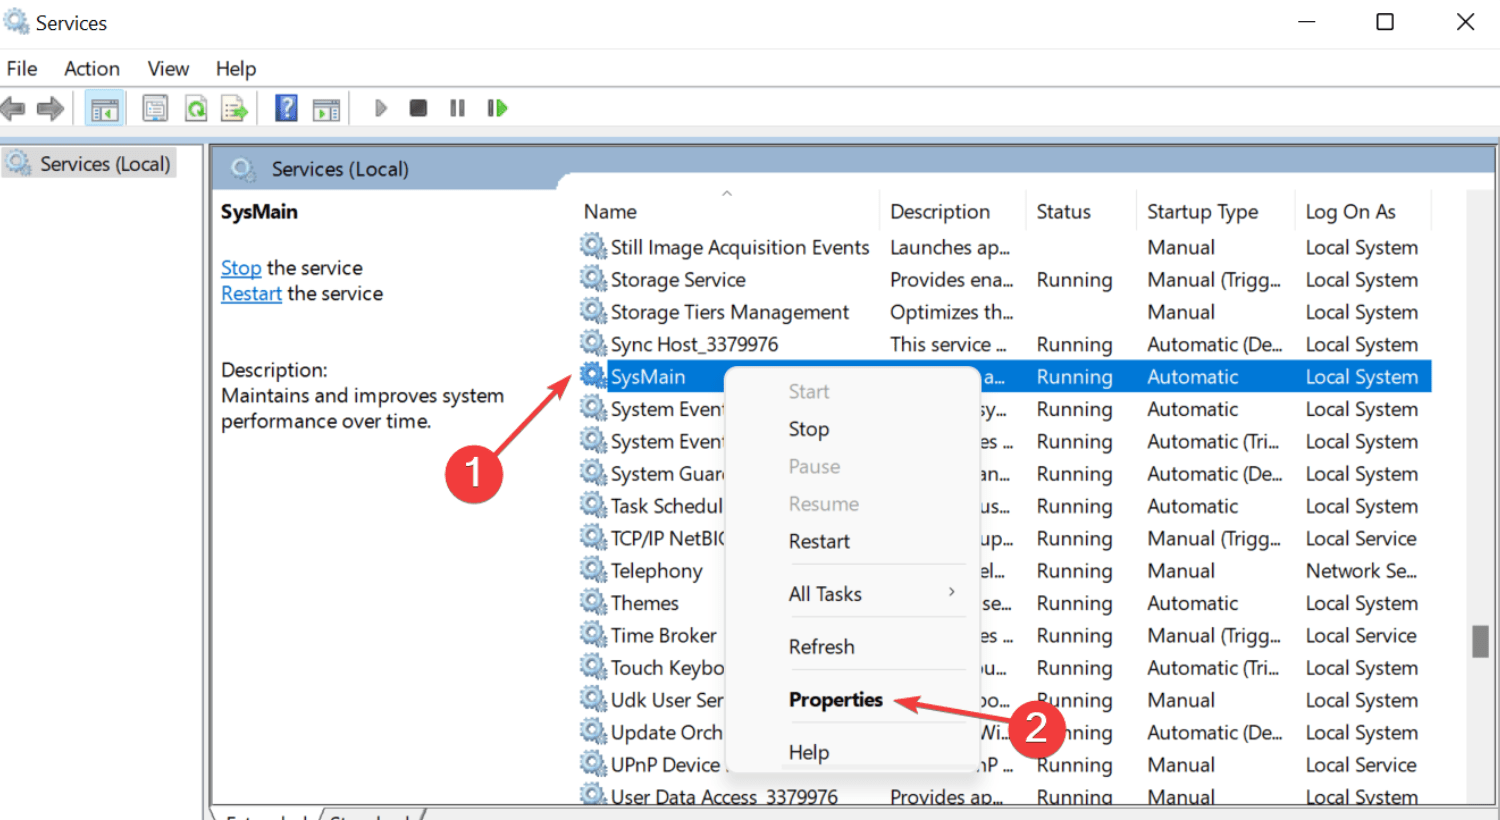
- Open the Windows search menu and search for Services.
- After that, open it and locate the SysMain from the list.
- Then, right-click on it and select the Properties option.

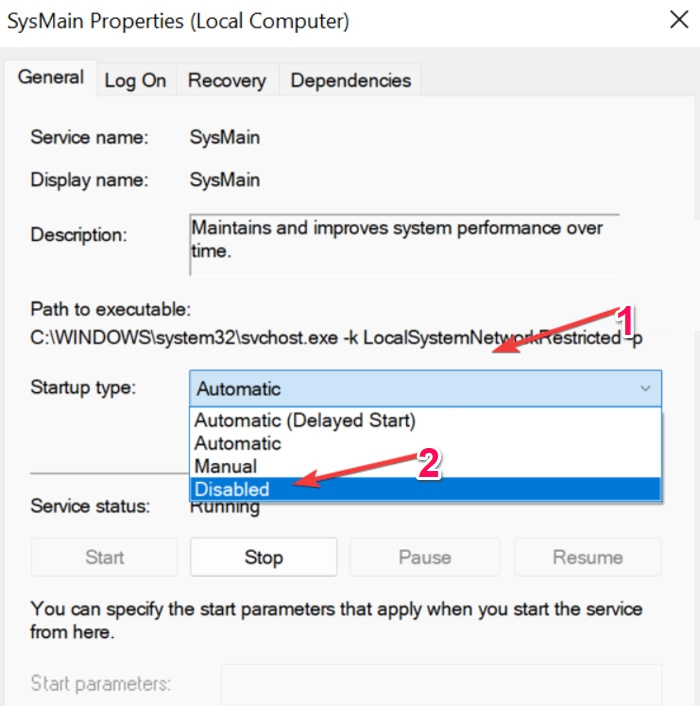
- Now, go to the General tab and click on the Startup type.
- Then, select the startup type to Disable.

- Thereafter, on the Service Status tap on the Stop button and hit the Ok.

That’s it. Now, to complete the process, you need to reboot your Windows 11 PC and check if it helps or not.
Method 3: Via Windows Registry
If you found both the methods mentioned above a bit difficult, then you must try out this one. Yes, you can turn off the SysMain on Windows 11 PC by editing the Windows registry files. So, let’s take a look at how to do this,
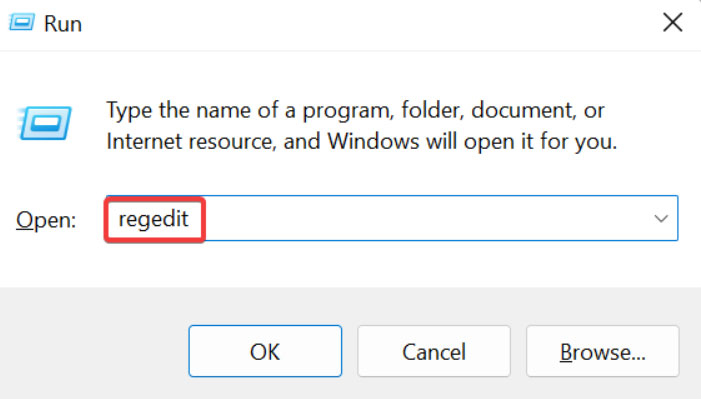
- Open the Run box and search for regedit.

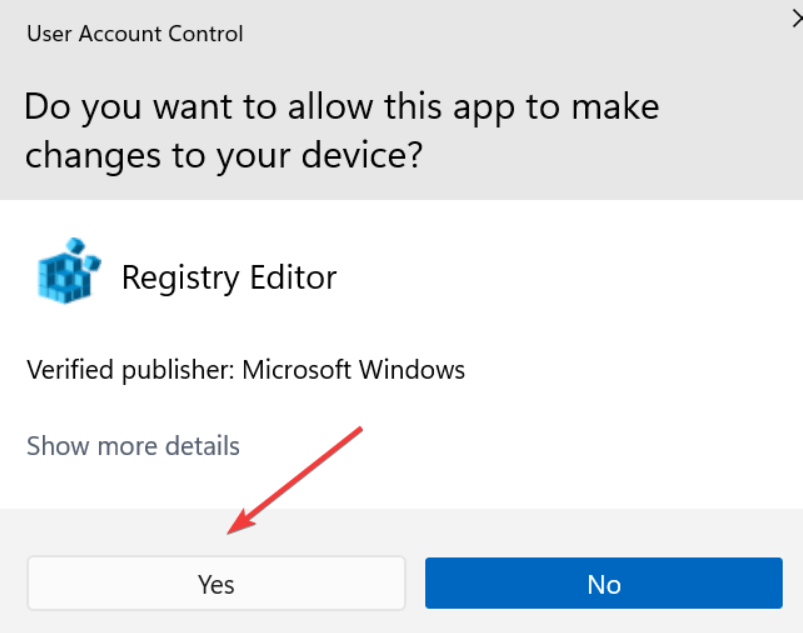
- Then, if UAC prompt window appears, tap on the Yes button.

- Now, simply paste the path into address bar:
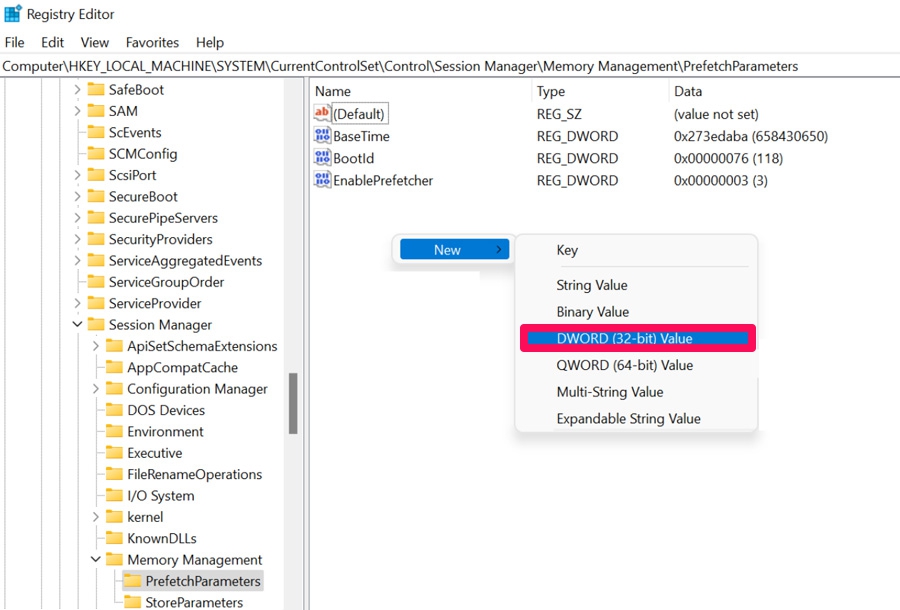
Computer\HKEY_LOCAL_MACHINE\SYSTEM\CurrentControlSet\Control\Session Manager\Memory Management\PrefetchParameters
- Thereafter, right-click on the empty space and select New > DWORD (32-bit) Value.

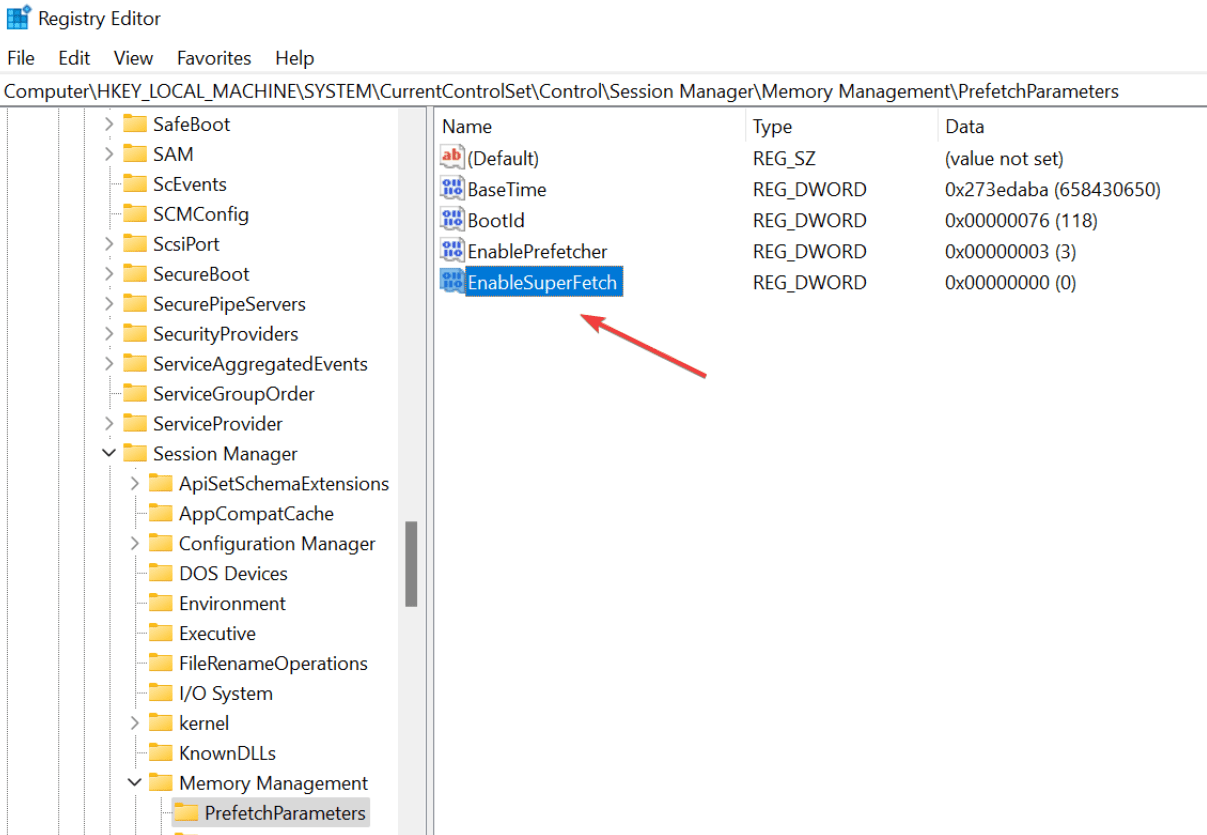
- Then, name that entry EnableSuperfetch and double-click on it.

- Now, enter o to Value Data option and hit the enter key.
If you've any thoughts on How to Disable Superfetch (SysMain) in Windows 11, then feel free to drop in below comment box. Also, please subscribe to our DigitBin YouTube channel for videos tutorials. Cheers!

