Remote Desktop is a feature in Windows 11 through which a user can access and manage a computer from a distance. Users can access their computer or another computer from a distant place using this function, making it ideal for remote work, troubleshooting, and collaboration. Some users might be concerned about the security ramifications of having remote access to their computer or network because it could potentially make them subject to hacking attempts or unauthorized access. These dangers can be reduced by disabling Remote Desktop.
So, it is preferable to disable Windows Remote Desktop if you are worried about similar issues or if you don’t usually use it to connect to your computer. This tutorial will explain the major issues with an open remote desktop connection and detail every way to disable a remote desktop on a Windows 11 computer.
How Does Windows Remote Desktop Work?
Windows Remote Desktop is a feature that allows users to access a computer remotely from a different location. It functions by turning on Remote Desktop on the computer you wish to connect to and then establishing a connection to it using the Remote Desktop client on a different computer. When you have successfully authenticated, you can access the remote computer’s desktop and operate it just like you were in front of it. Both the local and remote computers must have an active internet connection for Remote Desktop to function, and you may need to adjust your firewall and network settings to permit connections.
Why Should Remote Desktop Be Disabled?
Unless there is a specific reason, it is generally not advised to disable Remote Desktop on Windows 11. Users can access a computer remotely using the useful feature known as “Remote Desktop,” which is useful for both remote work and computer troubleshooting. However, if security is a concern for you for several reasons, disabling Remote Desktop on Windows 11 can be a good policy.
Prevent Unauthorized access
Anyone with the proper login information for the computer can access it remotely if Remote Desktop is enabled. If an attacker gets hold of these details, they might be able to view confidential data or carry out malicious operations on the computer. This kind of illegal access can be avoided by disabling Remote Desktop.
Protect yourself from Remote Attacks
Remote Desktop is a popular target for hackers who try to take advantage of holes in the service to access a computer. You can avoid the success of these assaults by turning off Remote Desktop.
Reduce the Attack on Surface
By blocking a potential access point for hackers, disabling Remote Desktop can reduce the attack surface of a computer. The computer may become less vulnerable to hacking as a result.
Restrict Lateral Movement
If a hacker acquires access to a computer via Remote Desktop, they may use that access to move laterally across the network to other systems. This type of lateral movement can be restricted, as well as any possible threats, by disabling Remote Desktop.
Therefore, even though Remote Desktop can be a helpful tool for remote access, turning it off when not in use can help to increase computer security and lower the chance of infiltration or attacks.
Top Ways to Disable Remote Desktop on Windows PC
By following these methods, you can easily disable remote desktops in Windows 11.
1. Using the Control Panel
Using the Control Panel, you can disable Remote Desktop on Windows 11. This is how:
- Launch the Control Panel by typing “Control Panel” in the search bar and clicking on the app.

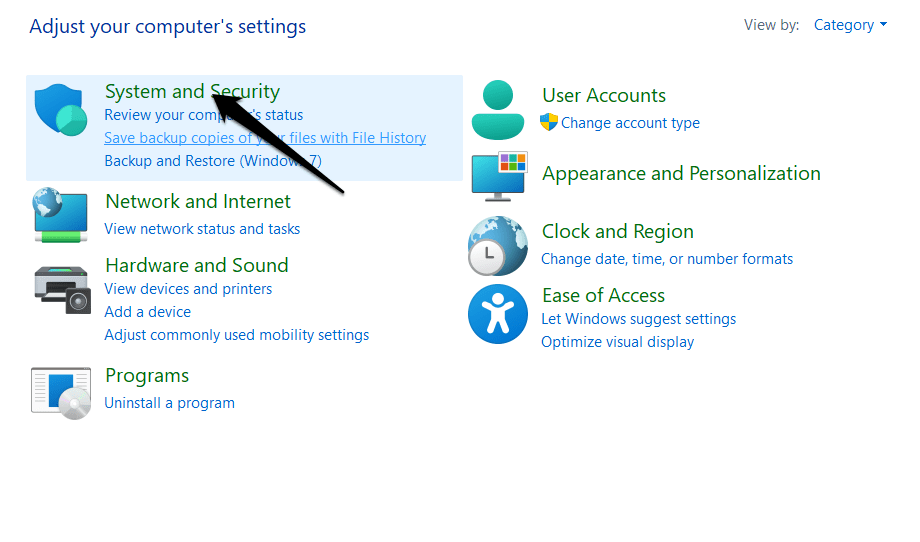
- Now, click on the “System and Security” option.

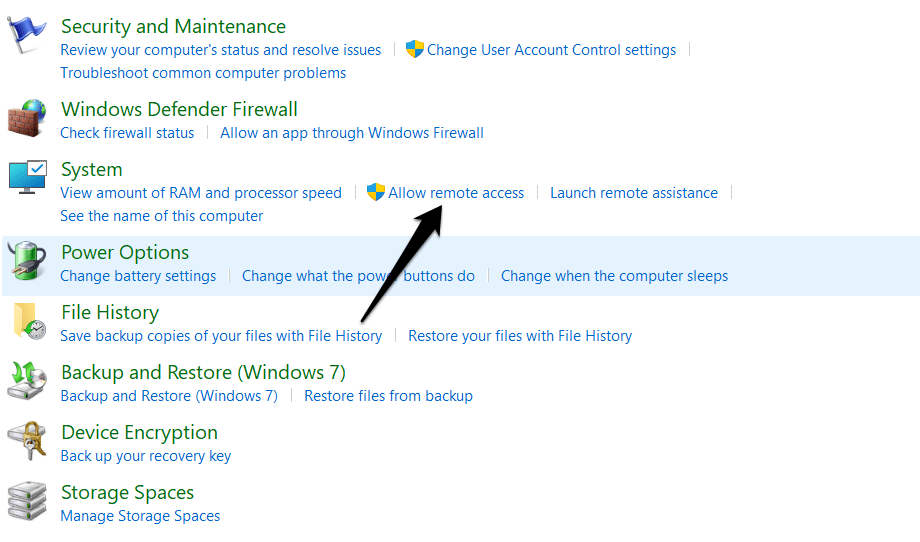
- Under the “System” section, Click on “Allow remote access“.

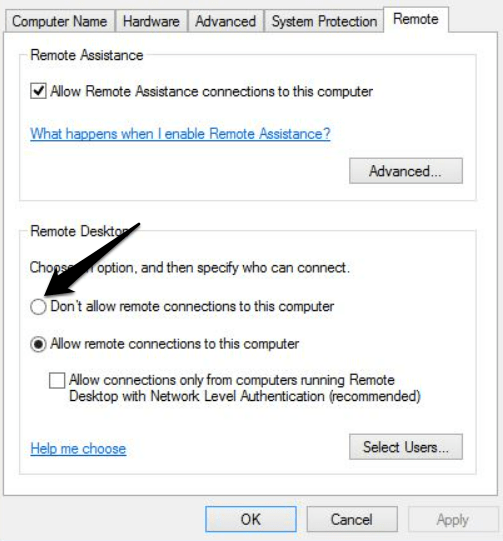
- In the “Remote” tab of the System Properties window that appears, choose the “Don’t allow remote connections to this computer” option.

- Click on “Apply” and then click “OK” to save the changes.
Your Windows 11 PC will now be deactivated for Remote Desktop. Simply return to the “Remote” page and choose the relevant option to enable it again.
2. Using the Settings App
Using the Settings app, you can also turn off Remote Desktop on Windows 11. Here’s how:
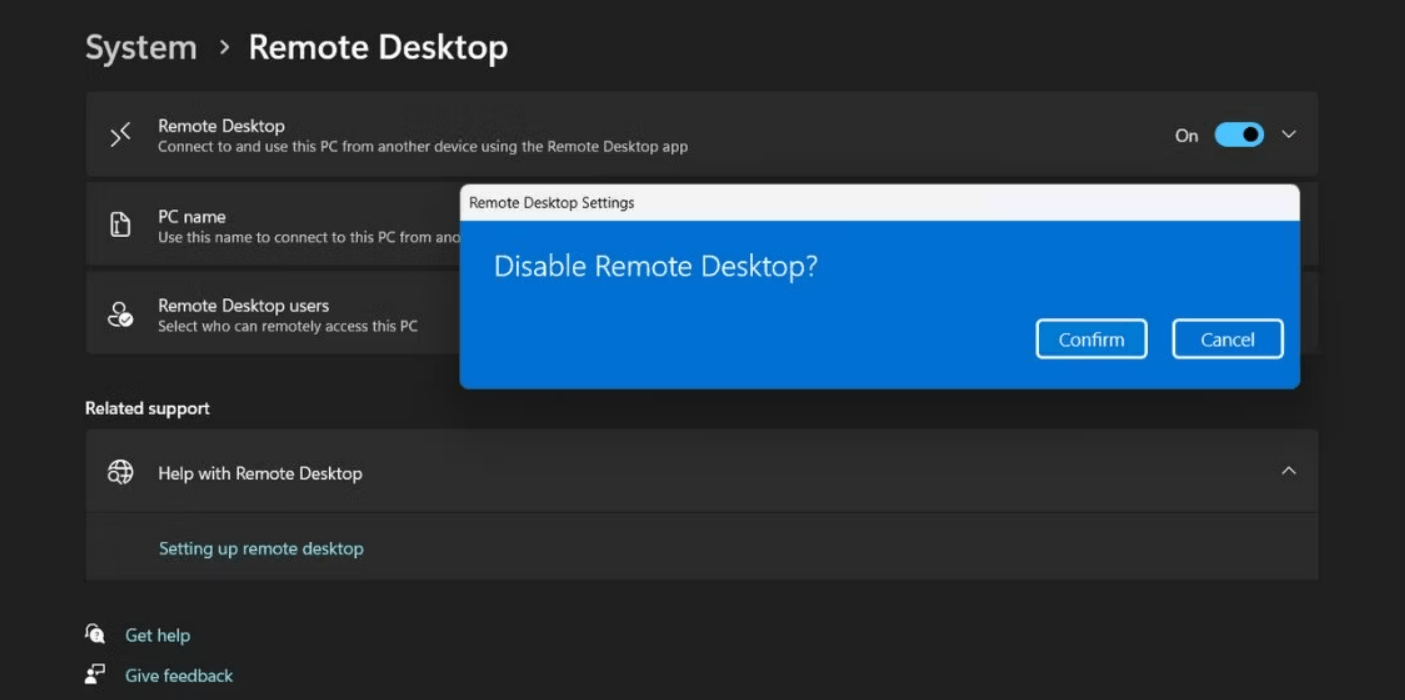
- Launch the Settings app by clicking on the Start menu and then clicking on the gear icon, or by pressing the Windows key + I.
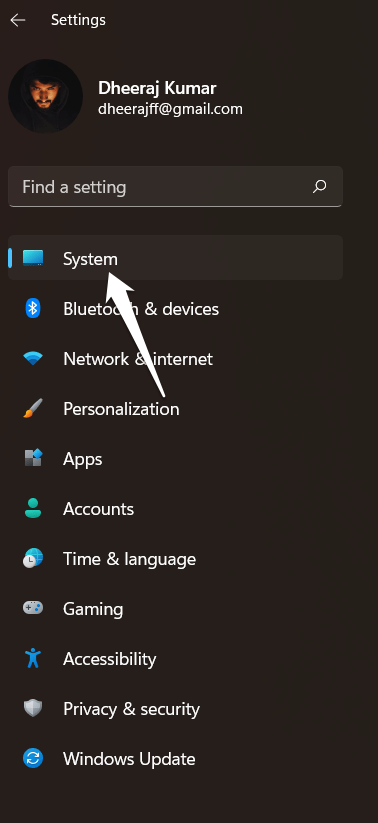
- Click on the “System” options.

- In the left pane, choose “Remote Desktop.”
- In the “Remote Desktop” section, toggle off the switch for “Enable Remote Desktop.”

Your Windows 11 PC will now be deactivated for Remote Desktop. Simply repeat the process and turn on the “Enable remote desktop” option to enable it once more in the future.
3. Using the Registry Editor
To turn off the Remote Desktop functionality on your PC, you can manually create a registry key. Making changes to the registry is dangerous, so you should always make a backup of it before proceeding. If something goes wrong, you may always import the backup and restore your system.
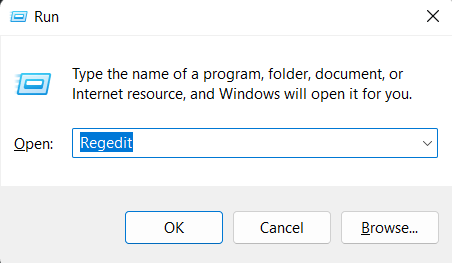
- To open the Run command window, press Win + R.
- To start the utility, enter Regedit into the text input field and hit Enter.

- Then, paste the following path into the address bar at the top of the Registry Editor window and press the enter key: SYSTEMCurrentControlSetControlTerminal Server in HKEY LOCAL MACHINE
- Find the fDenyTSConnections DWORD value once you are in the Terminal Server key. If it is missing, right-click and choose Create > DWORD (32-bit) Value.
- Without capitalizing it, give the newly formed key the name “fDenyTSConnections.”
- Double-click the fDenyTSConnections DWORD value and set the Value Data to 1.
- Keep the base hexadecimal.

- Finally, press the OK button to close the registry editor.
- Restart your computer to make the changes take effect.
On your Windows 11 PC, Remote Desktop will now be disabled. Using the same procedures and setting the value data back to 0, you can activate it once more in the future.
4. Using the Command Prompt
You can disable Remote Desktop without opening the Control Panel or the settings app by using the Command Prompt. This is how you can do it:
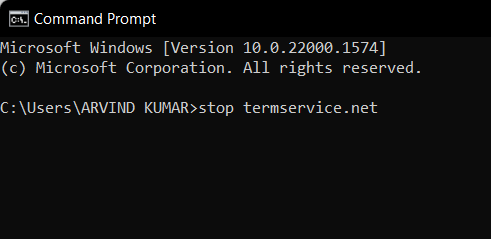
- To open the Command Prompt, type “cmd” in the search bar, and then click “Command Prompt” or “Run as Administrator” to open it with administrator rights.

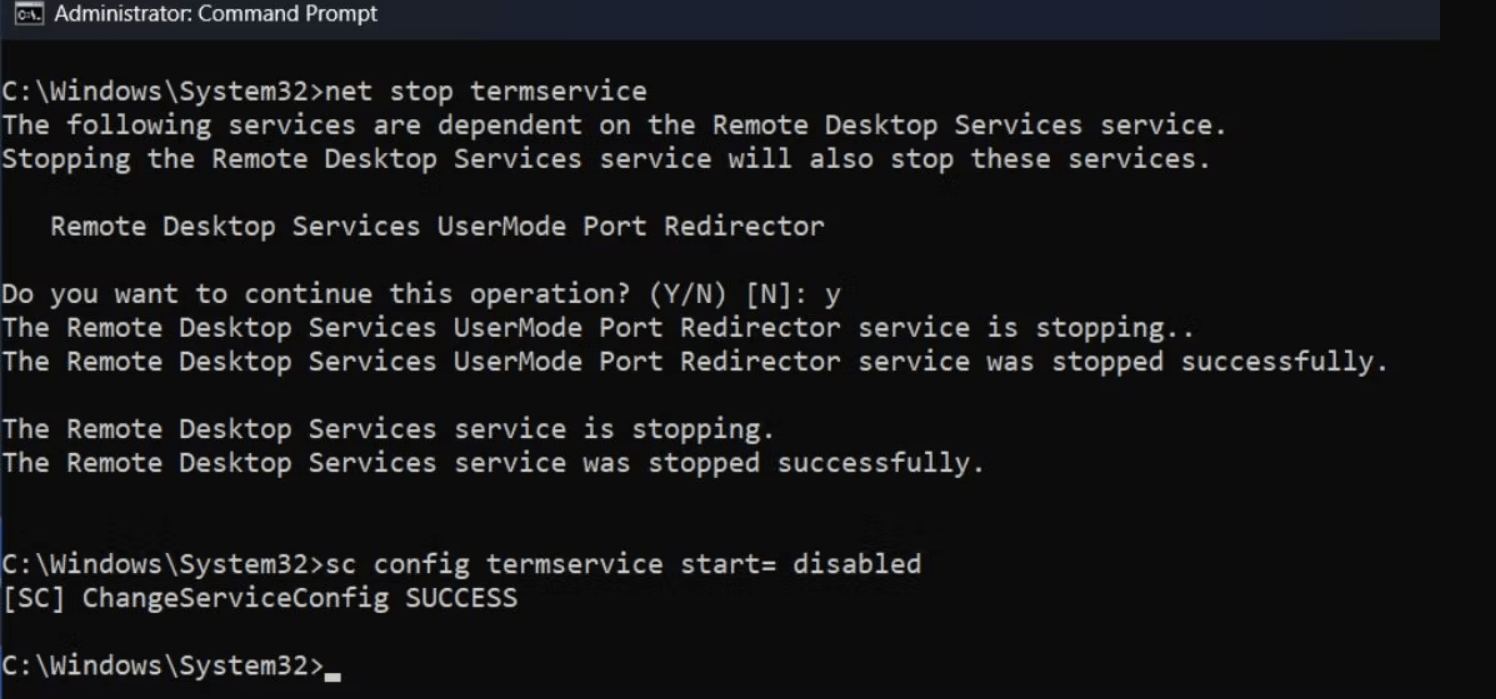
- Enter the following command into the Command Prompt window and press the Enter key: stop termservice.net.

- Enter Y to stop Remote Desktop and its associated services.
- Then, type the command sc config termservice start=disabled and press the enter key.

- When the command has been executed successfully, type exit to close the Command Prompt window.
5. Using a Batch File
On Windows 11, you can disable Remote Desktop by creating a batch file. Here’s how it’s done:
- To access the desktop, press Win + D.
- Select New > Text Document from the shortcut menu on the Desktop.
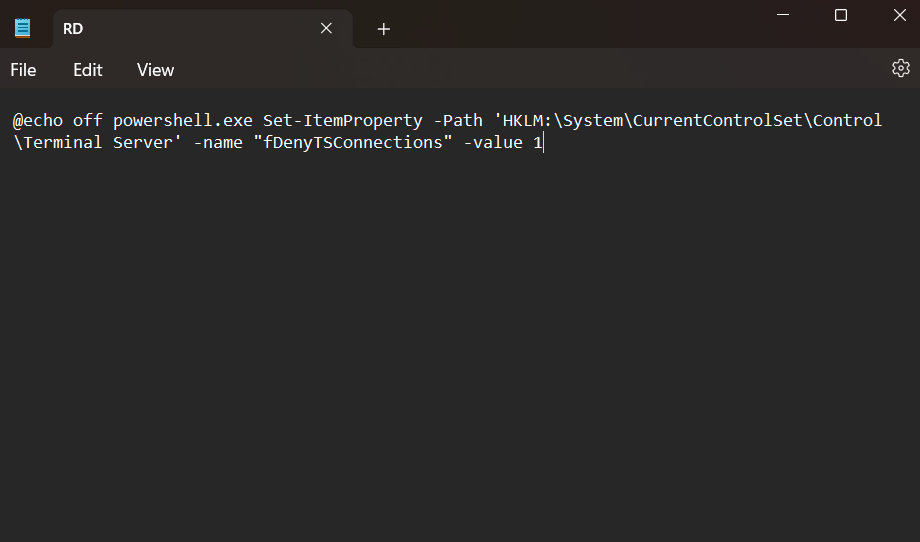
- Copy and paste the following code snippet into n empty text file:
@echo off powershell.exe Set-ItemProperty -Path 'HKLM:\System\CurrentControlSet\Control\Terminal Server' -name "fDenyTSConnections" -value 1

- Press Ctrl + Shift + S to open the Save as option.
- Keep the File Type set to All Files and name the file RD.bat. Now press the Save button.
- To return to the desktop, press Win + D and right-click on the RD.bat file. From the context menu, select Run as administrator.
- The batch file will launch PowerShell, run the disable command, and then exit. You are not required to intervene.
6. Using Windows Firewall
Remote Desktop can be blocked from the list of allowed apps in the Windows Firewall. Here’s how it’s done:
- To open the Run dialogue box, press the Windows key + R.
- To open the Windows Firewall, type “control firewall.cpl” and press Enter.

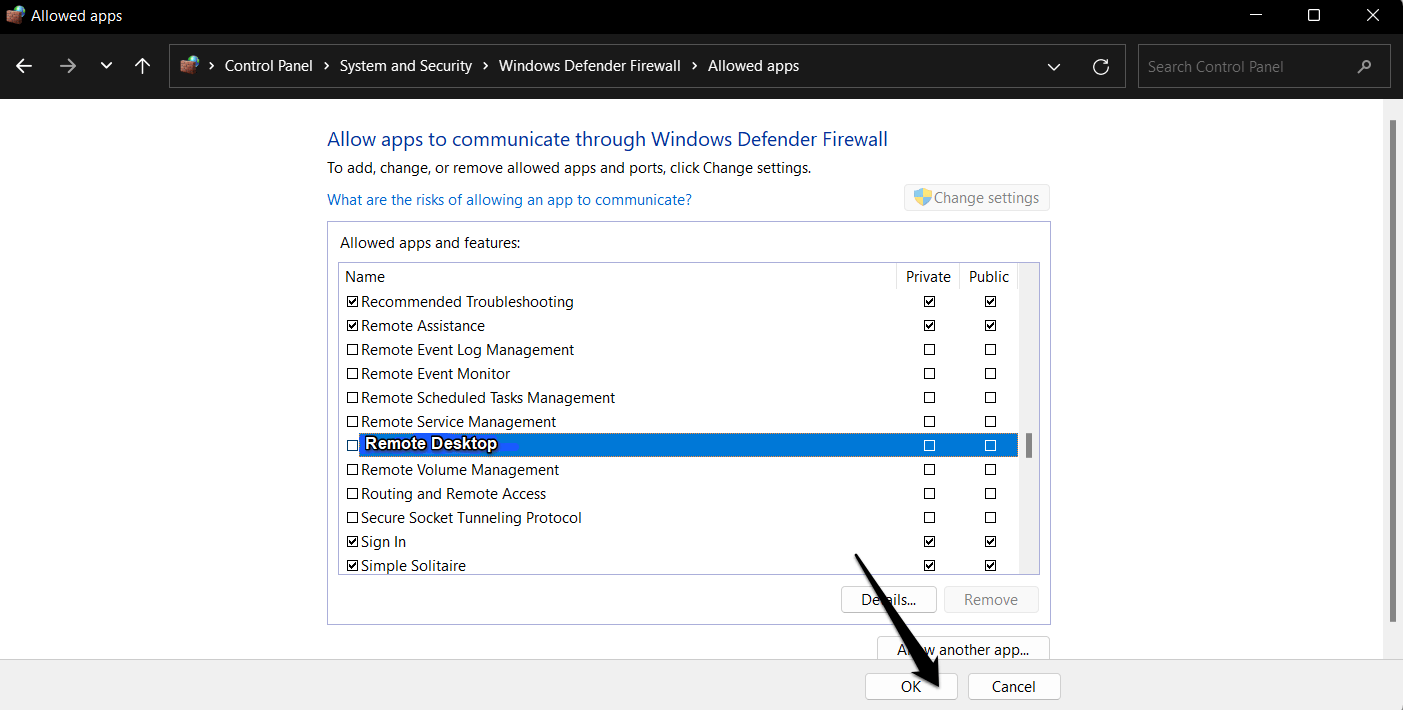
- On the left, select “Allow an app or feature through Windows Defender Firewall“.

- Click the “Change settings” button.
- Scroll down to “Remote Desktop” and uncheck the box next to it.

- To save the changes, click the “OK” button.
The Windows Firewall will now block Remote Desktop connections. Return to the same settings and check the box next to “Remote Desktop” if you want to allow Remote Desktop connections again in the future.
Note: This method only blocks Remote Desktop connections via the Windows Firewall and does not disable the Remote Desktop feature itself.
Conclusion
There are multiple ways to disable Remote Desktop in Windows 11. To disable Remote Desktop, use System Properties, the Settings app, Registry Editor, Command Prompt, or create a batch file. Disabling Remote Desktop can be helpful if you want to enhance the safety of your computer or protect others from remotely accessing it. If you need to use Remote Desktop again, simply repeat the process. To prevent incoming connections, you can also block Remote Desktop from the list of allowed apps in the Windows Firewall. Overall, it’s critical to be aware of the various methods for disabling Remote Desktop on Windows 11 and to select the one that best suits your needs.
We hope the guidelines in the section of this article termed “6 Ways to Disable Remote Desktop on Windows 11” were effective. We sincerely hope that this guide assists you in settling your problem. If you have any questions or suggestions, please leave them in the comments section below.
If you've any thoughts on How to Disable Remote Desktop on Windows 11?, then feel free to drop in below comment box. Also, please subscribe to our DigitBin YouTube channel for videos tutorials. Cheers!


