Hypervisor is a program to create hardware virtualization. It is popularly referred to as Hyper-V. During its early days, it was known as Windows Server Virtualization. Hyper-V creates virtual machines on a computer. Microsoft’s native virtualization product is available for Windows Pro, Enterprise, and Education Editions.
Using a virtual machine you can deploy and test other operating systems apart from the real one running on the PC. Now, not everyone uses the Hyper-V on their computers. Several users report regarding the slow performance of their PCs due to keeping the hypervisor enabled. If you are not testing an operating system using Hyper-V, you should turn off the feature on your machine.
Different Methods to Turn off Hyper-V on Windows PC
There are several ways to disable the hypervisor virtualization system on a Windows computer.
1. Turn off Hyper-V from the Control Panel
Access the Control Panel Programs and Features to disable Hyper-V on your PC.
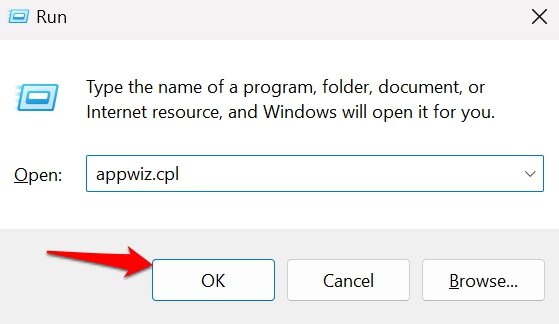
- Press Windows + R hotkeys to launch the Run box.
- Type appwiz.cpl and press enter to plan on the Programs and Features section of the Control panel.
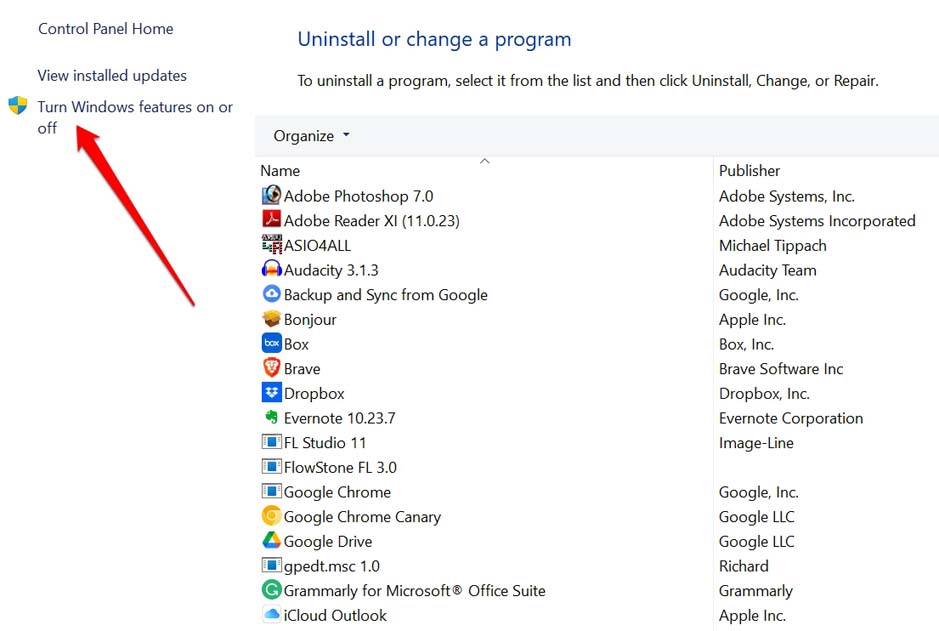
- Click on Turn Windows Features On or Off on the upper left-hand side.
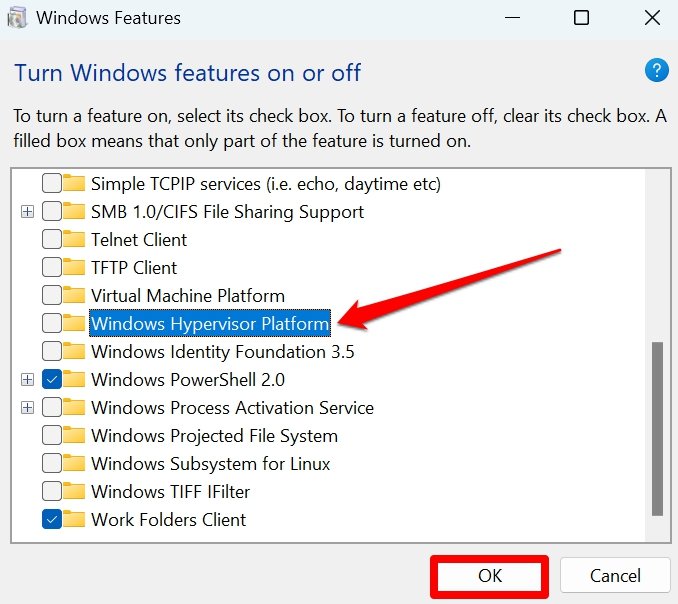
- Clear the Checkbox next to Windows Hypervisor Platform.
- Click the OK button.
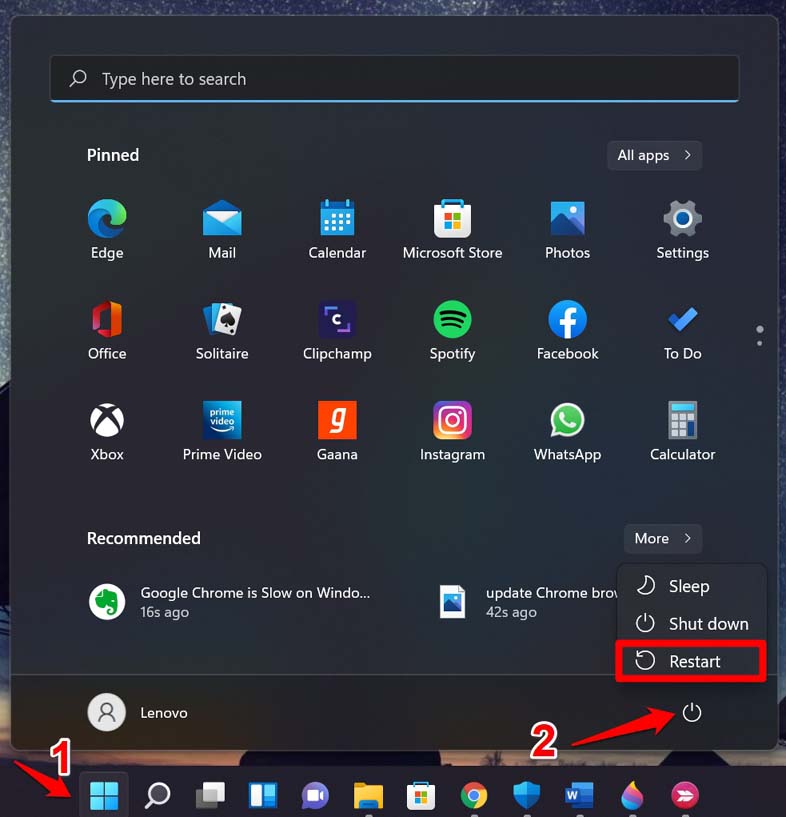
- Restart the computer.
2. Use DISM Command to Disable Hypervisor
Launch the Command Prompt to issue a DISM command and disable Hyper-V. Here are the steps for you.
- Press Windows + R to open the Run box.
- Type cmd and press enter.
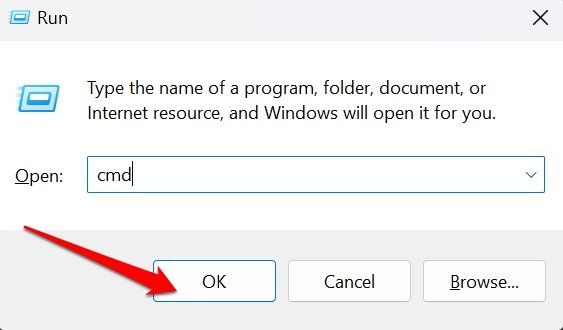
- Now, type the following command
dism /online /disable-feature /featurename:Microsoft-hyper-v-all
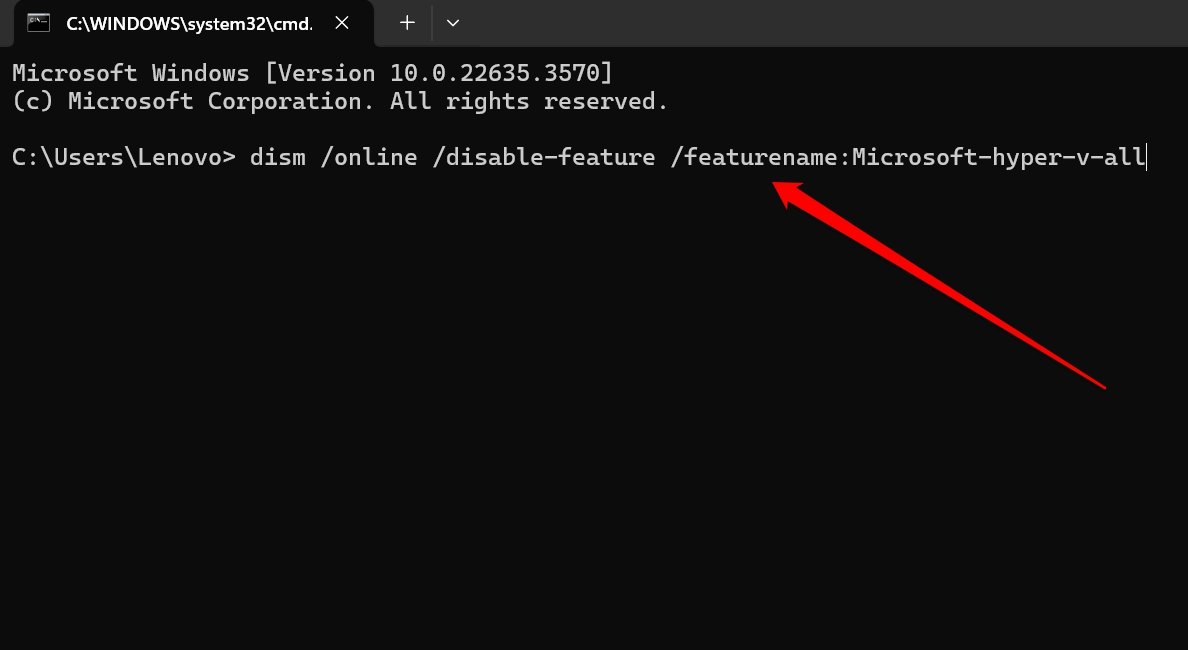
- Press the Enter key to execute the command.
- Exit the Command Prompt and restart the PC.
NOTE: To use the DISM command-line tool, connect your computer to the internet.
3. Deactivate Hypervisor Using Command Prompt
Apart from using DISM, you can issue the BCDEdit command on the Command Prompt to turn off Hypervisor.
- Press Windows + S to launch the search console.
- Type cmd and click Open when the relevant search result appears.
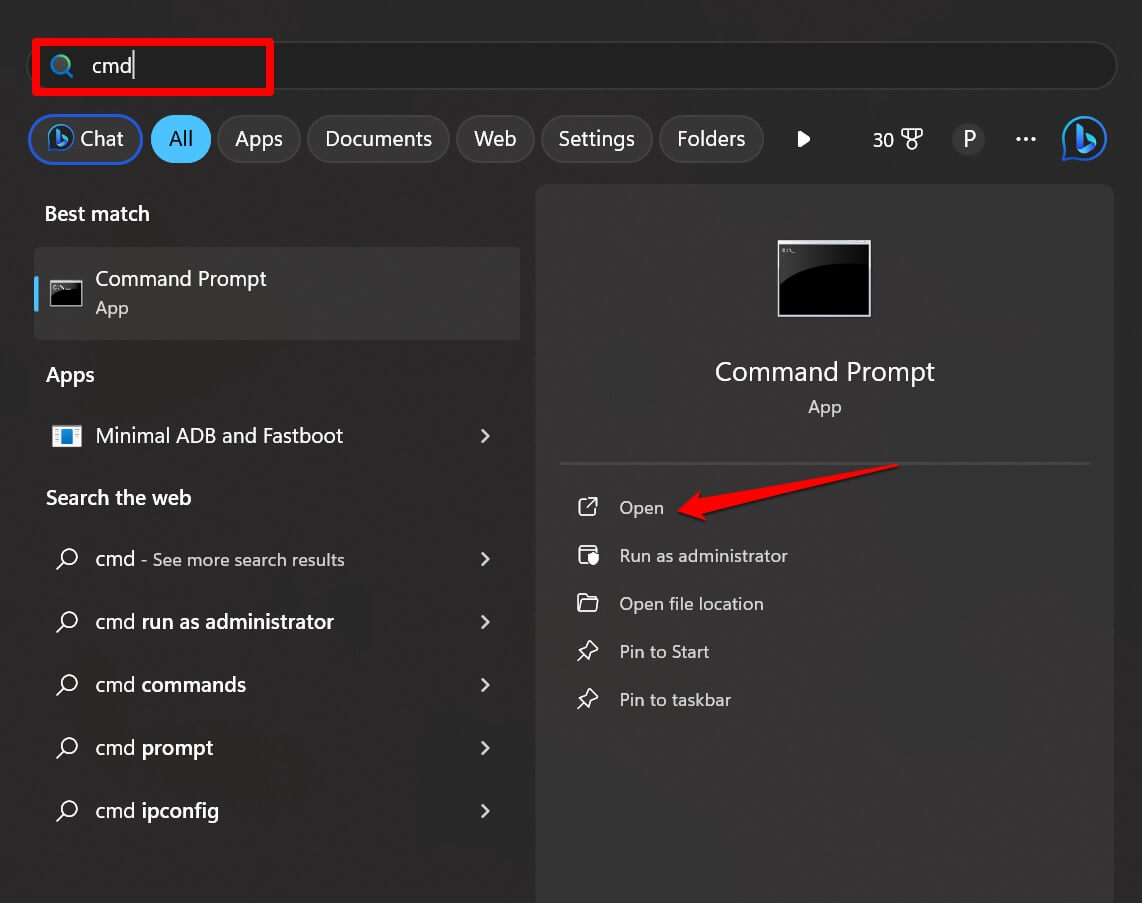
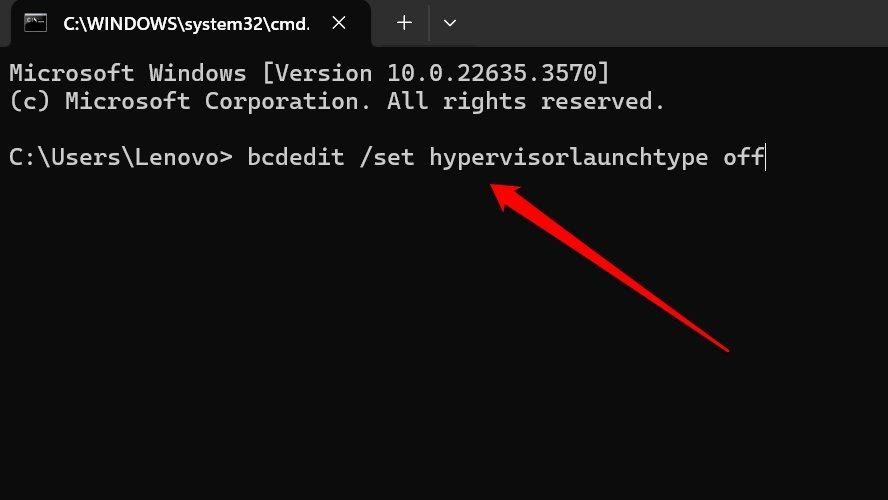
- Type this command and press the Enter key to execute.
bcdedit /set hypervisorlaunchtype off
- Close the Command Prompt.
- Restart the computer to allow changes to take effect.

4. Disable Hyper-V on Windows 11 Using PowerShell Command
If you cannot use the Command Prompt, access the PowerShell tool to run a command and turn off the Hypervisor on Windows 11.
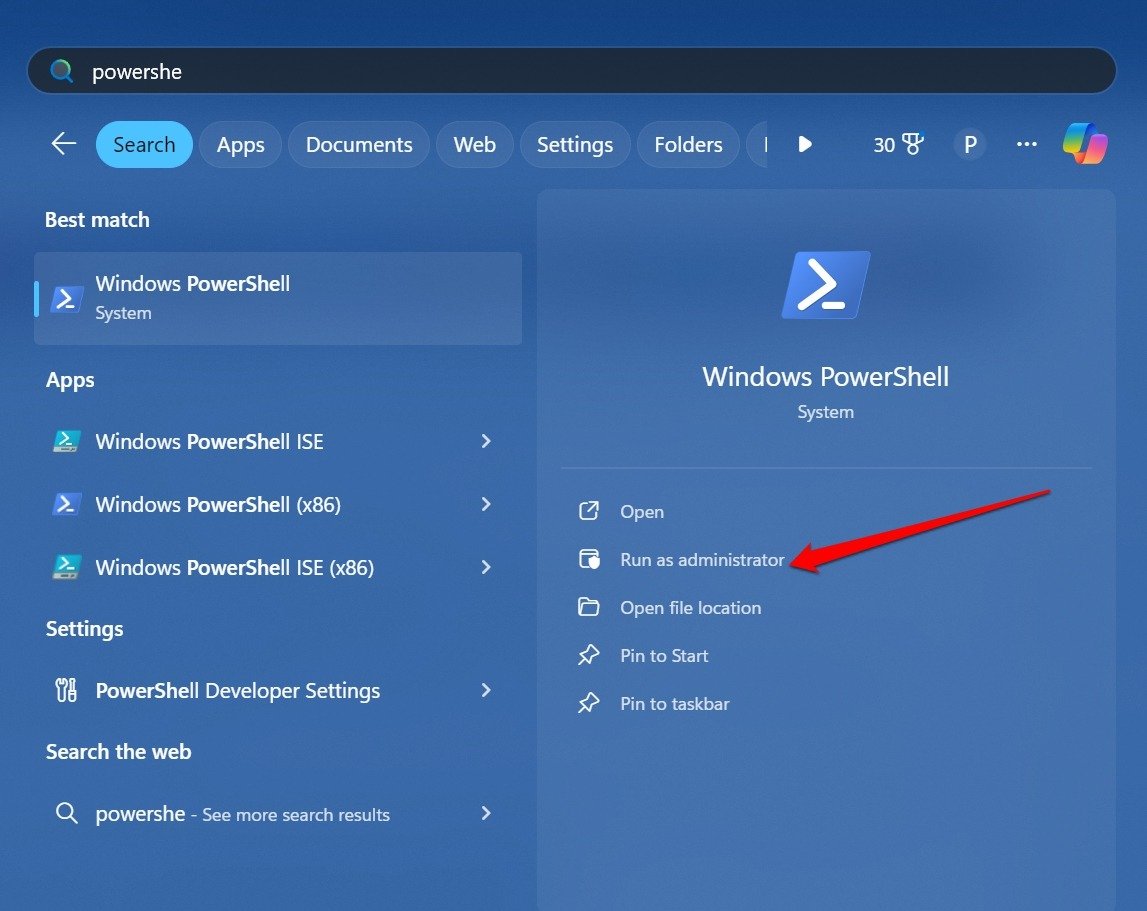
- Press the Windows key to bring up the search.
- Type PowerShell.
- When the search result appears, click on Run As Administrator.
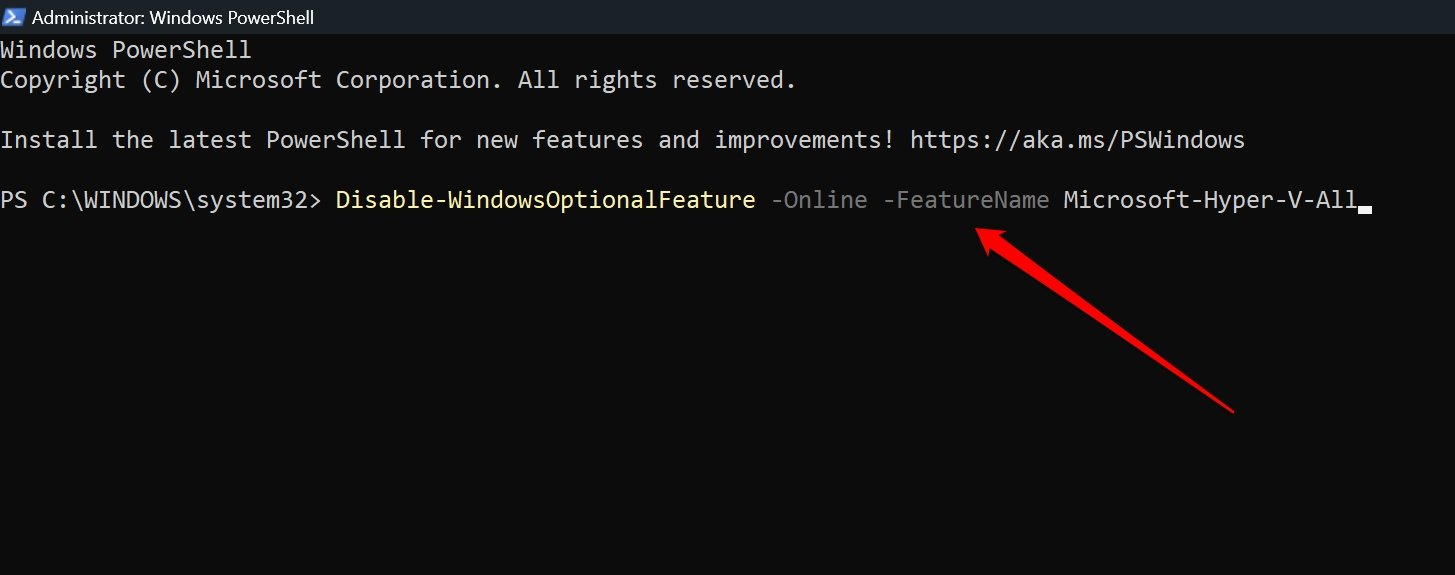
- On the screen, type the following command.
Disable-WindowsOptionalFeature -Online -FeatureName Microsoft-Hyper-V-All
- Press the Enter key.
- When the prompt asks to restart the PC after executing the command, comply by pressing Y.
Frequently Asked Questions(FAQs)
Does Turning off Hyper-V Affect the Computer in any way?
NO. If you are not using Hypervisor to test virtual systems, turning it off will improve your PC’s performance. It can carry out other tasks swiftly and efficiently.
Which Windows OS Editions Support Hyper-V?
Hypervisor is available on Windows Enterprise, Professional, and Education Edition. It is not available on Windows Home Edition.
Is it Necessary to Turn on Hypervisor to Use Windows?
NO. Hyper-V is an optional feature on Windows 11. It is used for creating, deploying, and testing virtual machines. Apart from that, other apps or programs on the system do not depend on Hyper-V to function.
Bottom Line
Hypervisor is a great tool to run and test virtual operating systems on Windows PCs. However, if you use your Windows computer for basic use, consider turning off Hyper-V on it.
To improve the performance and efficiency of managing other important tasks, you can turn off Hyper-V on Windows 11 using the methods described in the guide.
If you've any thoughts on How to Disable Hyper-V in Windows 11, then feel free to drop in below comment box. Also, please subscribe to our DigitBin YouTube channel for videos tutorials. Cheers!
