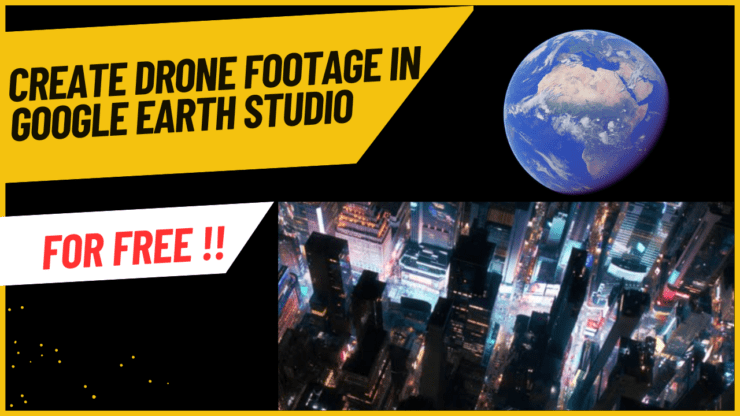
Do you want to add some clips of catchy drone footage of a location in your video content? You can easily get drone shots without using a drone.
This guide explains the steps to use Google Earth Studio to generate free drone footage for Instagram reels, YouTube Shorts, or full-length videos.
Drones are quite expensive and everyone may not have access to one. Also, you need sufficient technical knowledge to fly a drone and monitor the shots on the go.
While there is an option of obtaining stock drone footage available on the internet, you have to pay a hefty sum to obtain the copyright or purchase the video. Again, not everyone can follow this route.
This is where Google Earth Studio comes to your rescue. It is a tool from Google that allows you to animate and render geospatial data from around the planet to create visual footage for still images and video content.
How to Sign Up for Google Earth Studio?
If you are using Google Earth Studio for the first time, you have to submit a sign-up form. Here are the steps you have to follow.
Note that, Google Earth Studio is only supported on Google Chrome browser as of now. Ensure Chrome is updated to the latest version before working on Earth Studio.
- Launch Chrome browser on your PC.
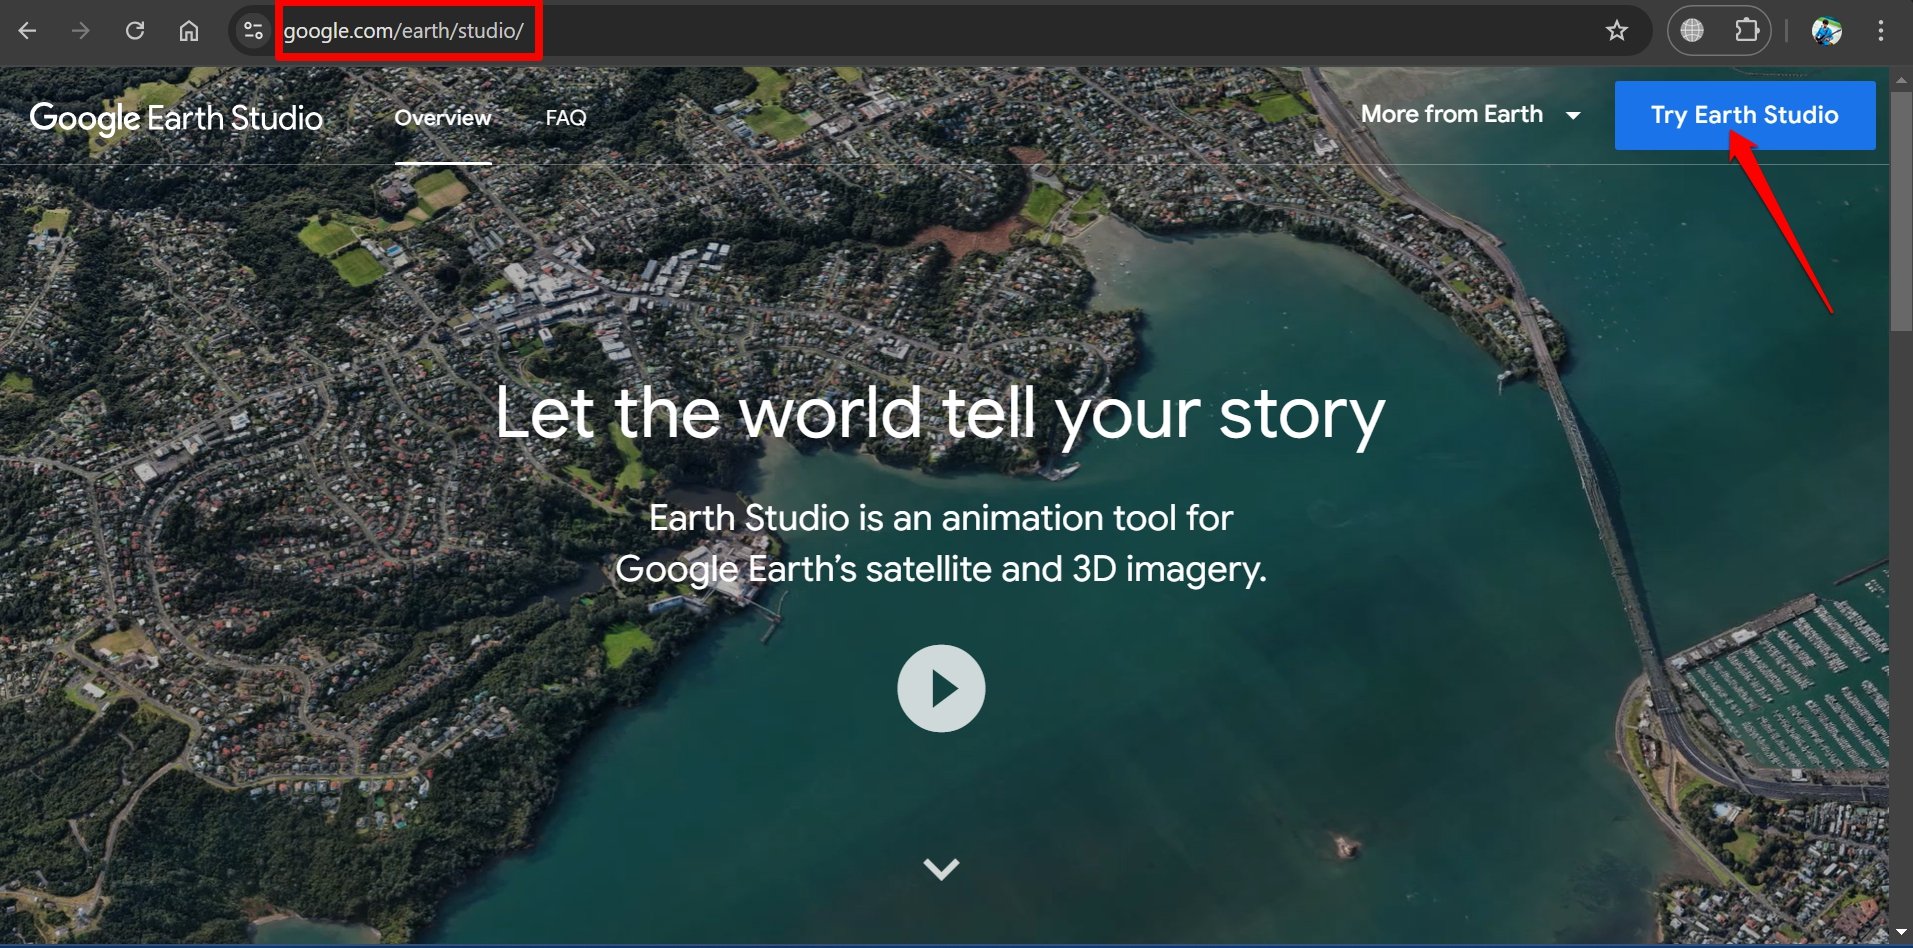
- In the address bar type Google.com/earth/studio.
- Click on Try Earth Studio.
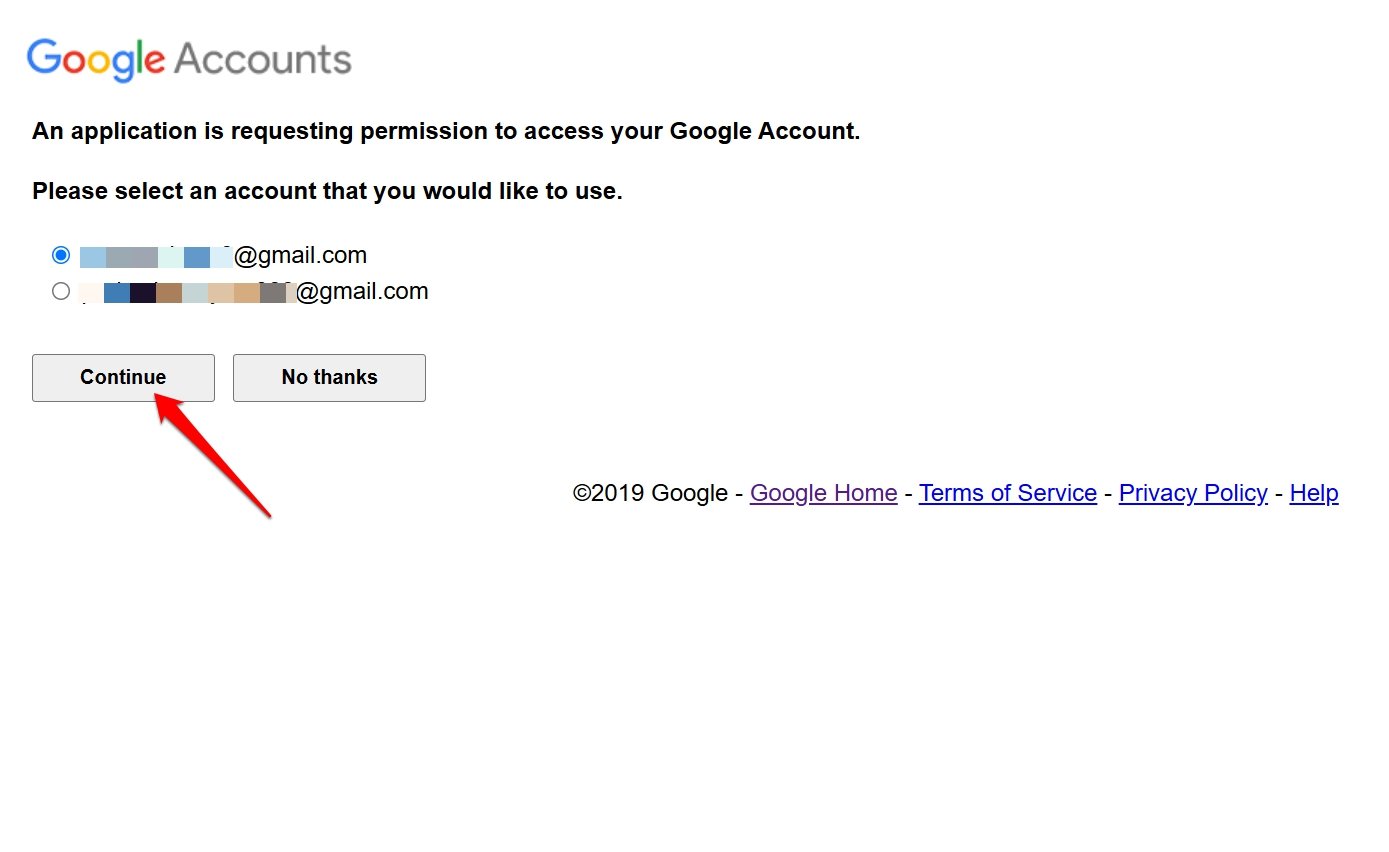
- Select the Gmail account to sign up for Earth Studio.
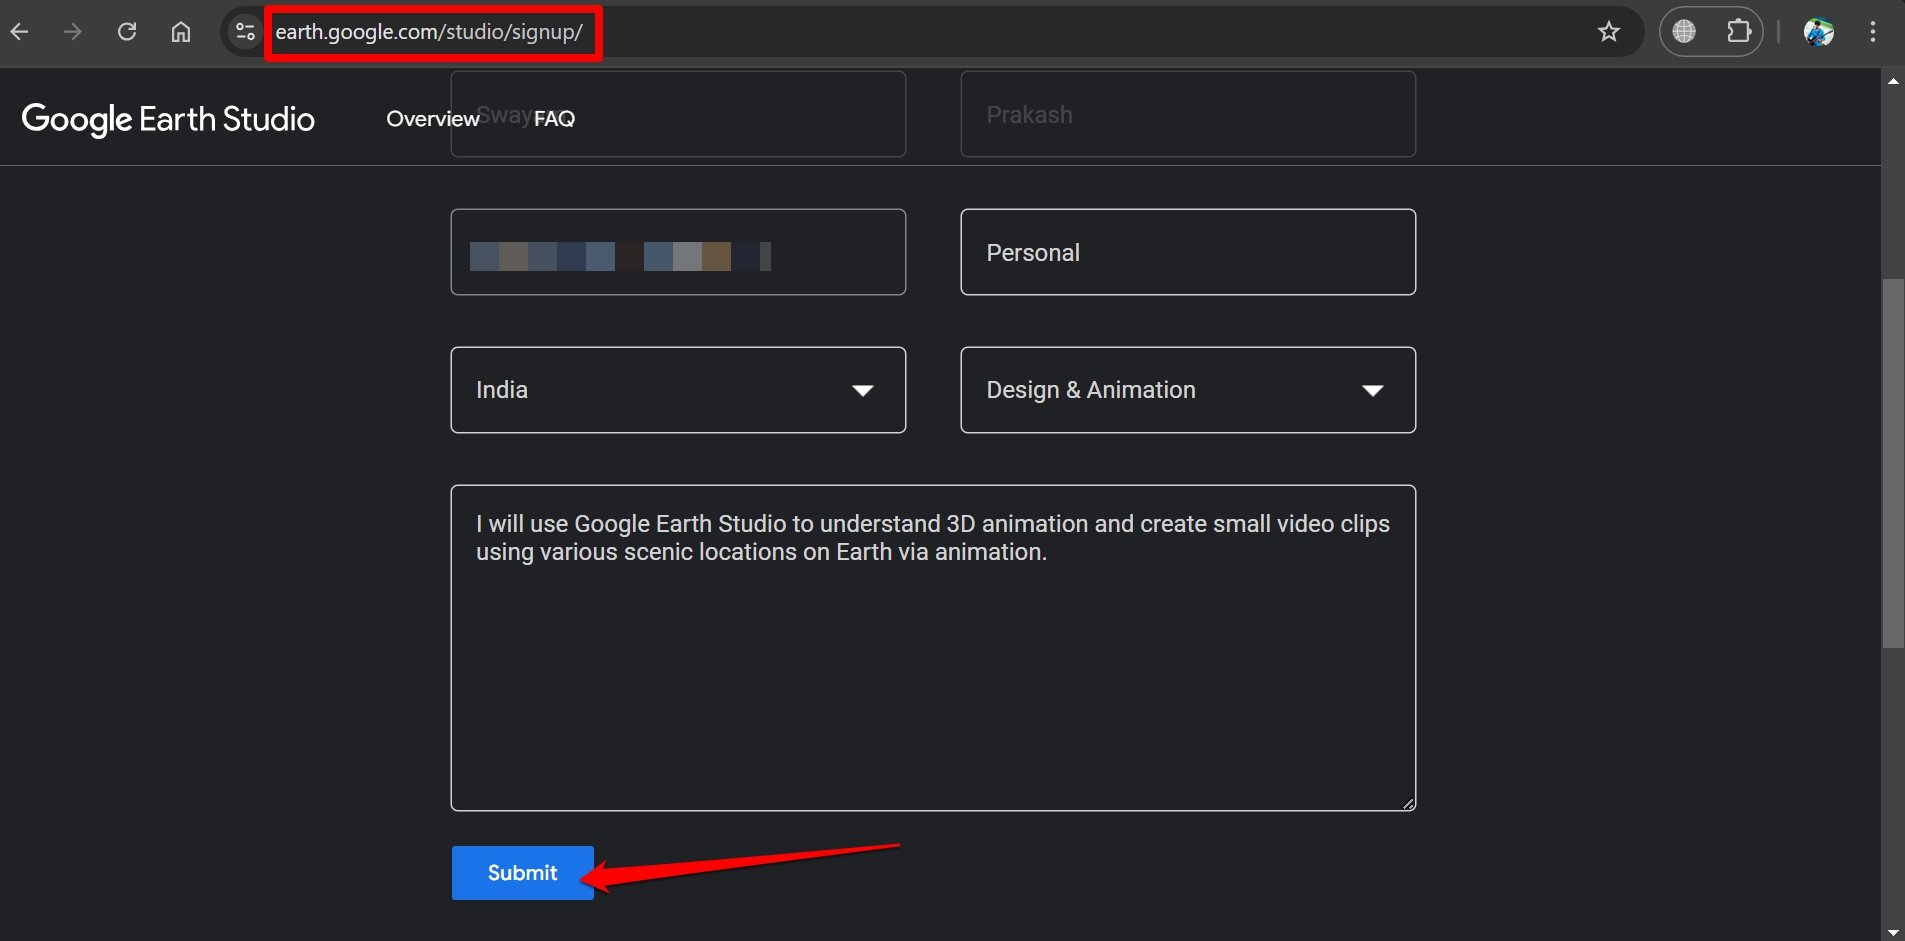
- Fill up the form on the next page and press Submit.
Almost instantly you will see the approval message that now allows you to use the Google Earth Studio. Click the link to get redirected to the Google Earth Studio dashboard.
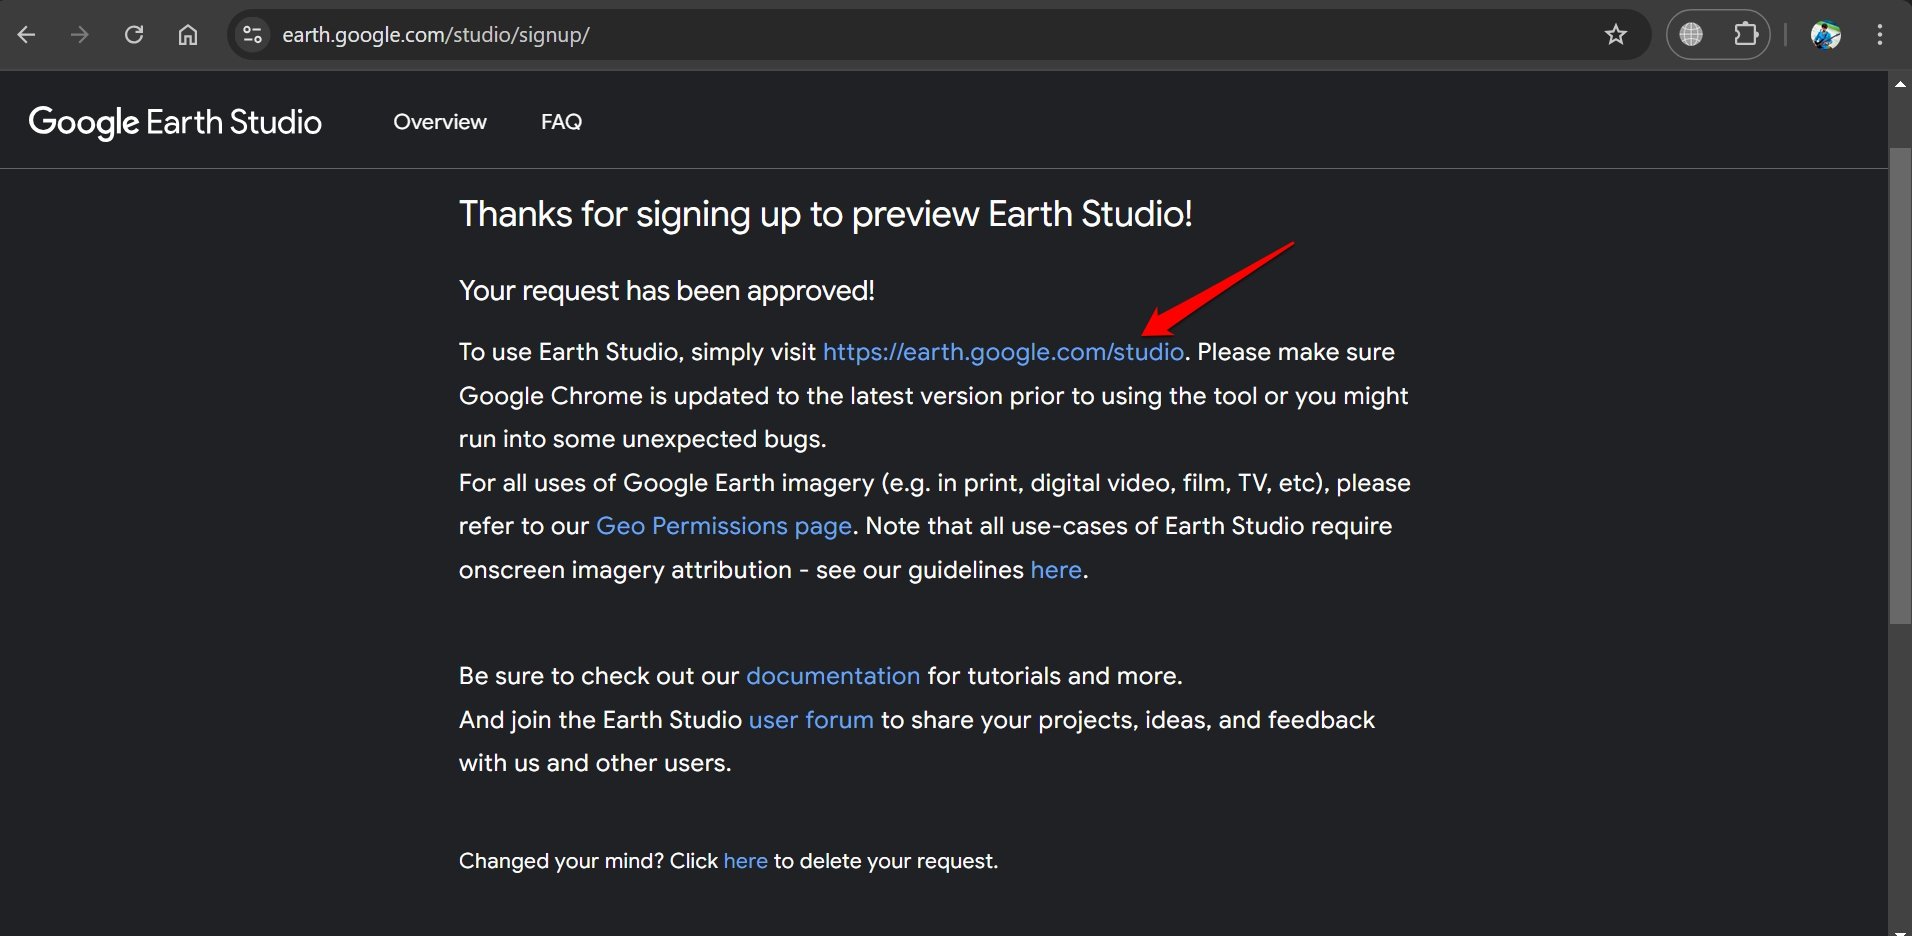
Sometimes, it may take close to 24 hours to get approved to start using the Earth Studio.
In your Gmail inbox, you will also receive a Welcome to Google Earth Studio email.
How to Use Google Earth Studio Drone Presets?
If you don’t want to get into technical details to create drone footage from scratch and want to generate drone shots instantly, use the presets or project templates available in the dashboard.
- Go to the Google Earth Studio dashboard.
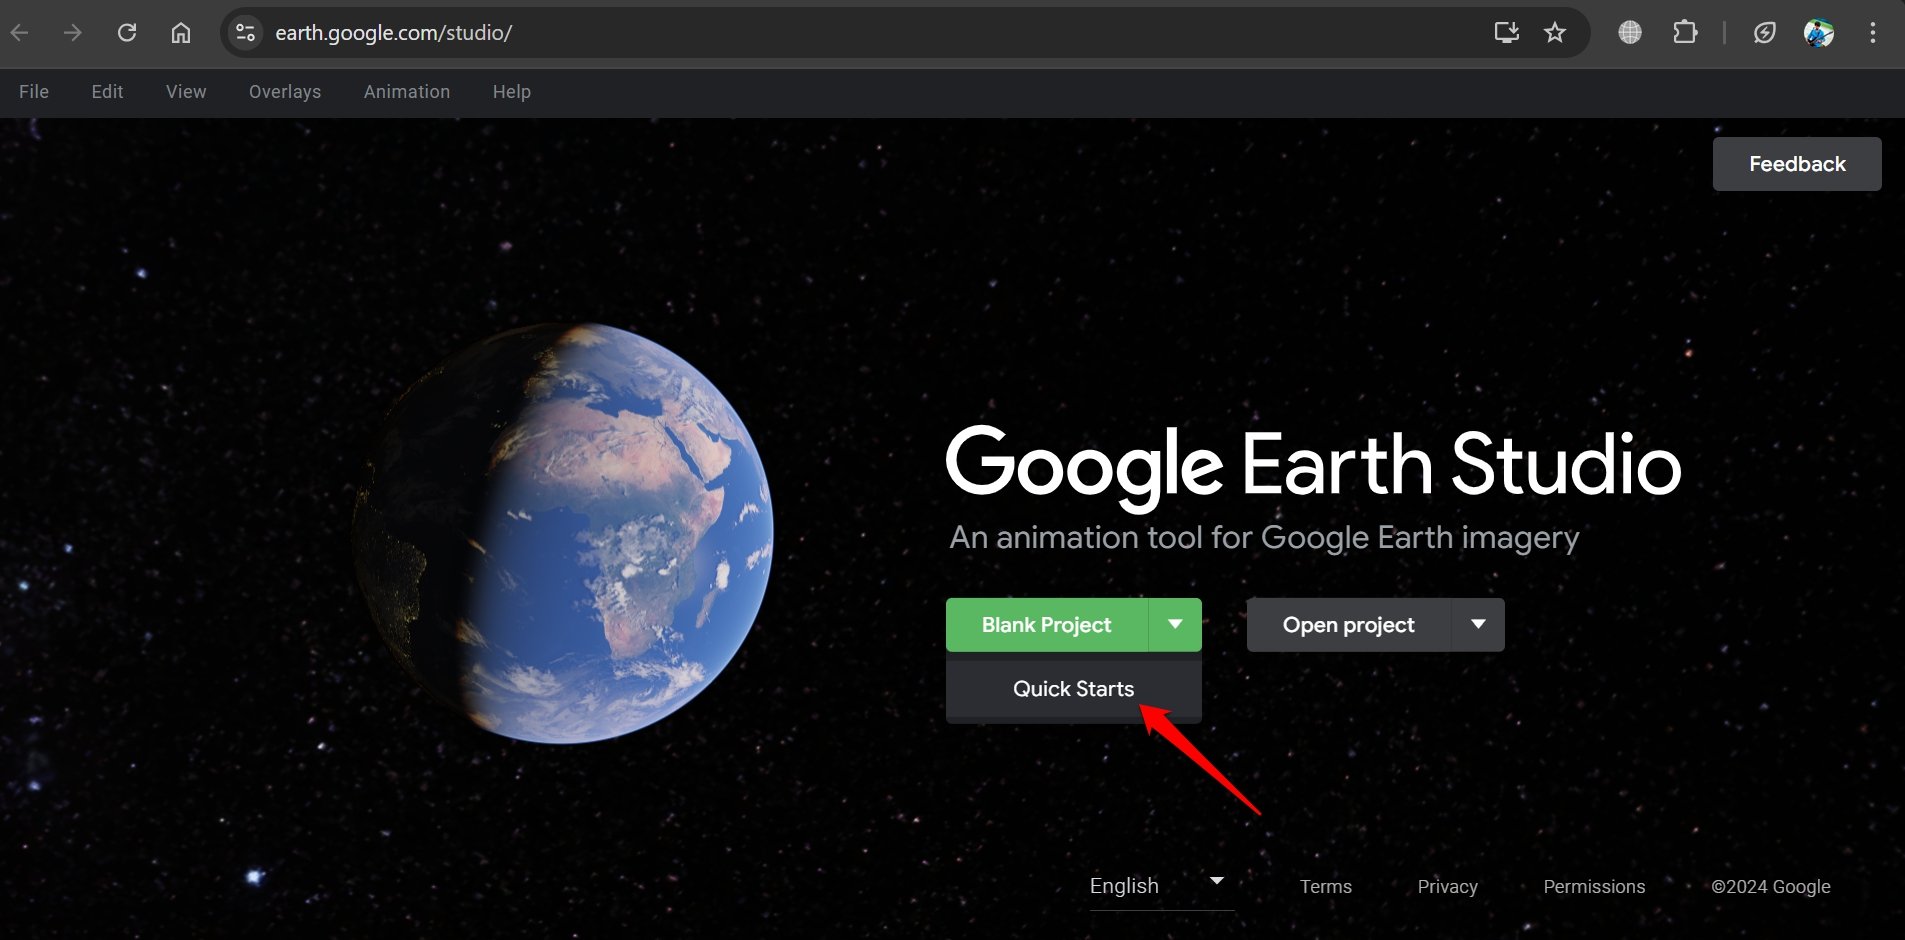
- Click the arrow icon on the green button and choose Quick Starts.
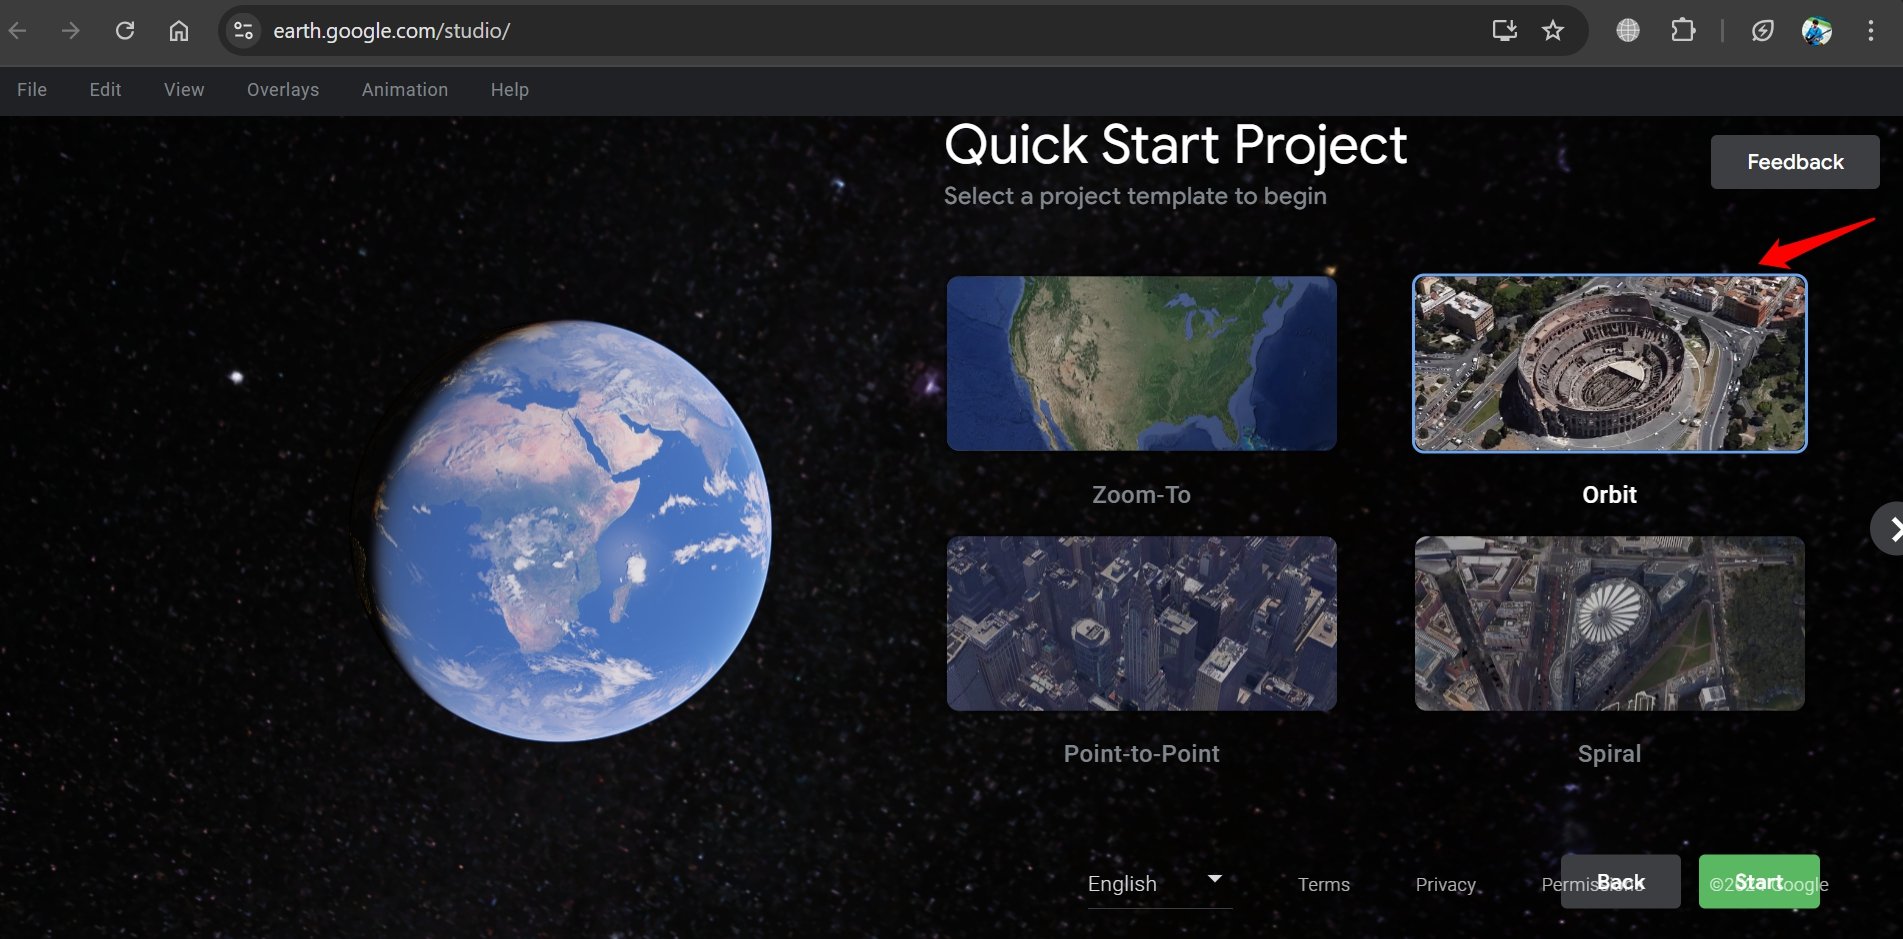
- Select a project template.
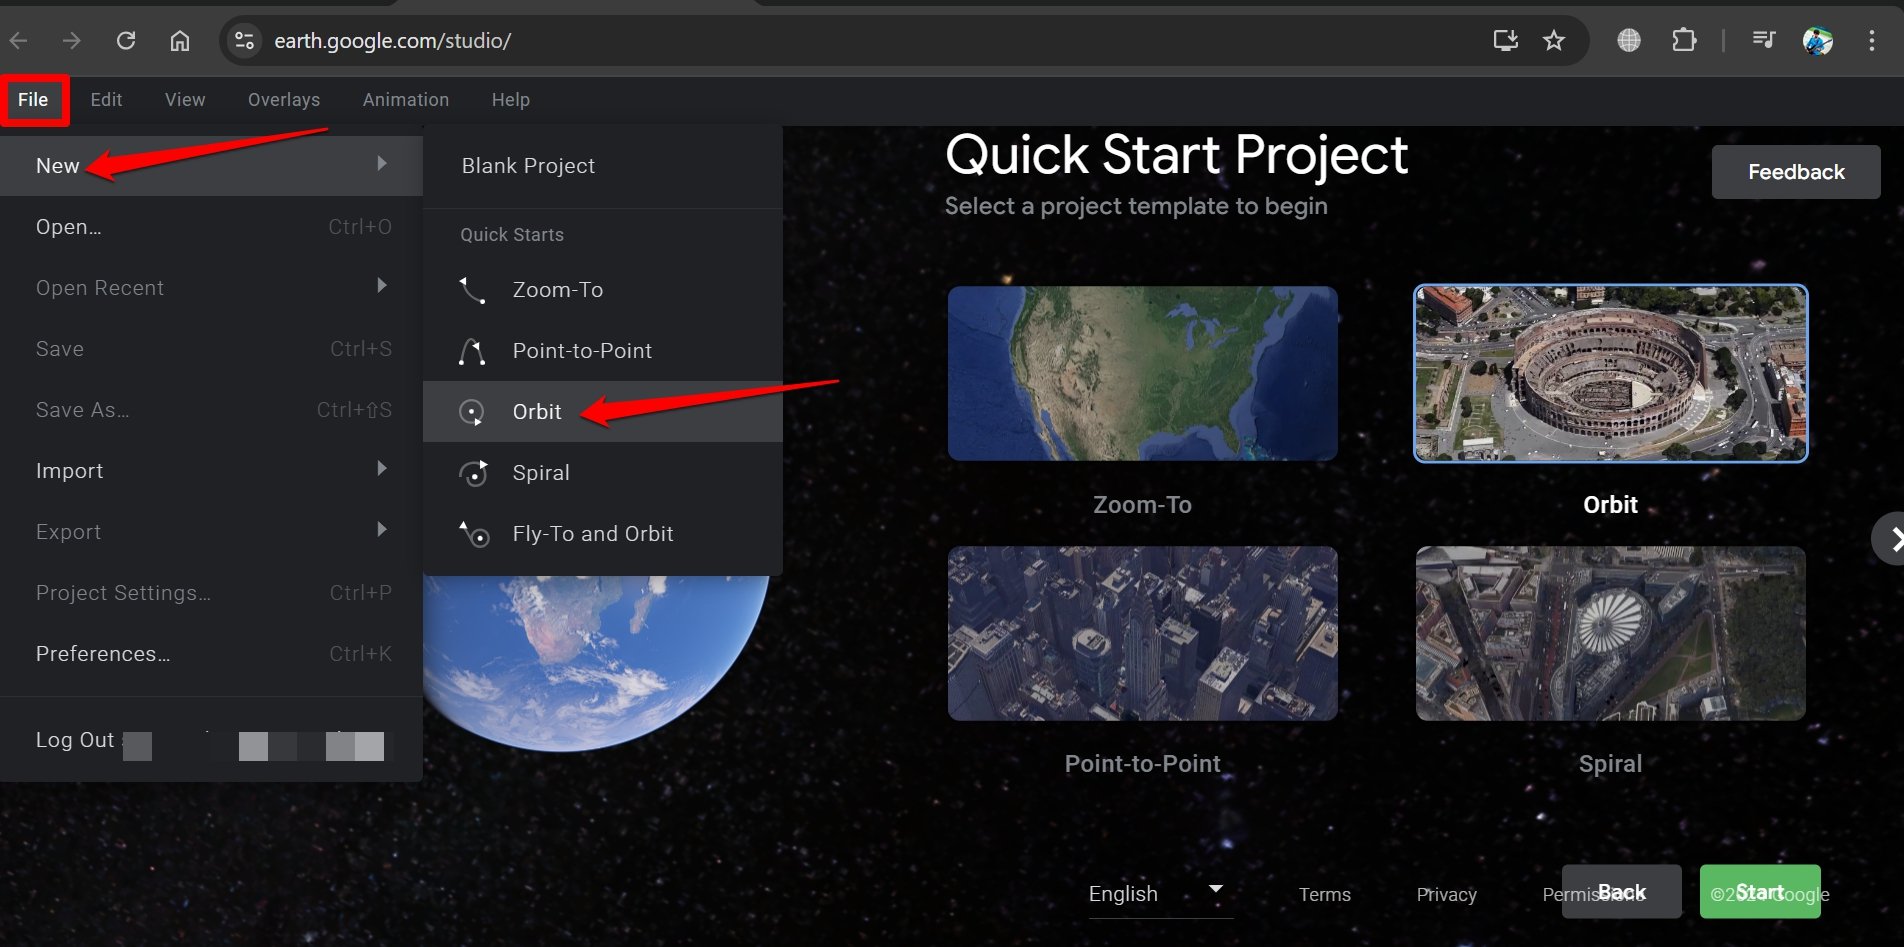
- Alternatively, you can click File > New > Select Template Name under Quick Starts.
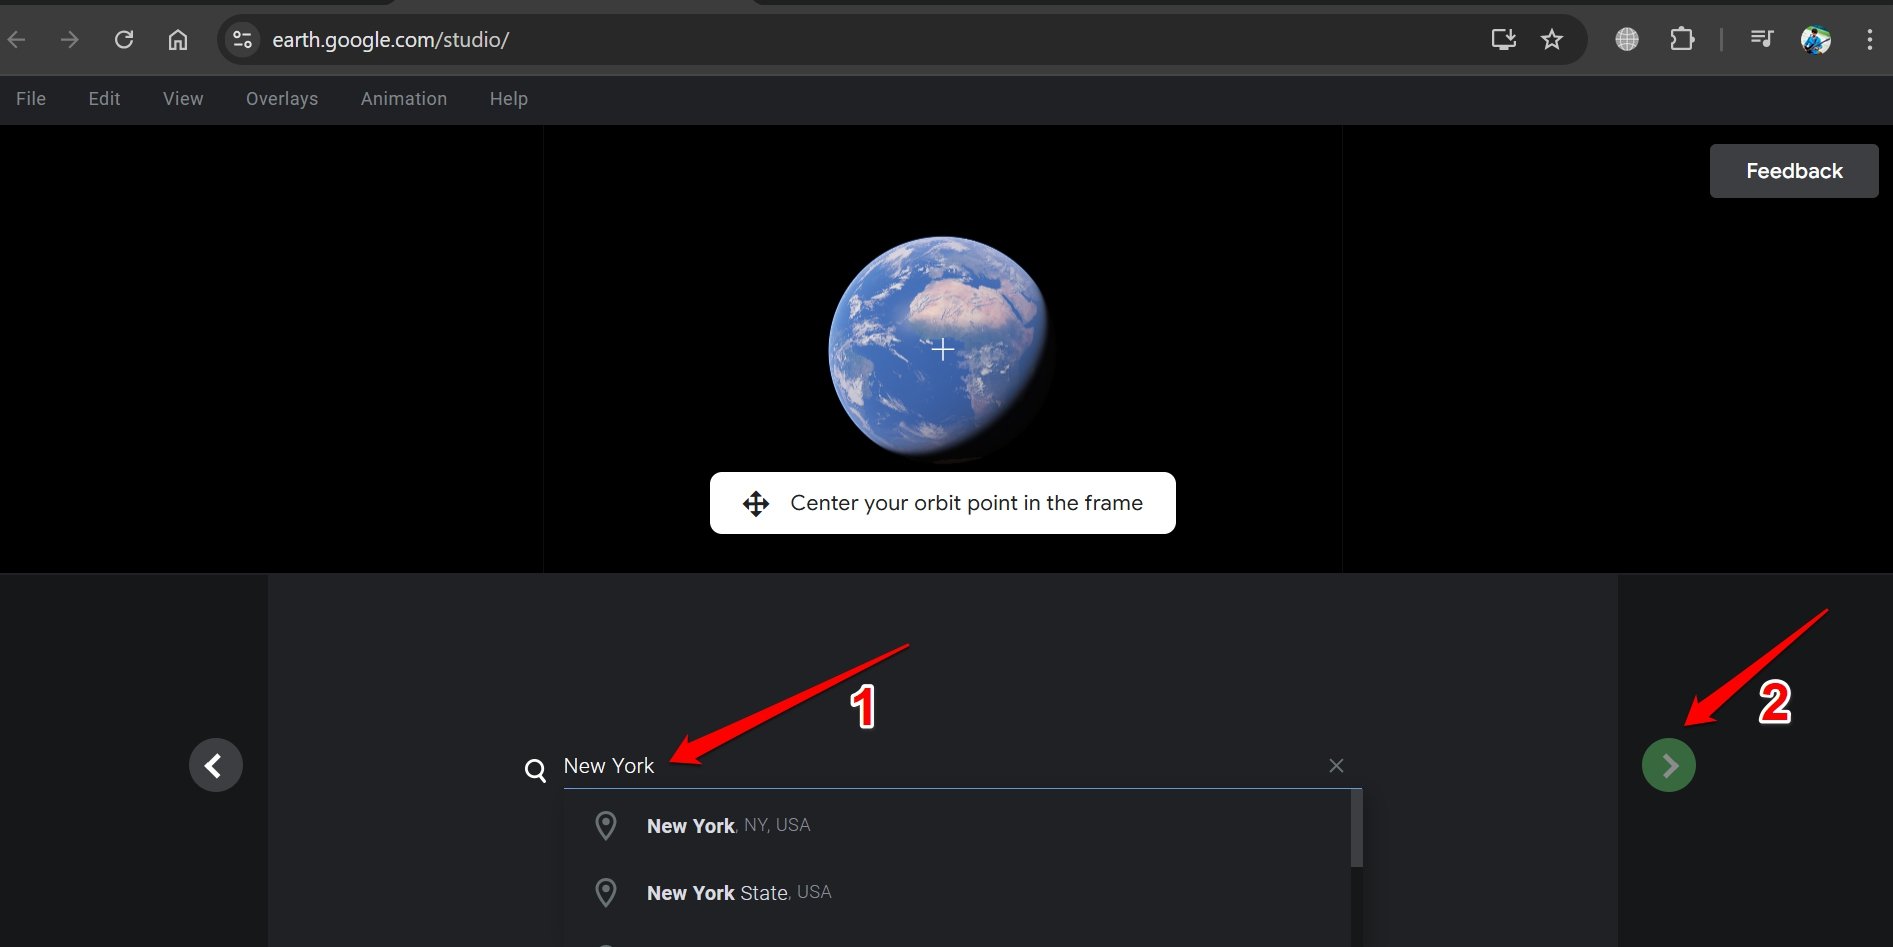
- Type the location name for which you want the drone shot and press the green arrow button.
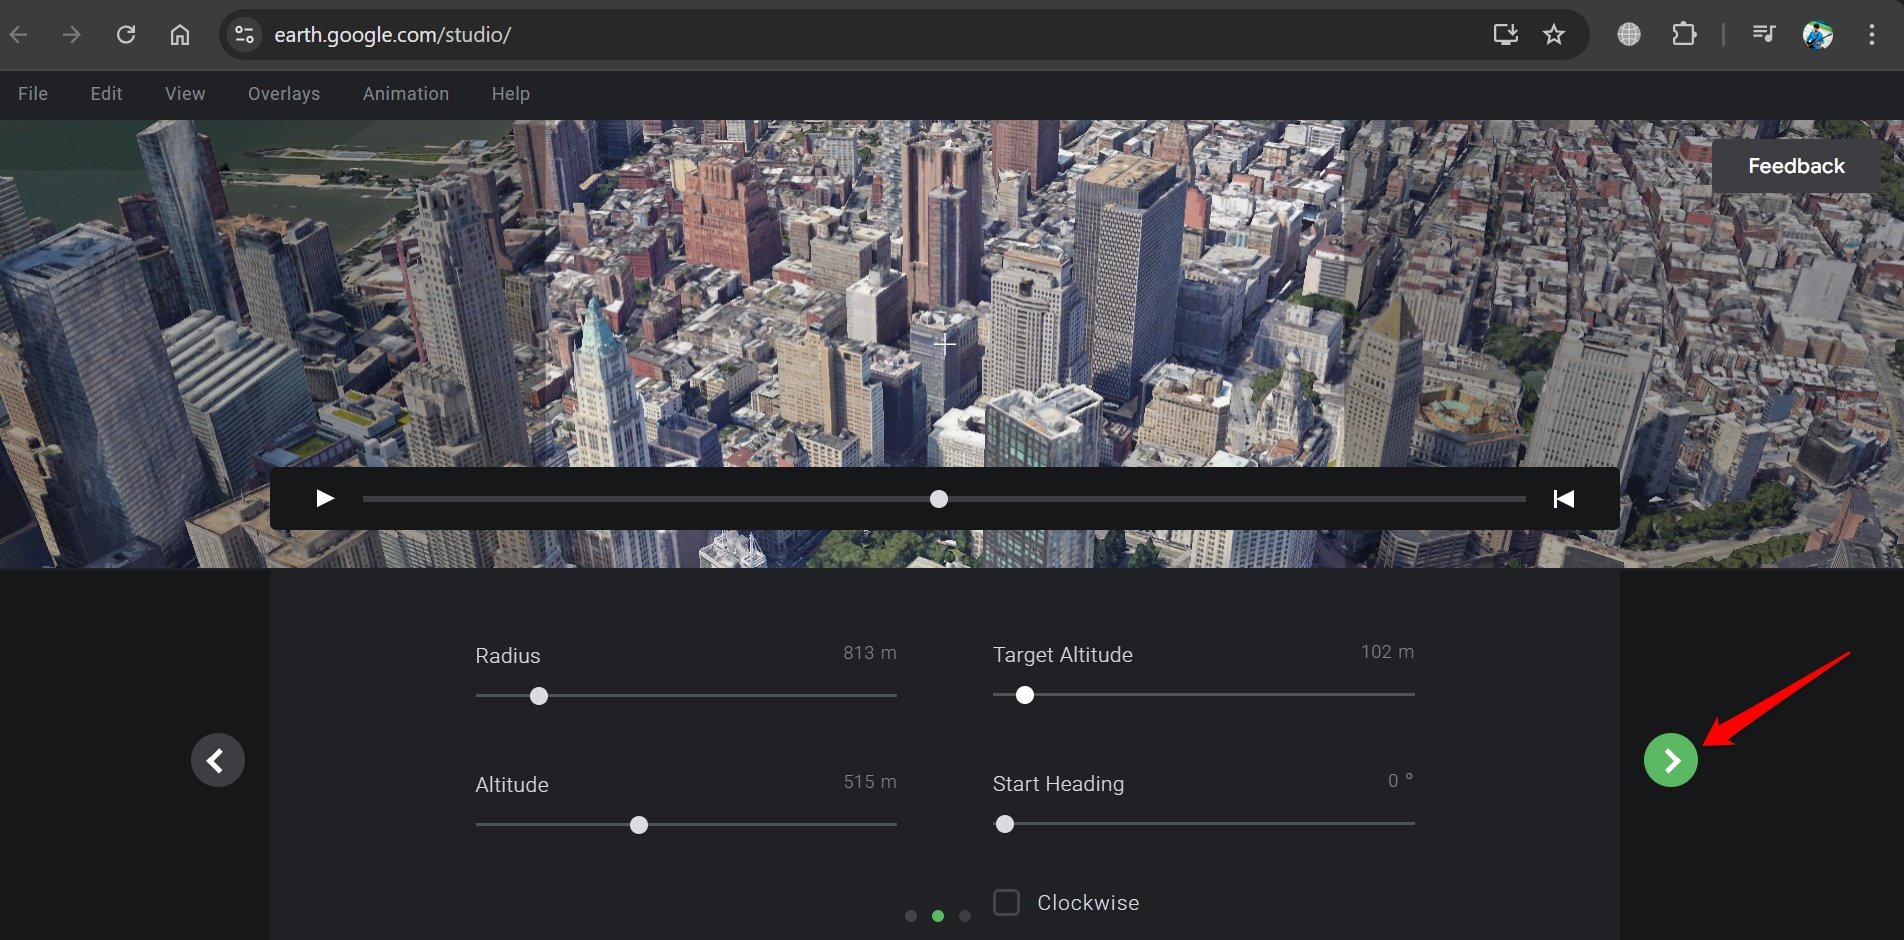
- Set the parameters such as Radius, Altitude, and Target altitude.
- Click the green arrow button to move to the next parameter.
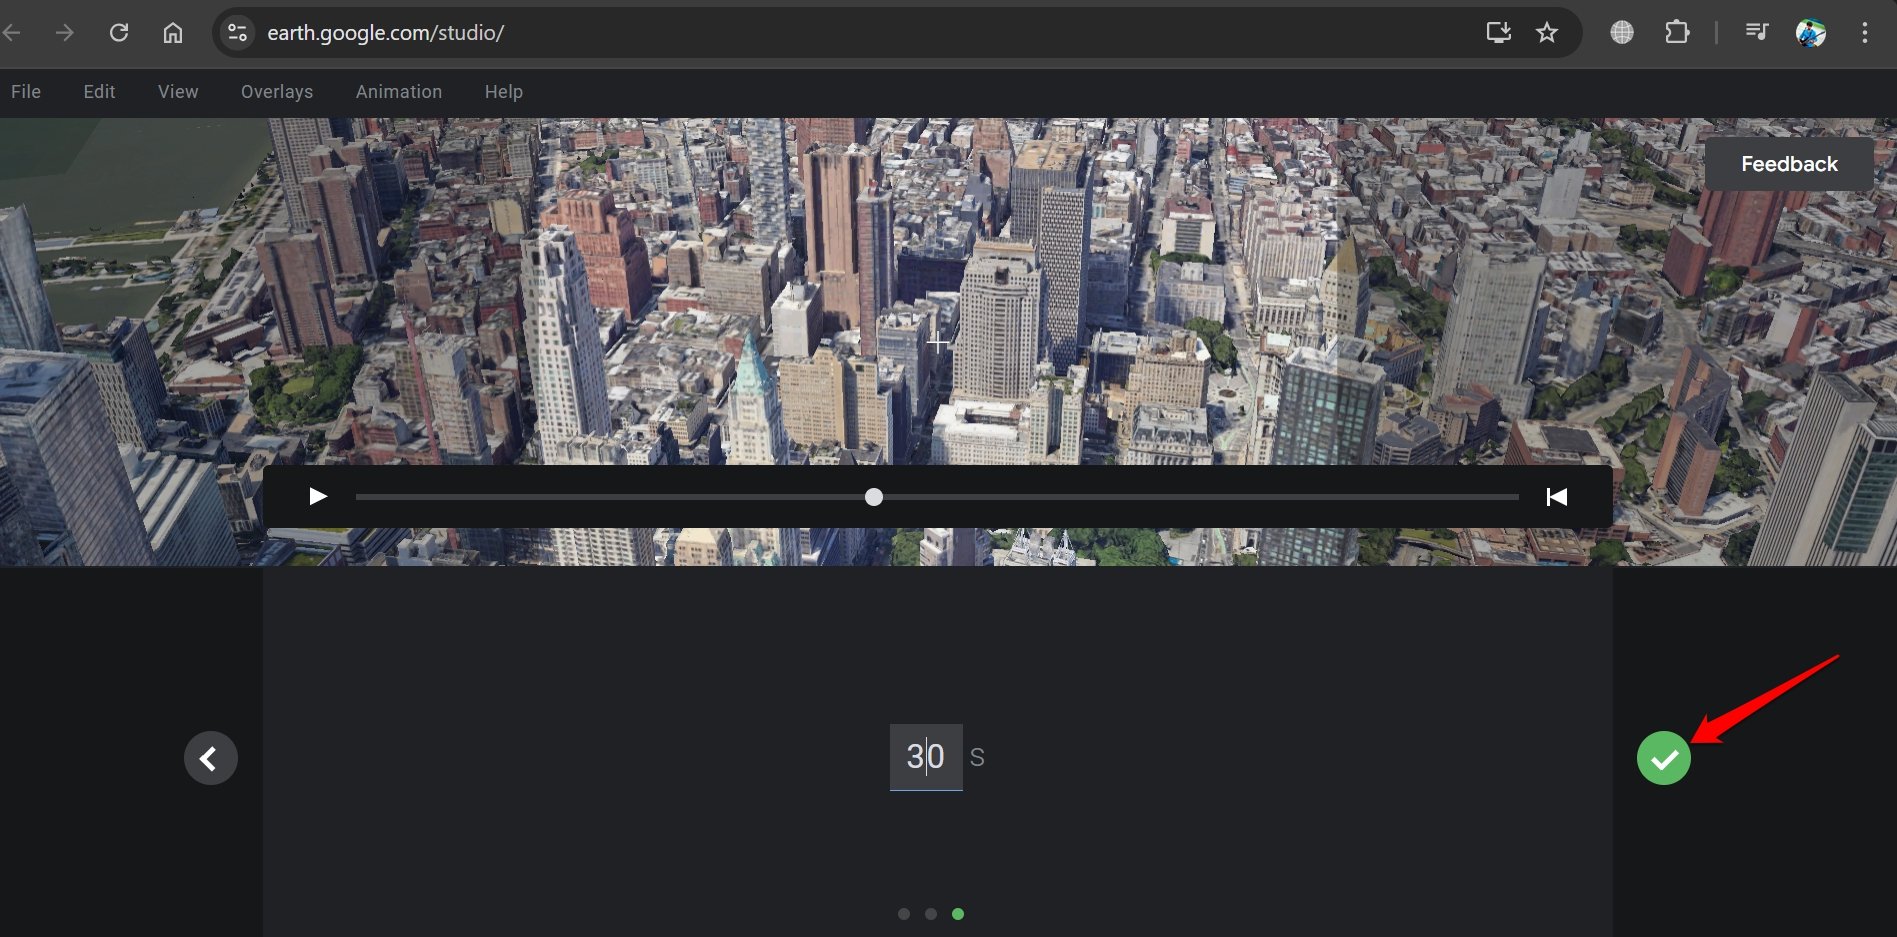
- Set the duration of the footage. An ideal timeframe is 20 to 30 seconds.
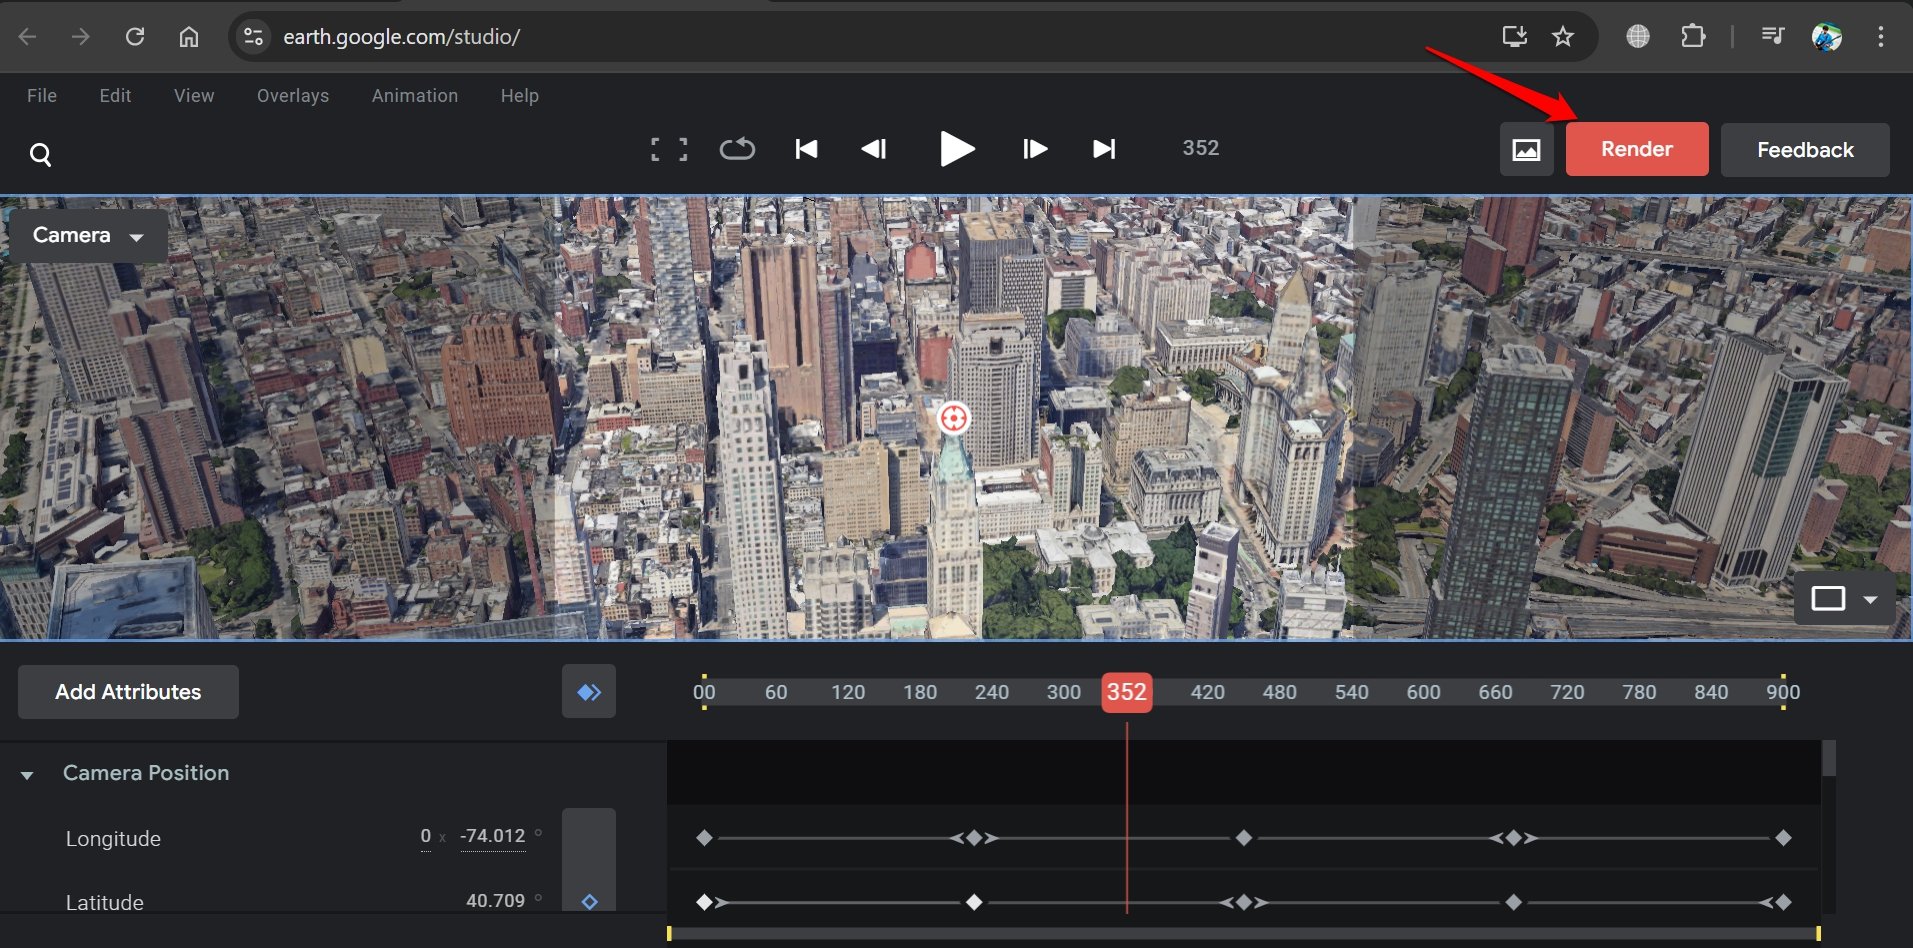
- On the final preview panel, press the Render button to export the drone clip.
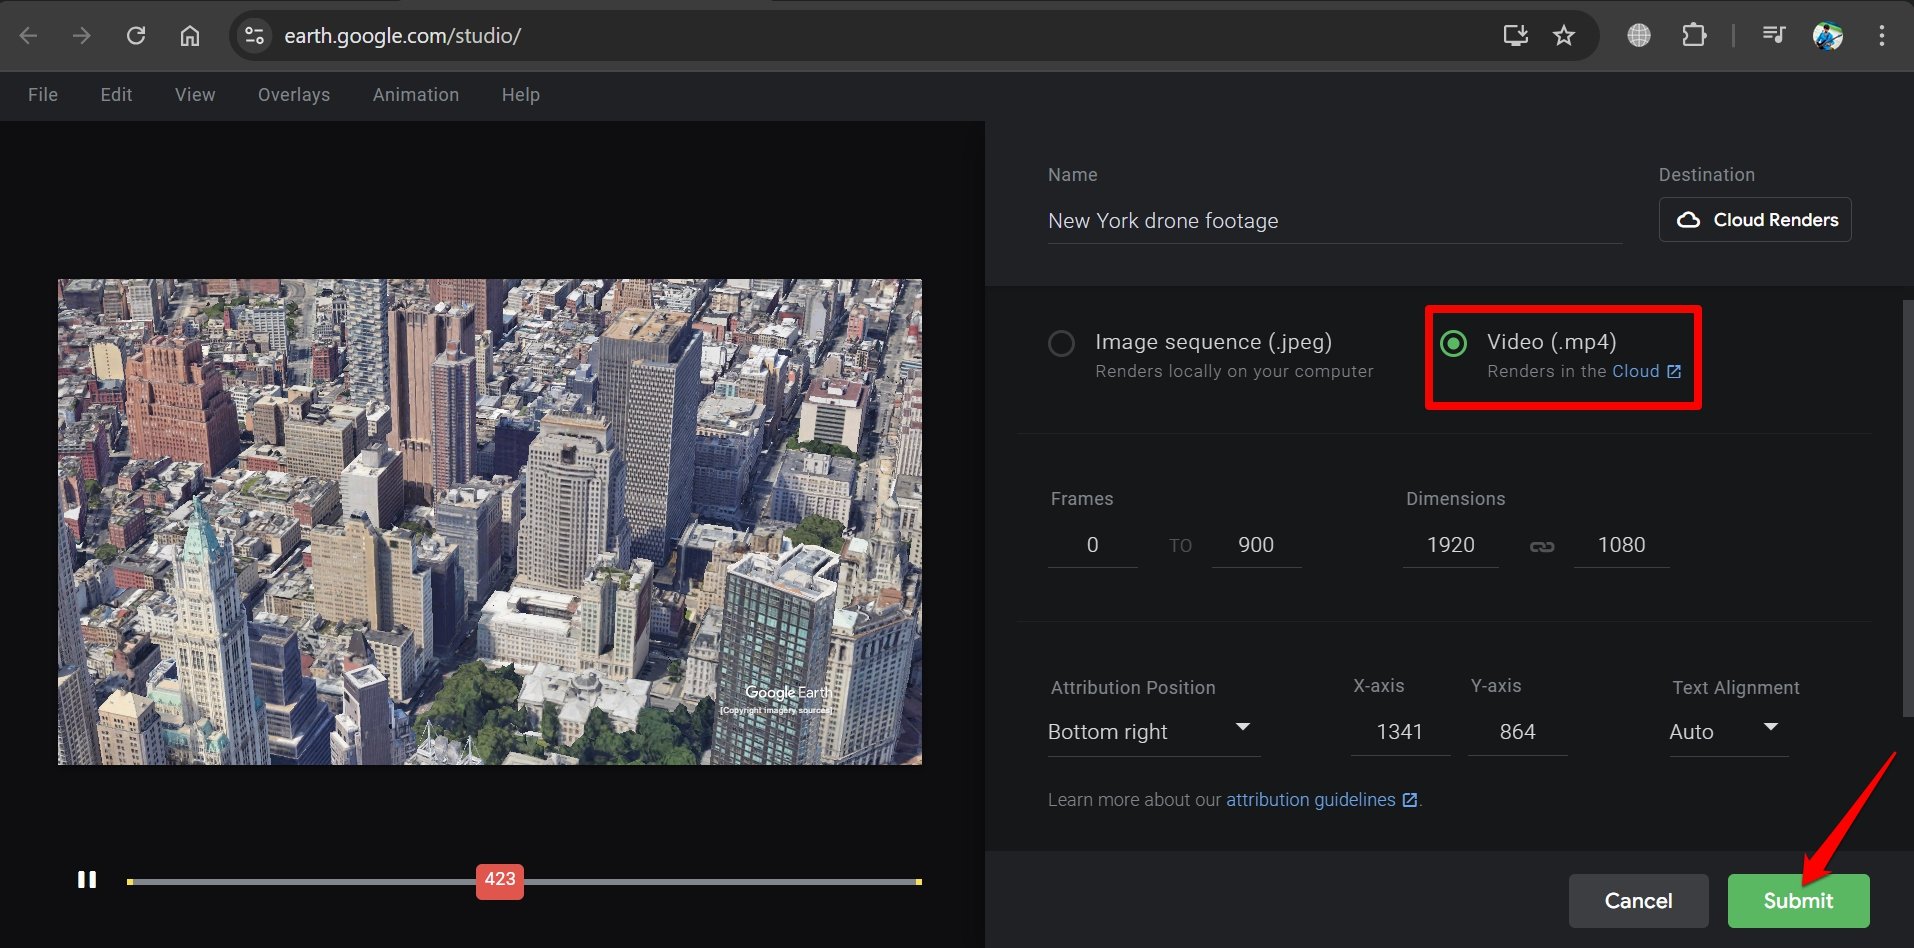
- Set a name for your clip, and choose Video to initiate cloud rendering.
- Press Submit to send the finalized footage to be rendered in the cloud.
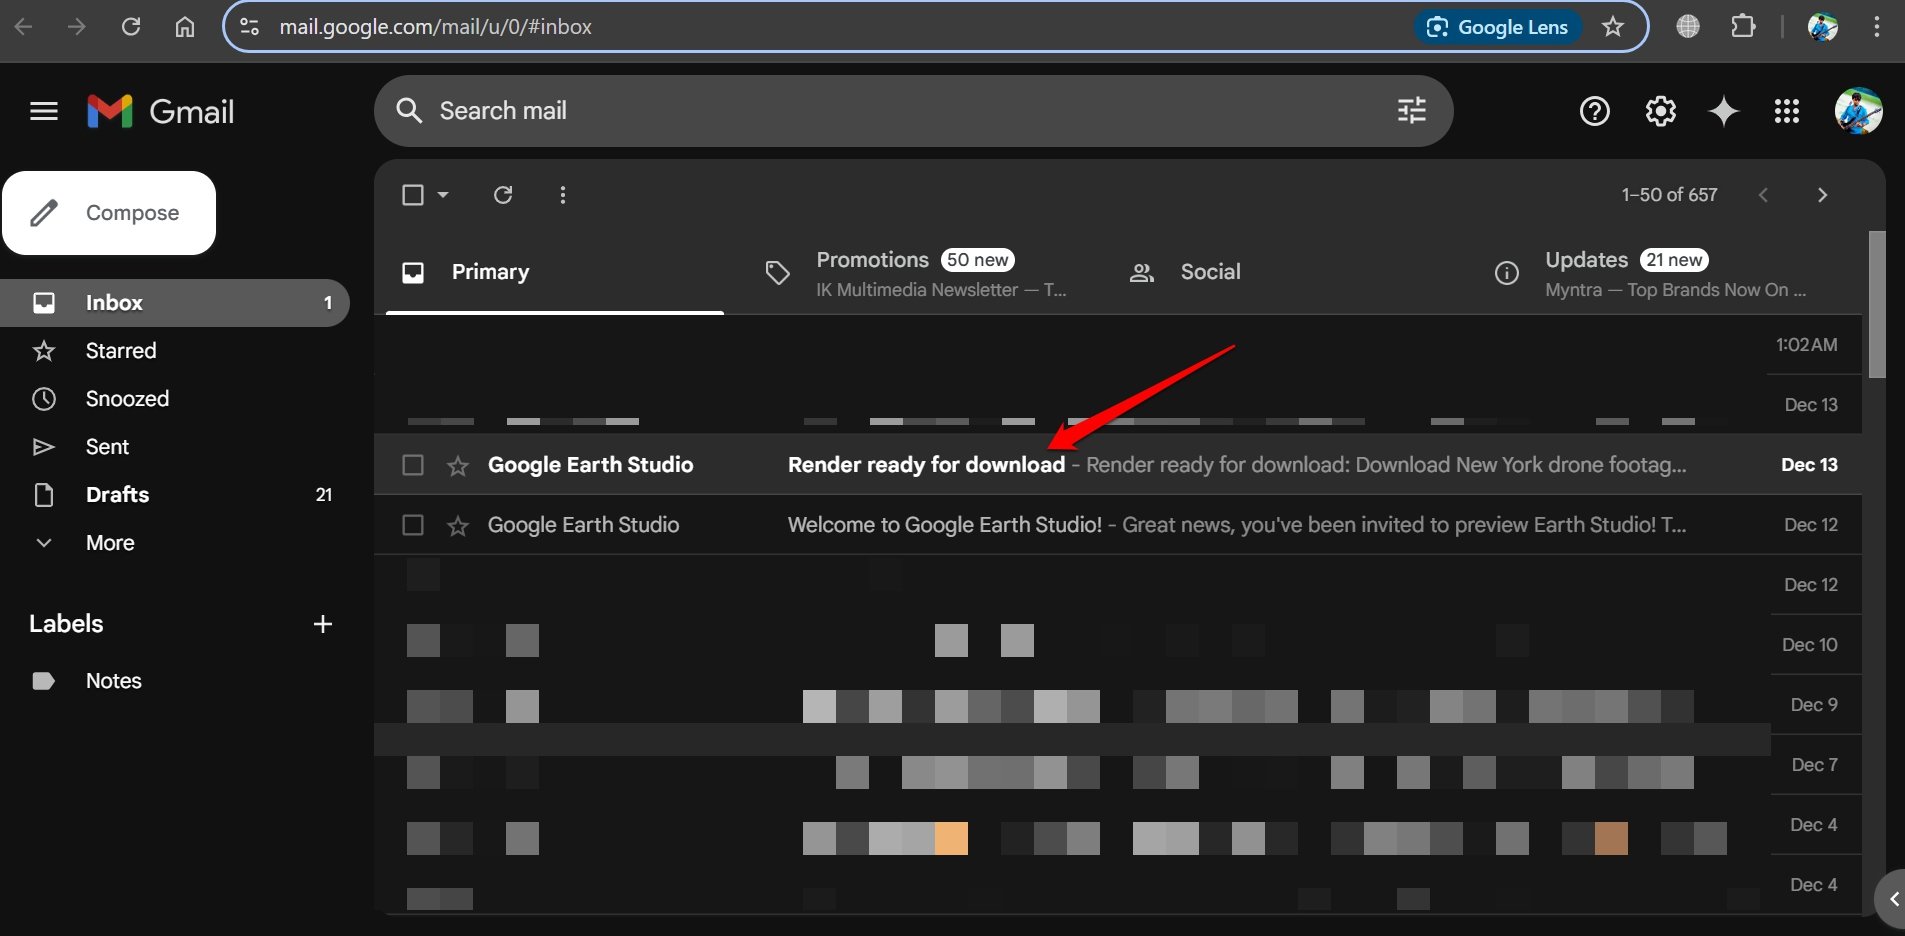
The complete rendered footage will be emailed to you in your Gmail inbox. It is the same account you used to sign up for Google Earth Studio. You can download the video clip to your PC for free.
How do You Generate Drone Footage for any Location without using a Drone?
There is a second method for generating drone footage in which you can manually adjust the location’s latitude, and altitude, along with camera movement actions such as tilt and pan.
You must already have signed up for Google Earth Studio. Refer to the steps explained in the previous section.
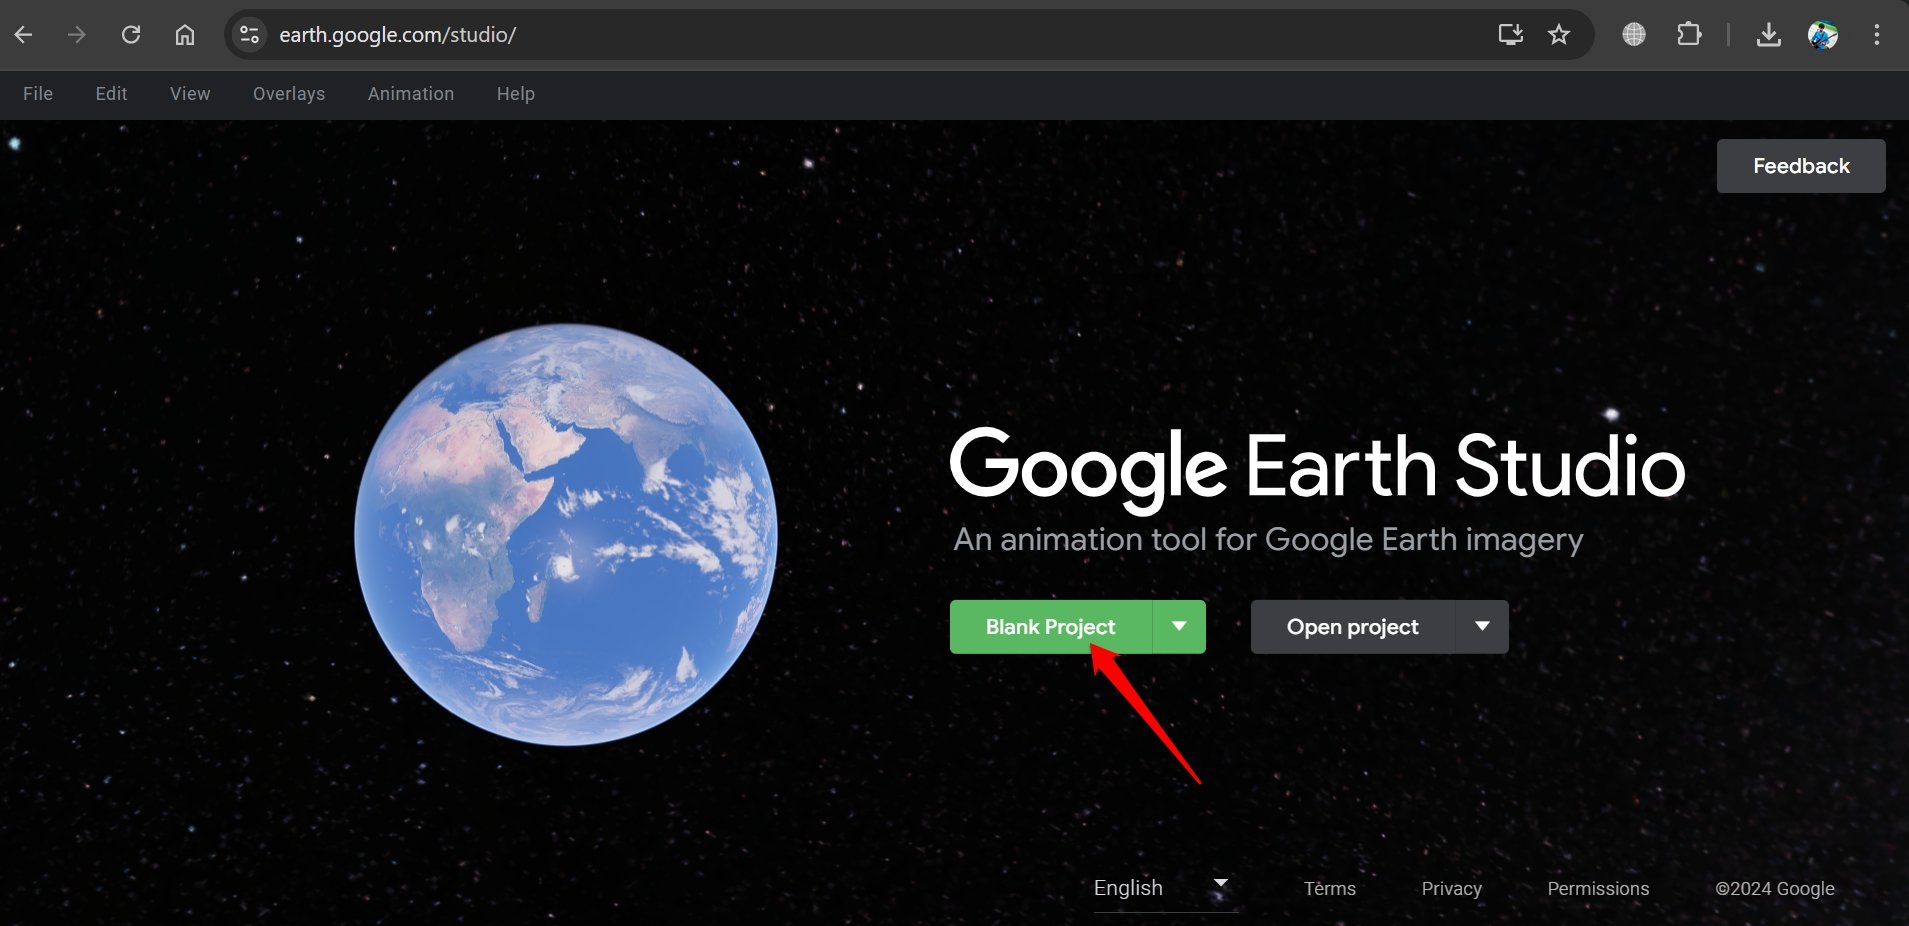
- Once on the Google Earth Studio dashboard, click on Blank Project.
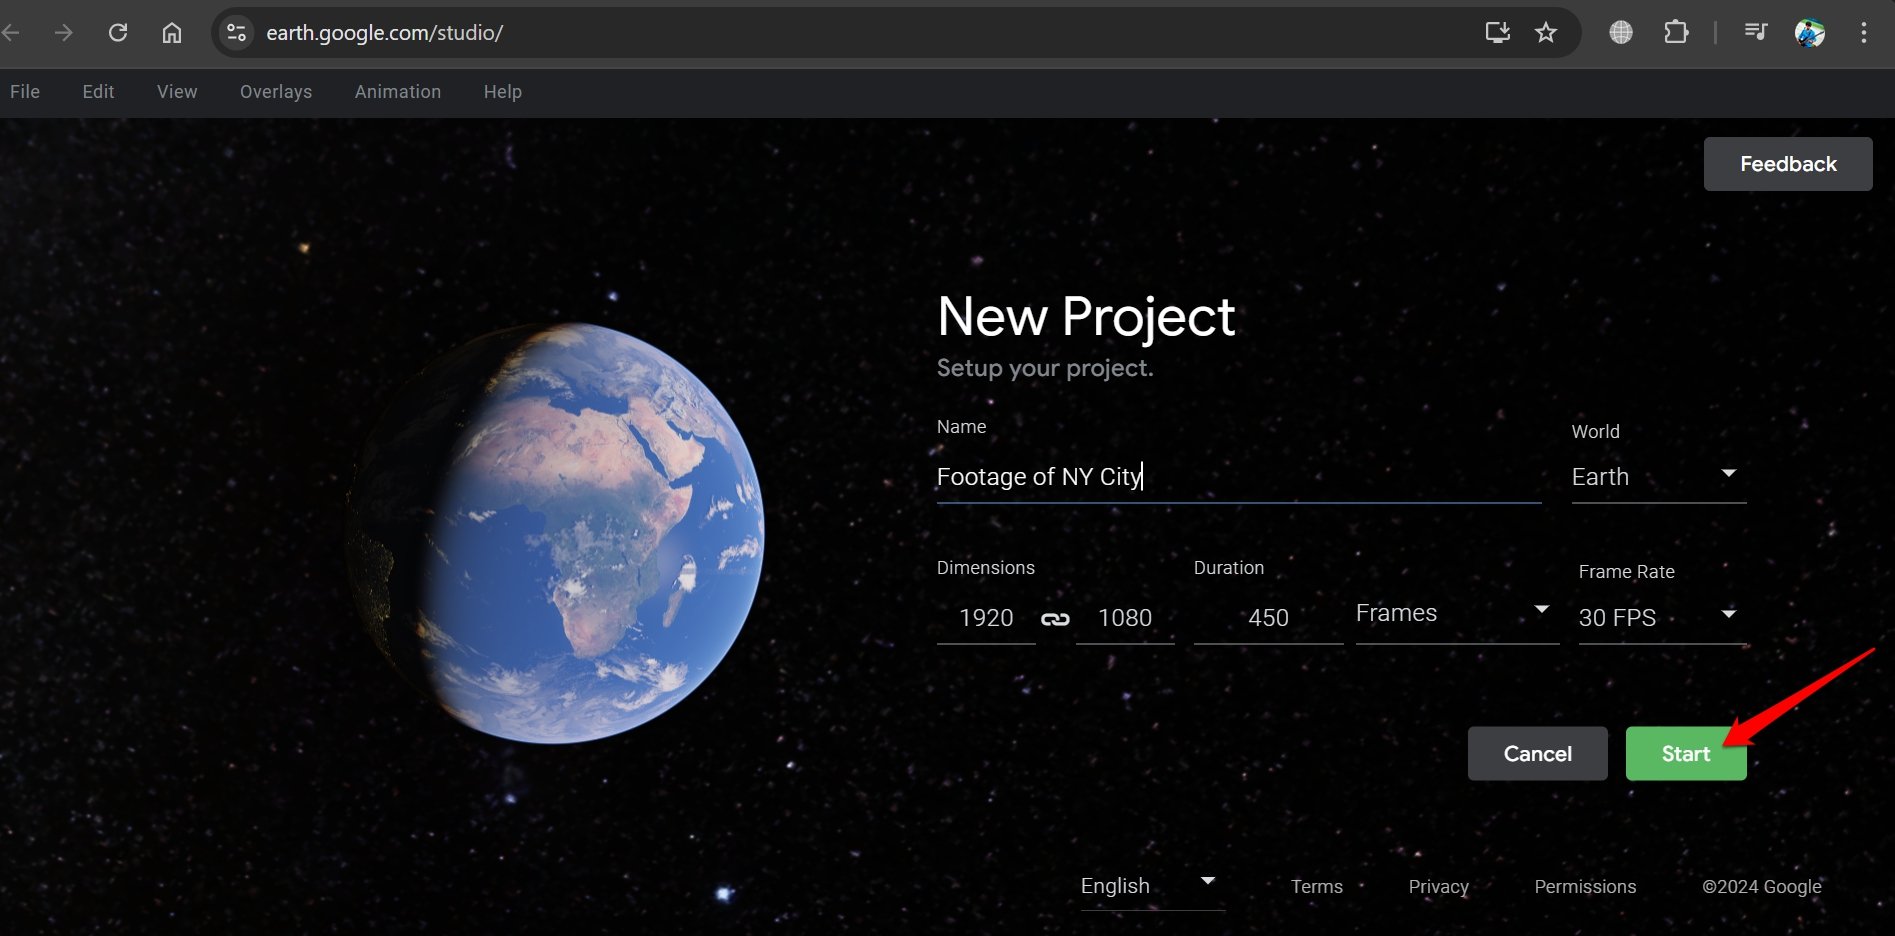
- On the project setup page, provide a name for your project, and set the dimensions.
- Also, specify the time duration of your clip and set the correct frame rate.
- Once you are done with the specifications, click on Start.
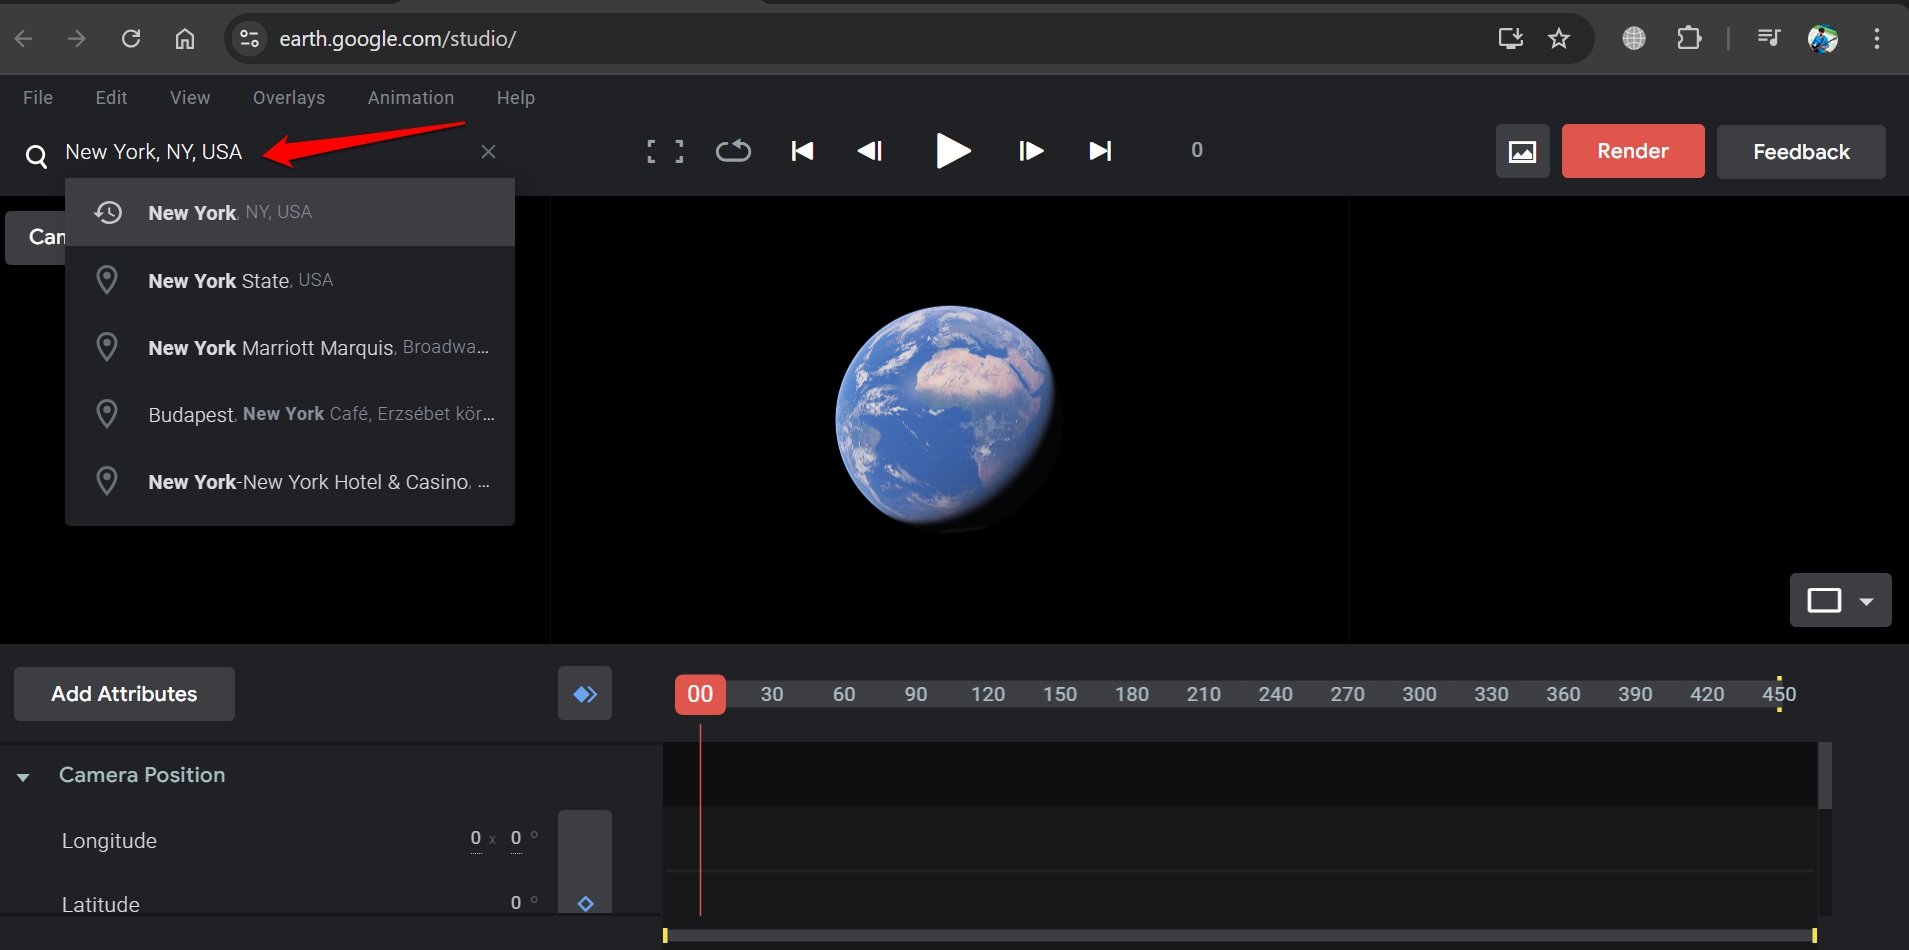
- In the location finder, type the name of the region for which you want to capture drone footage.
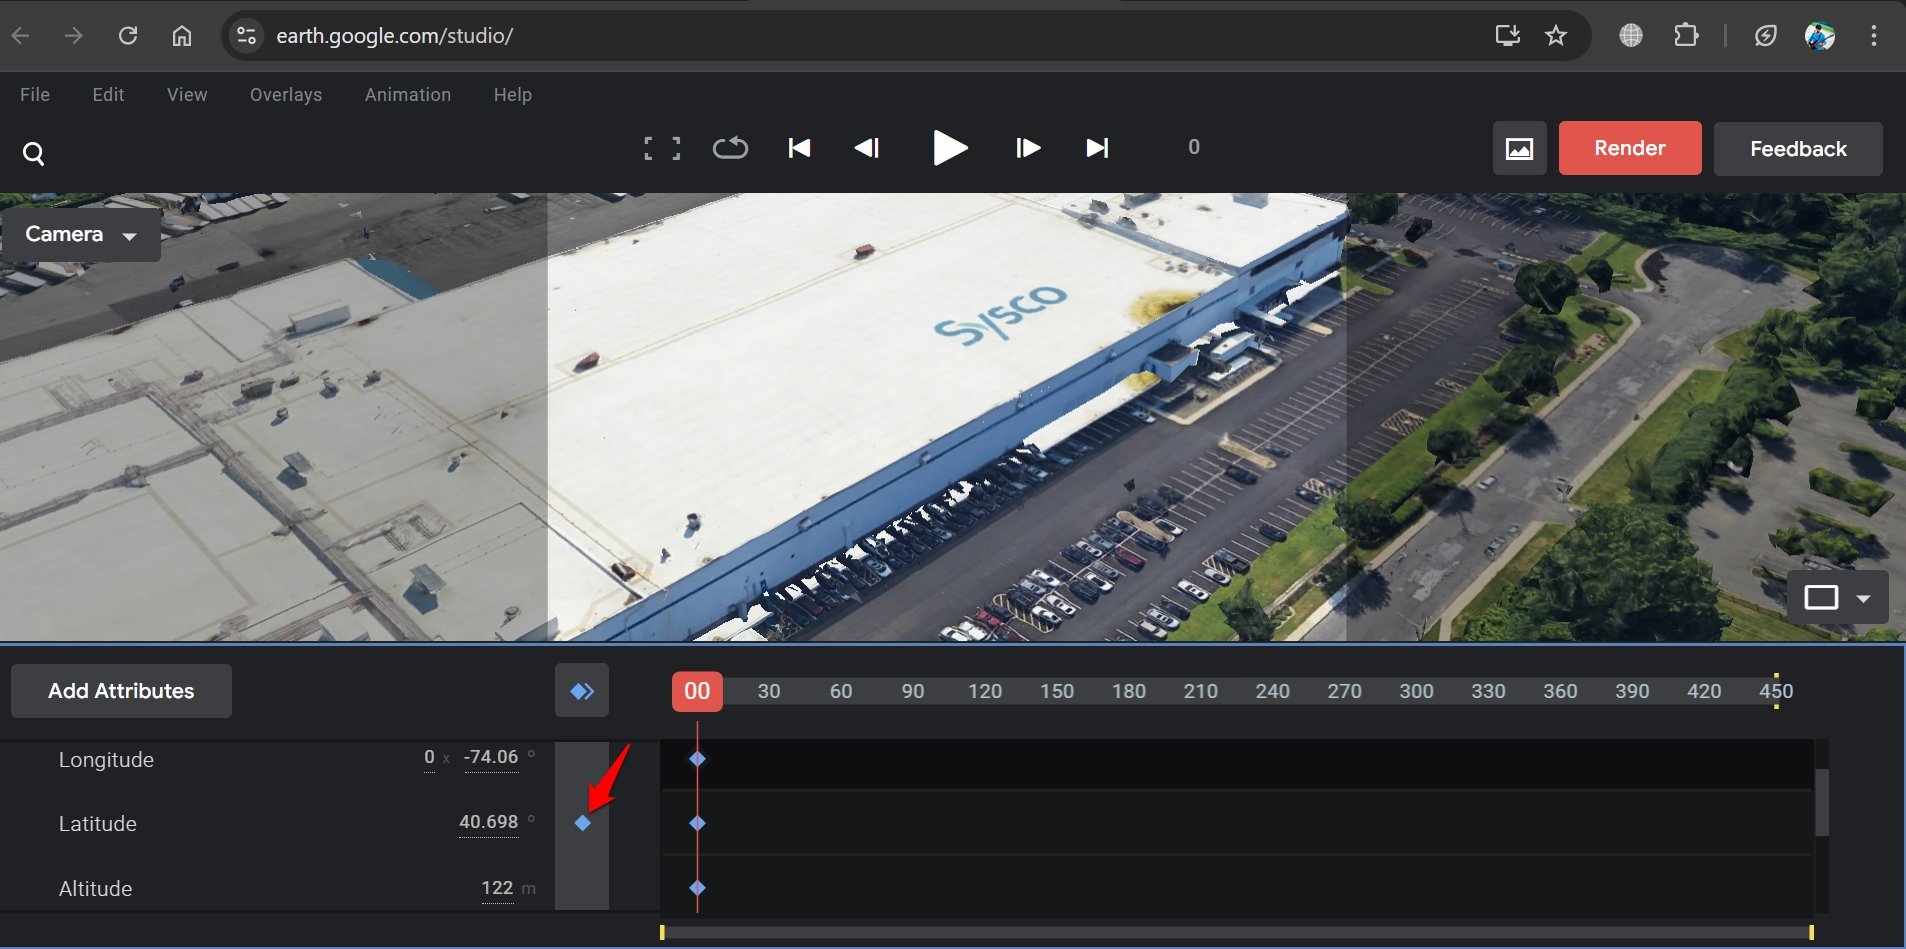
- On the map/camera view panel, use the trackpad/mouse to zoom in and get a close-up view of the buildings and the streets.
- Now, click the Add Keyframe button next to Latitude, longitude, and altitude.
- Move the red playhead on the editing timeline to change the frame of the camera.
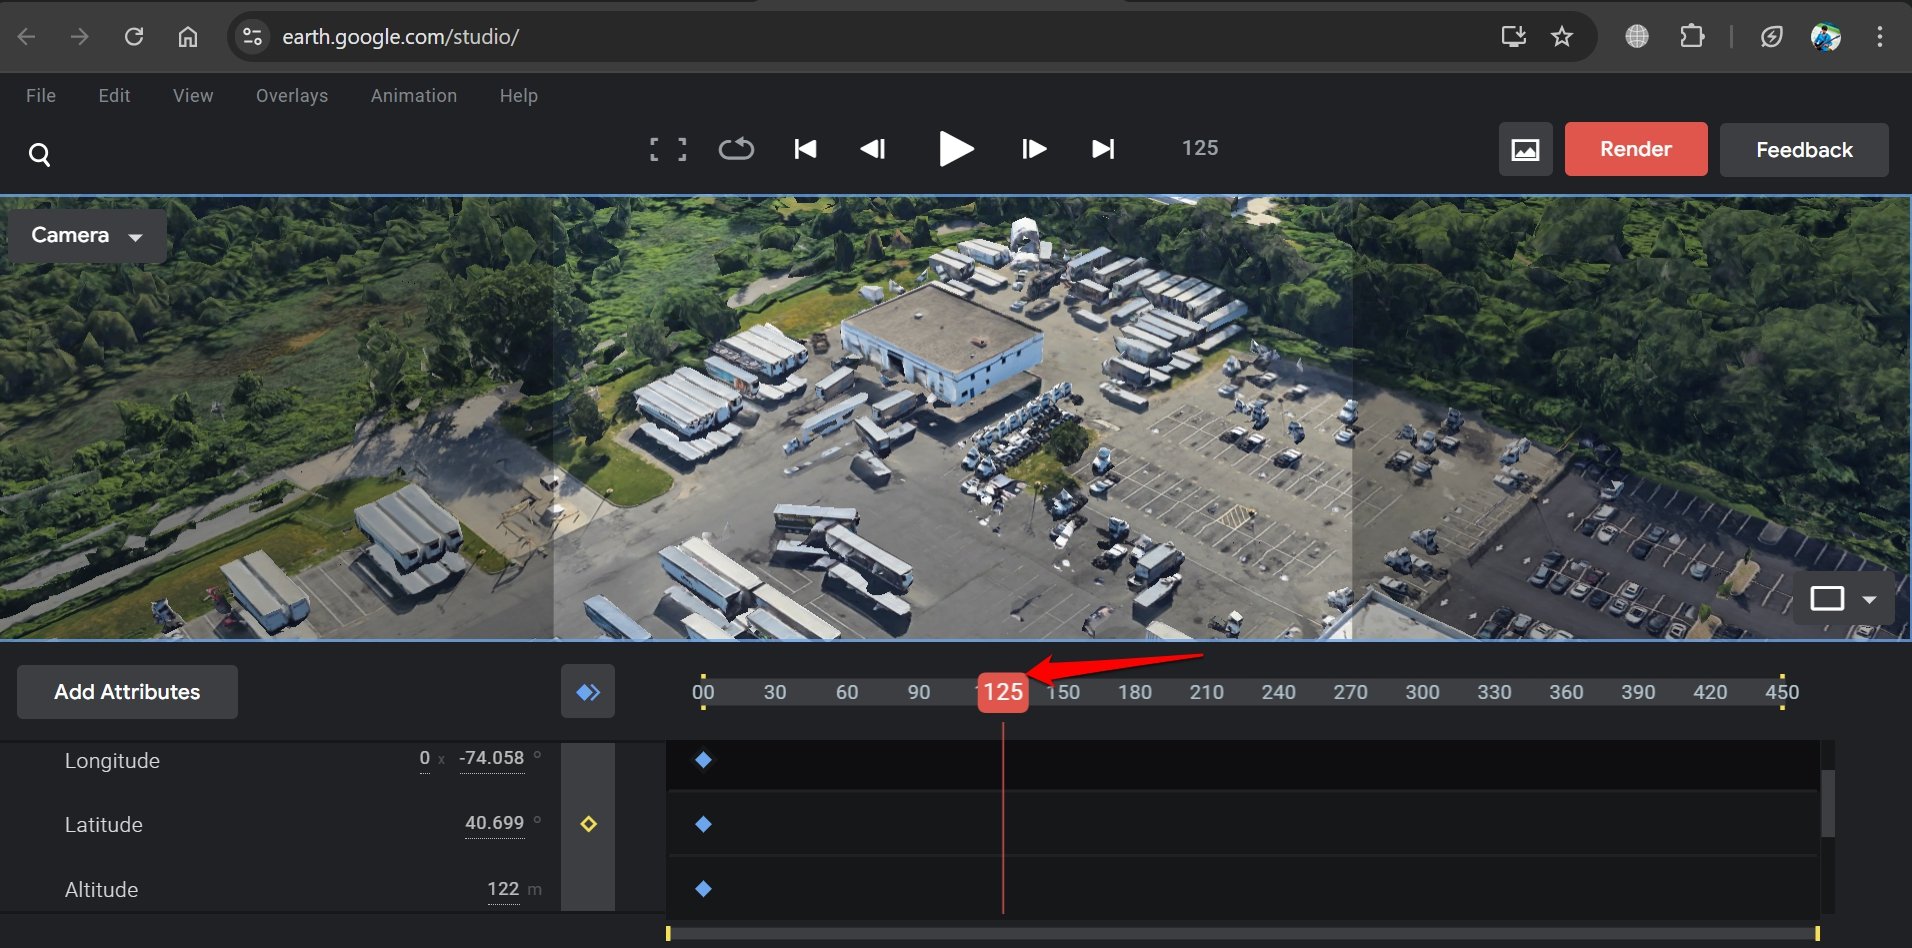
- On the 3D map view move the pointer to a different location.
- Again click the Add Keyframe button to integrate the frame and allow the movement/change of frames.
- Repeat steps 8 and 9 to integrate more frames to capture a diverse view of the location.
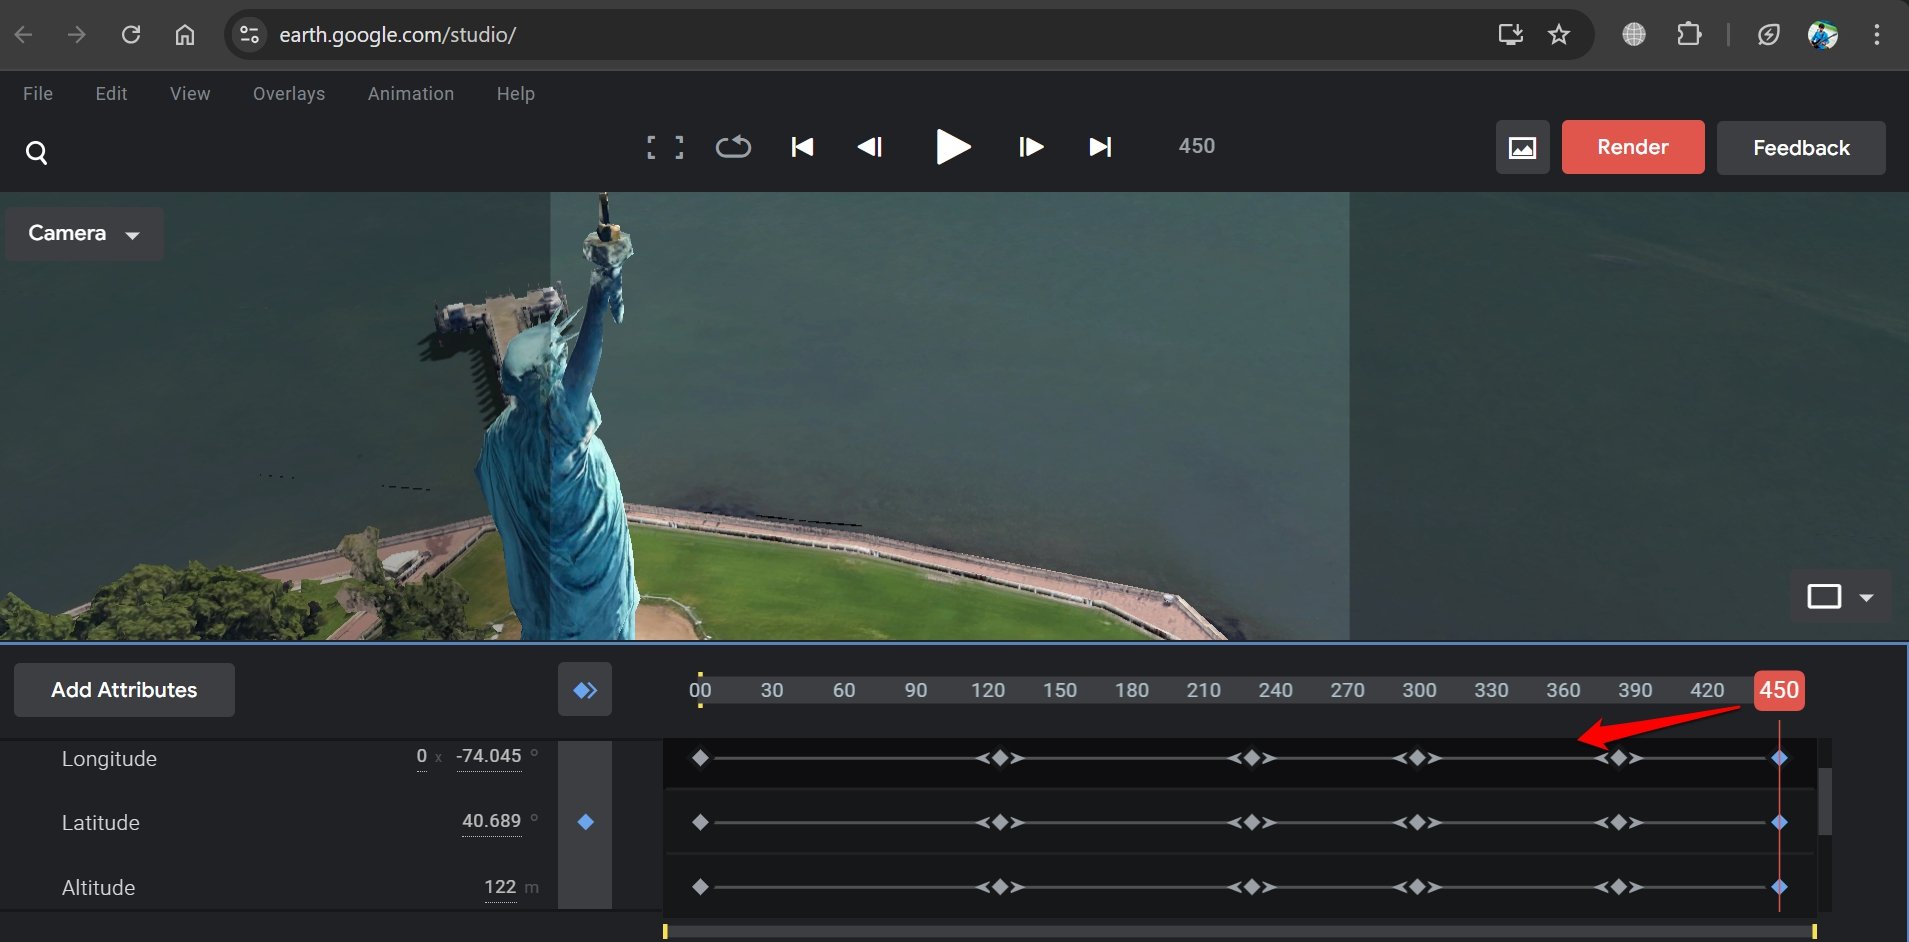
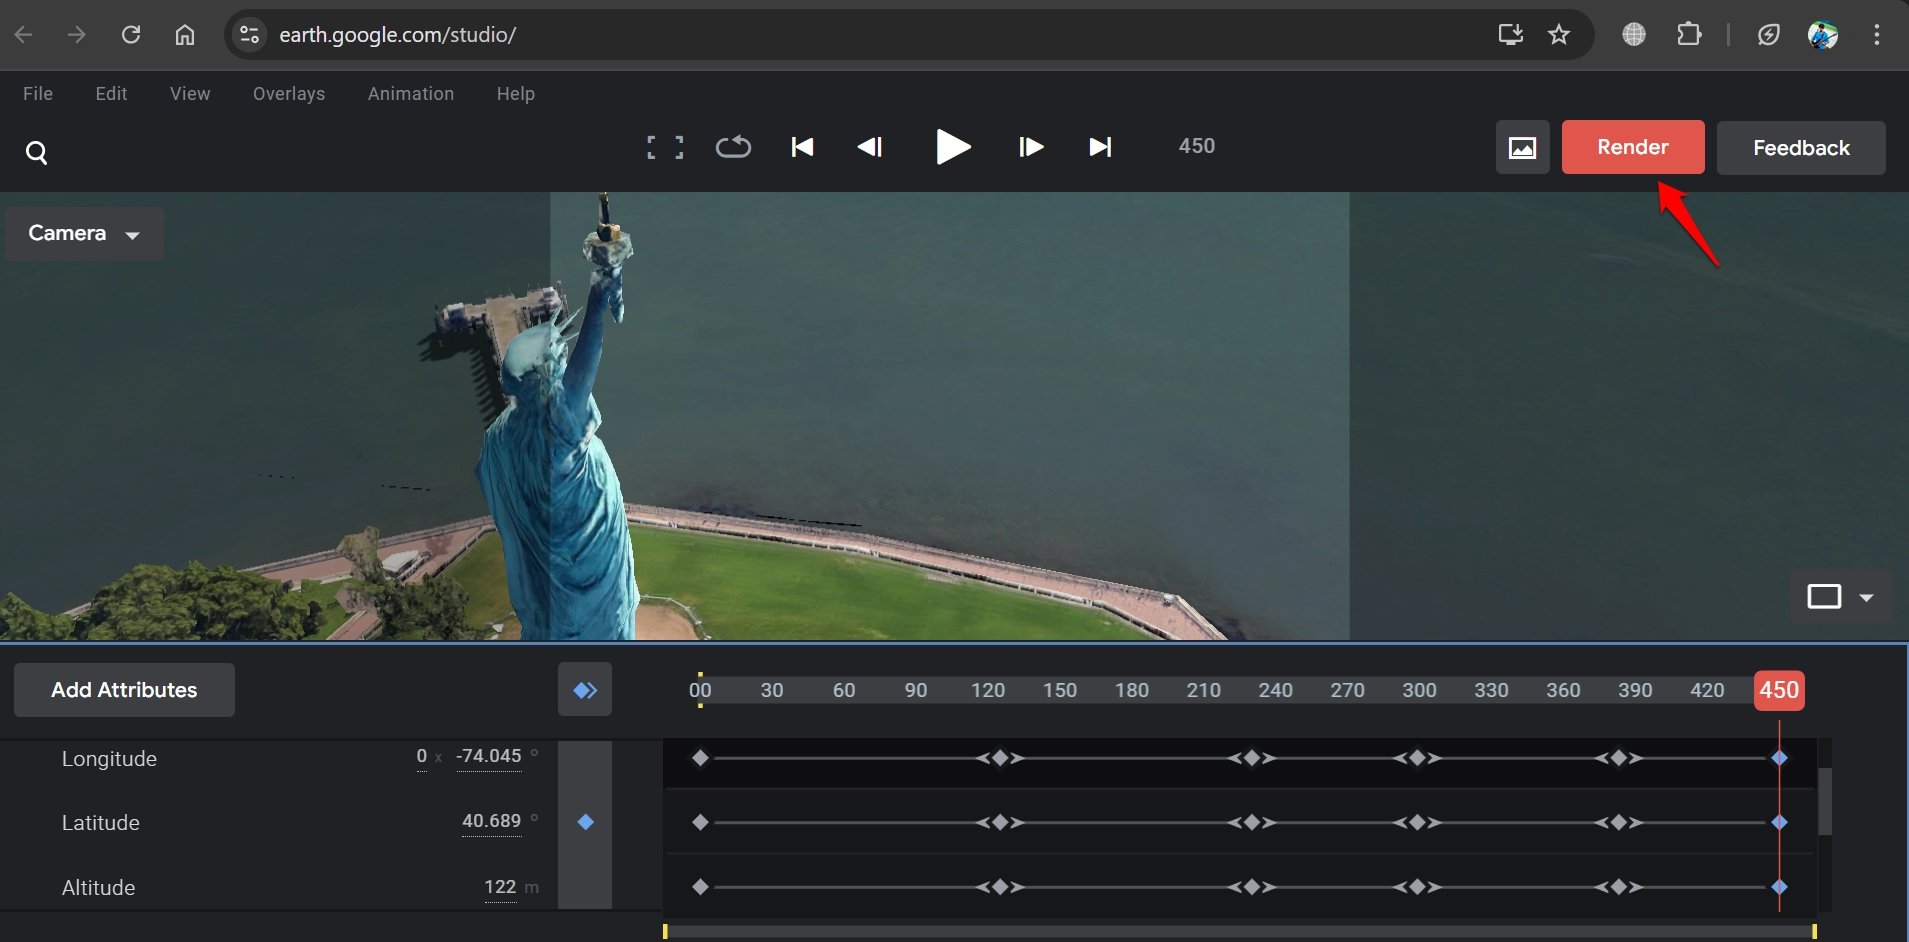
- Once you have your footage, click on Render.
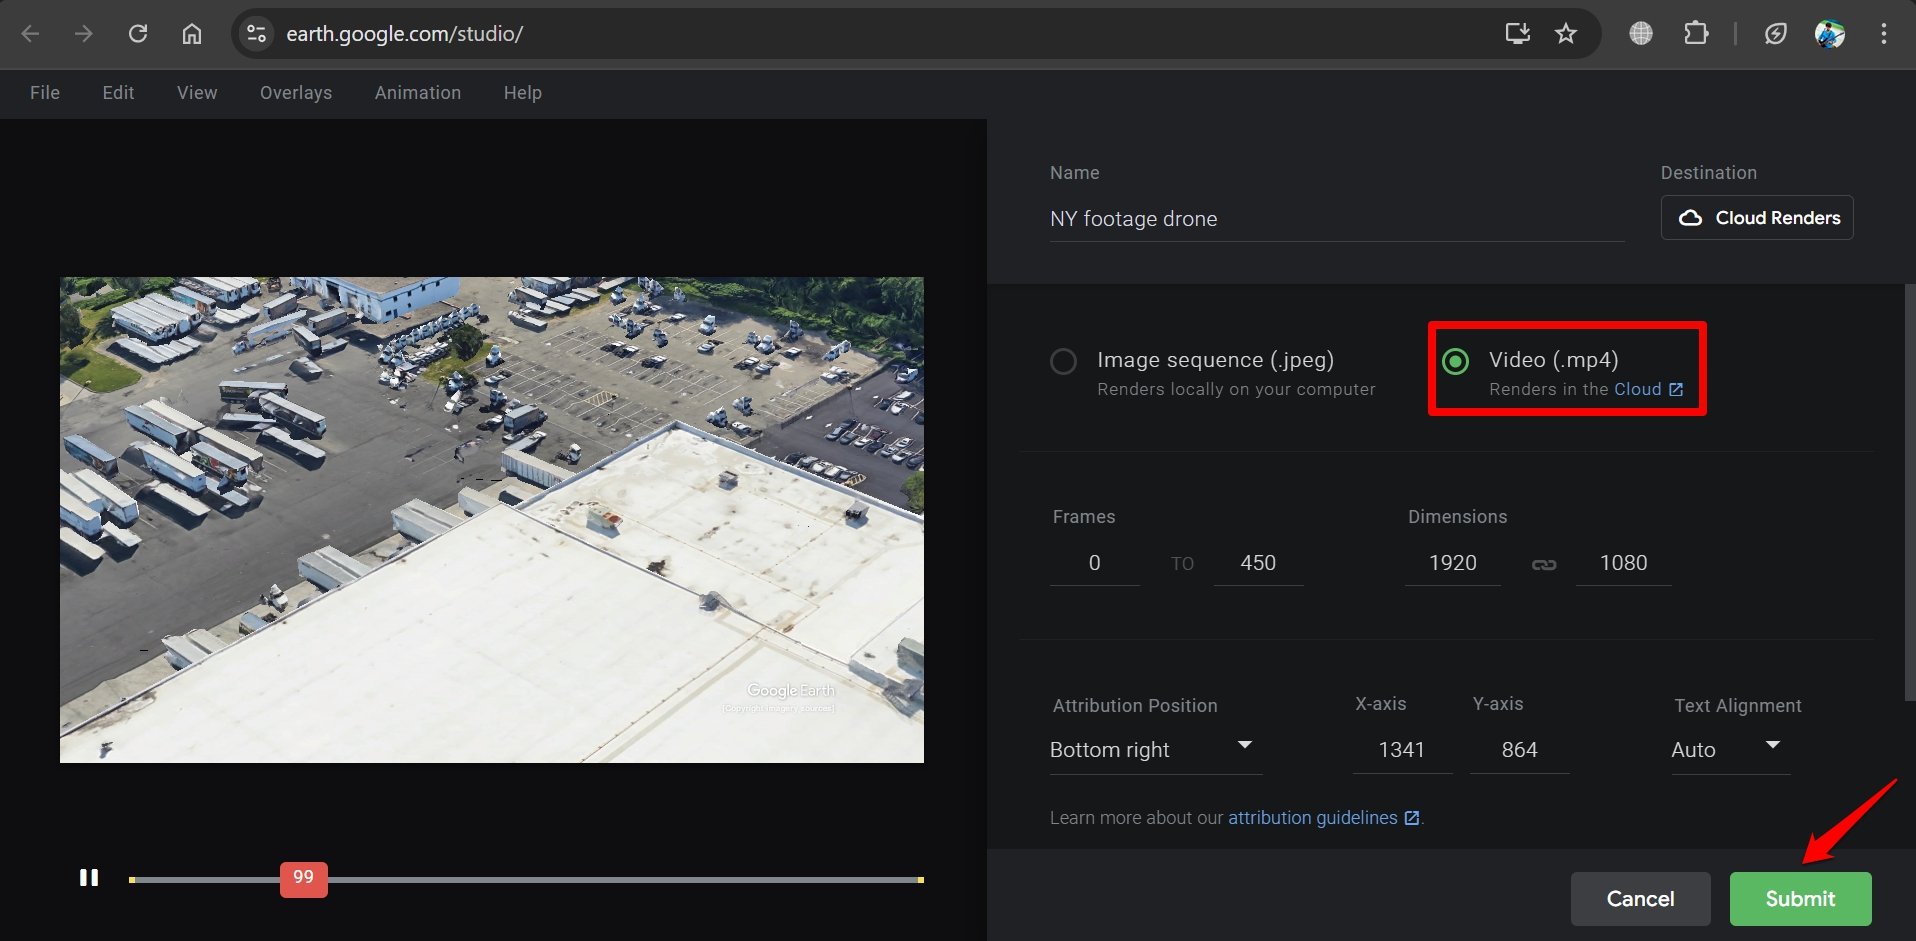
- Change the output to video with .mp4 extension and initiate the rendering.
- Make changes to the frame and dimension if necessary.
- Click Submit to send the footage for rendering in the cloud.
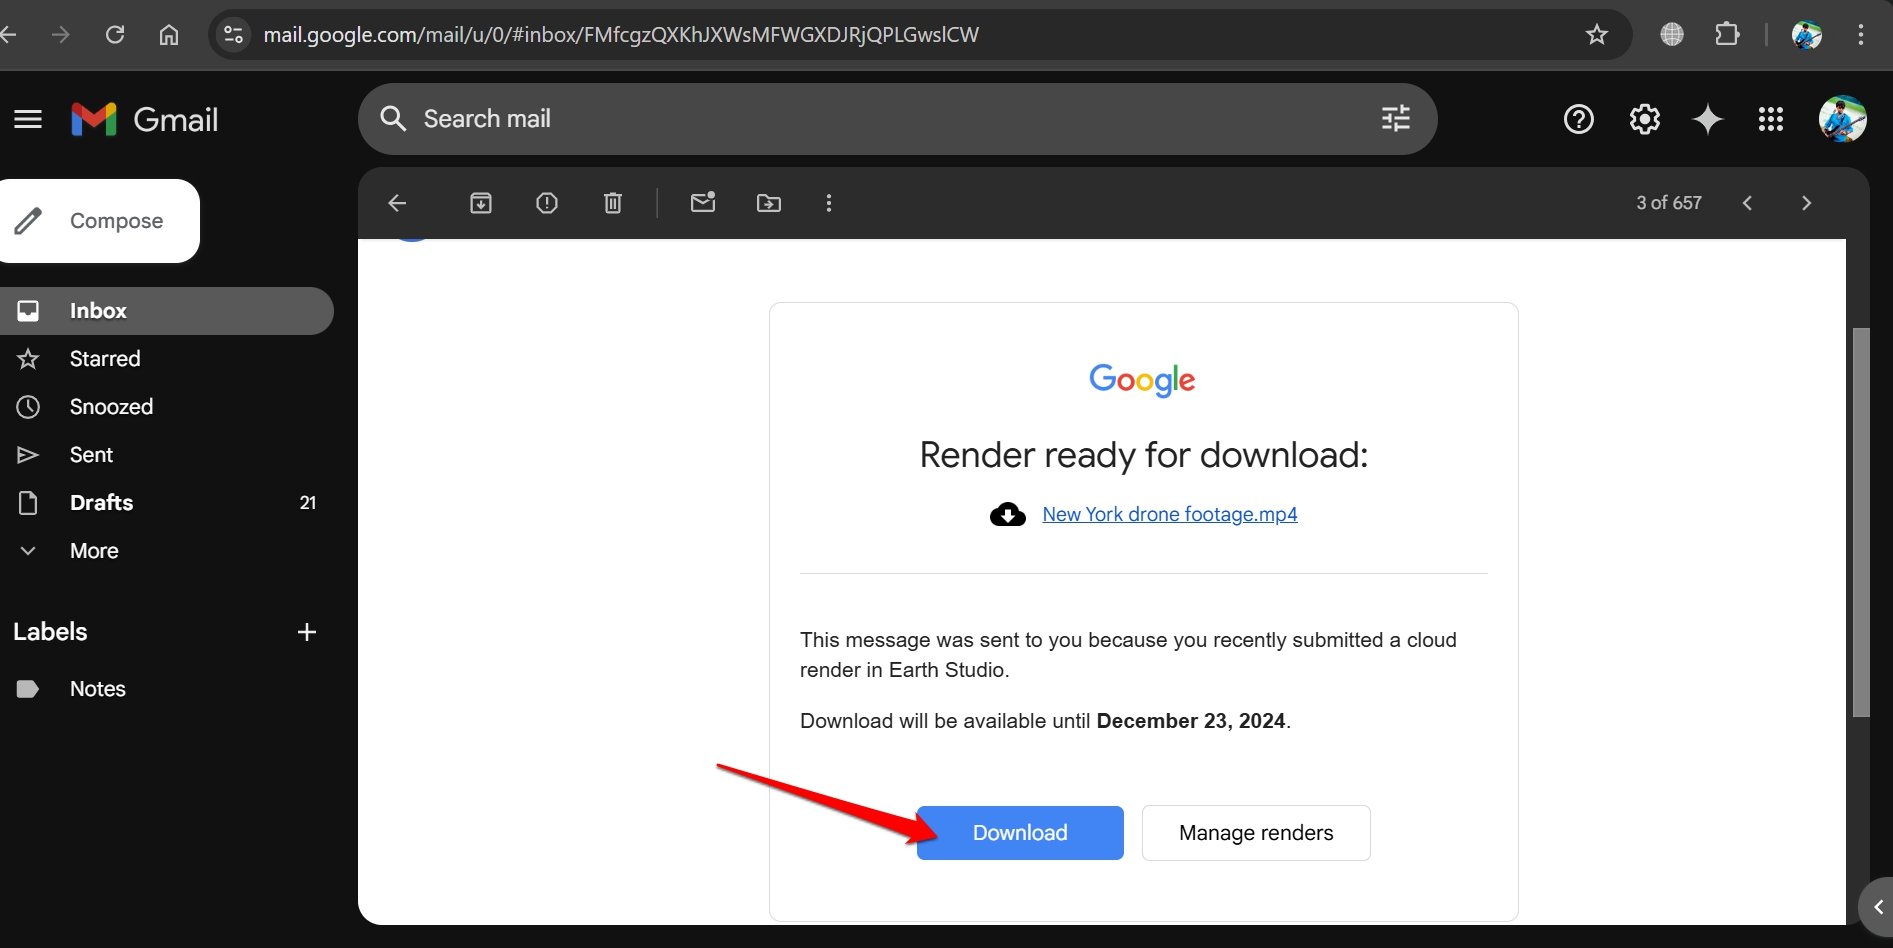
- After some time, check your email inbox for the final rendered drone video.
- Press the Download button to get the video on your PC.
Frequently Asked Questions(FAQs)
Is Google Earth Studio Free to Use?
YES. You can sign up and create 3D-animated drone footage and still images for free.
Can I use a Footage Generated on Earth Studio for Commercial Purposes?
NO. Google doesn’t permit the footage and stills created using Earth Studio for commercial usage. There is a Google Earth Studio watermark on the content you generate on this web-based animator.
Can I use Google Earth Studio on All Browsers?
As per the official FAQ page of Google Earth Studio, currently, it can be used only on Google Chrome browser.
Bottom Line
Now, to make your YouTube and Instagram videos interesting you can generate and add cool drone shots without spending a fortune on drones or stock drone footage.
If you've any thoughts on How to Create Fake Drone Shots Using Google Earth Studio?, then feel free to drop in below comment box. Also, please subscribe to our DigitBin YouTube channel for videos tutorials. Cheers!
