Do you use Microsoft Word to prepare your documents? If so, sometimes the document may look pale with the default simple color set and theme in Microsoft Word. Well, you can use custom color sets and theme options in MS Word to turn your documents and other background themes into a standard level.
Changing the theme color in Microsoft Word will affect the overall look of your document including the heading colors, hyperlink text, default text color, and more. If you’re bored with the default color in MS Word, you can either use a standard color or a custom color.
In this guide, we show you how to create a custom color set and theme in Microsoft Word. So, let’s have a look into it.
Steps to Create a Custom Color Set in MS Word
In Microsoft Word, a color set is mainly a collection of colors that is particularly used to customize and store colors. Microsoft Word comes with many themes and color sets which you can apply depending upon your needs.
Here’s how to create a custom color set in Microsoft Word:
- Launch Microsoft Word by going to the start menu on your computer.
- Navigate to your document or you can simply choose a blank page.
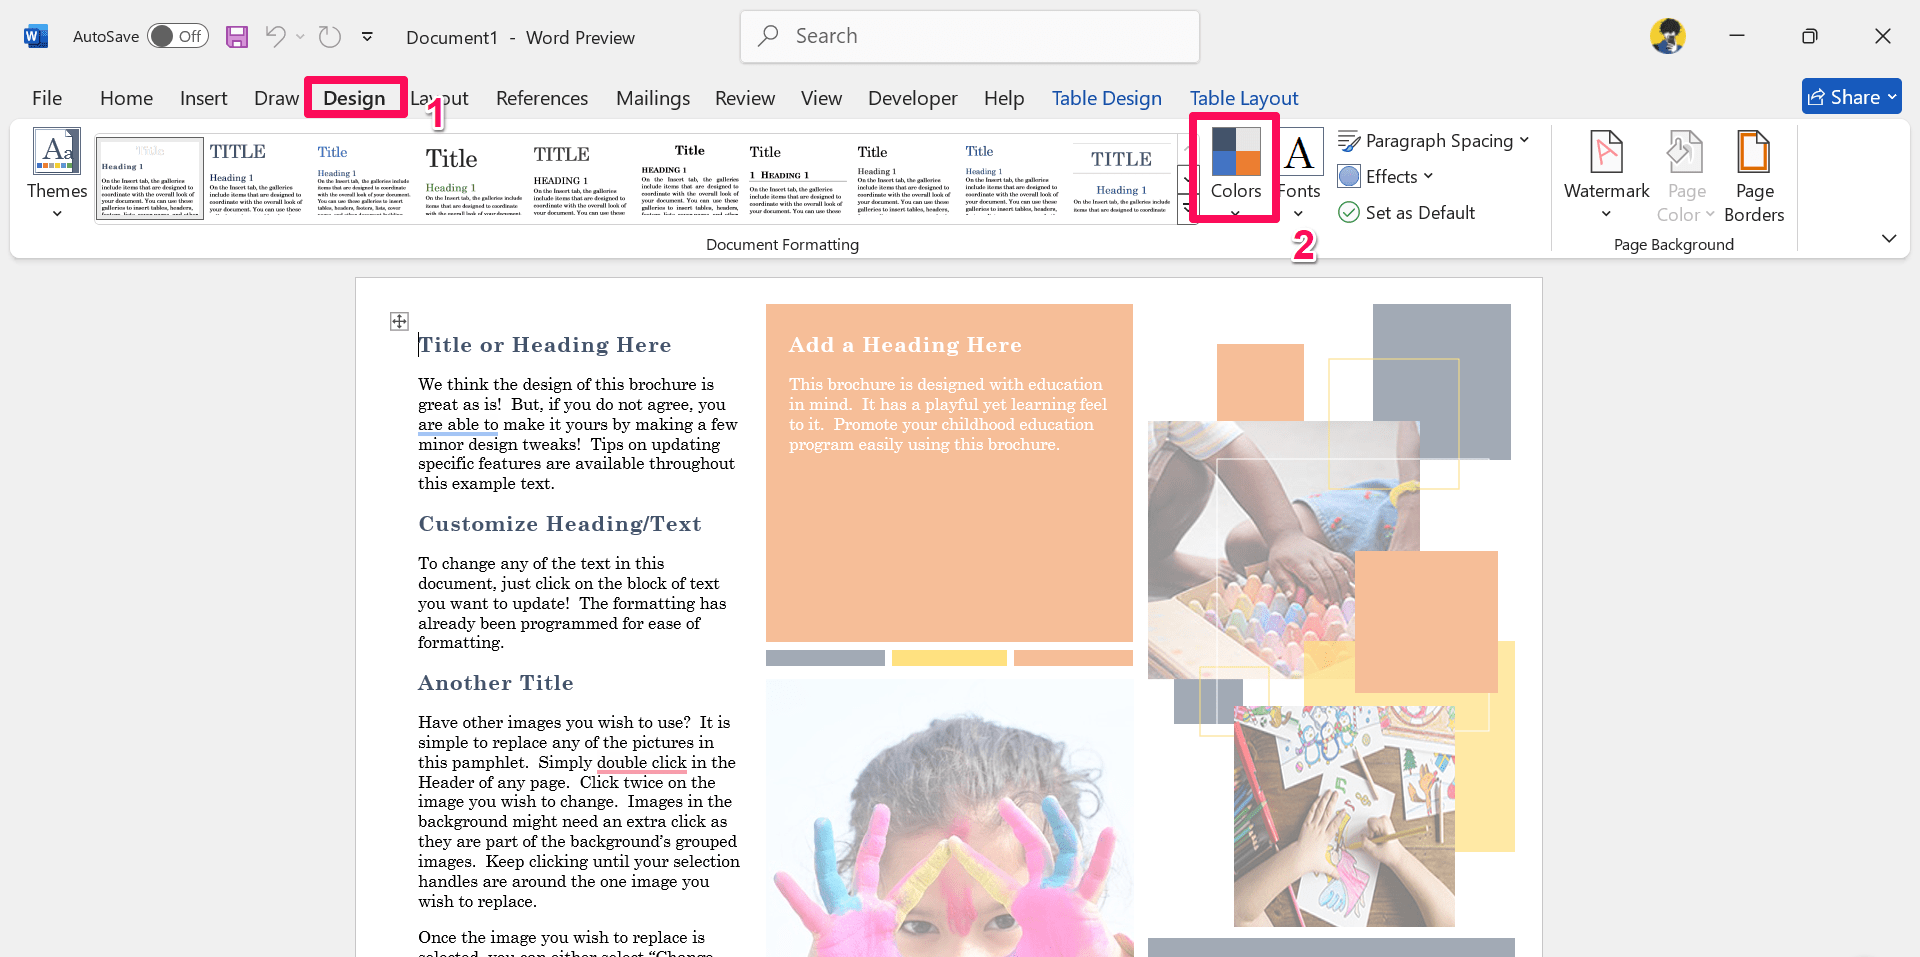
- Click on the Design tab located at the top ribbon.
- Then, click on the drop-down menu beneath the Colors option.

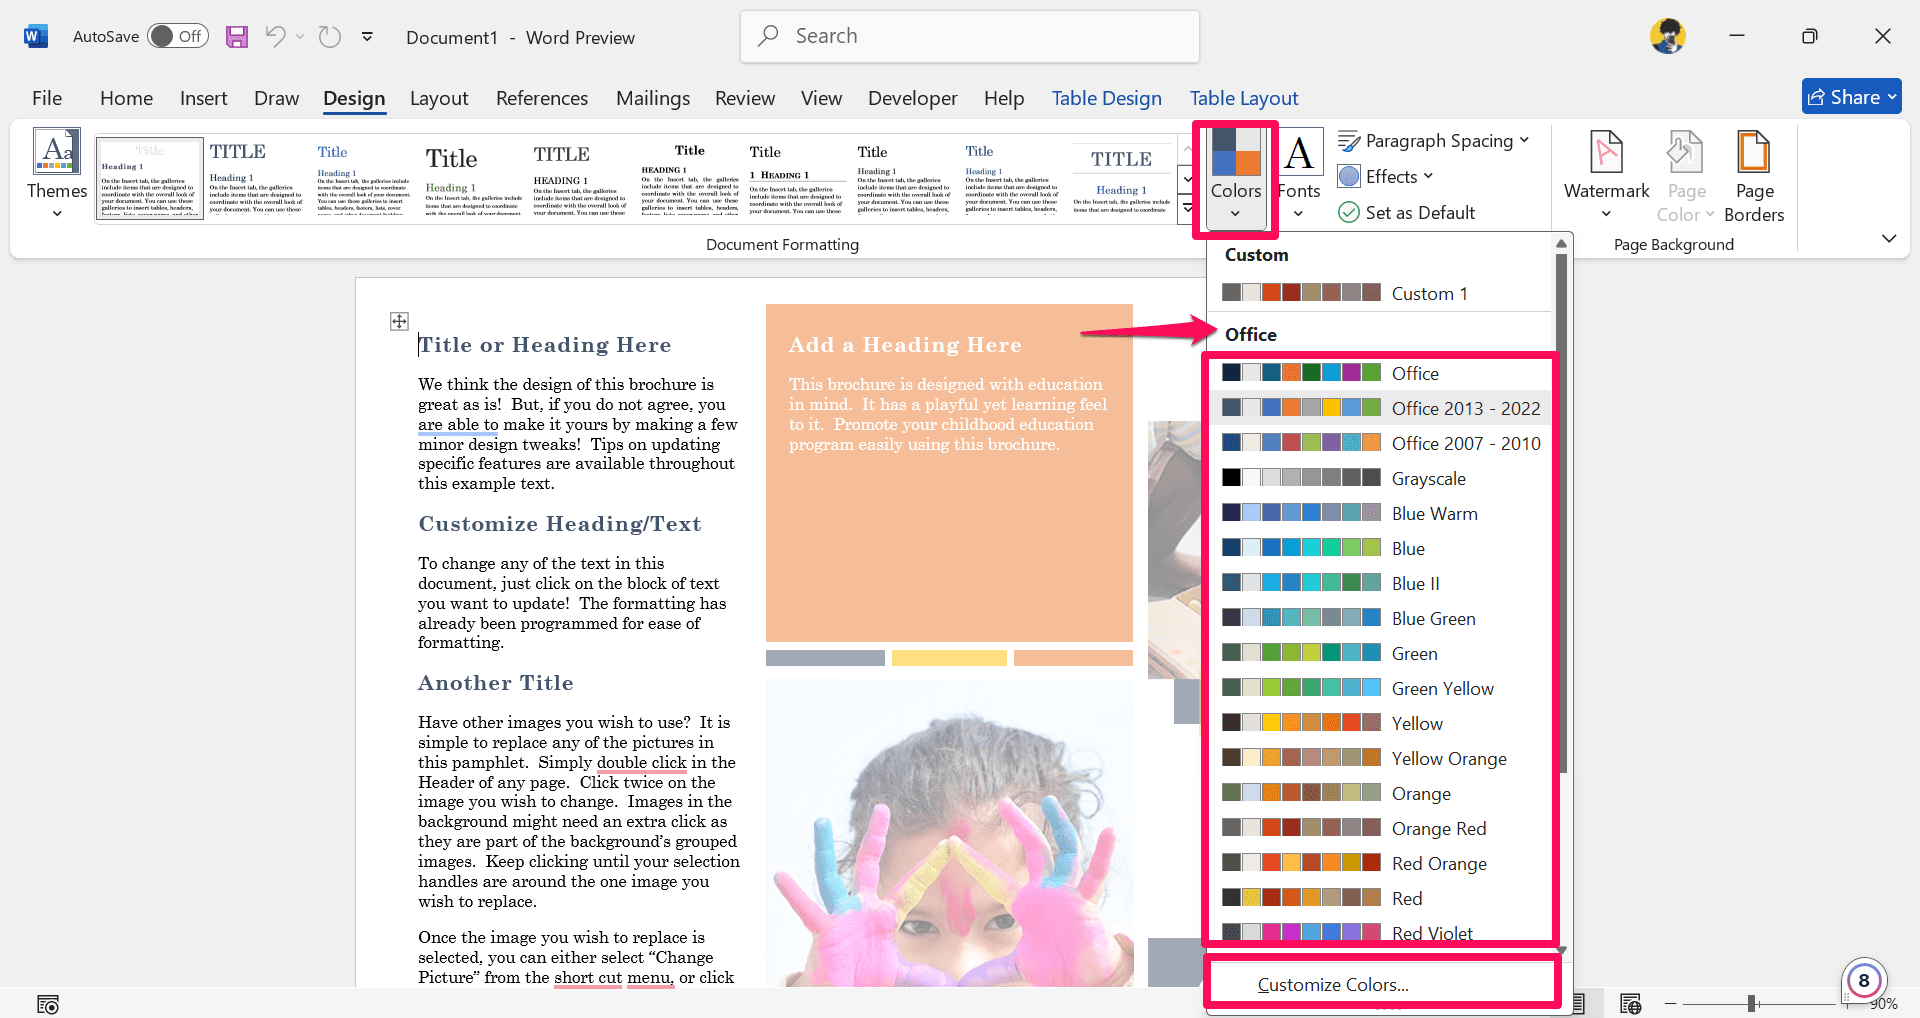
- In the drop-down menu, you will see a different color set. You can select the color to apply to your word.
- Click on the “Customize Colors” option to create a new theme color.

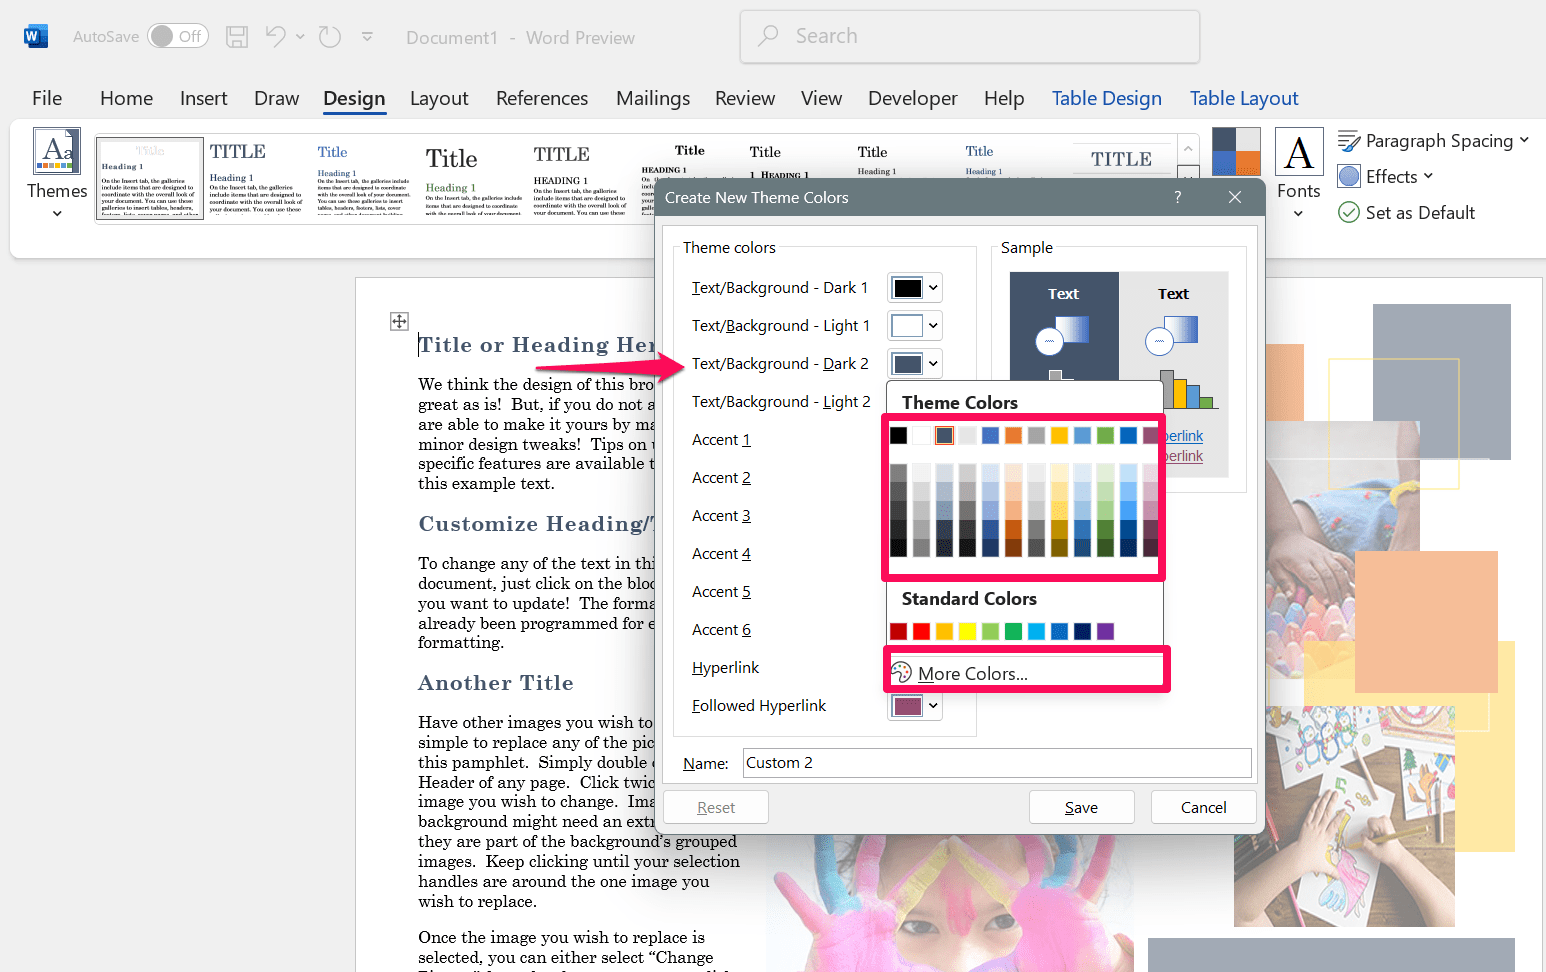
- Under the “Create New Theme Colors” dialog box, you may see a couple of Theme Colors.
- Click on the drop-down menu next to each Text/Background color, Accent Color, or Hyperlink color.
- From the drop-down menu, you can select either default colors or select a standard color. If you want to create your own customer color, click on “More Colors.”

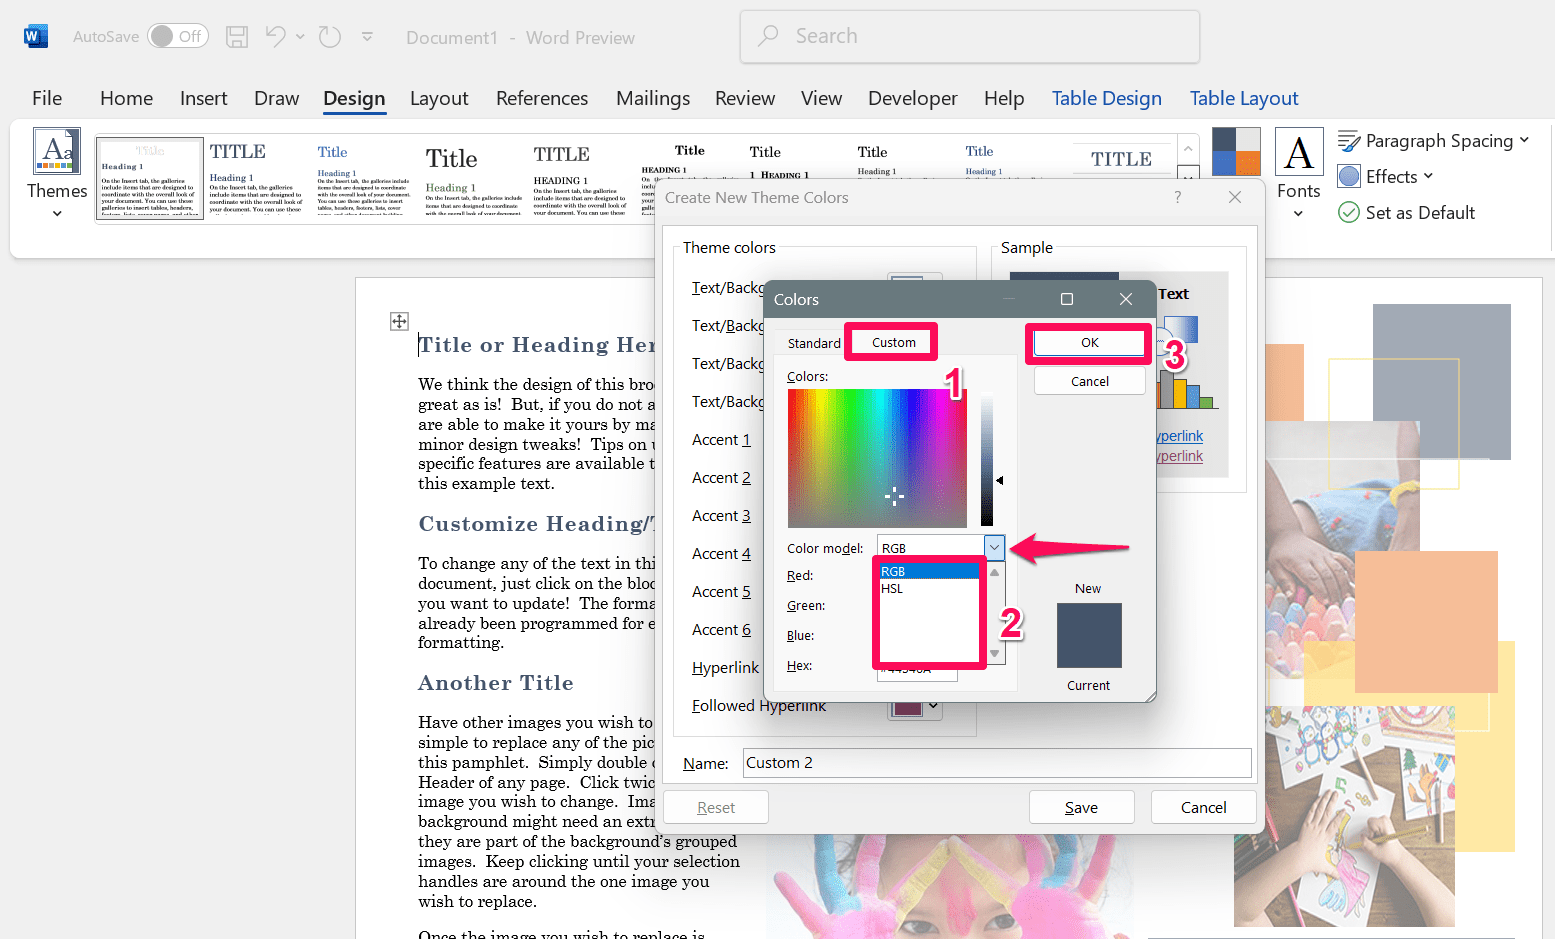
- From the pop-up window, click the “Custom” tab.
- In the Custom tab, click on the “Color model” drop-down menu and select your desired options: RGB (Red, Green, and Blue) value or the HSL (Hue, Saturation, and Lightness) value.
- You can also increase and decrease the color value in the Custom tab by clicking on the up and down arrow.
- Once you select the color, click on OK to close the window. Now, the color should appear under Theme Colors.

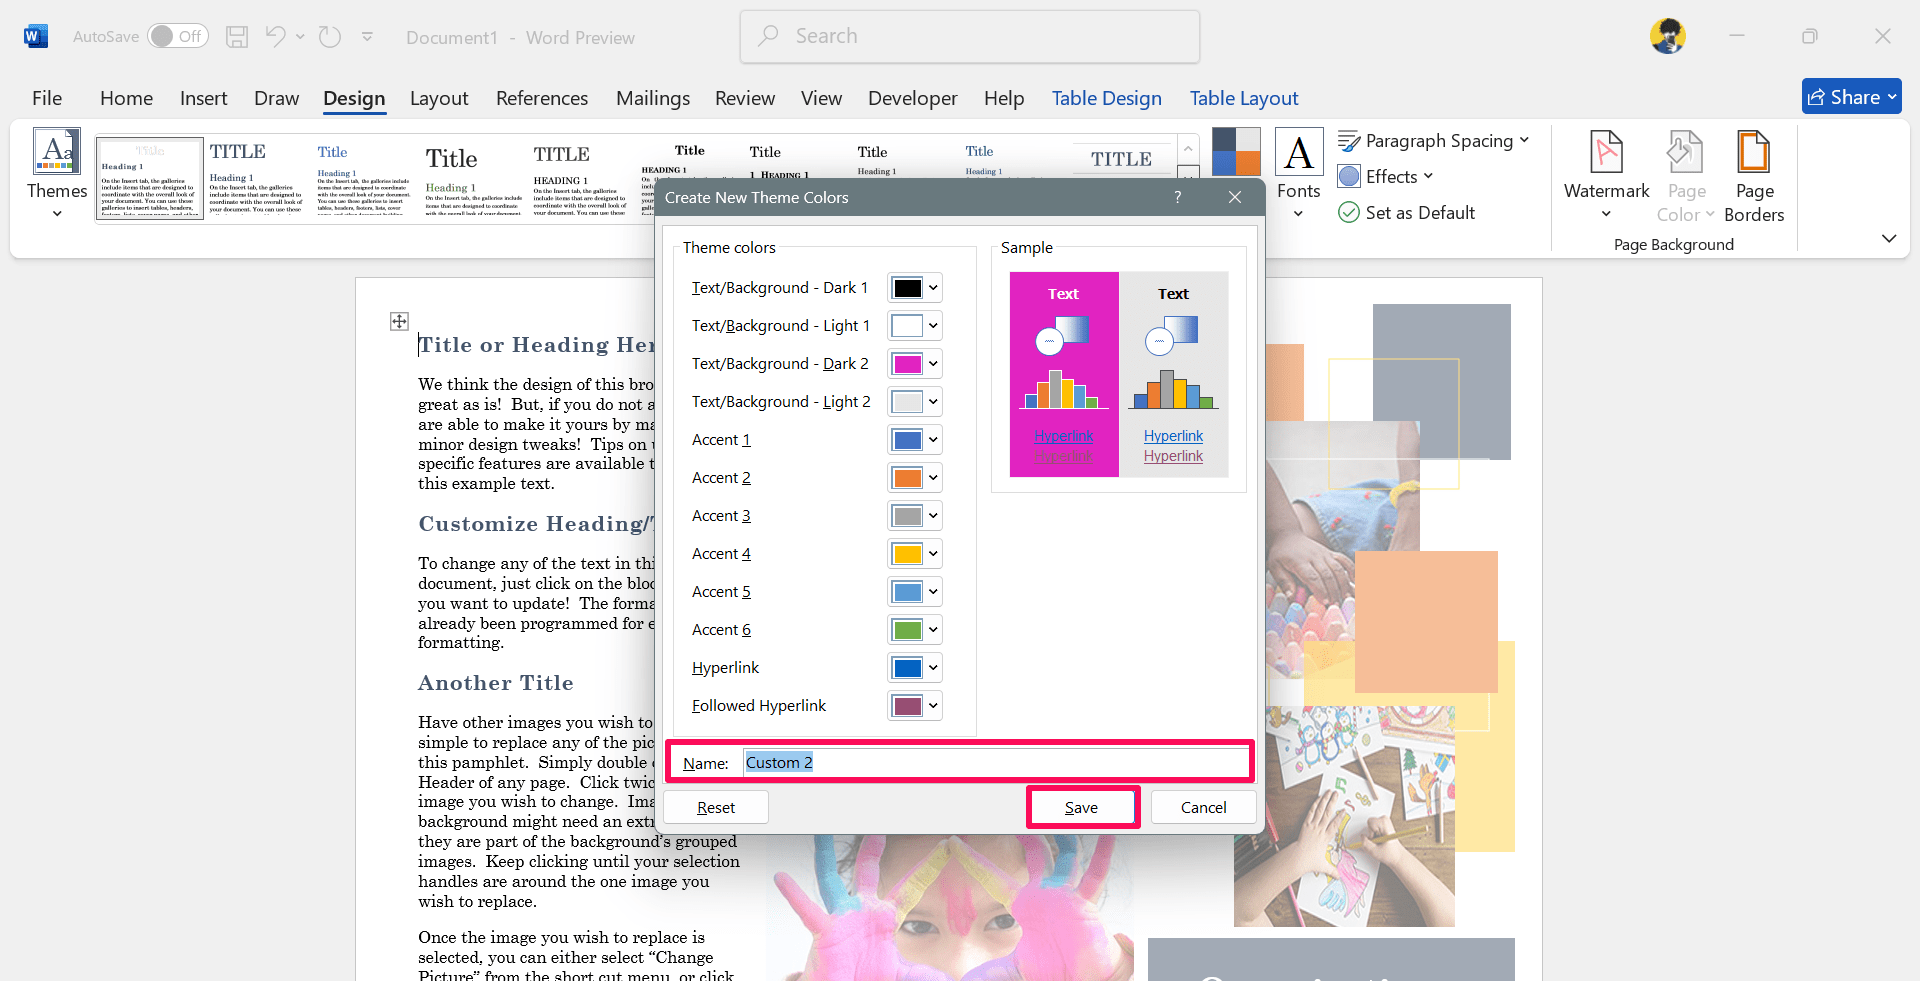
- You can update all Text/Background colors, Accent colors, and Hyperlinks to your preferred colors. Then, click on the text section and give a name for your color.
- Finally, click the Save button to save your new color set and it will apply to your Word document.

Steps to Create a Custom Theme in a Word Document
Now you may know how to create a custom color set on Microsoft Word. Now, let’s talk about how you can create a custom theme in Word documents.
- Launch Microsoft Word and open a Word document. Click on the Design tab at the top of the ribbon.
- In the Design tab, click on the drop-down beneath the “Colors” option.

- From the pop-up menu, select the Custom Color you want to apply.
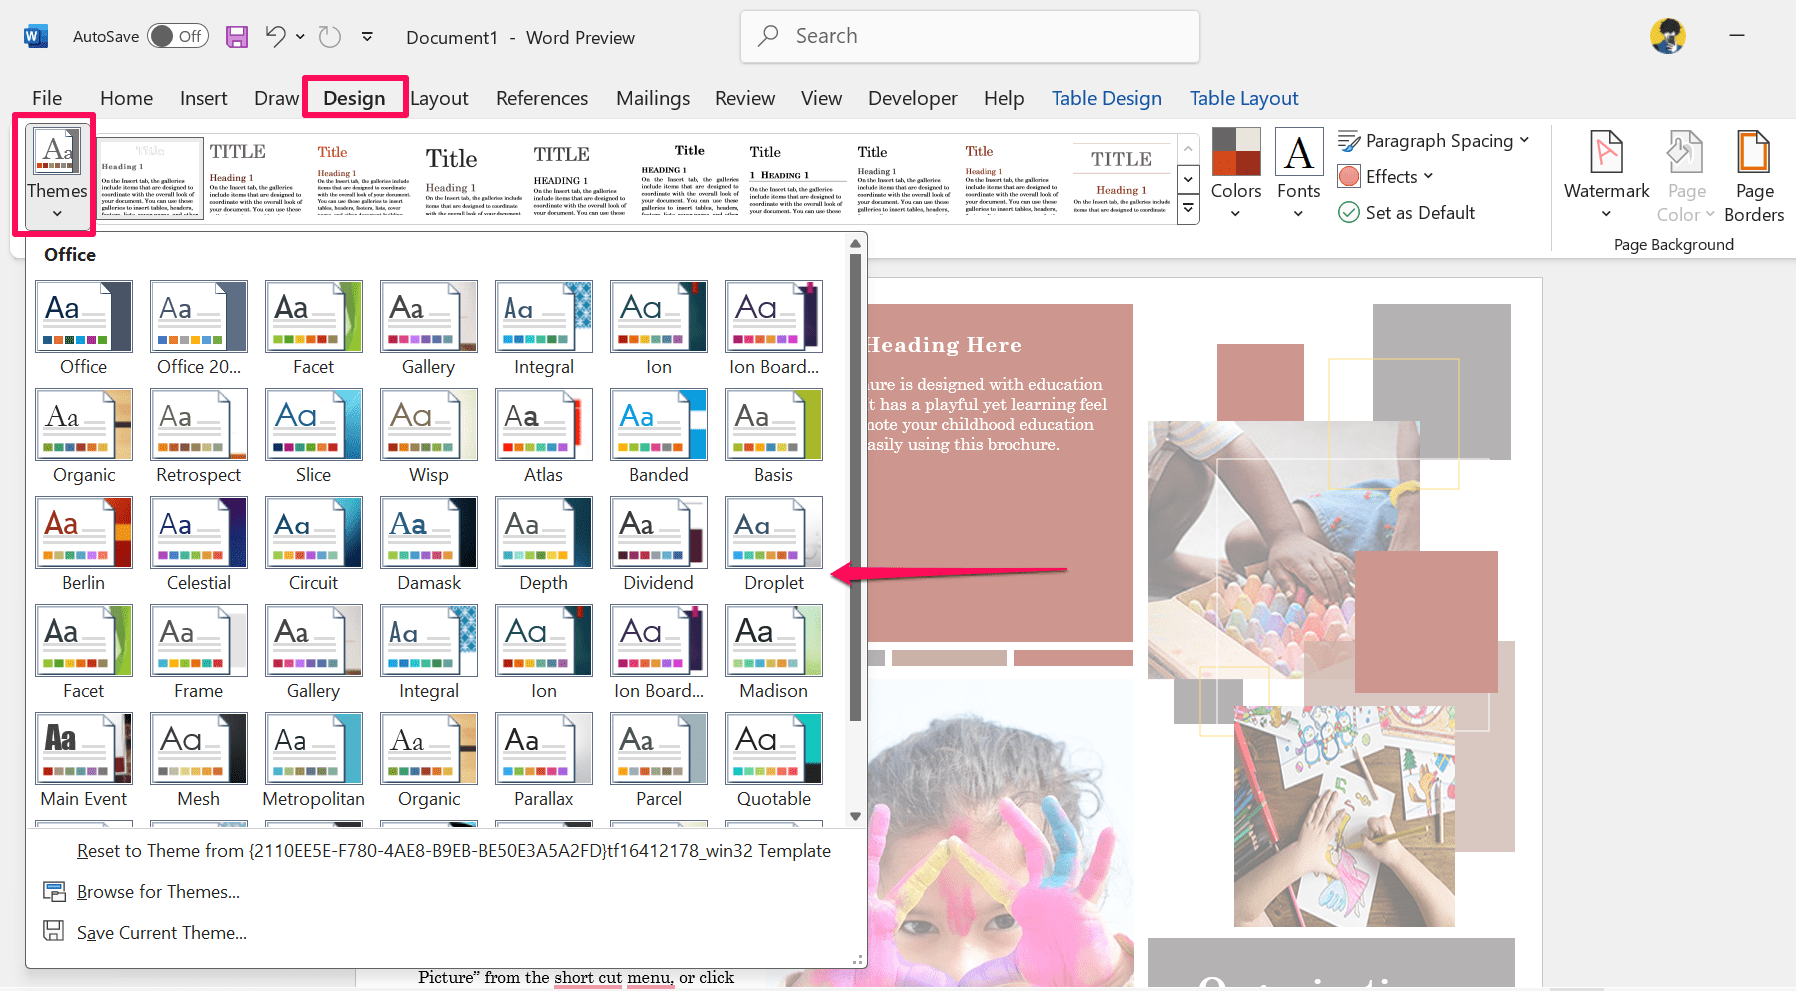
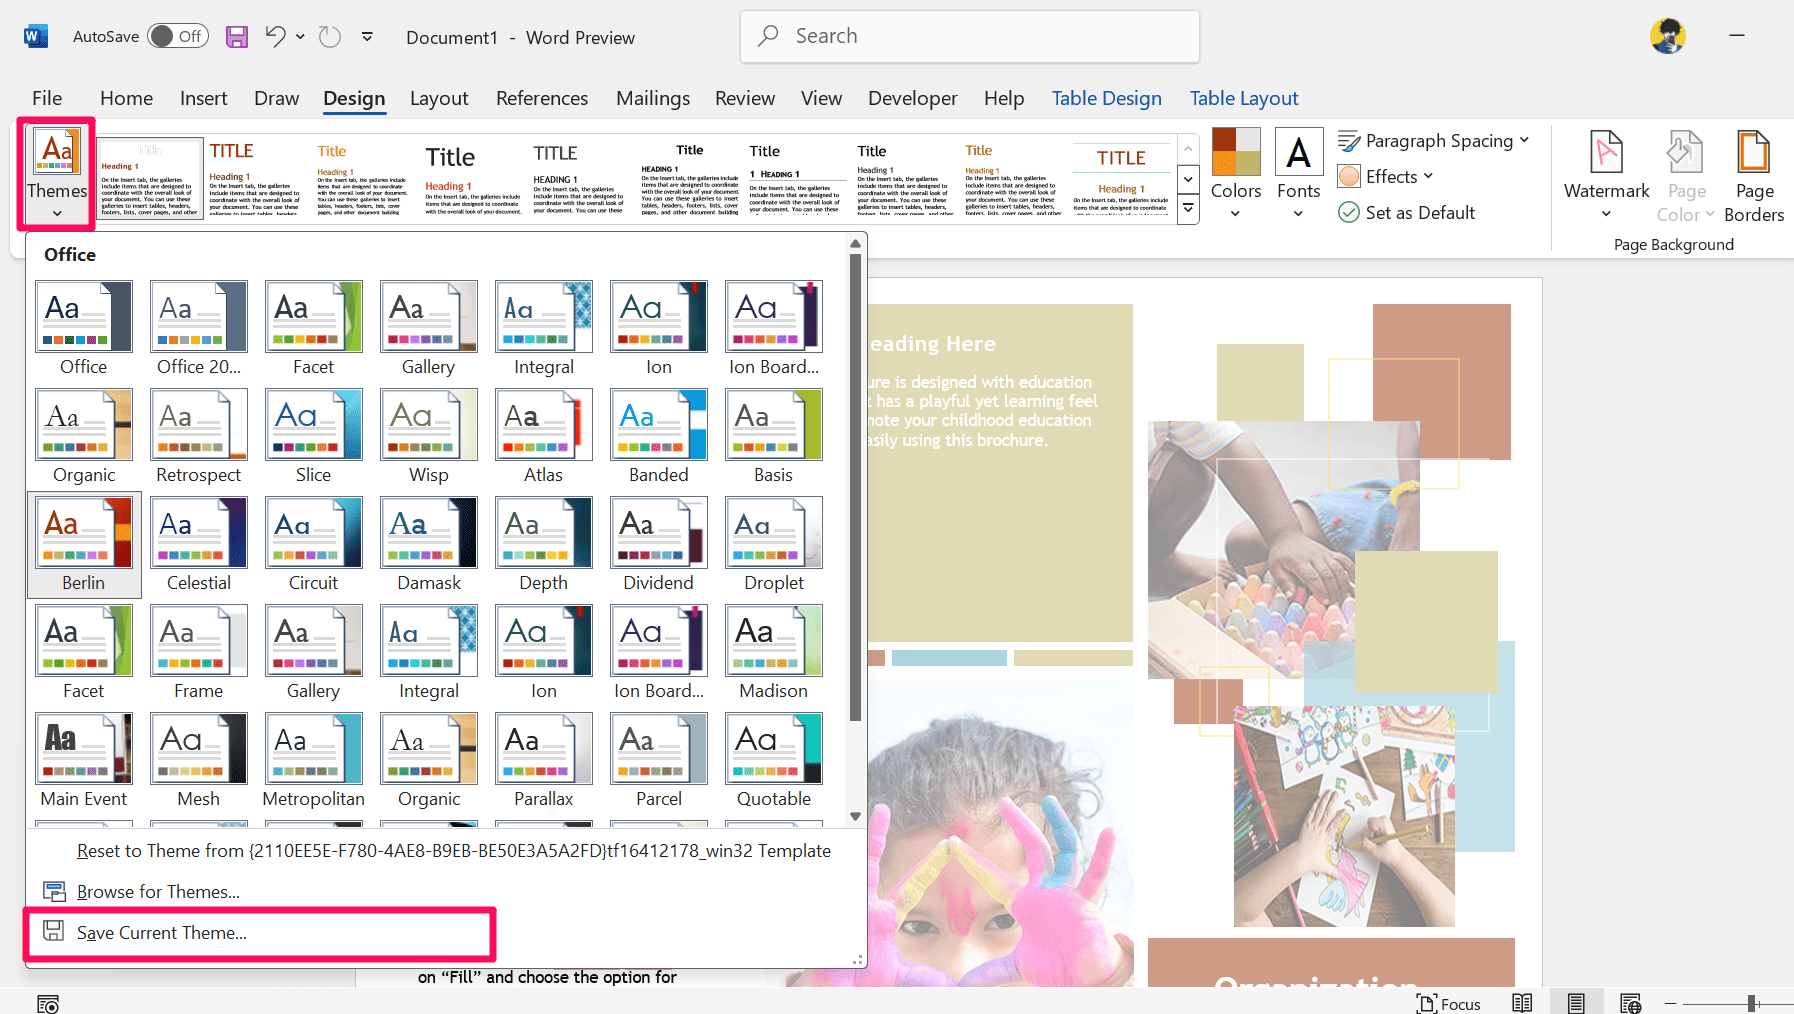
- Then, click on the drop-down menu beneath the “Themes” option.
- Here, you will get different theme options on the screen. Look for the one that you want to apply on the MS Word.

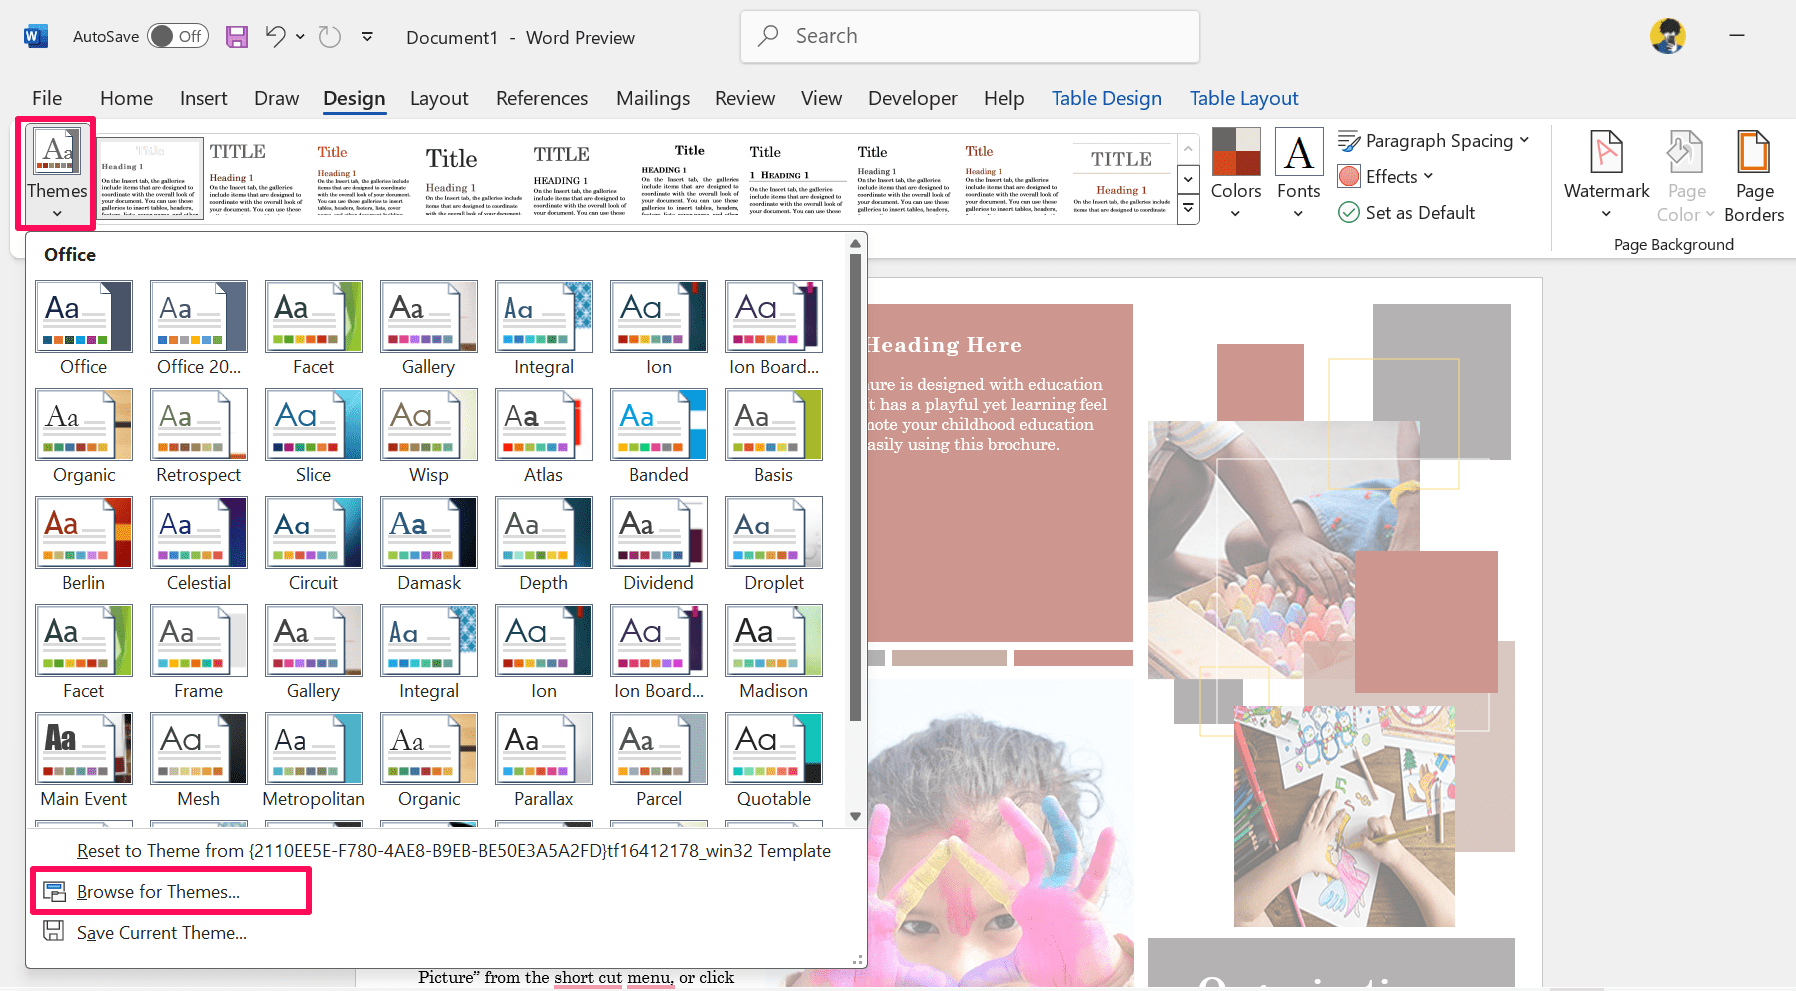
- If you want to apply a custom theme, then click on the “Browse for Themes..” option in the bottom left corner.

- Now you will be directed to your File Explorer. Simply, choose the theme file to apply to your document.
- If you want to save the current theme in File Explorer, click on “Save Current Theme.”

- Enter the name of your file and click on the Save button.
Once you save the theme file on your File Manager, you can apply it anytime on your Word document.
Steps to Create a Custom Font Set in MS Word
To turn your Microsoft Word into a unique and standard level, you should change the color and theme. Now you know how to do it. To create a perfect combination of color and themes, you should create a custom font set in Microsoft Word. Here’s how:
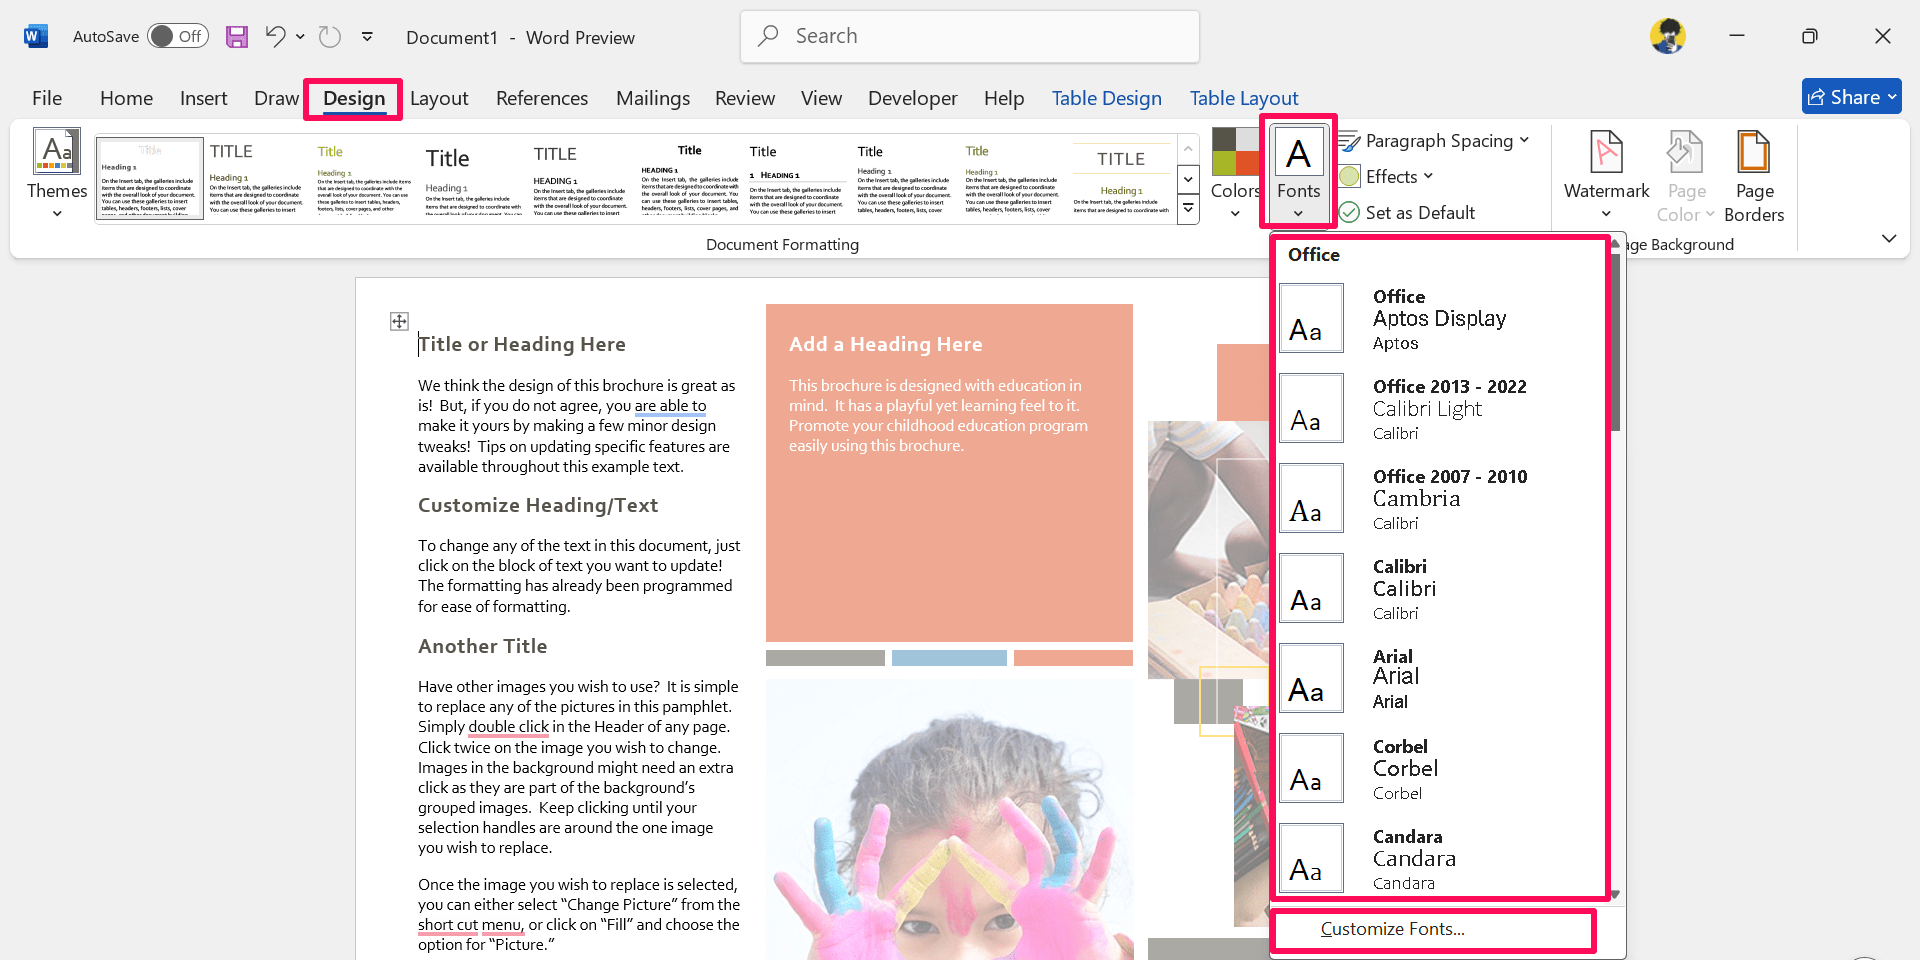
- On your Word document, click on the Design tab in the top ribbon.
- Click on the Fonts drop-down menu to open the font section.
- From the pop-up window, select a font you want to apply to your Word document.
- If you want a custom font, click on the “Customize Fonts” option from the drop-down menu.

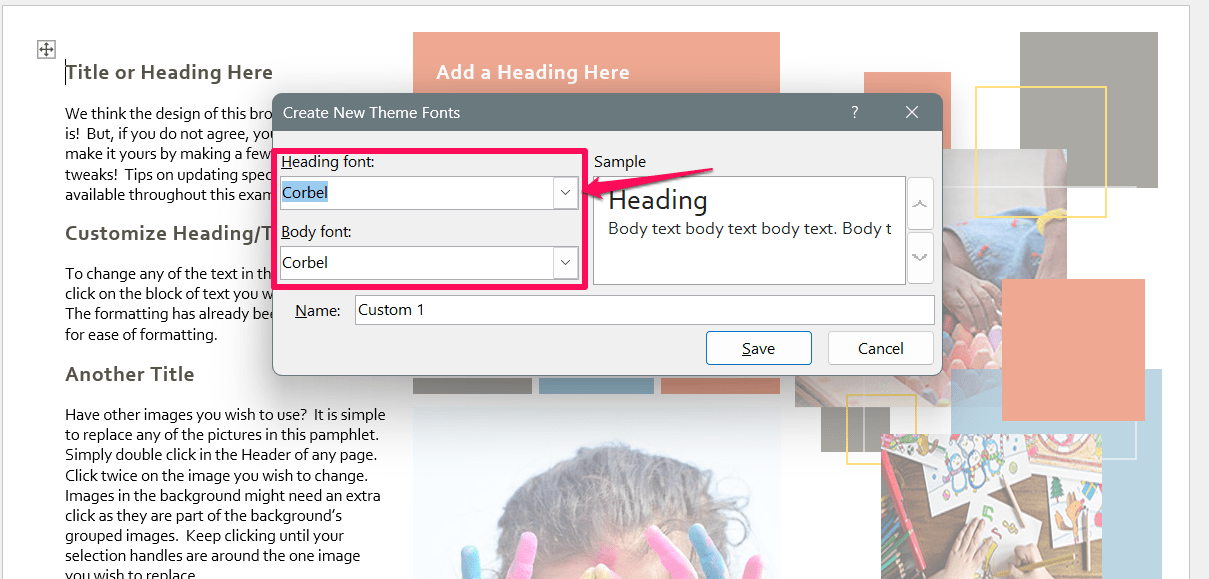
- In the “Create New Theme Fonts dialog window,” click on the “Heading font” drop-down menu and select your preferred font for the theme.

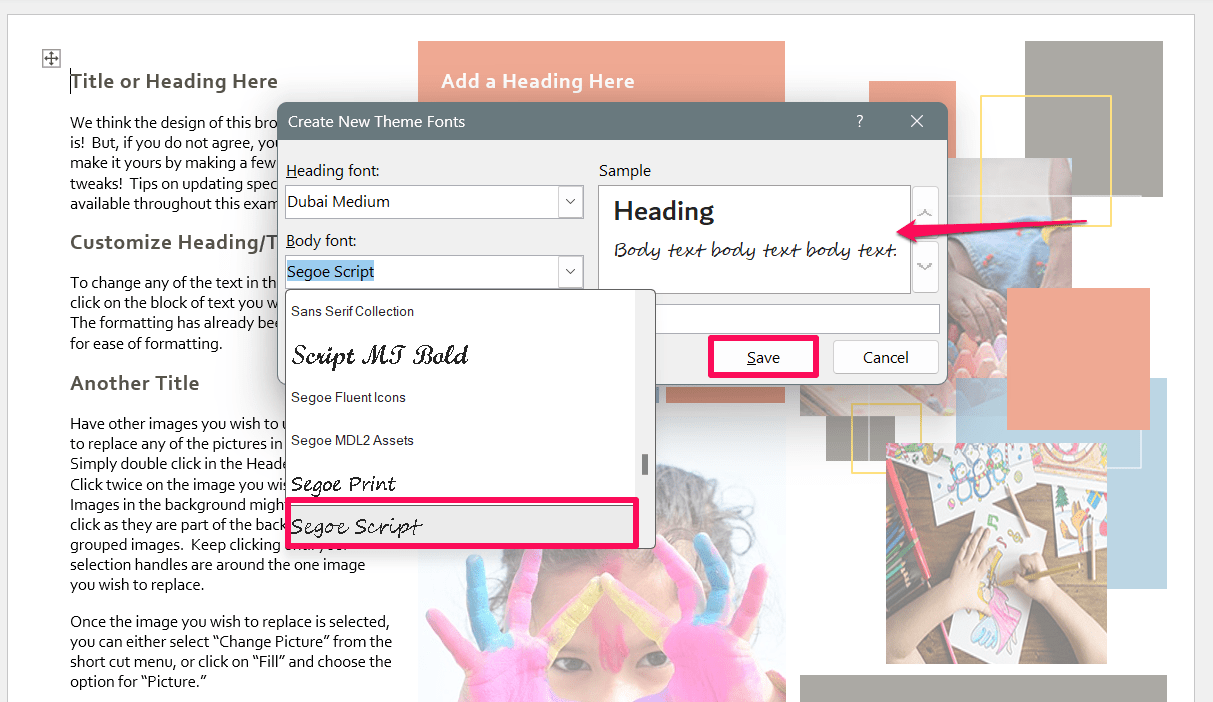
- Click on the Body font drop-down menu and choose your preferred body text font.
- Once you select the Heading font and Body font, then it will be visible in the Sample section.

- If you want to give a name to your selected font, click on the “Name” section and enter the name of your new font.
- Click on the Save button to confirm the changes and close the window.
- Now it may apply in your MS Word along with your custom theme and color set.
Bottom Line
That’s it. This is how you can quickly create a custom color and theme in Microsoft Word. However, it’s always best to choose the best color set and theme to customize your Word document to a standard level. It will give you a pleasant look while creating a document for your organization or school. I hope you have found this guide helpful.
If you've any thoughts on How to Create a Custom Color Set and Theme in MS Word, then feel free to drop in below comment box. Also, please subscribe to our DigitBin YouTube channel for videos tutorials. Cheers!
