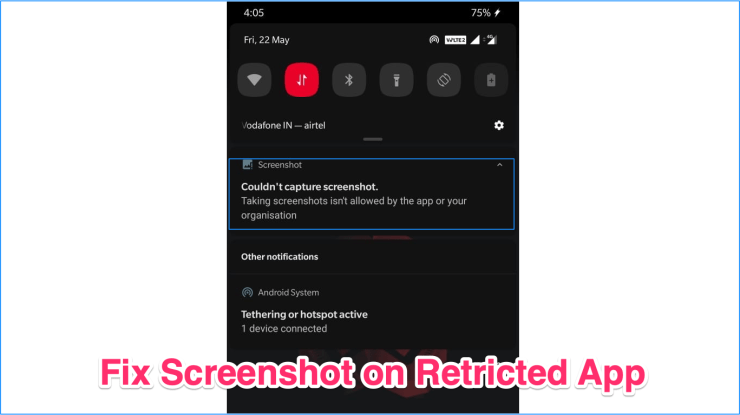
Earlier, taking screenshots on Android Phones on any app was easy. Still, with the increase in security threats and privacy concerns, Android started restricting screen capture on certain apps. Now, if you try to take a screenshot on certain apps or services, then you are greeted with a notification stating ‘Couldn’t Capture Screenshot‘ or ‘Cannot Save Screenshot‘. You are also shown a message below the notification, which states;
Taking Screenshot isn’t allowed by the app or your organisation.
Cannot Capture Screenshot, this Page Contains Personal Information.
Earlier, there was a trick of sharing a screenshot of the restricted App using Google Assistant, but Google released security updates and fixed that issue. Now, if you try to take a screenshot on any restricted app or a web page, then Google Assistant will Capture a Black Screen Screenshot. So, how can you grab a screenshot on any app which blocks it? DigitBin is here for your rescue.
Note: Taking Screenshots on apps that are not allowed may be against good practice; make sure you are using the following method fairly and for personal use only.
All the Apps may not work with these methods. But most of the apps surely work.
How to Take Screenshots on Restricted Apps Android?
Before sharing any method for capturing screenshots for apps that do not allow screenshots, let me clear out one thing. We at DigitBin respect the privacy and security enforced on any app for users. This guide is just for sharing knowledge with our readers. We do not support using these tricks to partake in any malicious activities that breach any smartphone user’s app security, data, and privacy.
Google Assistant Screen Capture Method Do Not Work anymore.
Method 1. Using App Cloner Application
You can use the App Cloner app to create a clone of an app with customized settings that can help you capture screenshots without a black screen issue.
Note: Make sure the app is not an APKs bundle but a single standalone APK version of the app. If it is APKs bundle than download the single APK standalone version from the Web.
- Download App Cloner APK and install it on your Android.
I tested the App on Android 12, and it is working well. If the above version force closes or not working on your device, try any other version from the web.
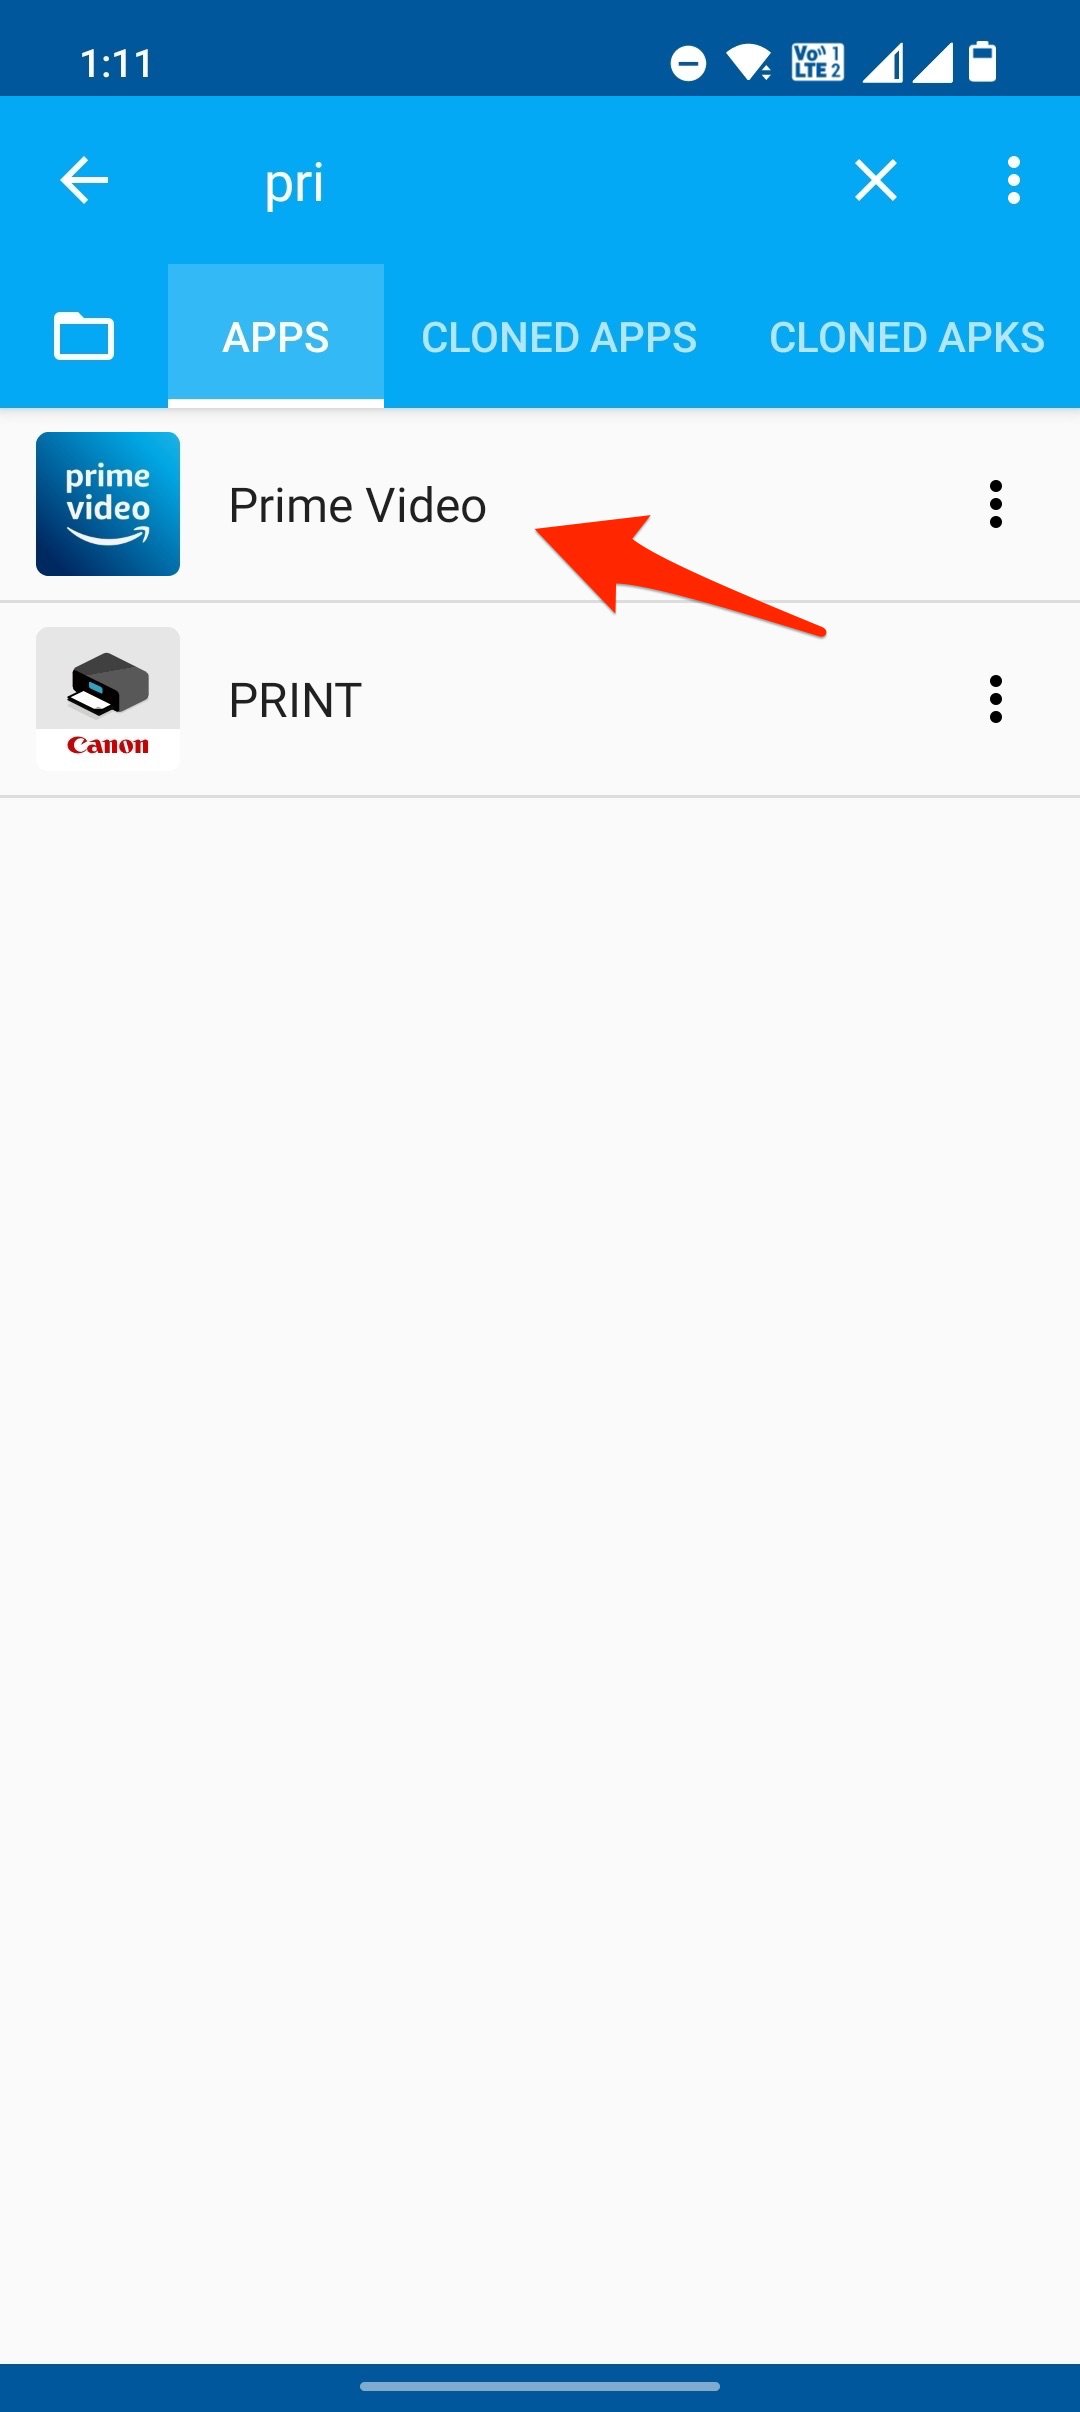
- Open the application and select the App that you wish to clone for taking screenshots on your Android.

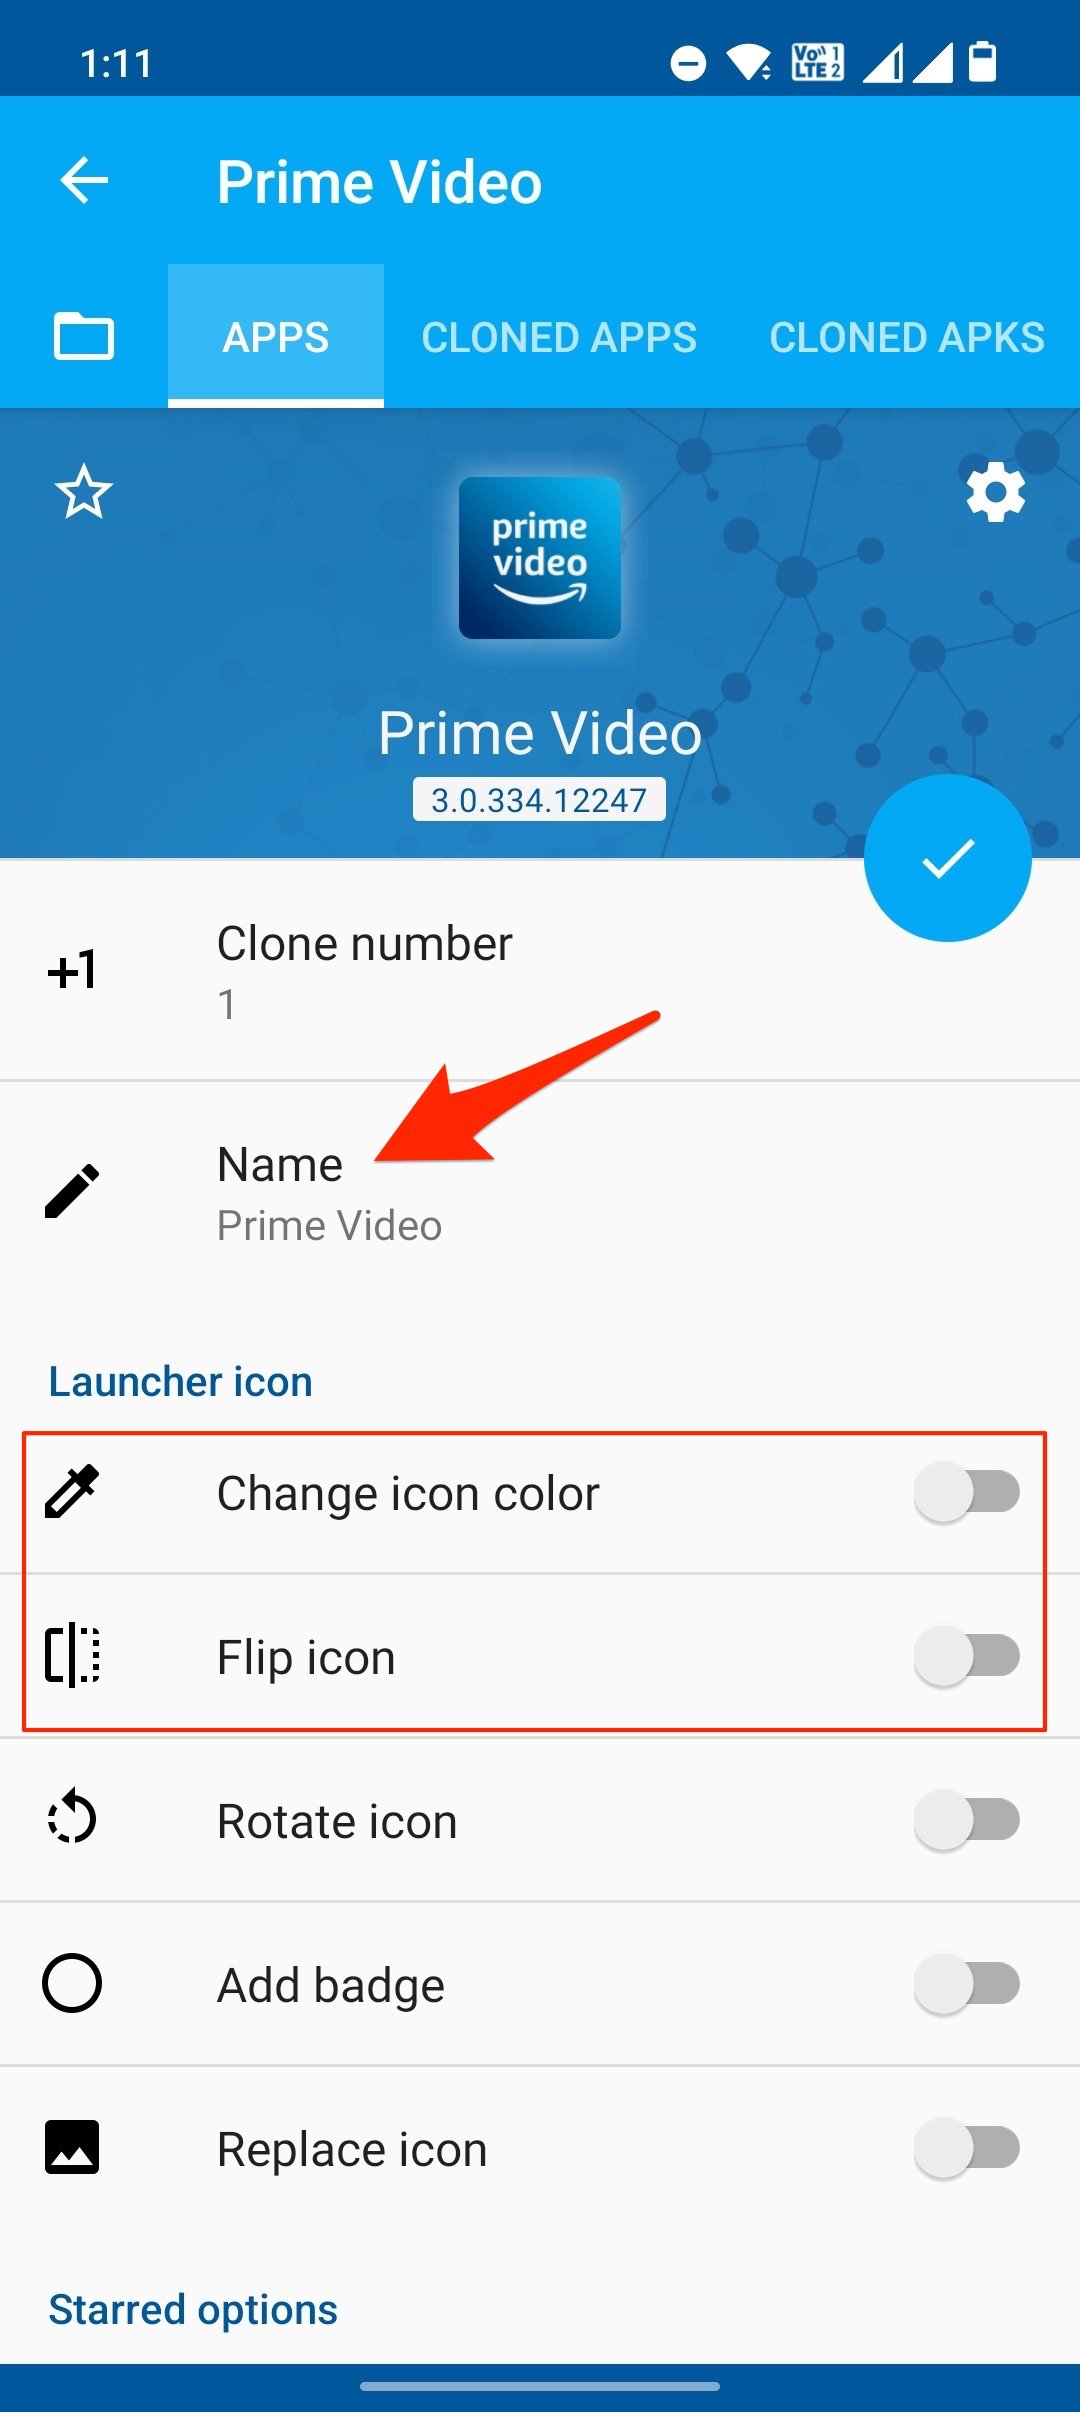
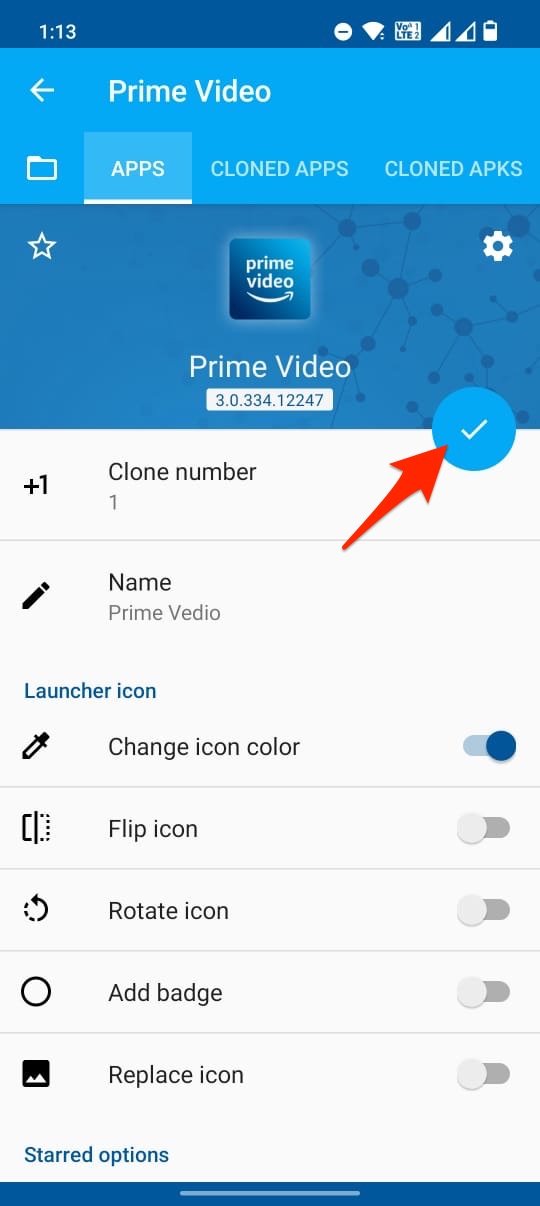
- Here change the app name or app icon color. This will help differentiate the cloned App from the original.
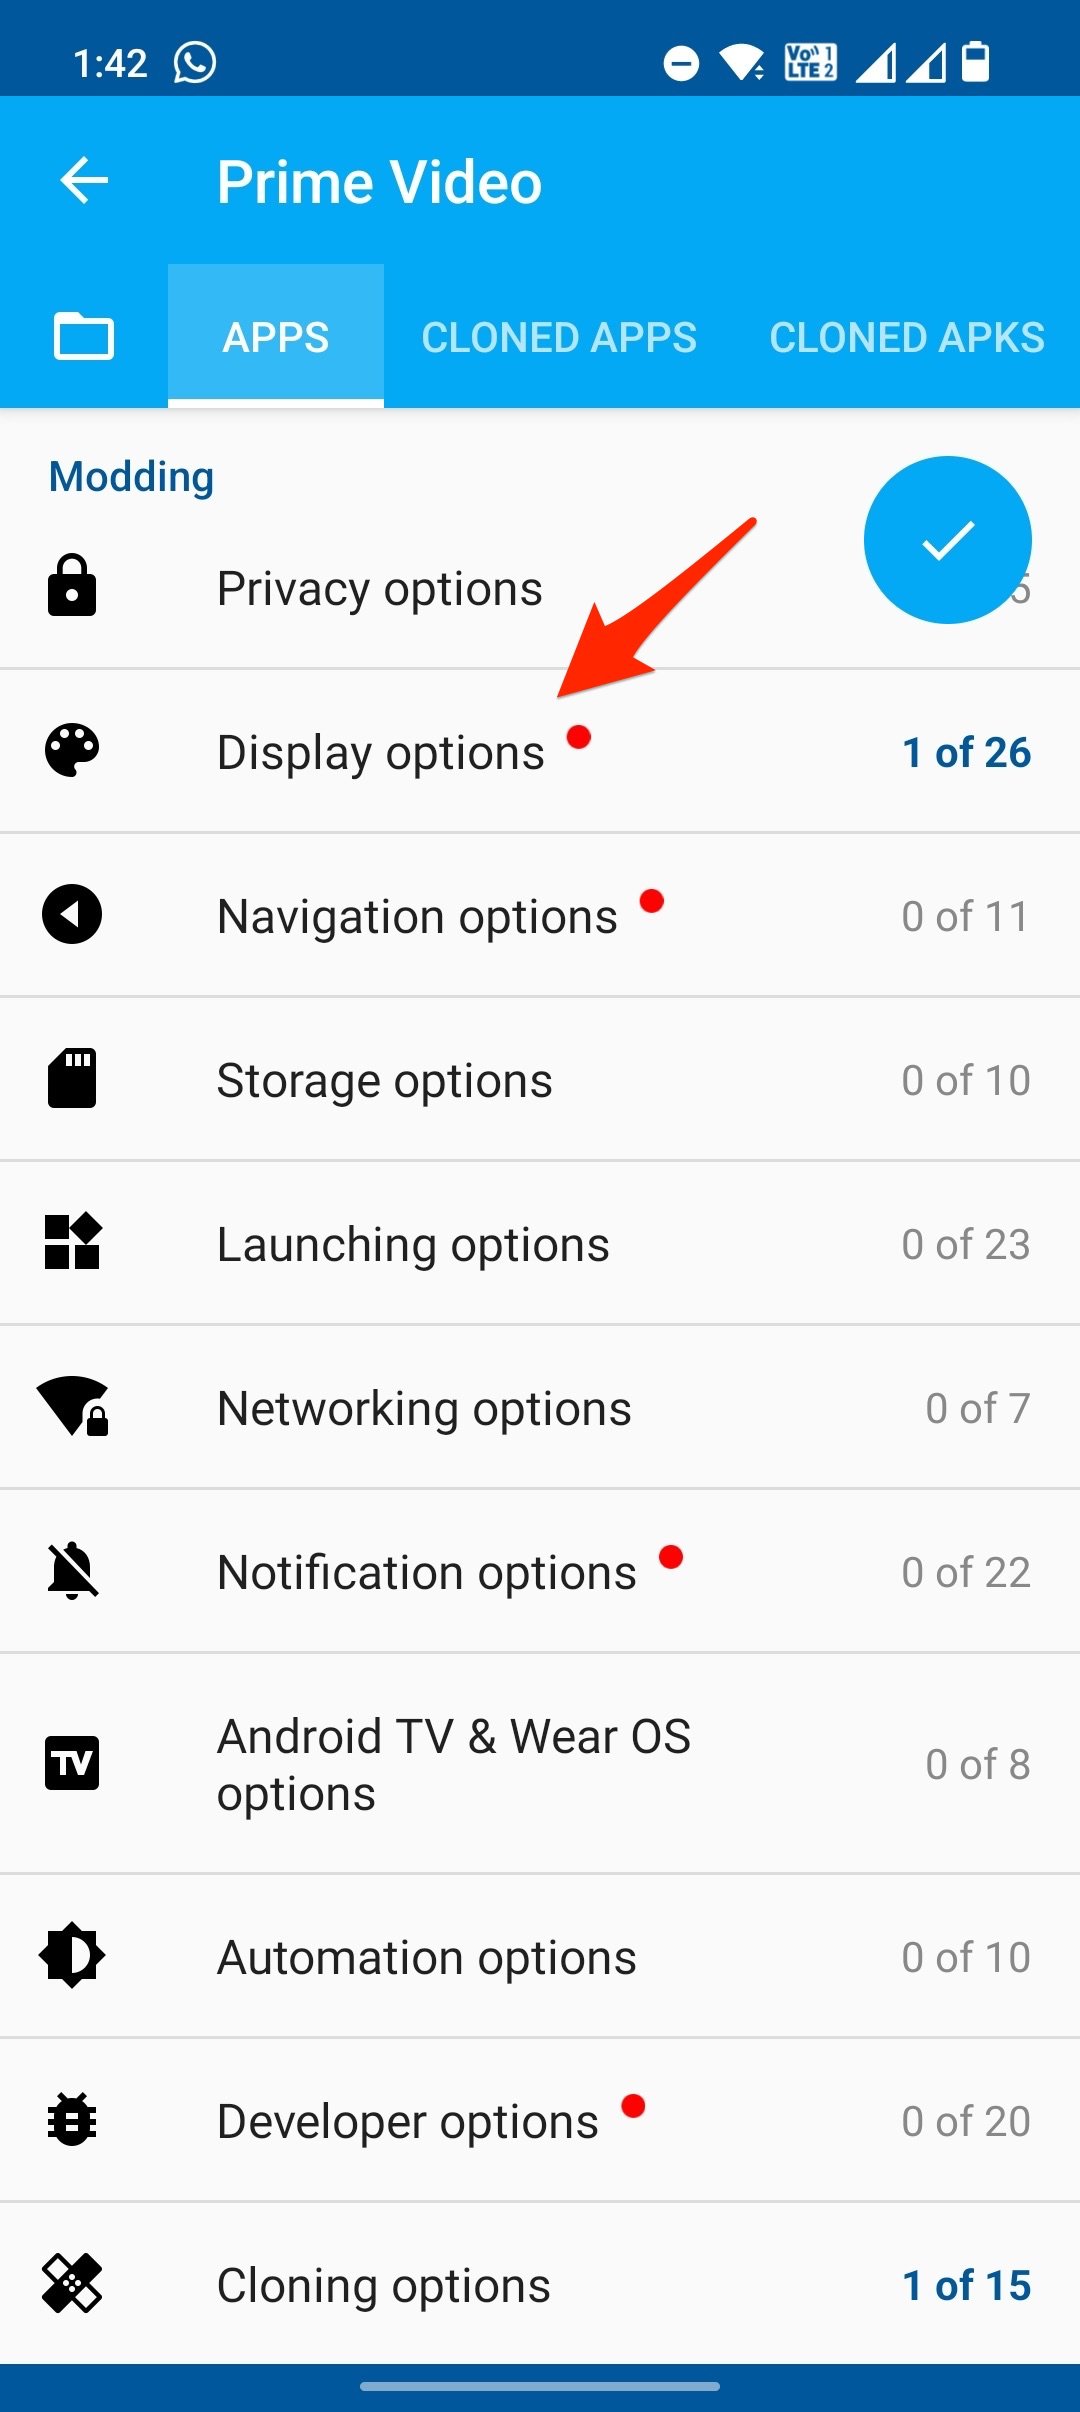
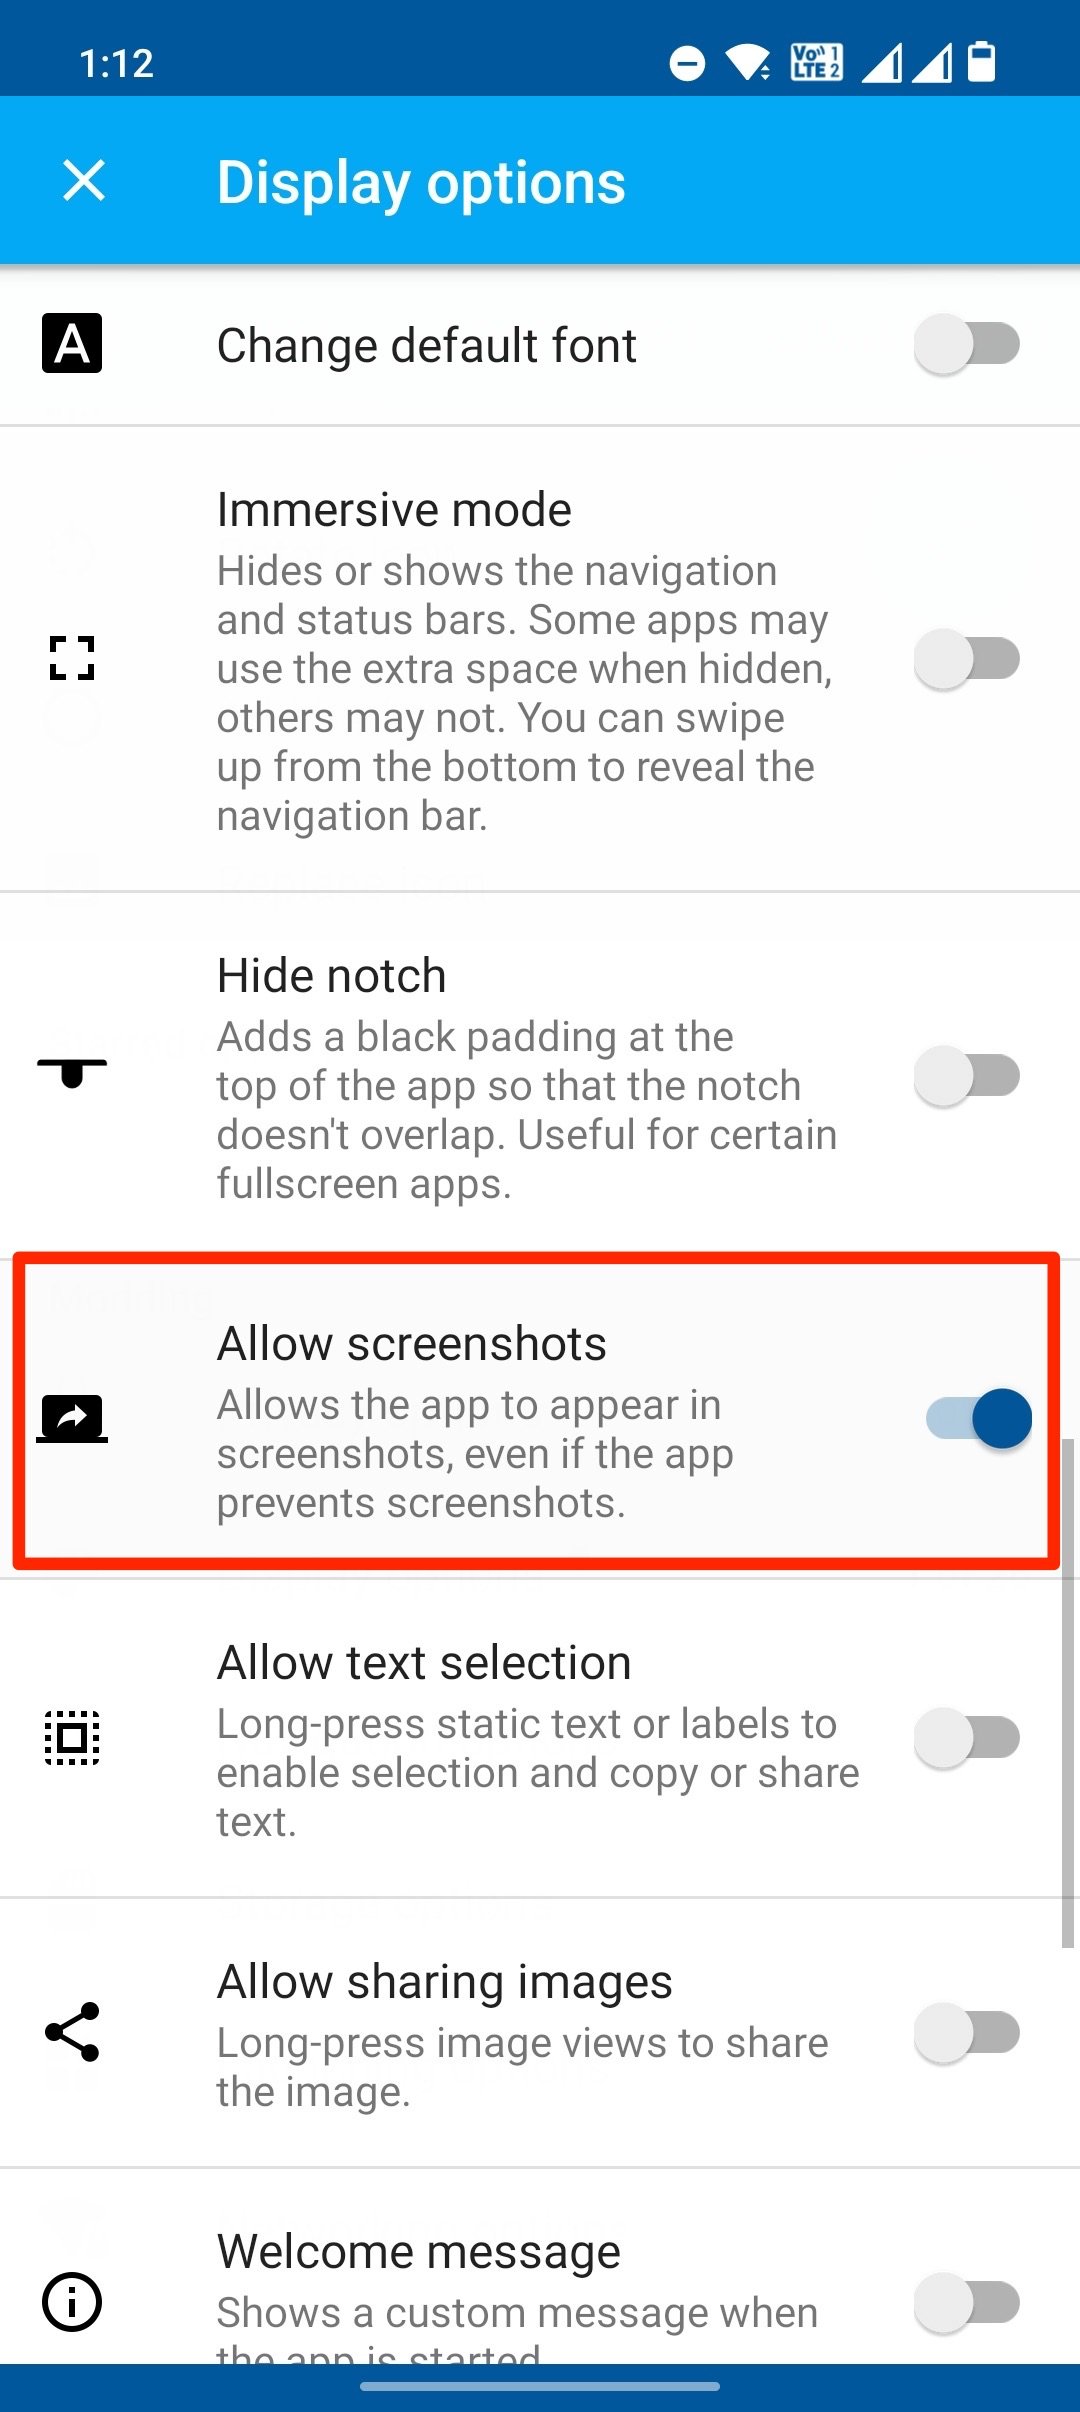
- Now scroll down and click on Display options and enable the Allow Screenshot toggle.
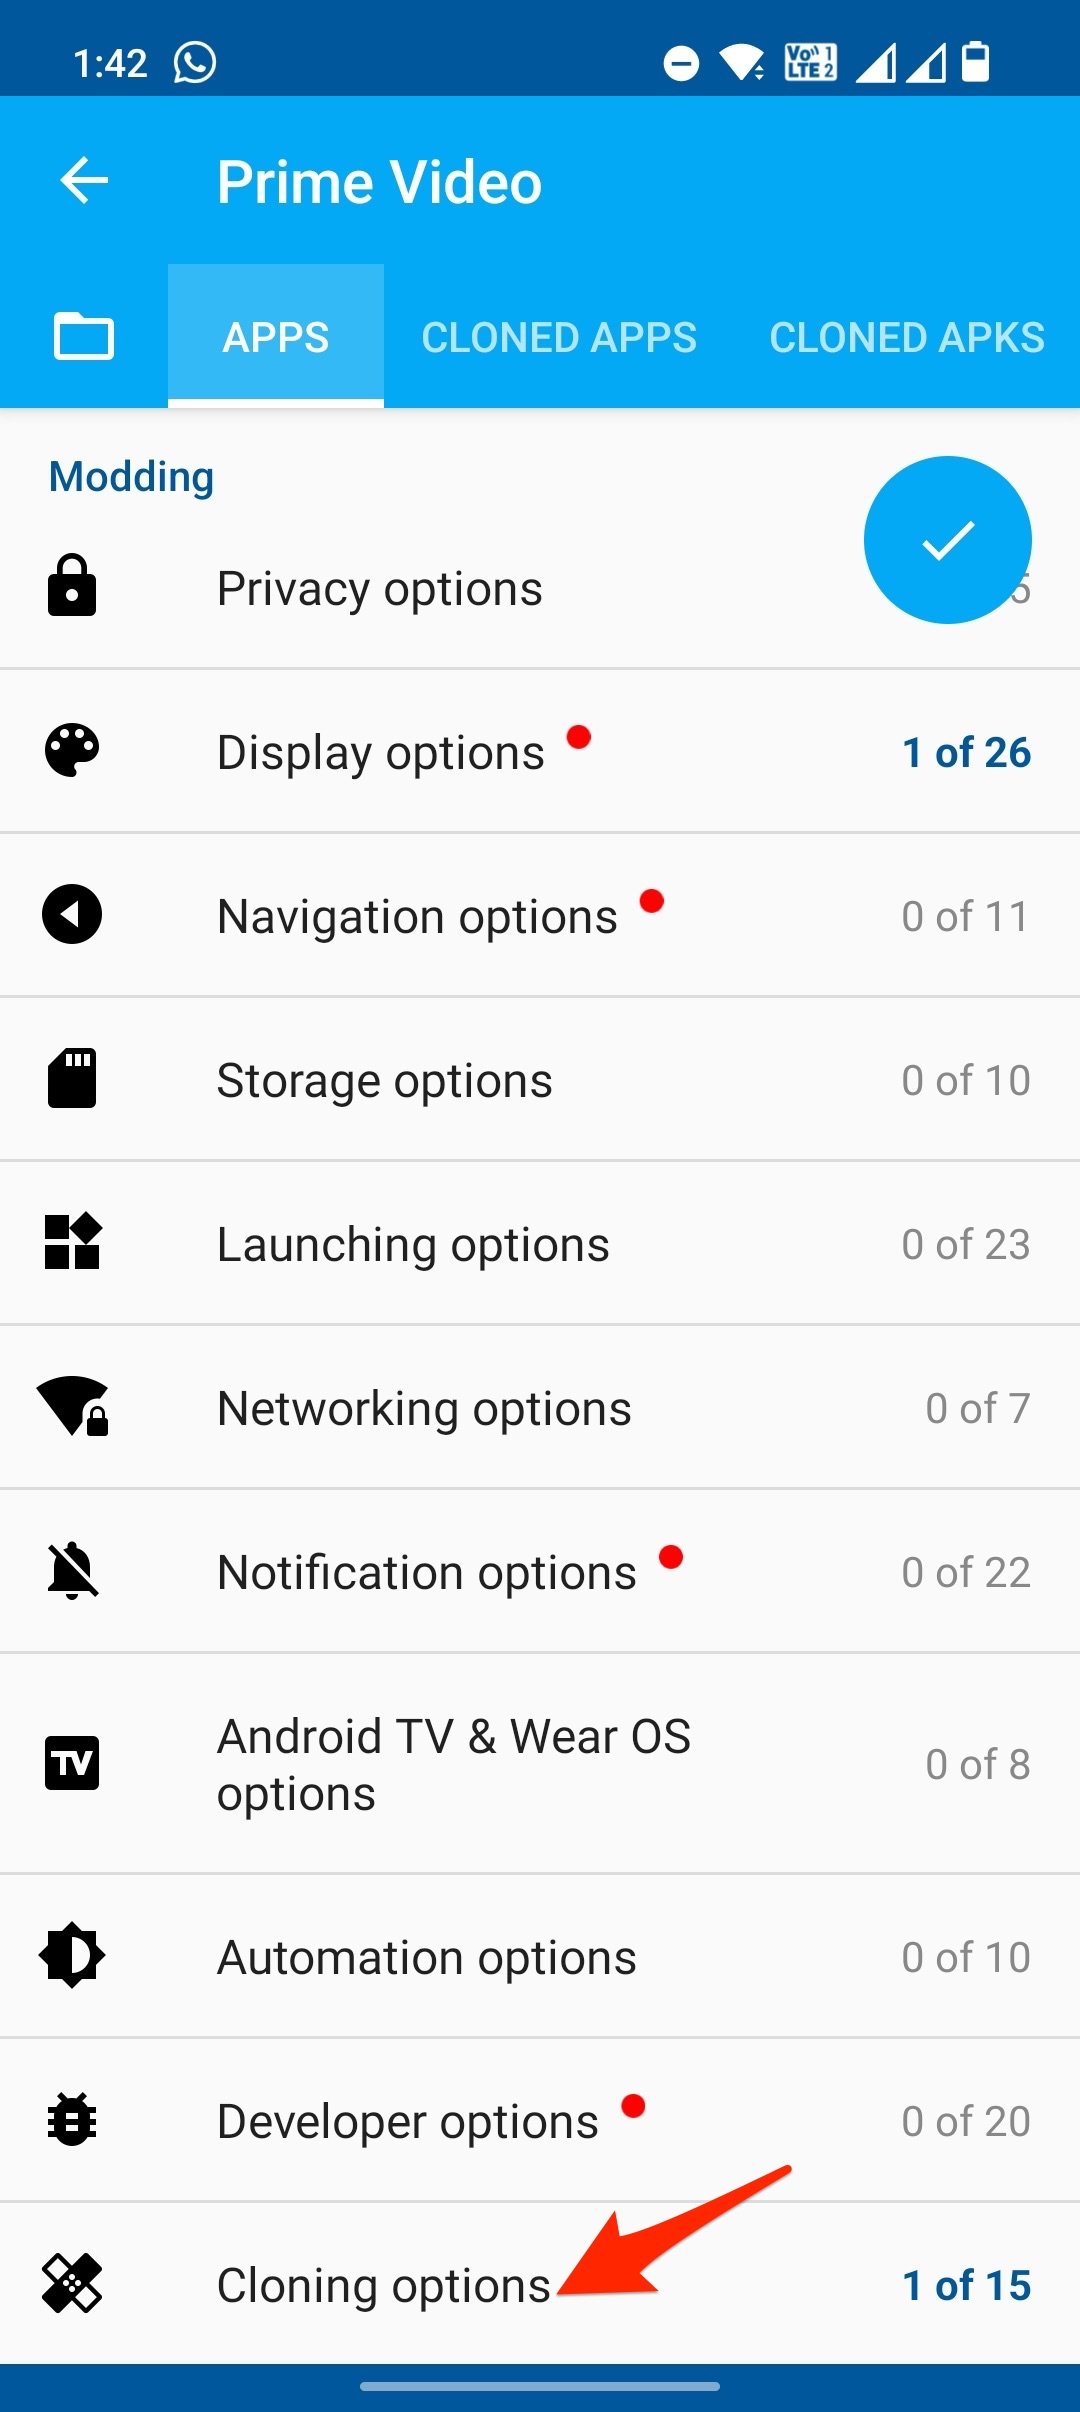
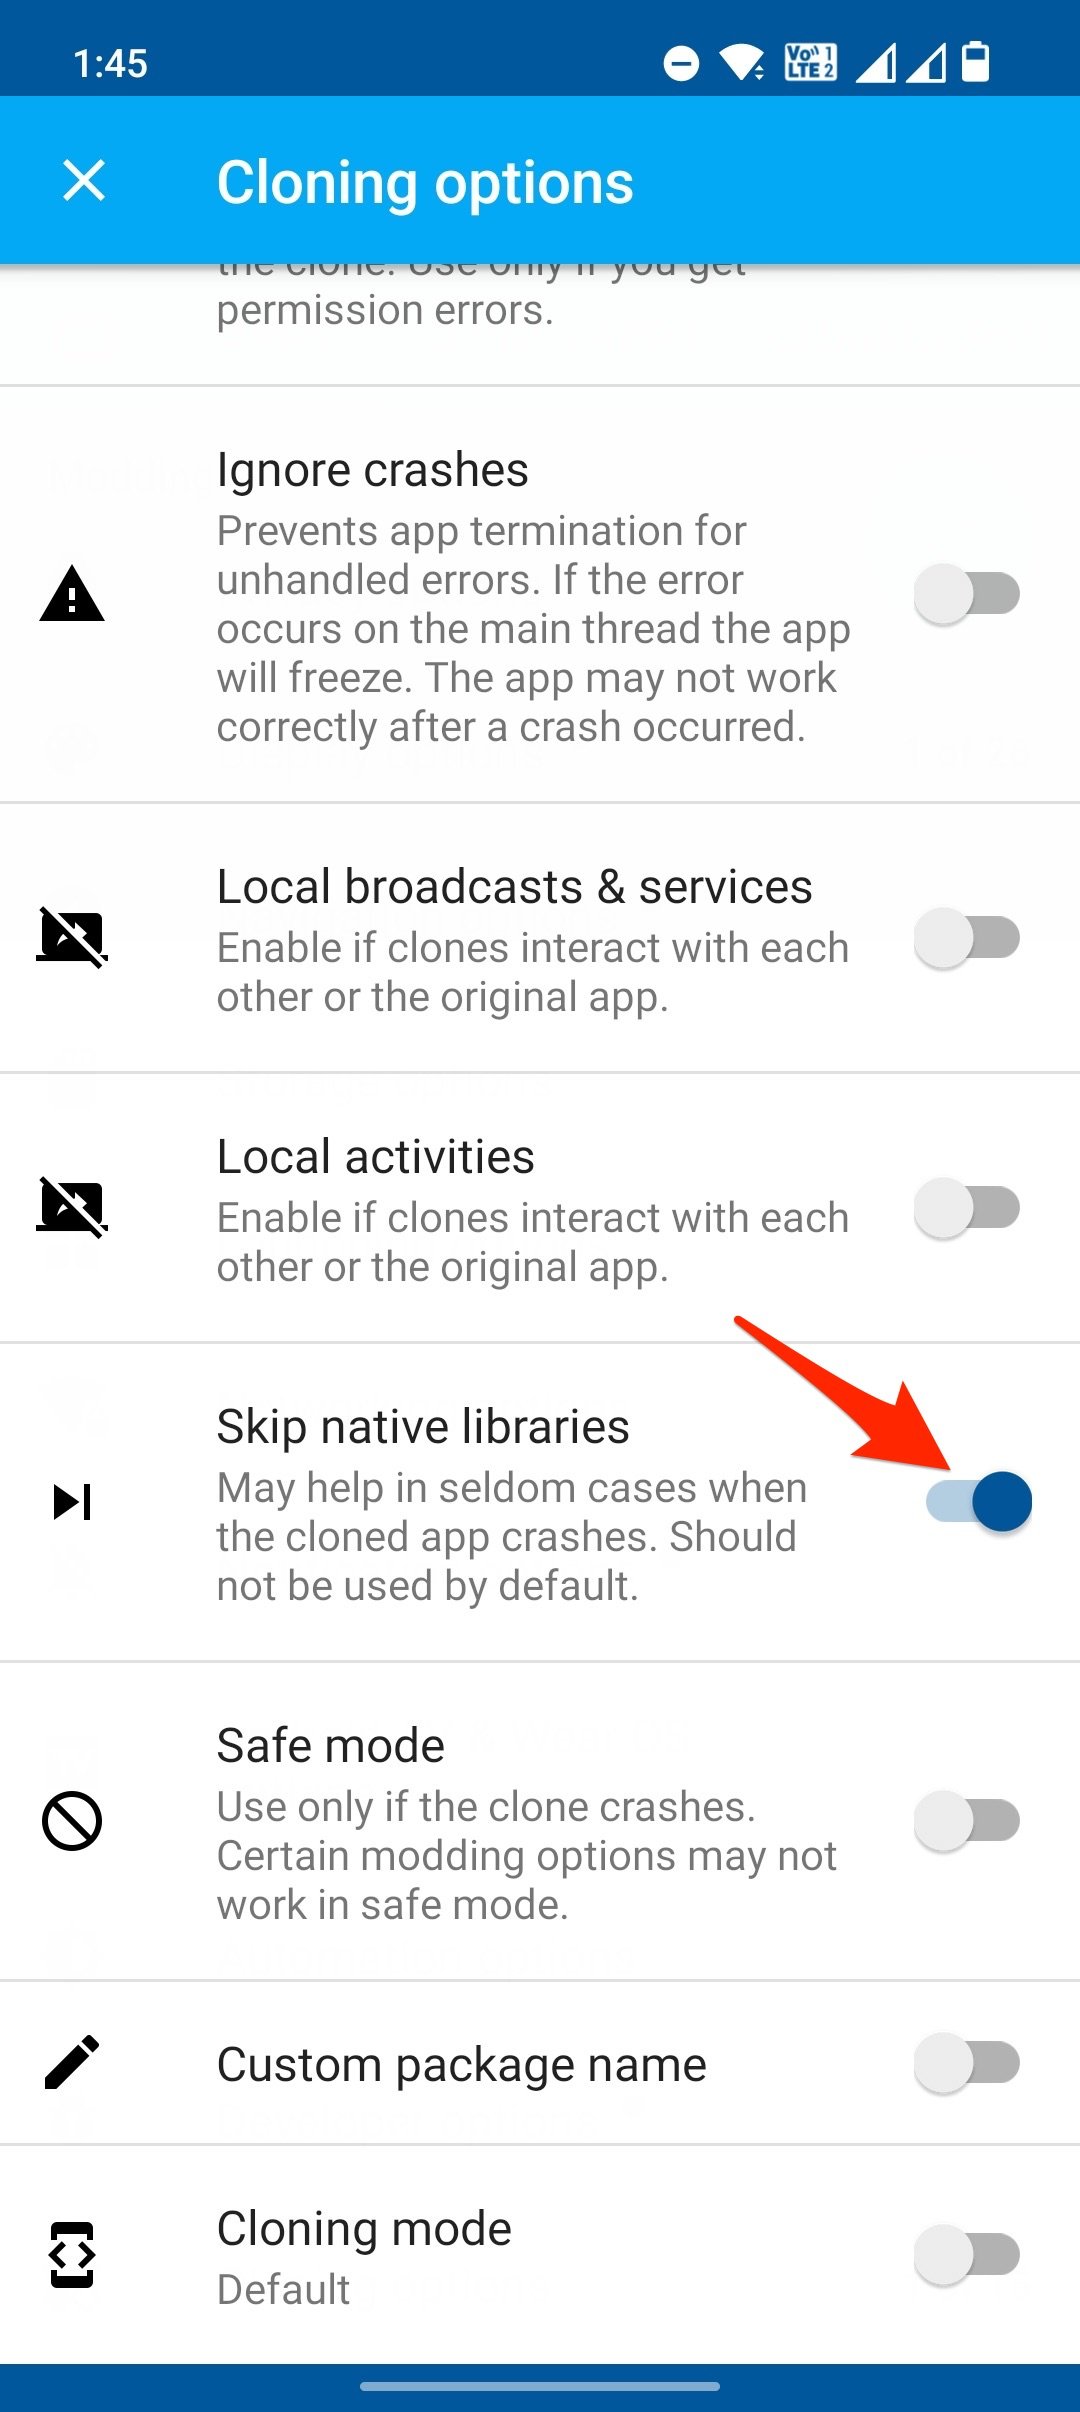
- Move back and click on Cloning options and enable Skip library.
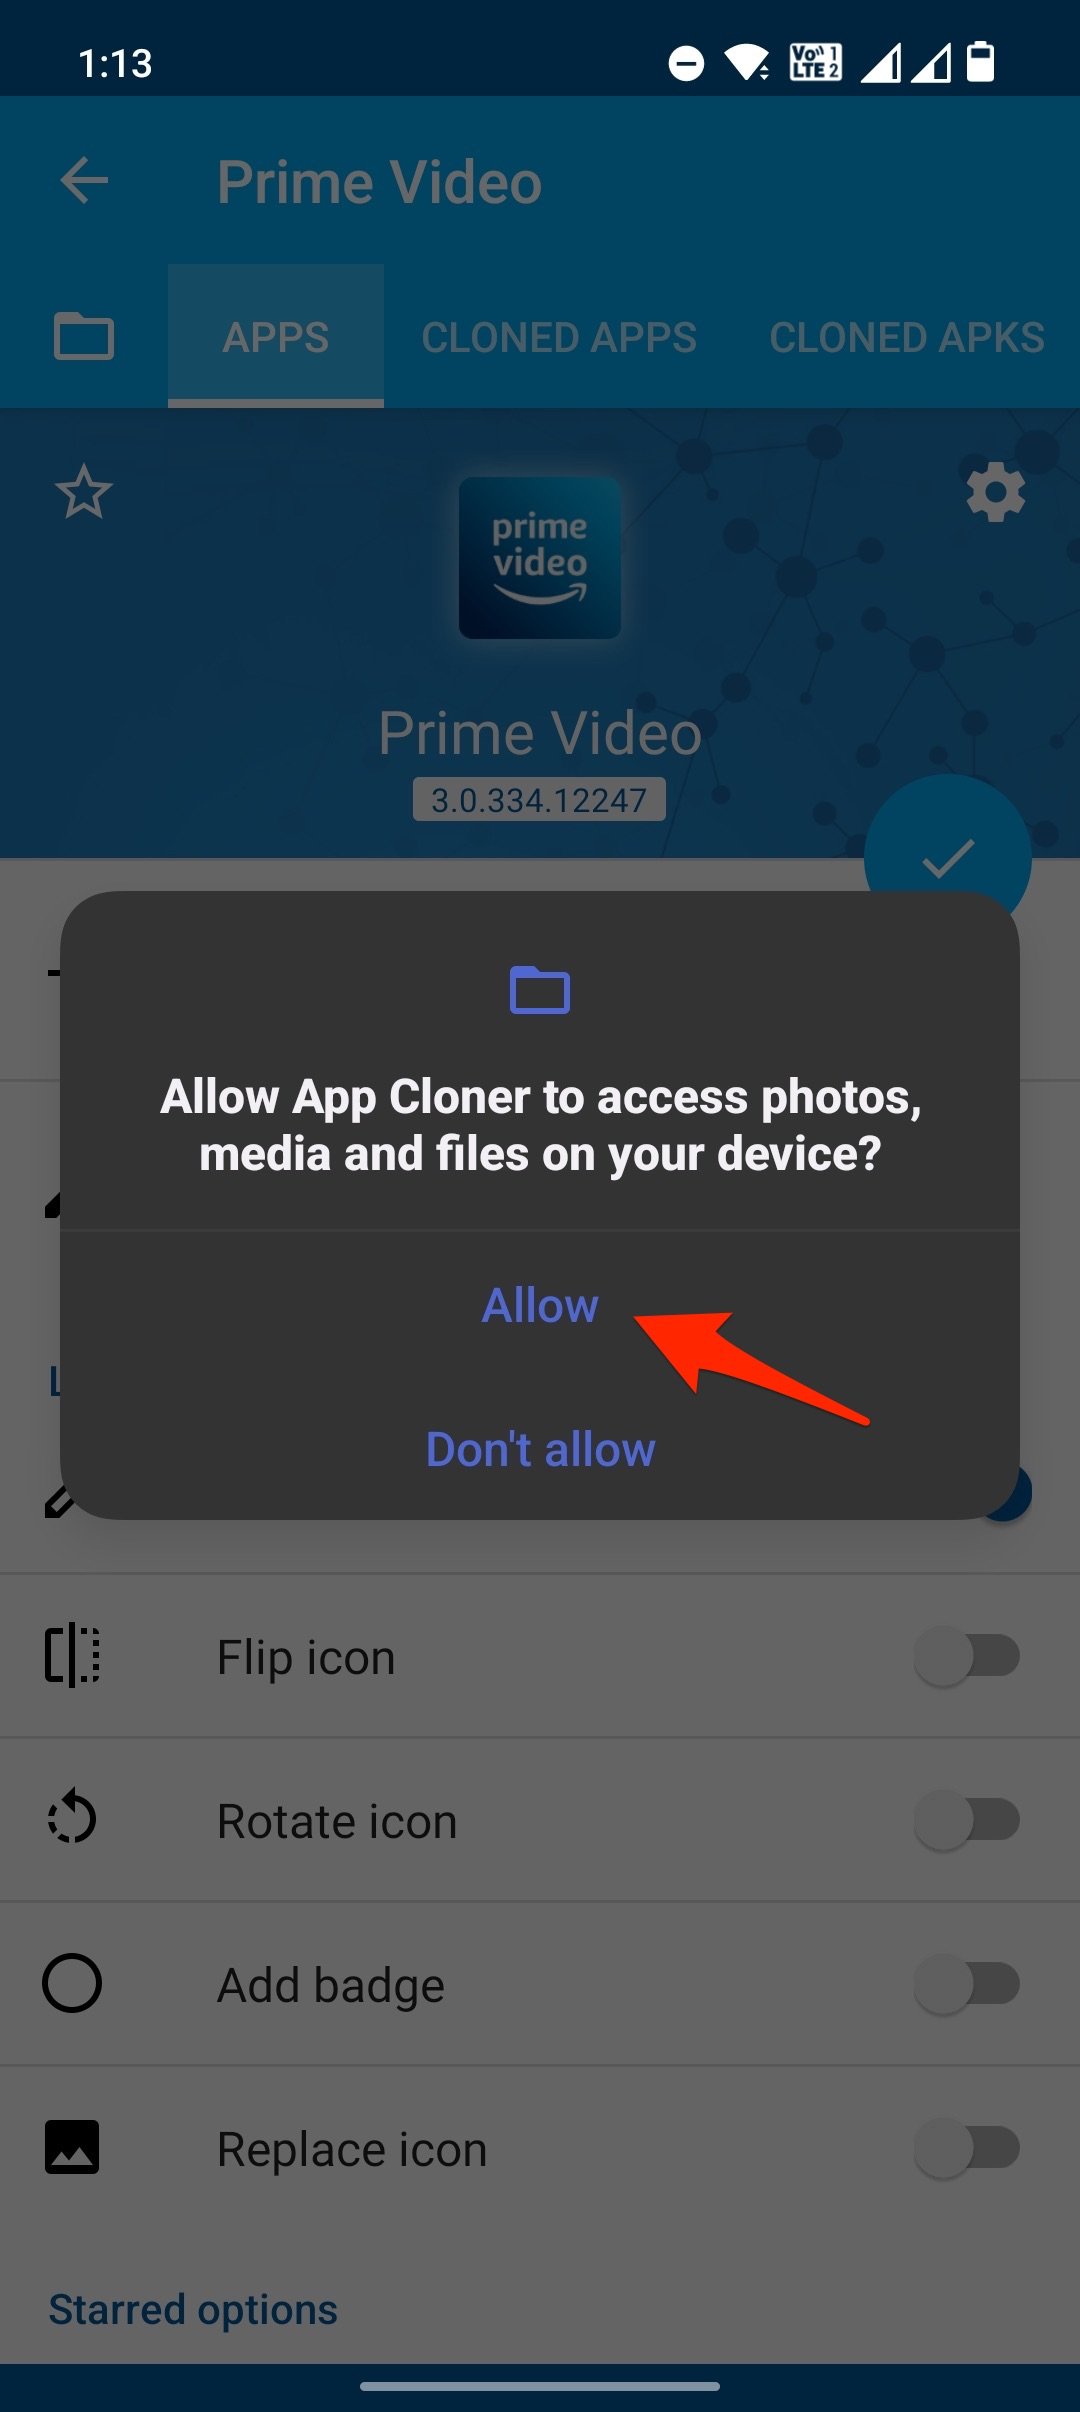
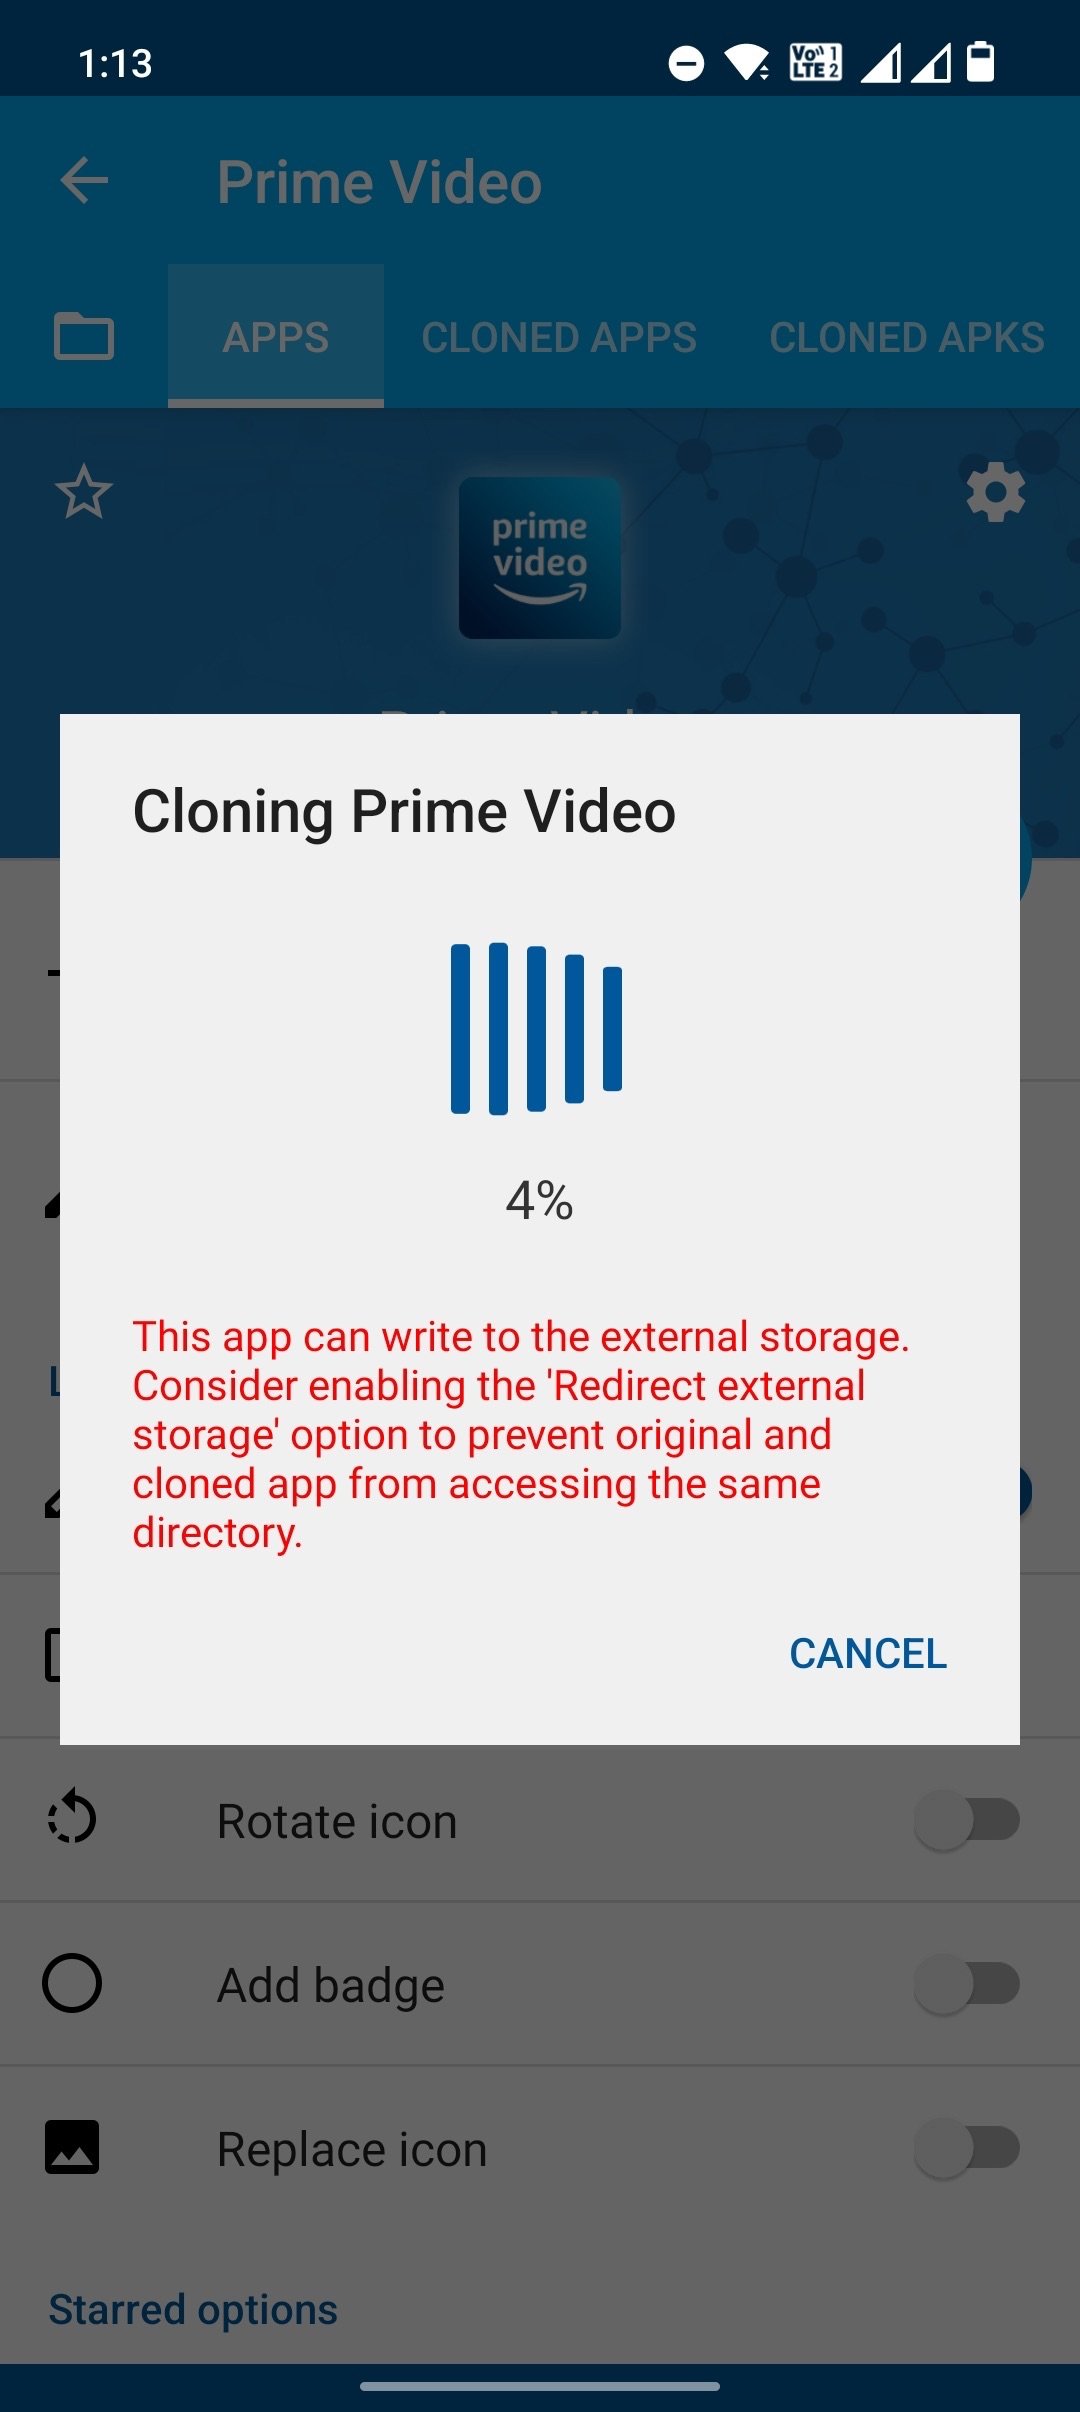
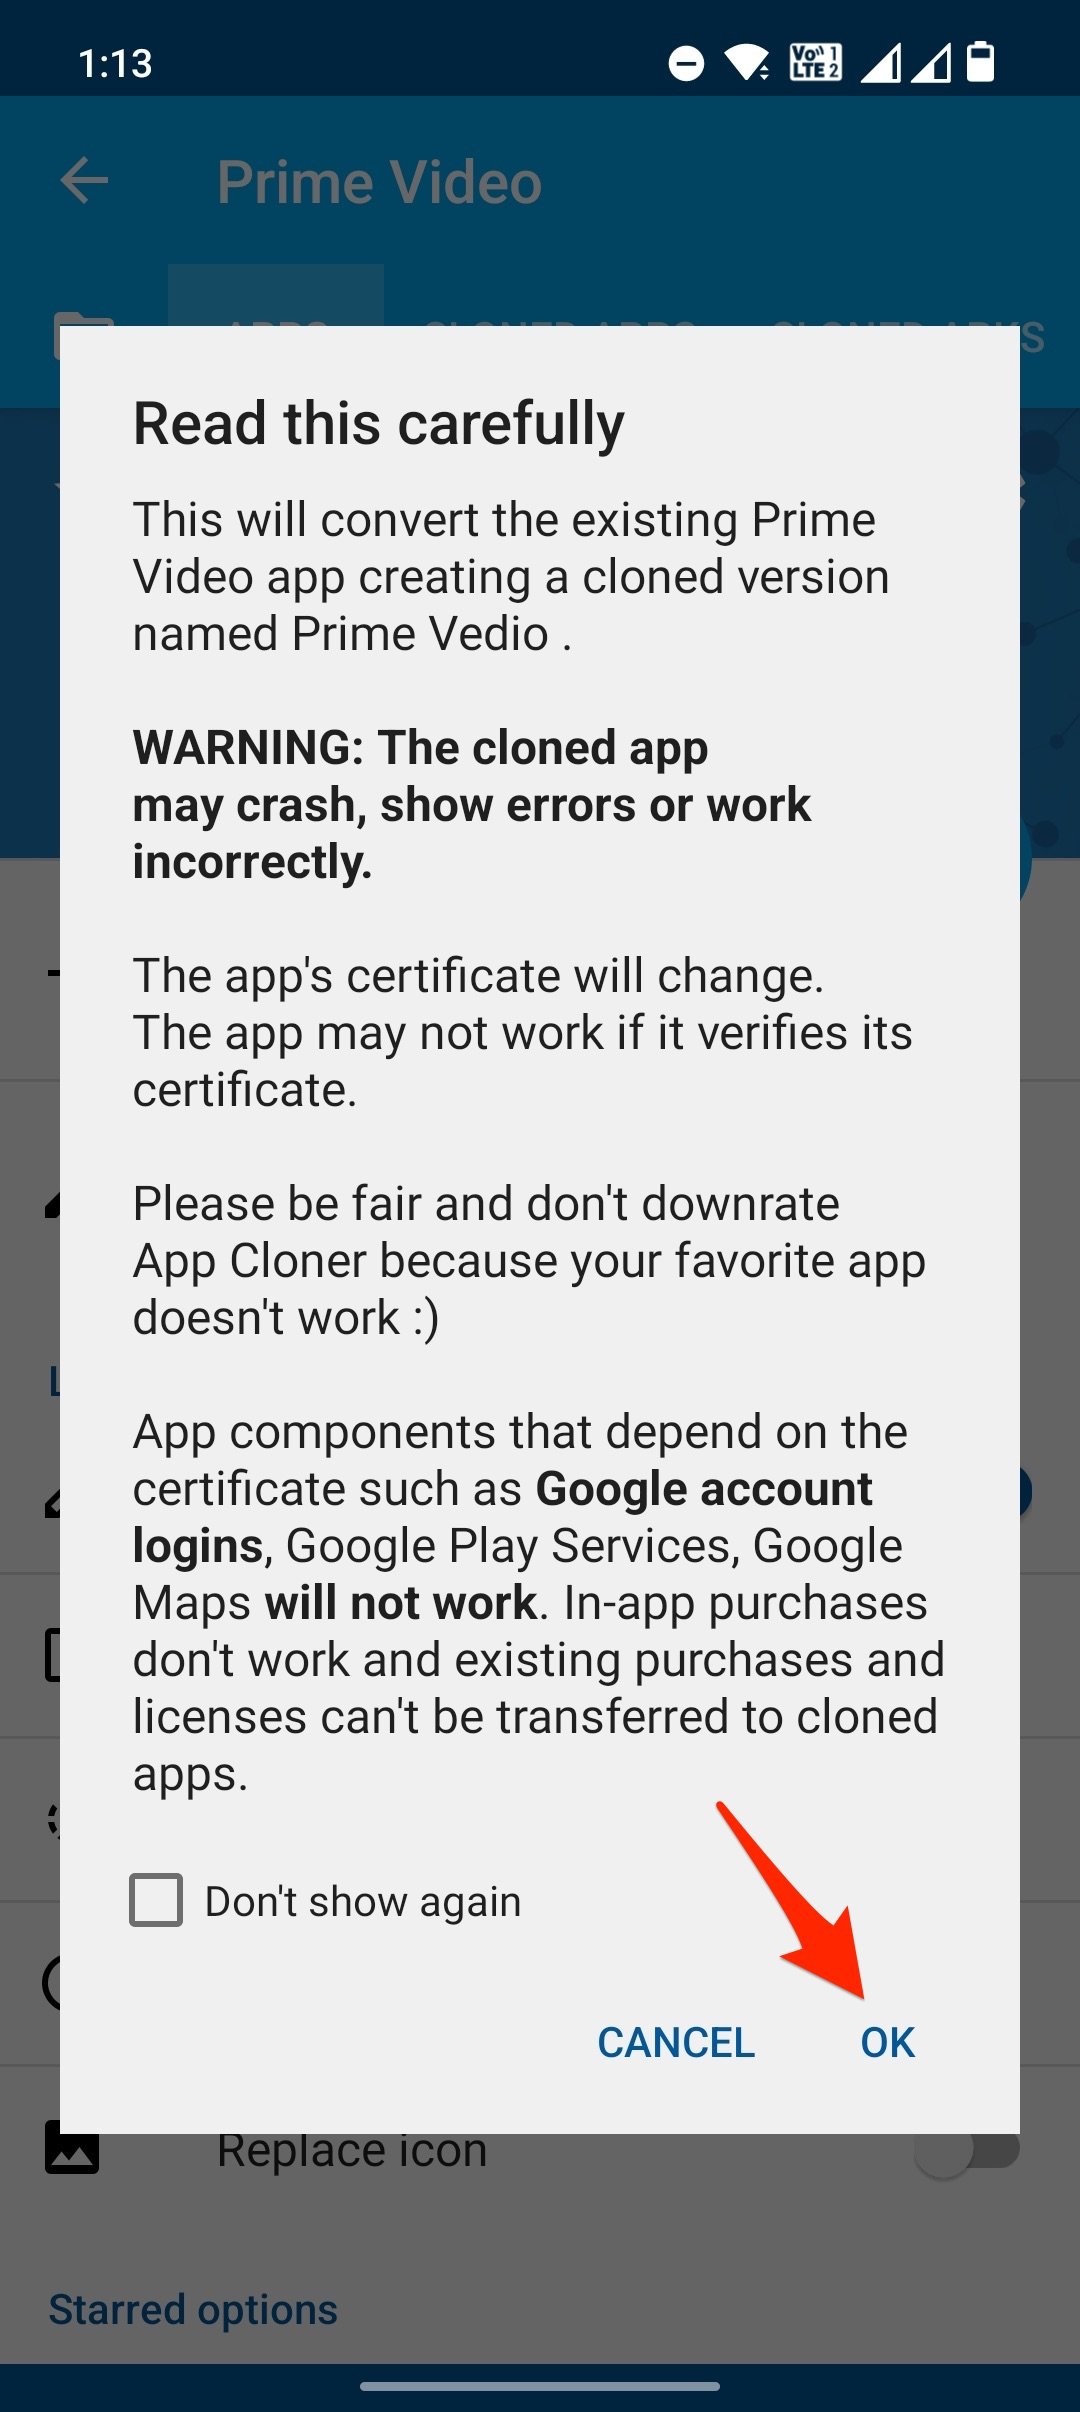
- Now click on the right-tick option to grant permissions and create the clone.
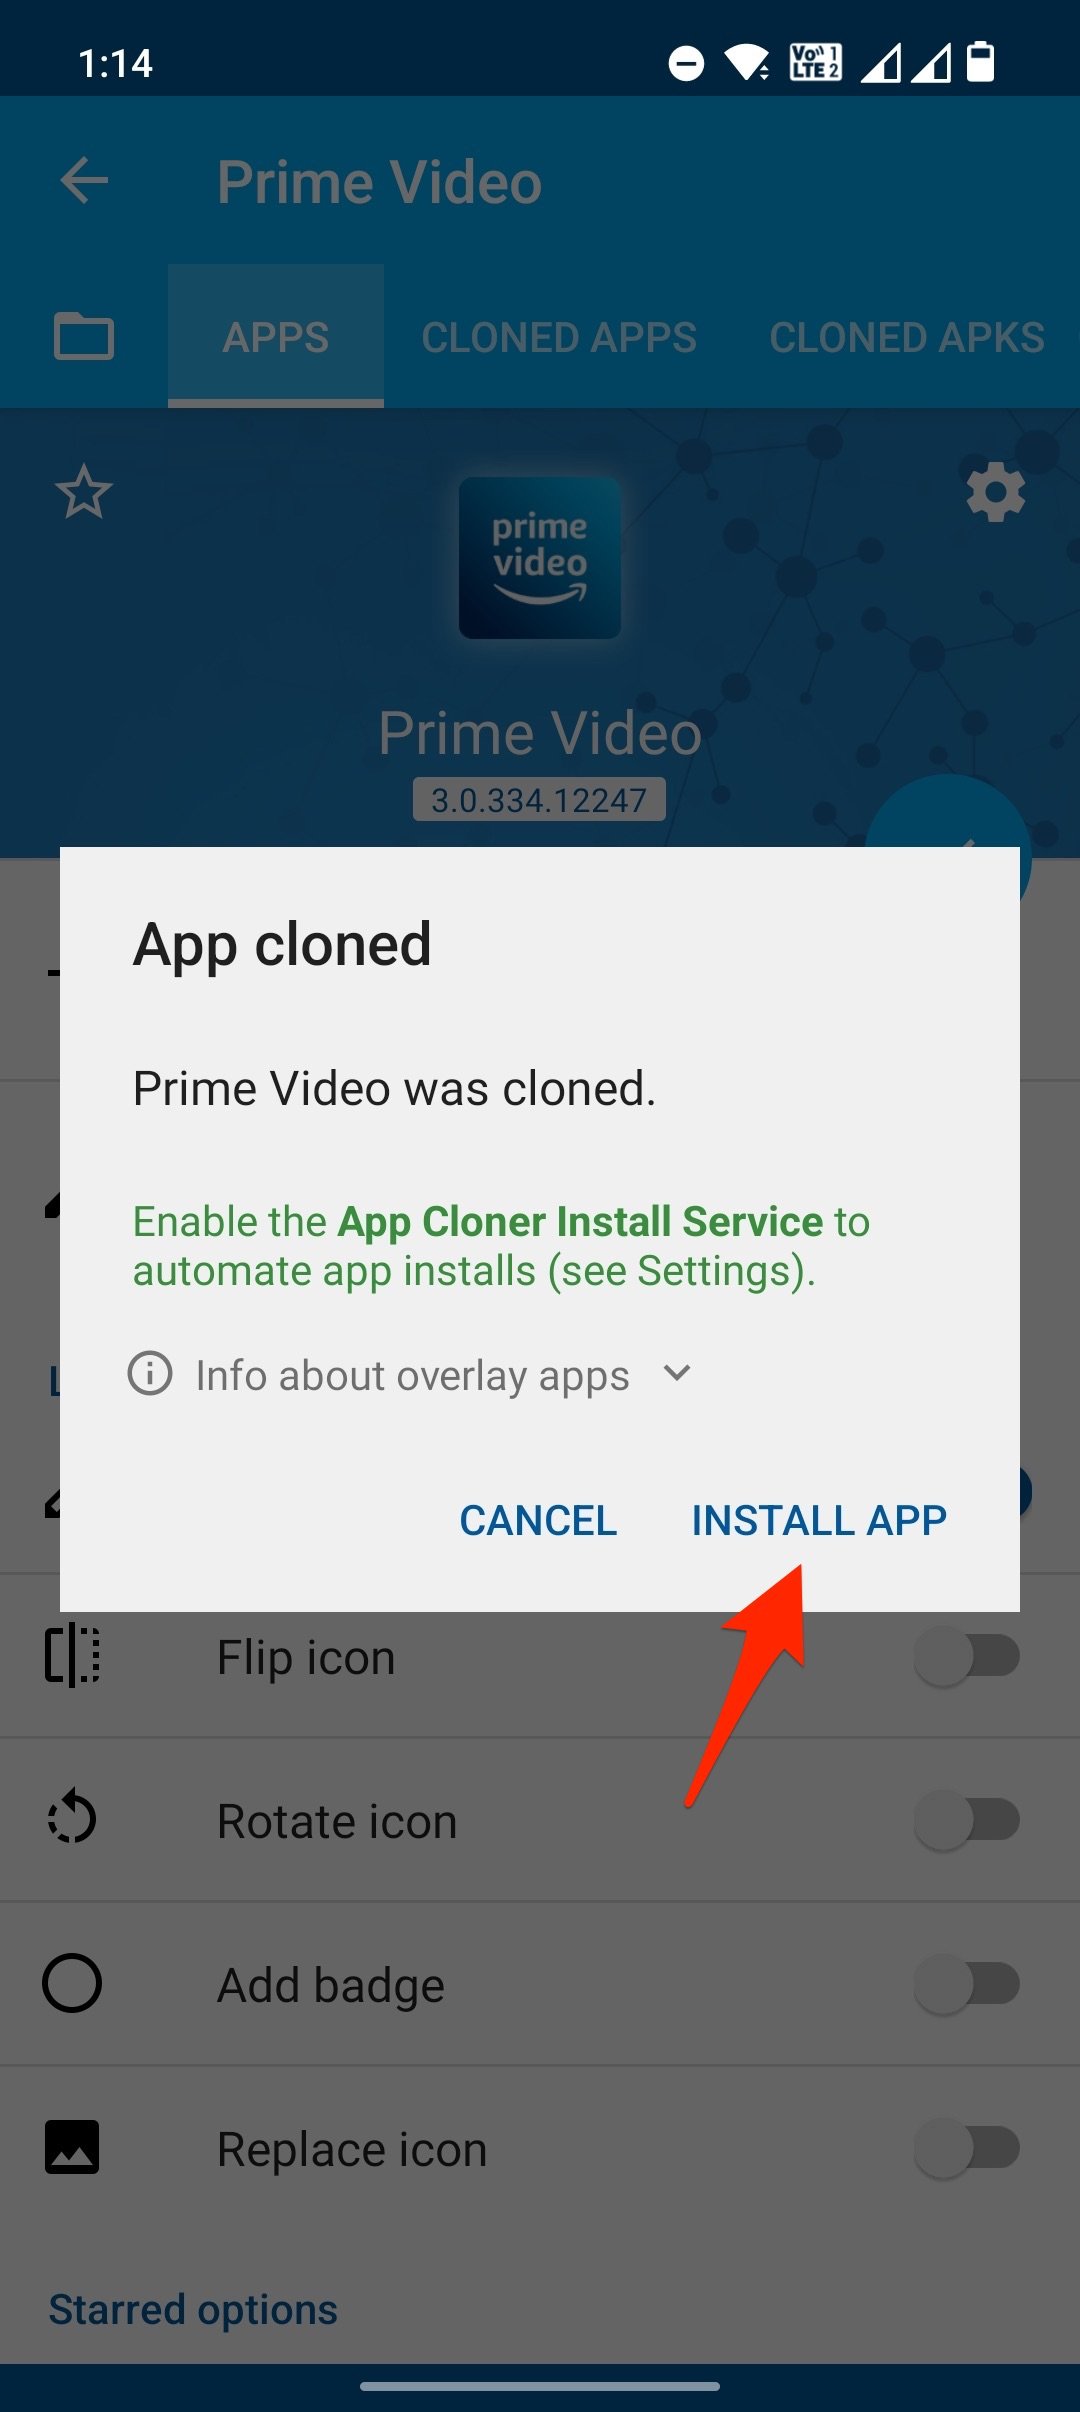
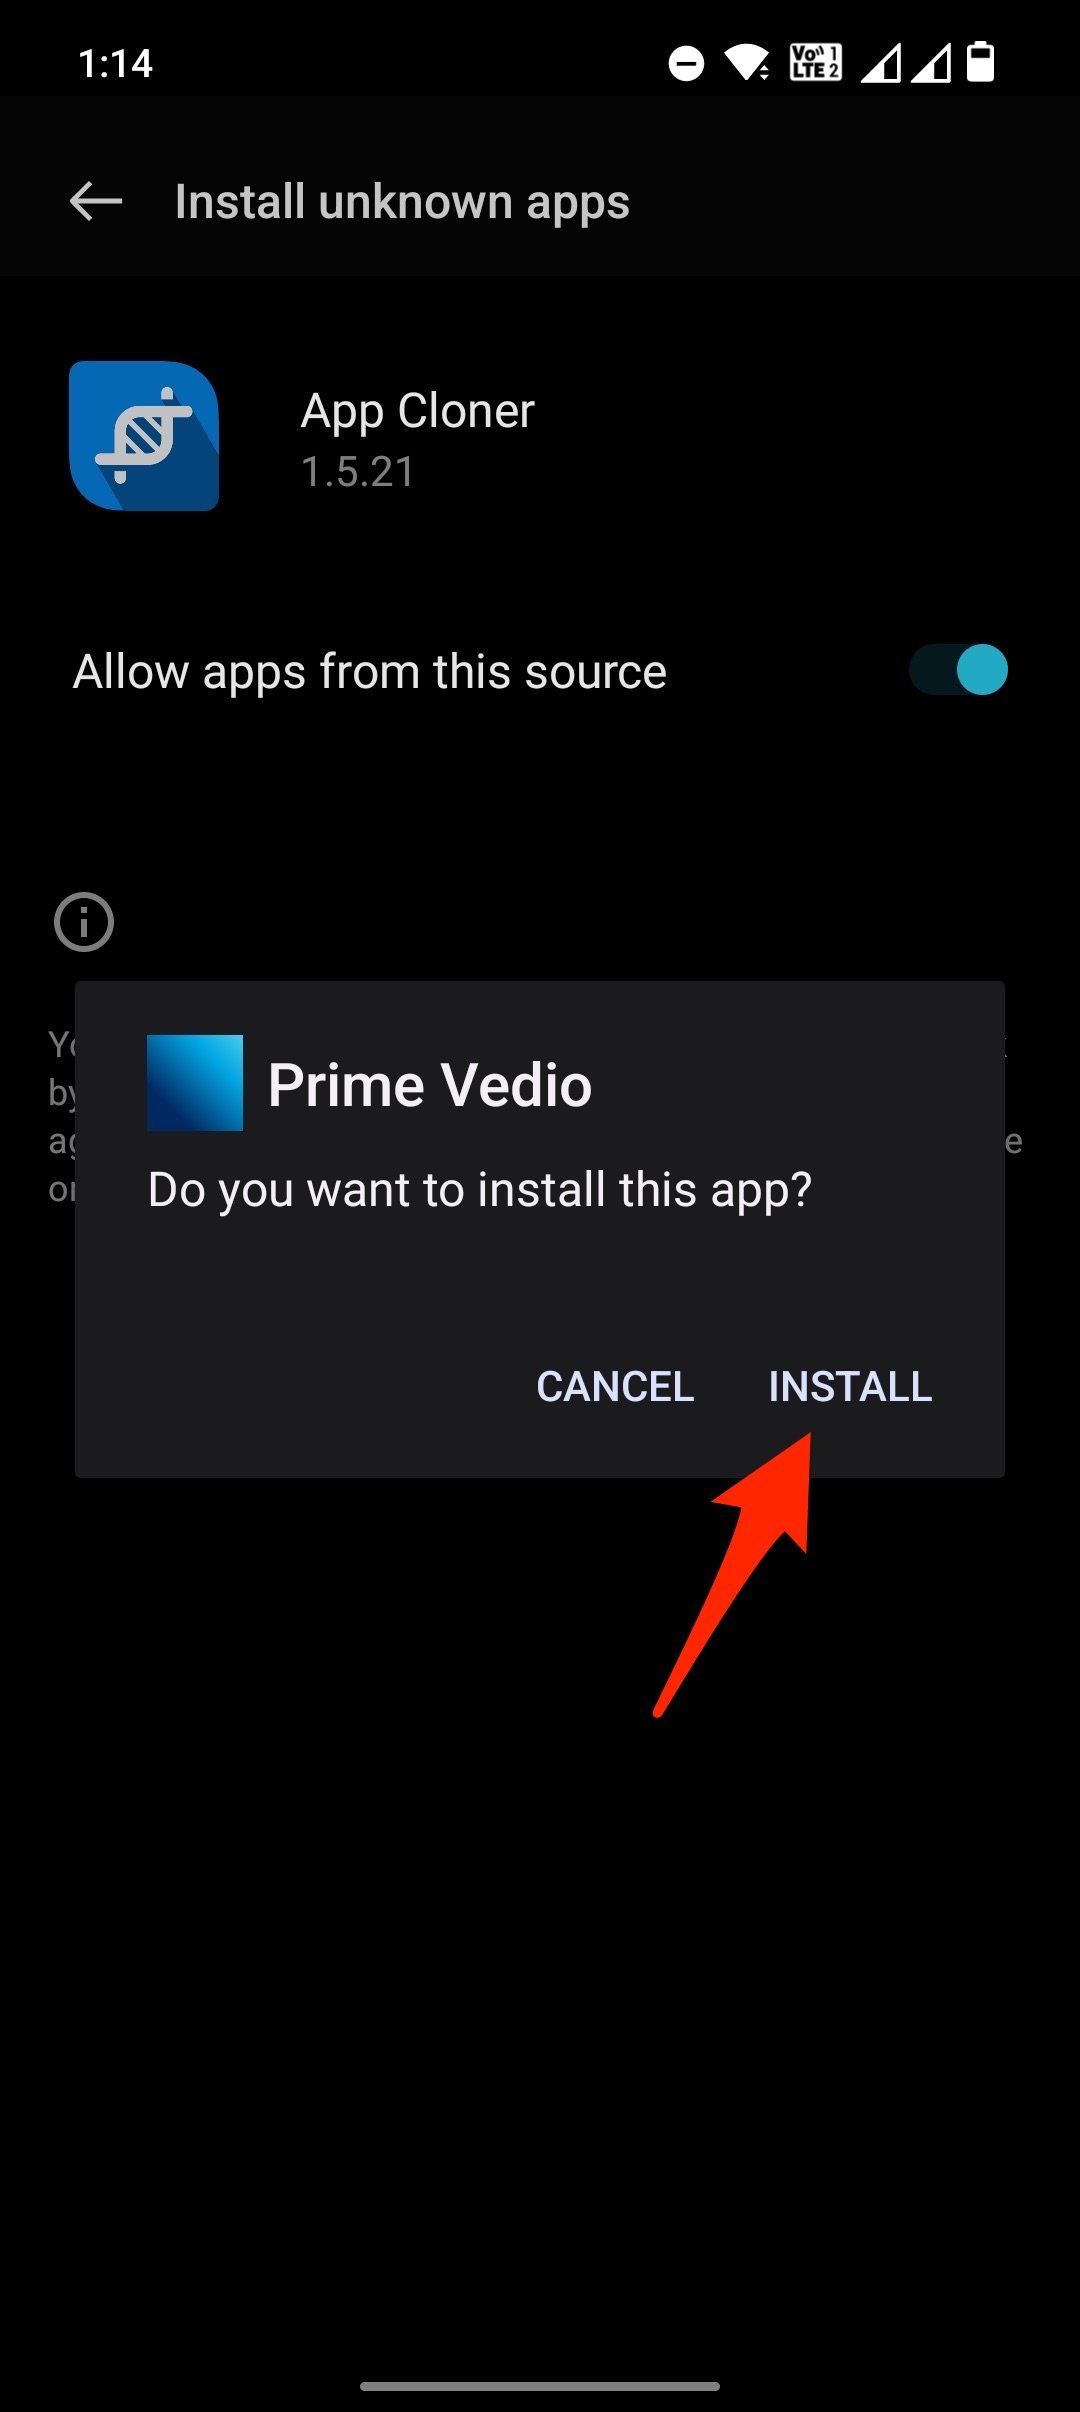
- Once the Cloned App is created, Install the App and (Enable Unknown Sources).
- Once the cloned App is successfully installed, you can screen grab restricted screens without a black screen issue on Android mobile.
If the cloned App you created forces close or crashes, you have to enable other options under Cloning options (try different combinations); namely, local activities, local broadcasts, and services ignore crashes. Check if these options help rectify the cloner app issues.
Method 2. Use Virtual Android to Screenshot
Here’s a step-by-step guide to fix Can’t take Screenshot due to PP Restrictions
- Download and install the Virtual Android app.
- Open the app, download the additional resource packages, and wait for the Android system to install.
- Tap the Start button to boot it up.

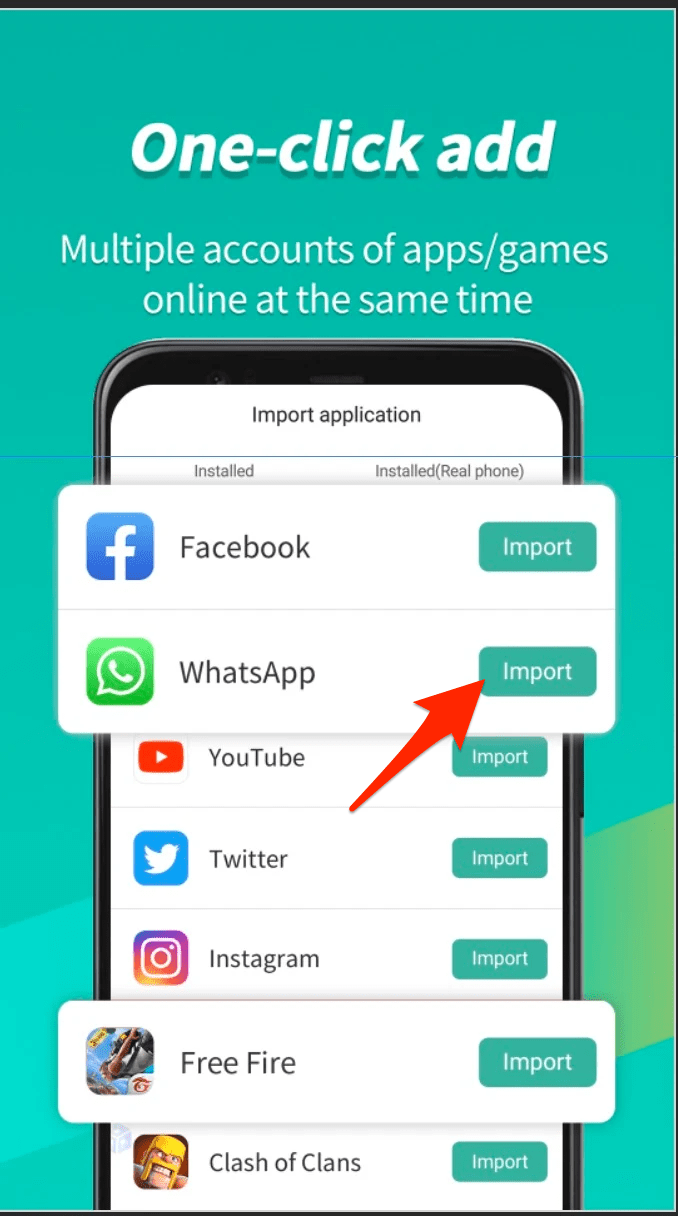
- Tap on the Import button. This tool allows you to install apps directly from your main Android system into Virtual Android.
- Find the app from the list of apps and Install it.

- Once installed, open the app and try taking the screenshot without a black screen or restriction error

- Next, open the app and take a screenshot on the restricted app.
Method 3. Take Restricted Screenshots Using Tai-Chi
Here is the Best Working Method to Capture a Screenshot on any app and Bypass the Restriction.
1. Download Tai-chi App and DisableFlagSecure (Alt Link) apps on your Android Device.
2. Install both apps normally.
3. Now Open the Taichi App and Grant all the permissions if prompted on the screen.
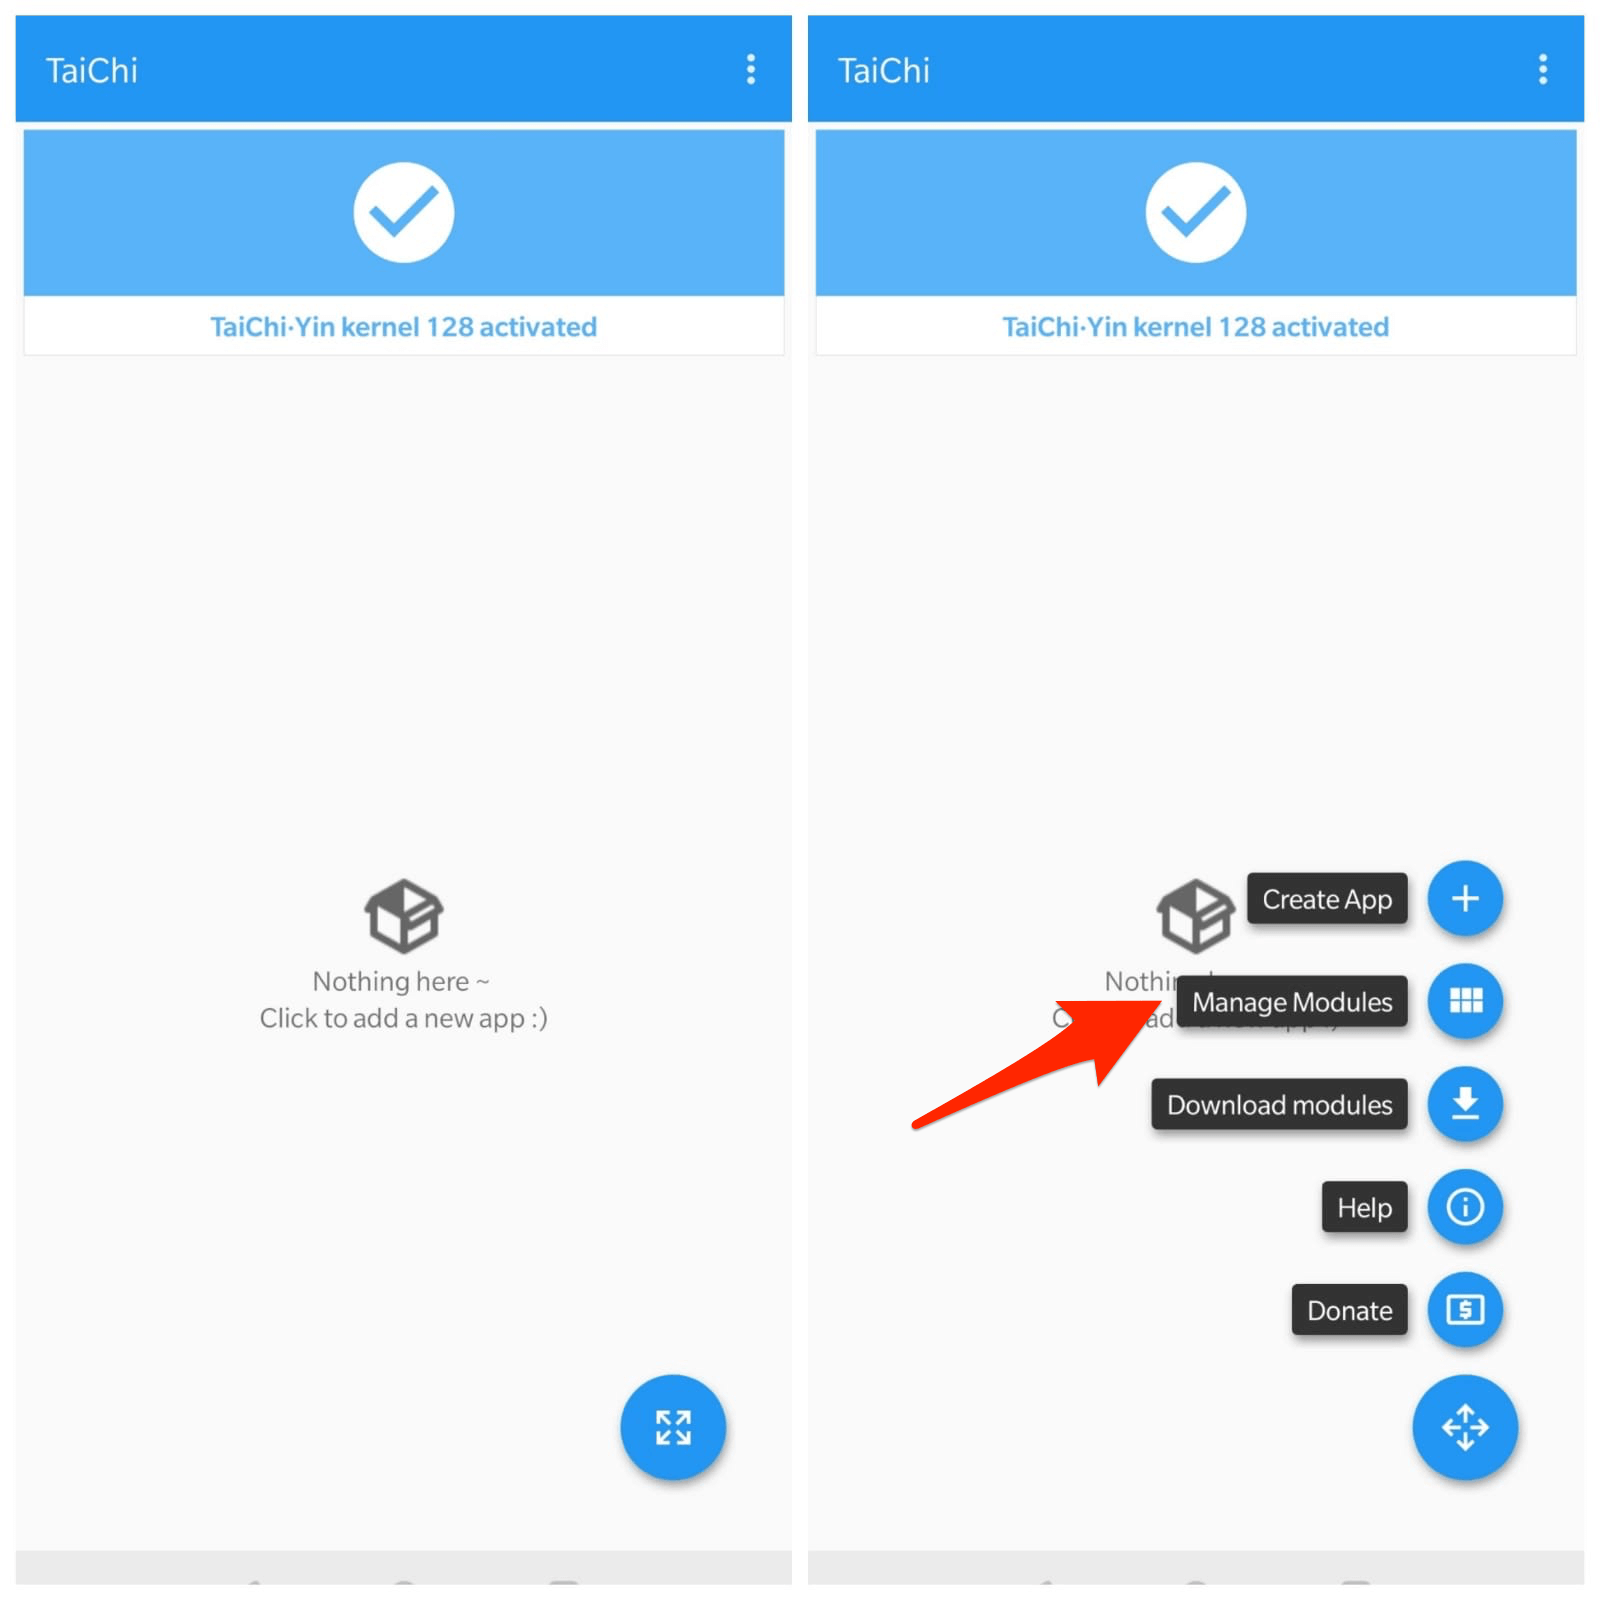
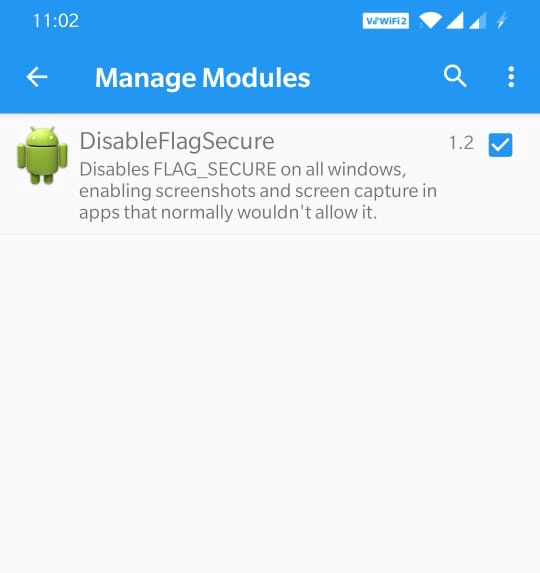
4. Click on Manage Modules and Right Tick DisableFlagSecure app.
5. Now, on the Menu icon the downright and click on Create App (+)
6. Now right-click and select the app/s for which you want to take a screenshot and click Create.
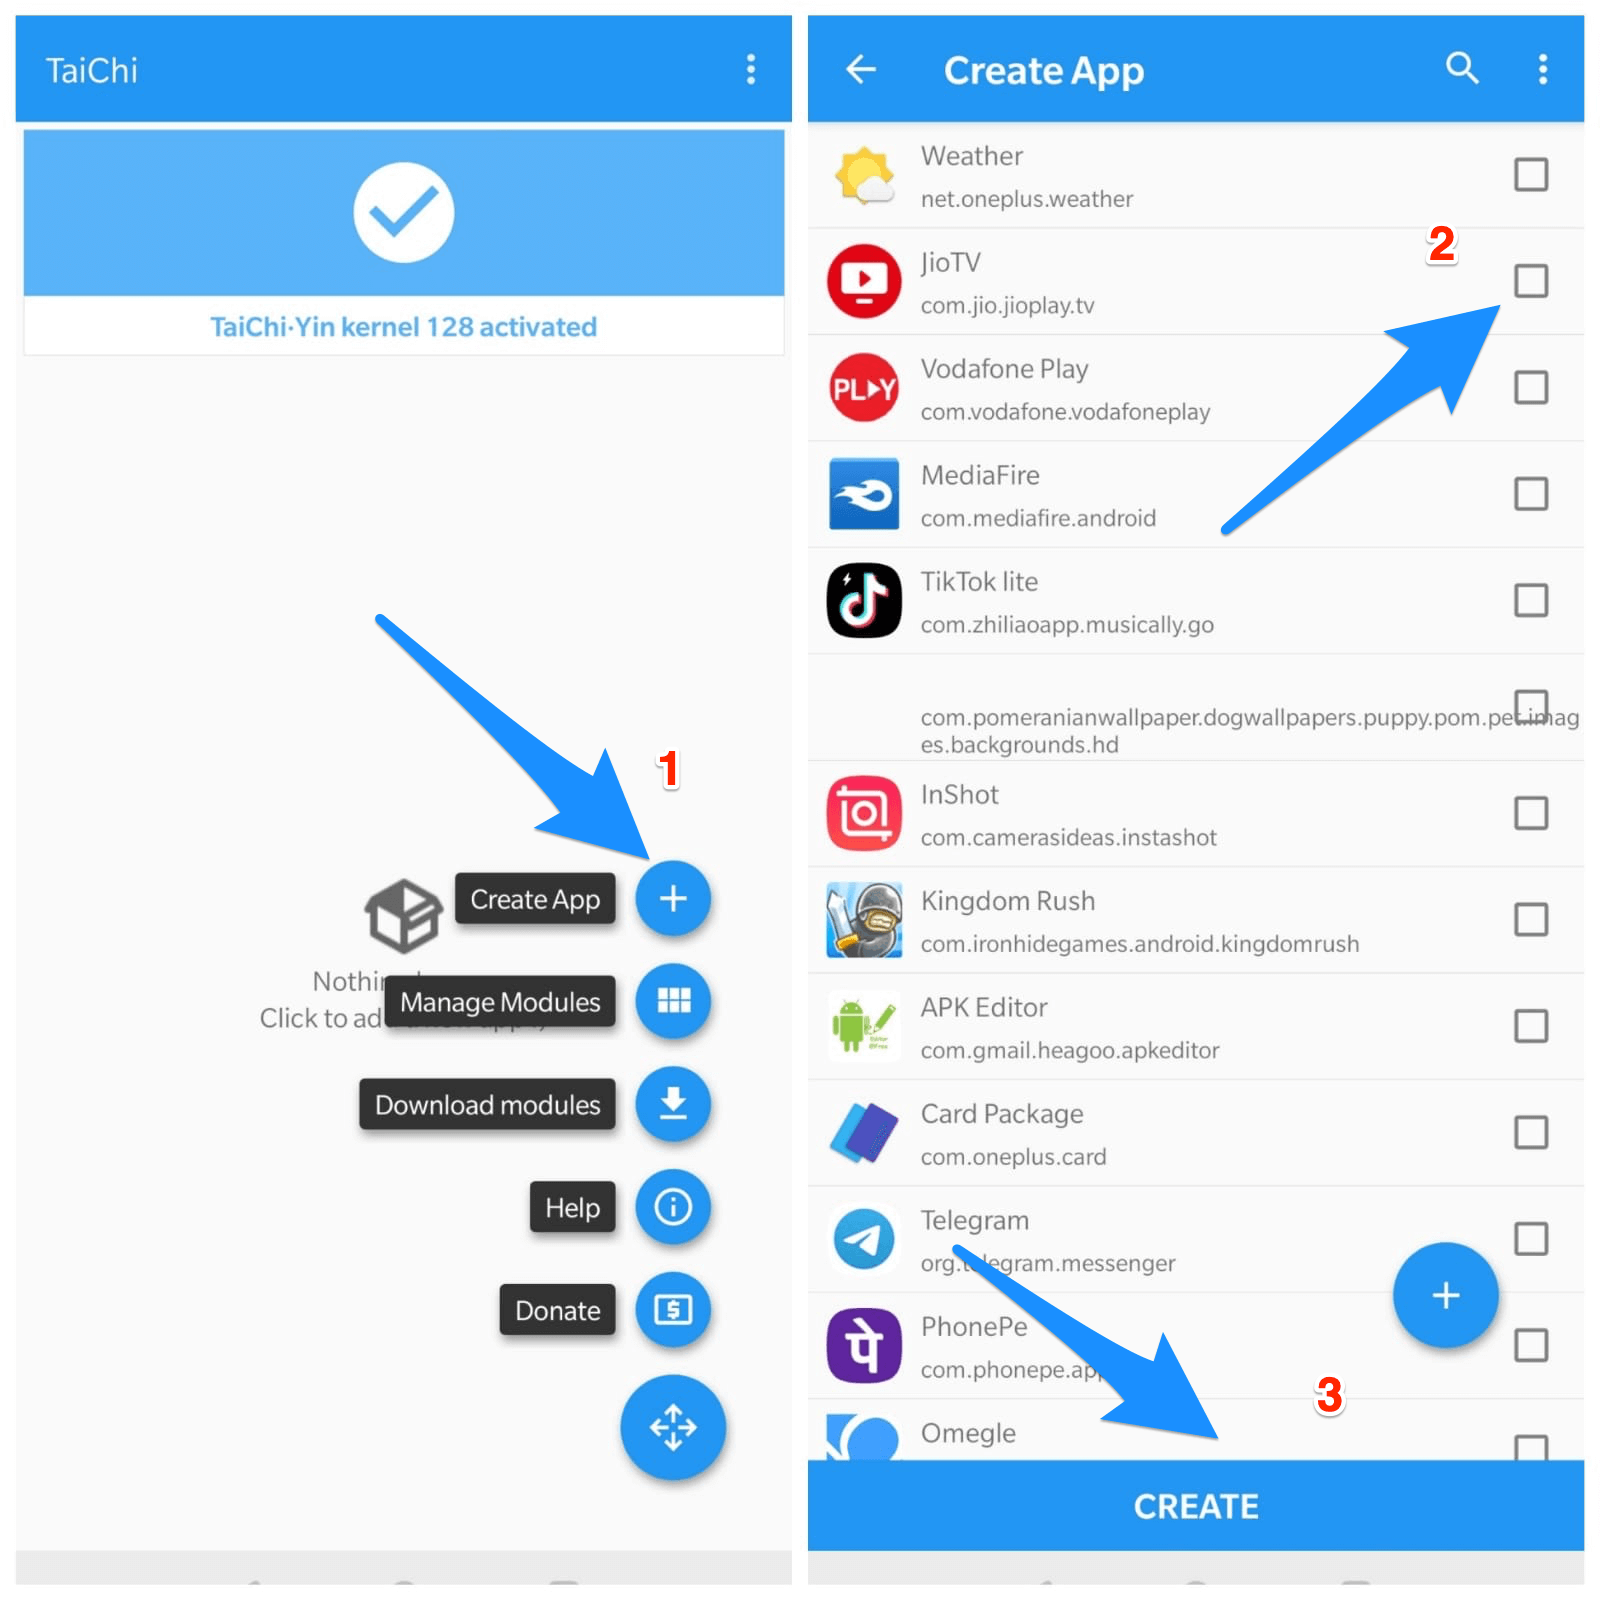
7. The Taichi will prompt you to delete the installed App, and confirm it.
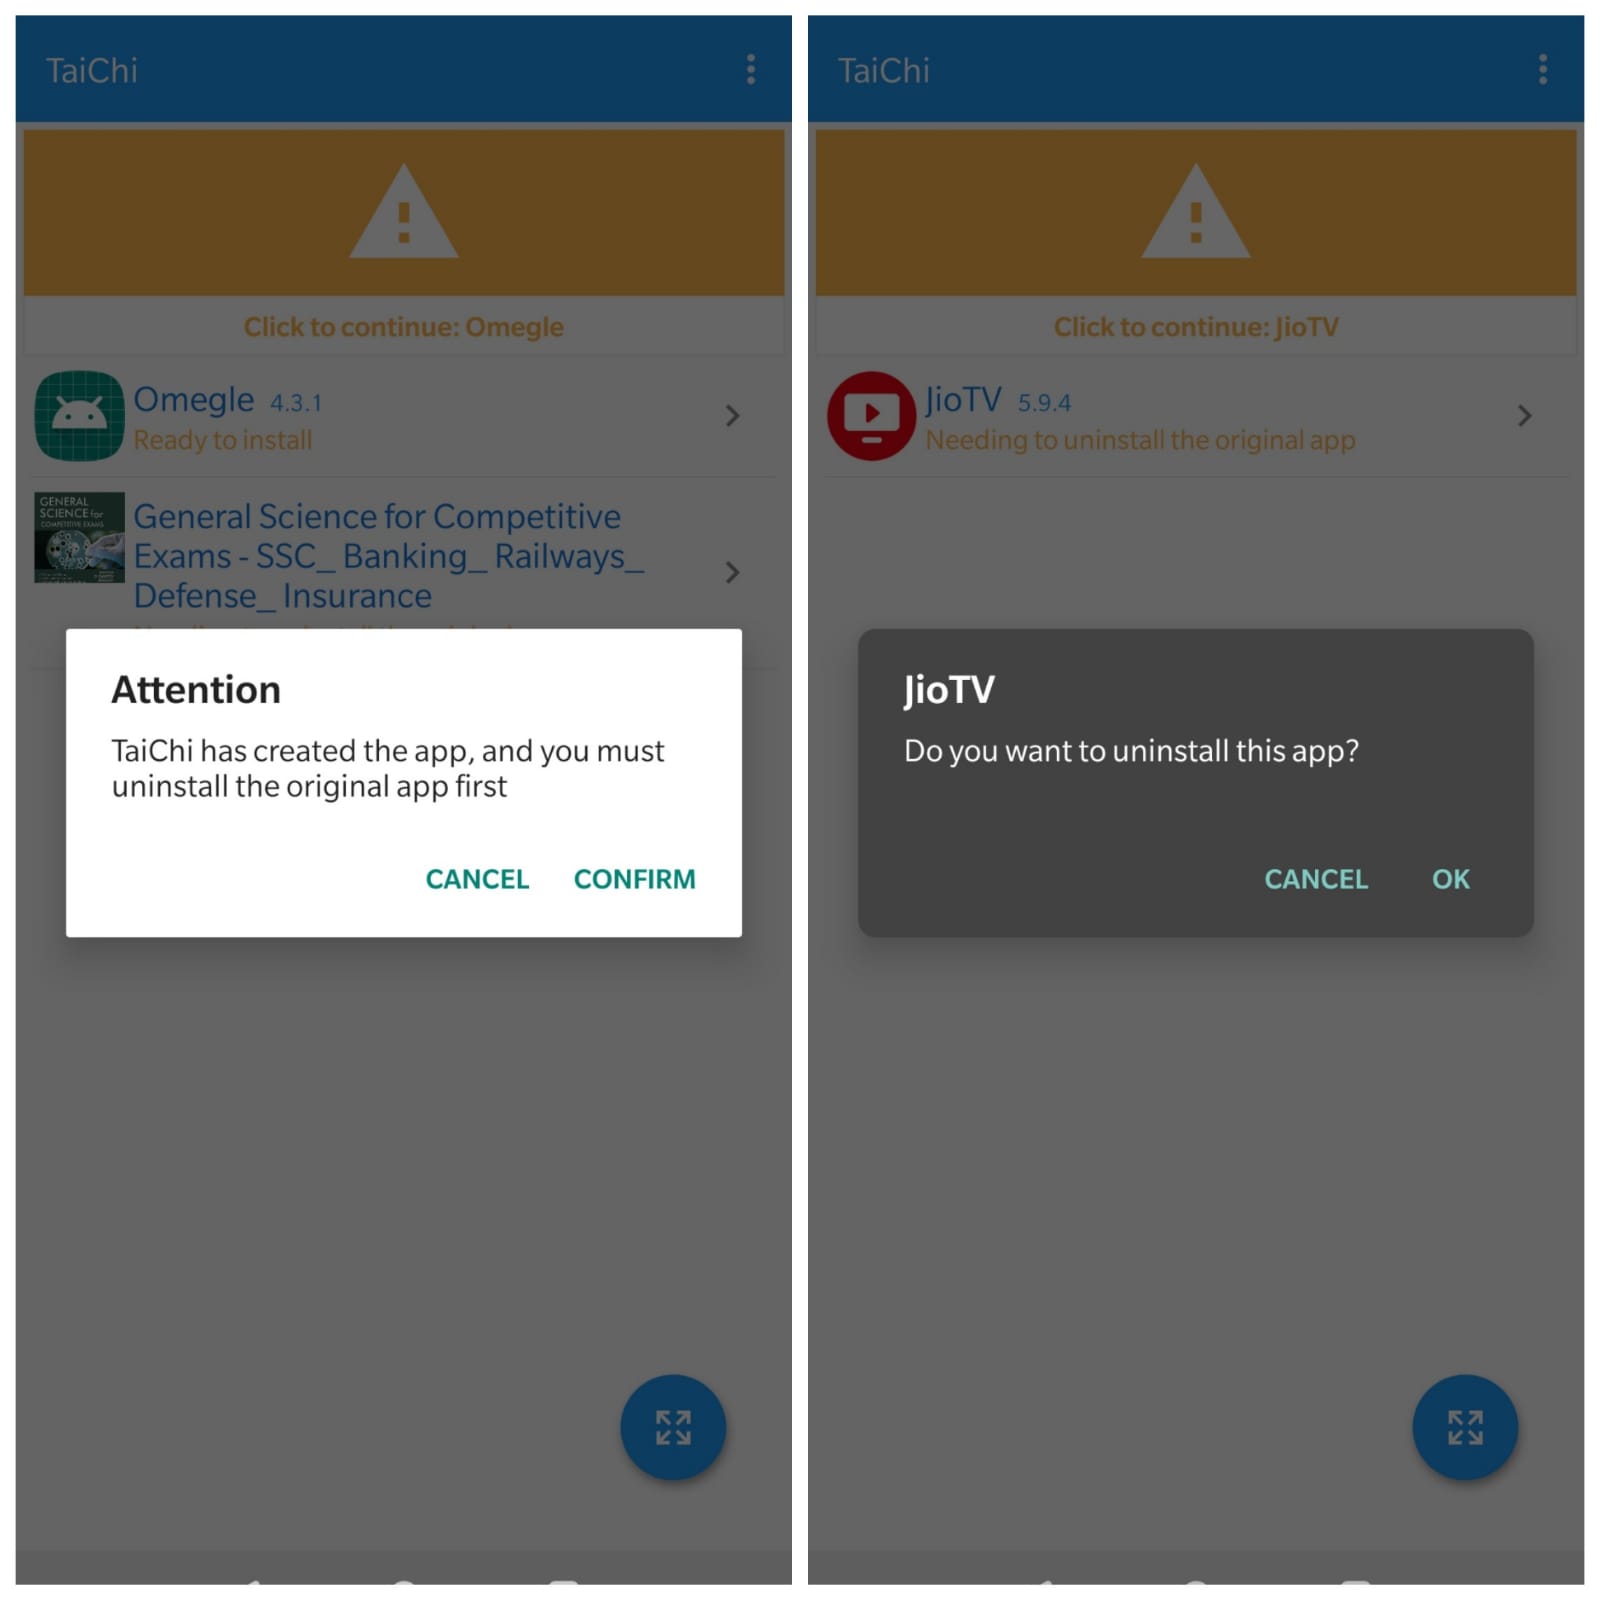
8. Taichi will uninstall the App, and Taichi will create a new app.
9. Install the Created App by Taichi using Taichi Installer. (Grant Unknown Sources Permission)
Note: You may see a message box; The App isn’t found in the list of installed apps. Don’t worry; just click OK and click on the created App to install using taichi Installer; it works.
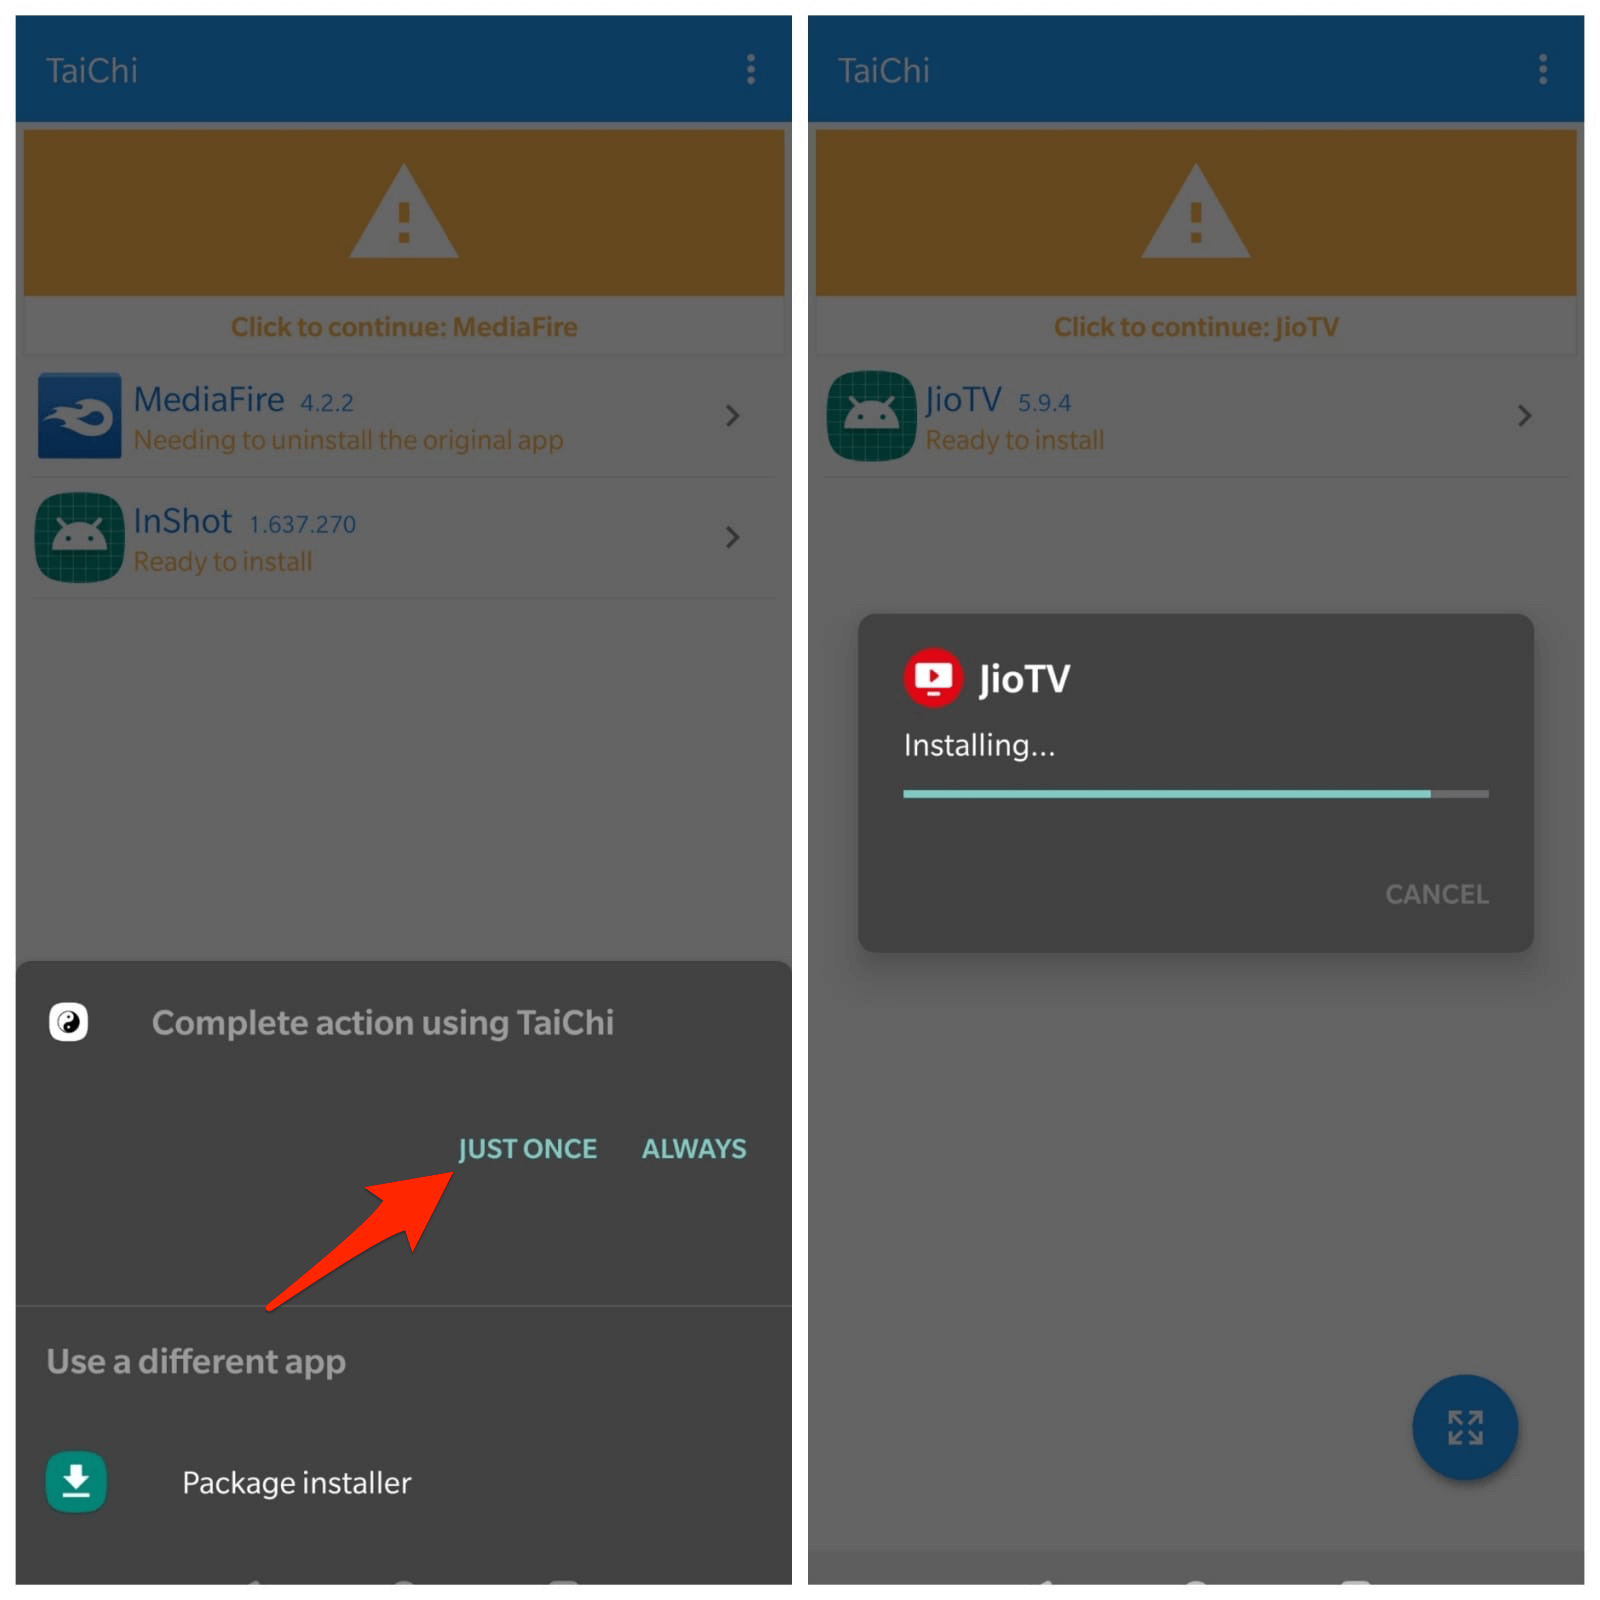
10. Now, return to back the app and open it from the Taichi home screen.
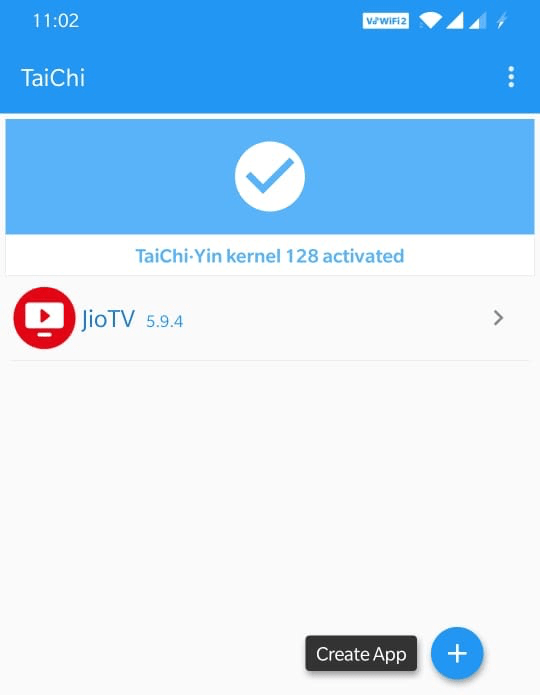
11. Done! You can now Grab a Screenshot and share it with your family and friends.
Method 4. Use the Scrcpy Tool to Capture the Screenshot
Here is another easy technique that you can utilize to capture the screen of your Android device. You have to use a tool called Scrcpy to mirror your smartphone screen on the PC. Then from the mirrored screen, you have to take a screenshot. Although it may sound like rocket science, it is quite simple when you apply it.
- Grab the latest version of Scrcpy from GitHub. Depending upon whichever operating system your PC runs, get the corresponding version of Scrcpy.
- Now, set up ADB on your PC.
- Connect your Android phone to the PC via USB.
- Use PowerShell and run the ADB command to check if your PC and smartphone have connected successfully.
- Open the Scrcpy ZIP file on your PC and navigate to scrcpy.exe. Launch it.
- As your smartphone is connected to the PC, the latter should now mirror the screen on the phone with Scrcpy.
- On your smartphone, launch the App on which you want to capture the screen, and use any method to get the screenshot. The same will get captured on the PC.
This tool may or may not work on some apps, depending on the limitations the app developers set for capturing screenshots.
Method 5. Use Another Phone to Take a Photo
This probably sounds like the silliest trick, but it is pretty useful. In case, the content of the screen is not being captured using dedicated physical buttons, gestures, Google Assistant, or even the Scrcpy tool, then follow this method.
- Open the page or section on the app/website that you want to screenshot.
- Grab another smartphone that has a working rear camera.
- Simply launch the camera of this second phone and click a picture of the exposed screen of the first phone.
Whether other tricks may work or not, this one is surely going to work, and you can get a high-quality image of the screen as a photo.
Other Methods to Save Screenshots on Restricted Apps
Use Virtual Exposed App [No-Root]
1. Download Both Virtual Exposed and DisableFlagSecure on Android.
2. Install Both Apps Normally.
3. Now Open Virtual Exposed App and Grant all the Permissions.
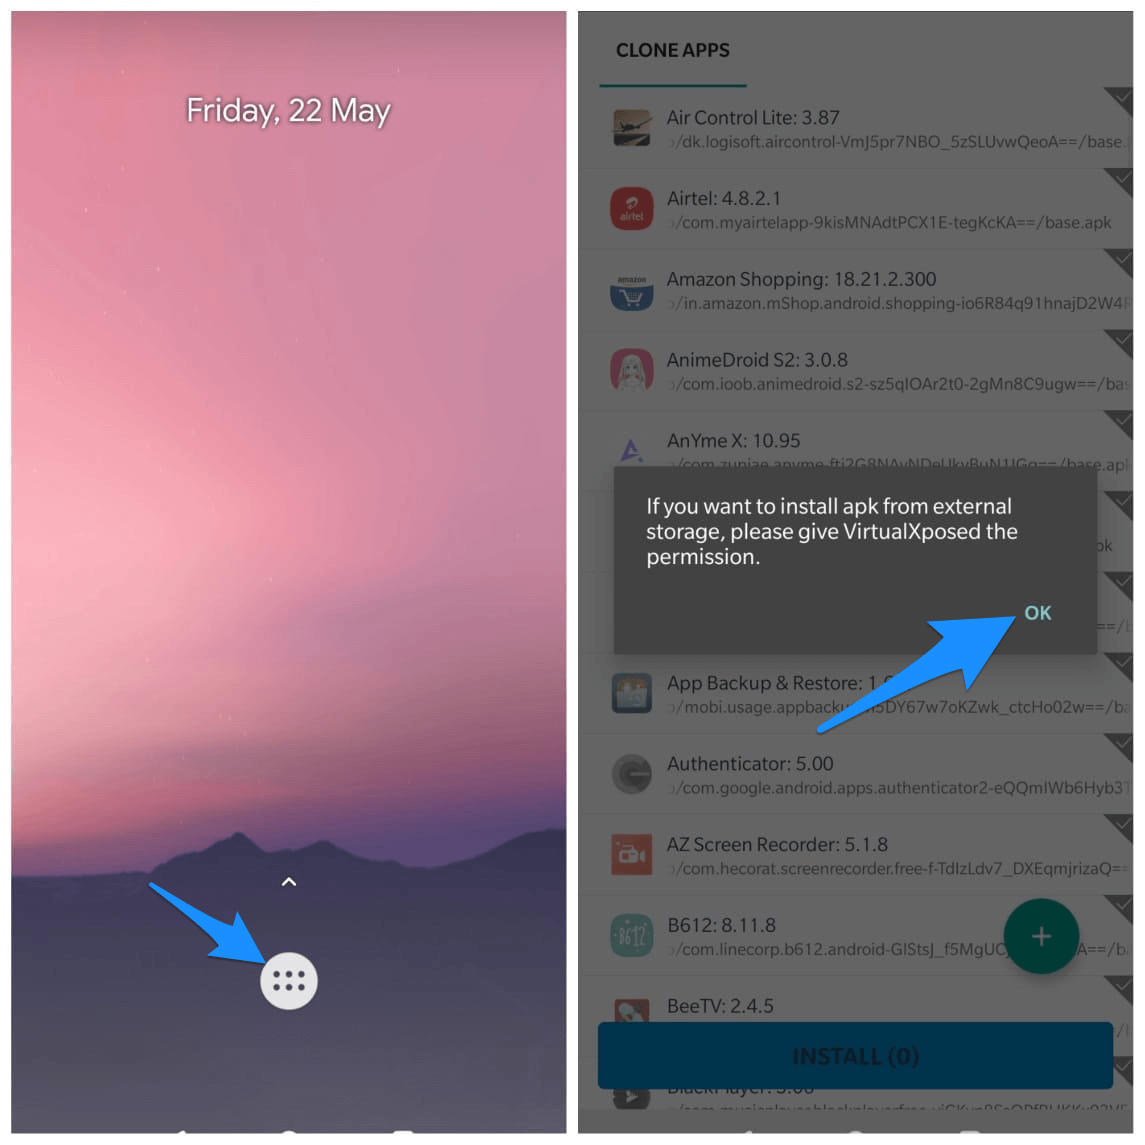
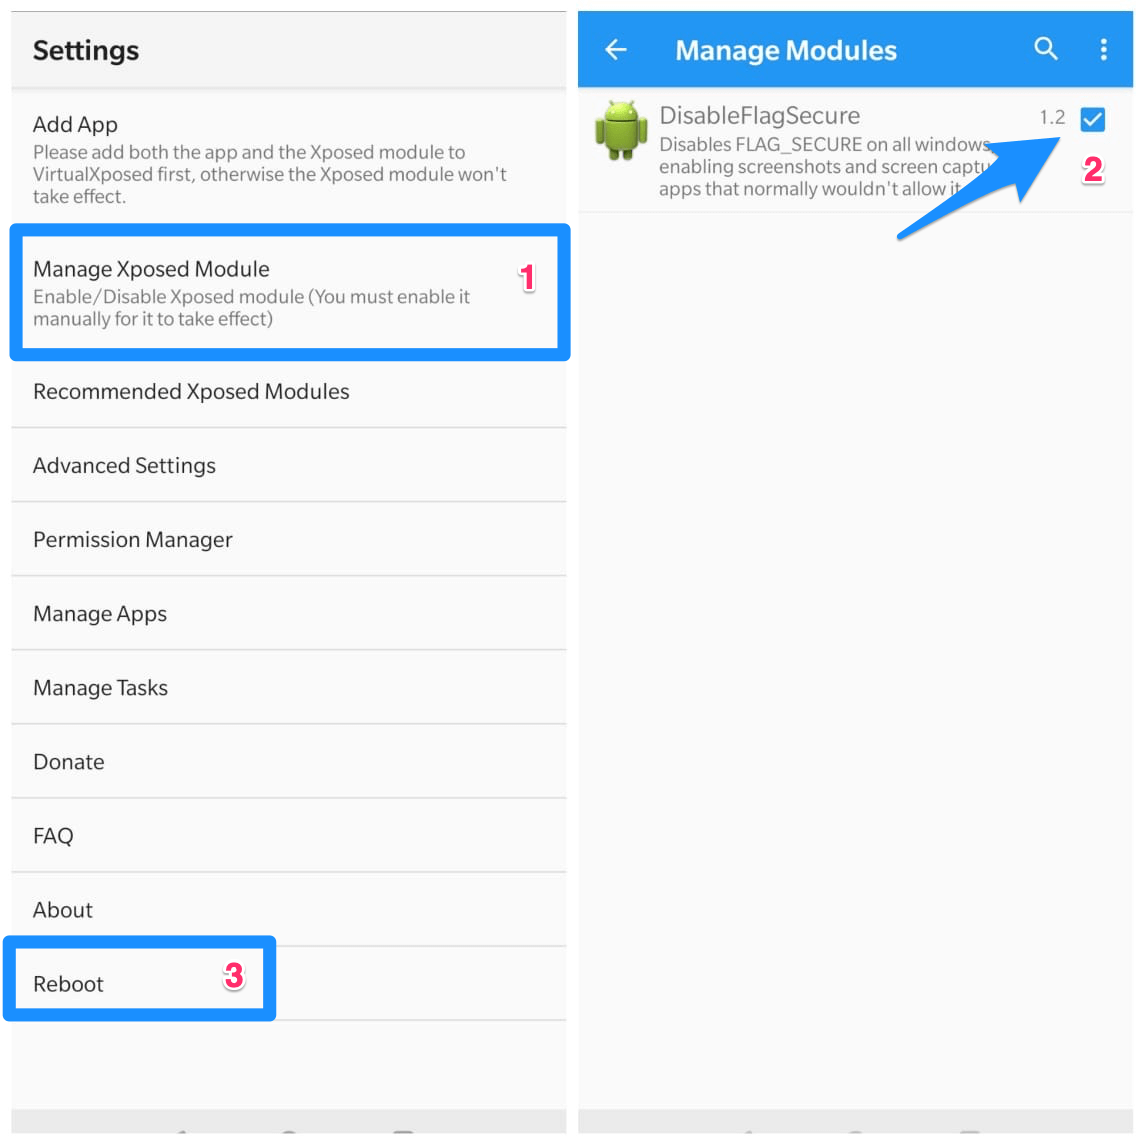
4. Click on Manage Xposed Modules, and Right Tick DisableFlagSecure, and Reboot
4. Now Select the App which you want to take a screenshot and also DisableFlagSecure from the app list.
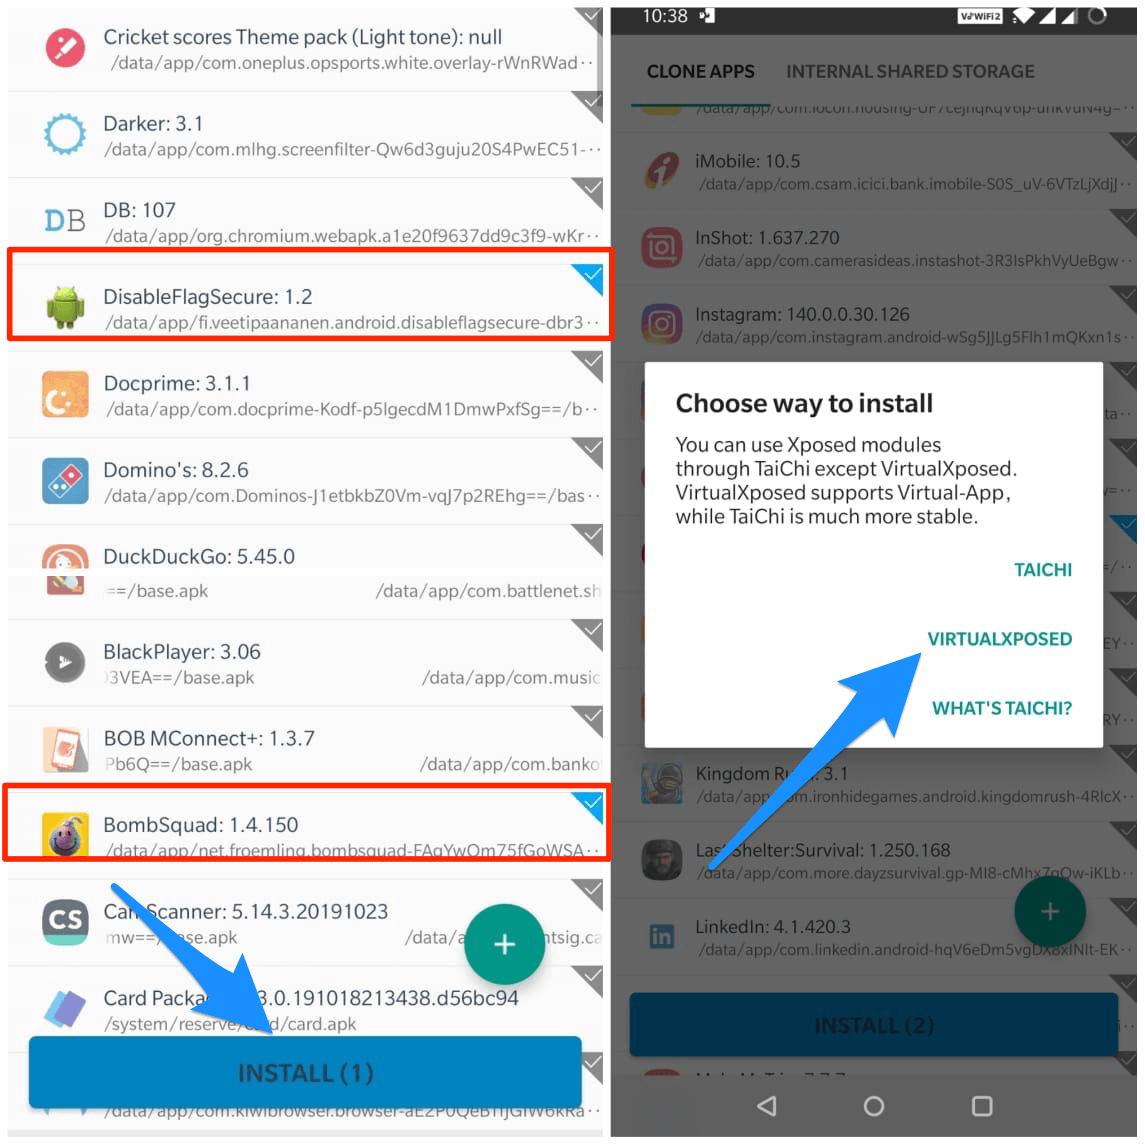
5. Click Install at the bottom and select VirtualExposed.
6. Once Installed, click Open.
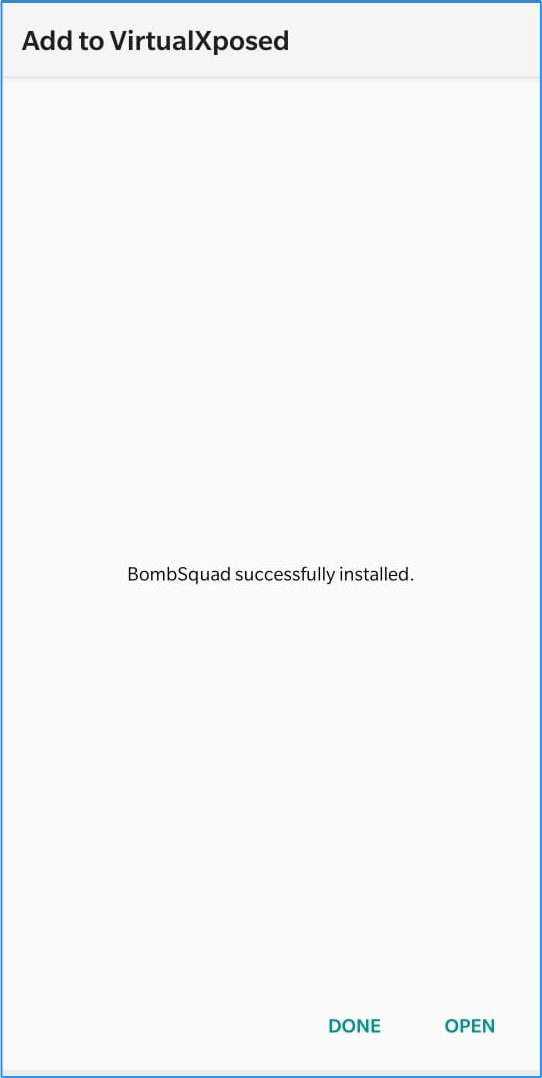
7. Done! You can now save a screenshot on the restricted App.
Other Alternatives to Capture Screenshots on Android
If the above tips and tricks did not yield any result in capturing the screenshot on an Android device, then, the last resort that remains is rooting your Android device. Unless you are into tinkering with devices as an enthusiast, superuser, or developer, I would not suggest rooting your Android device for something as simple as taking a screenshot. There are forums like XDA where you can get ample information and tools to perform a root on your device.
Empty Device Storage
Can’t take screenshot due to limited storage space
This generally happens when your device storage is filled. Though you may have a good amount of storage space left in your device, the error notification will show up. There is no particular reason for the same. So, I recommend you straightforwardly as much storage as possible. That is the only solution to fix this issue.
Conclusion: Due to Privacy and Security Concerns, most of the apps block screen capture. If you wish to take a screenshot of the App seriously, then the above methods will surely work for you.
If you've any thoughts on How to Fix Can’t take Screenshot due to PP Restrictions, then feel free to drop in below comment box. Also, please subscribe to our DigitBin YouTube channel for videos tutorials. Cheers!
