Delivery Optimization breaks down an available update into parts to facilitate faster downloads on a network of PCs. Through peer-to-peer sharing, the updates for one computer are fetched from the web server or the other PCs on the same network.
The data regarding delivery optimization is cached whenever there is an instance of update installation. Over a period, this cached data may get corrupt leading to several bugs on the operating system. The delivery optimization cache also consumes a significant amount of computer storage.
That is why the need to clear the delivery optimization cache arises. This guide explains different methods to refresh the delivery optimization cache. It is a safe process and doesn’t harm the personal files stored on your PC hard drive. Also, it won’t hamper future software updates for the computer.
Clear Delivery Optimization Cache from the Settings
This is the basic method to clear the delivery optimization cache.
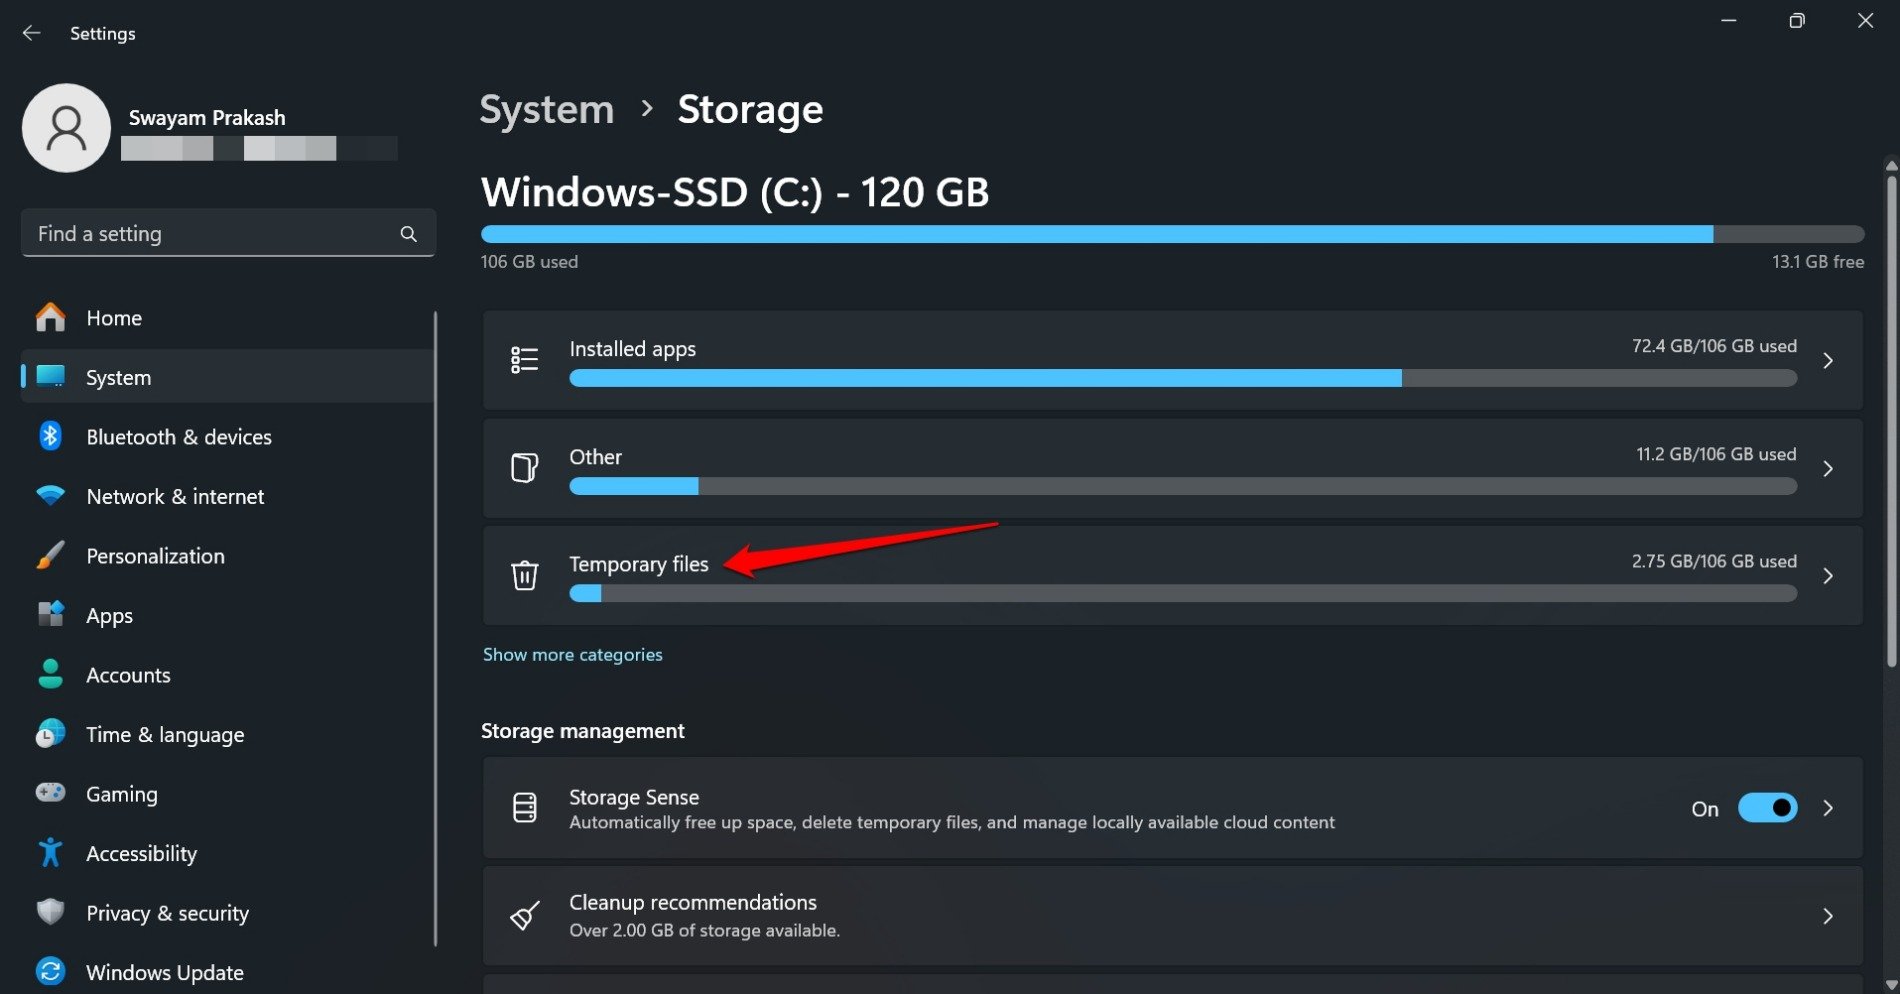
- Press Windows + I to launch the Settings.
- On the left sidebar, click System > Storage.
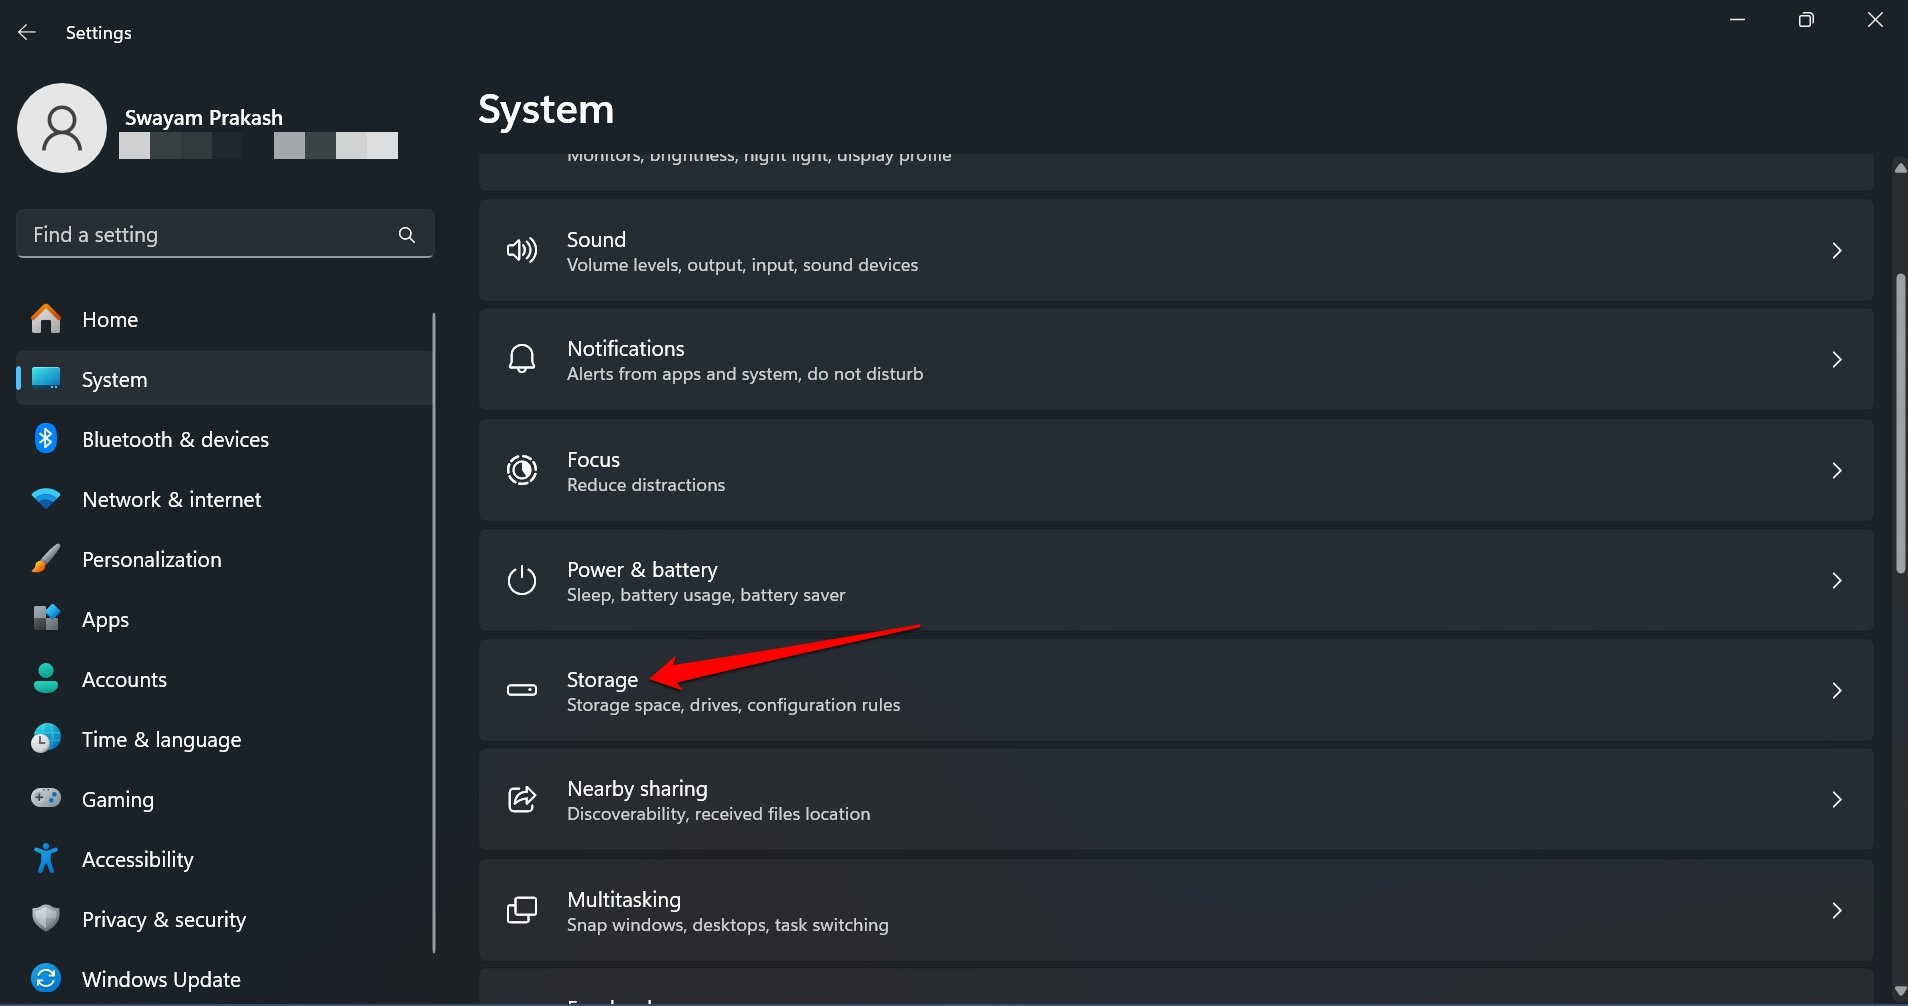

- Access the Temporary Files section.

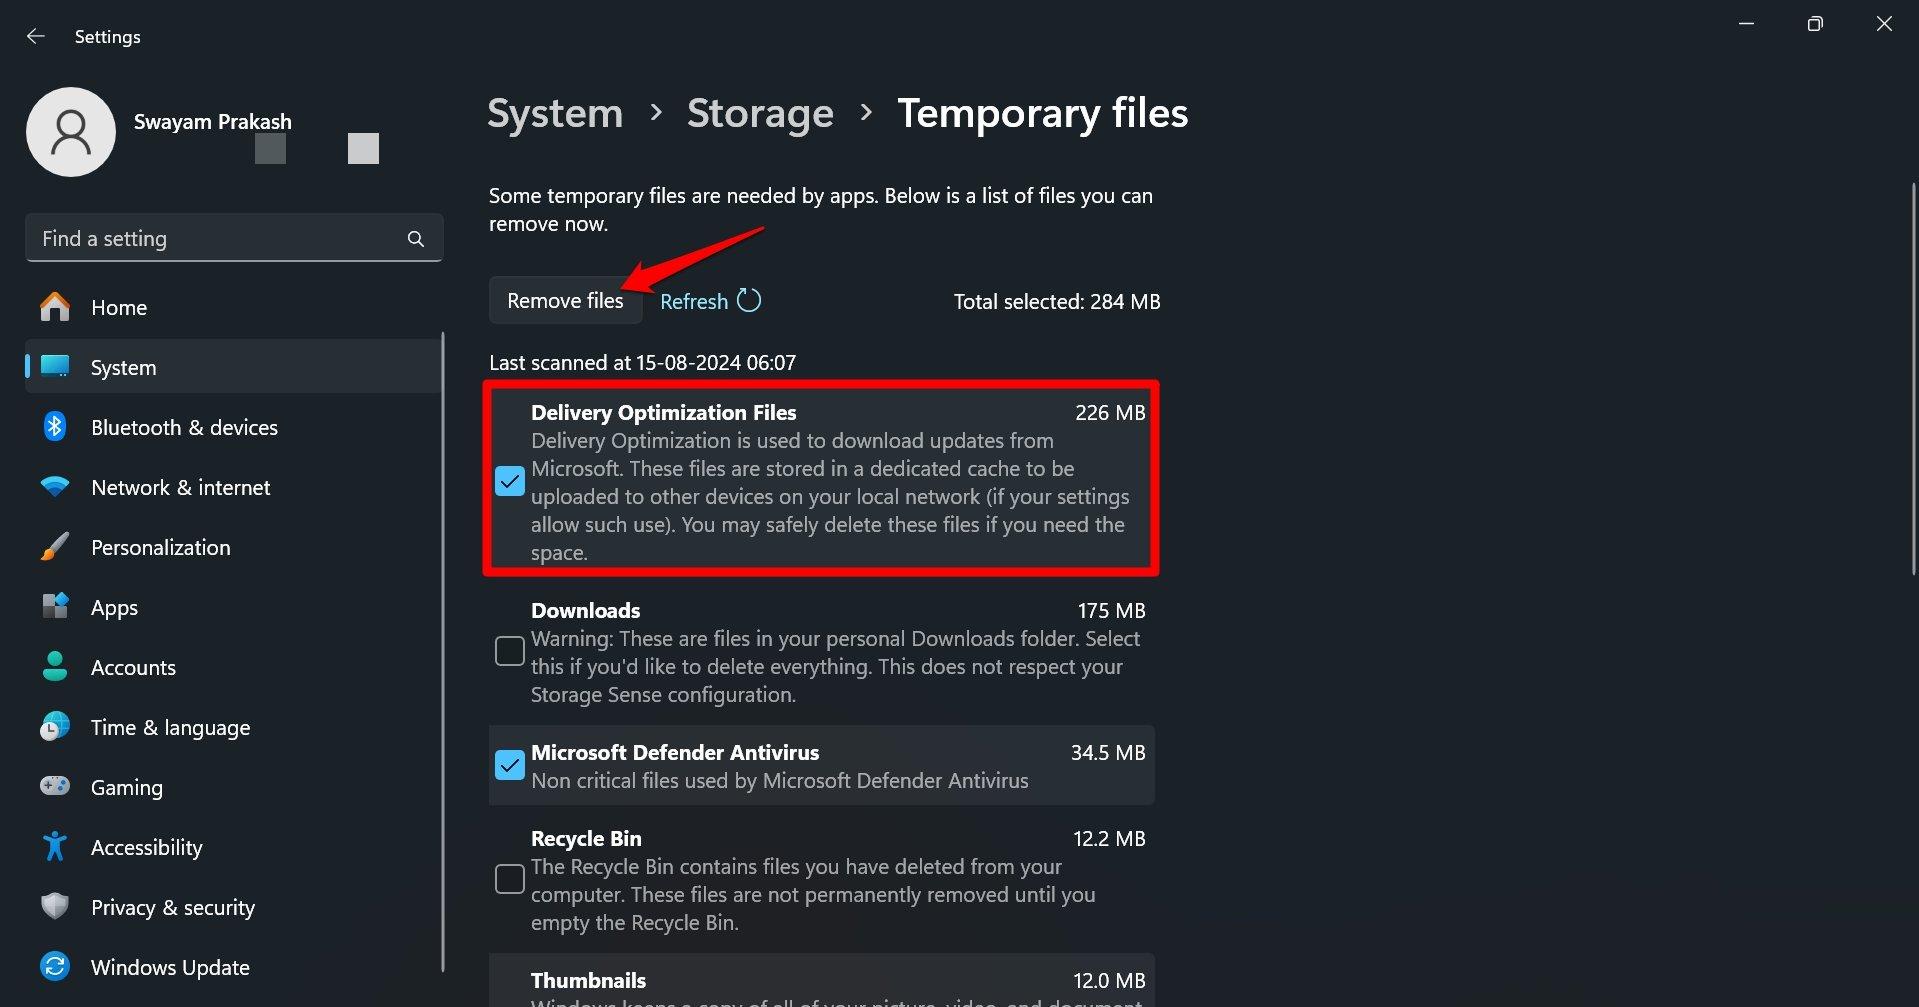
- Select the checkbox Delivery Optimization Files.
- Press Remove Files.

Use Command Prompt to Clear Delivery Optimization Cache
Summon the command line interpreter and issue some commands to clear the delivery optimization cache.
- Press Windows + R to view the Run box.
- Type cmd to access the Command Prompt.
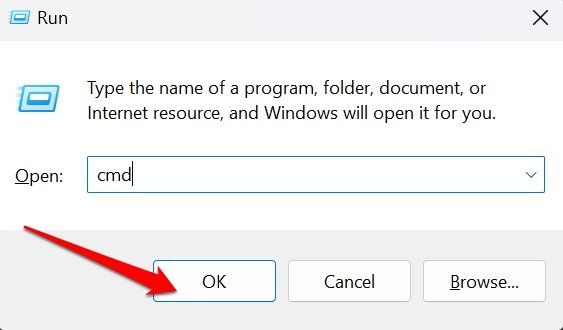

- Write this command
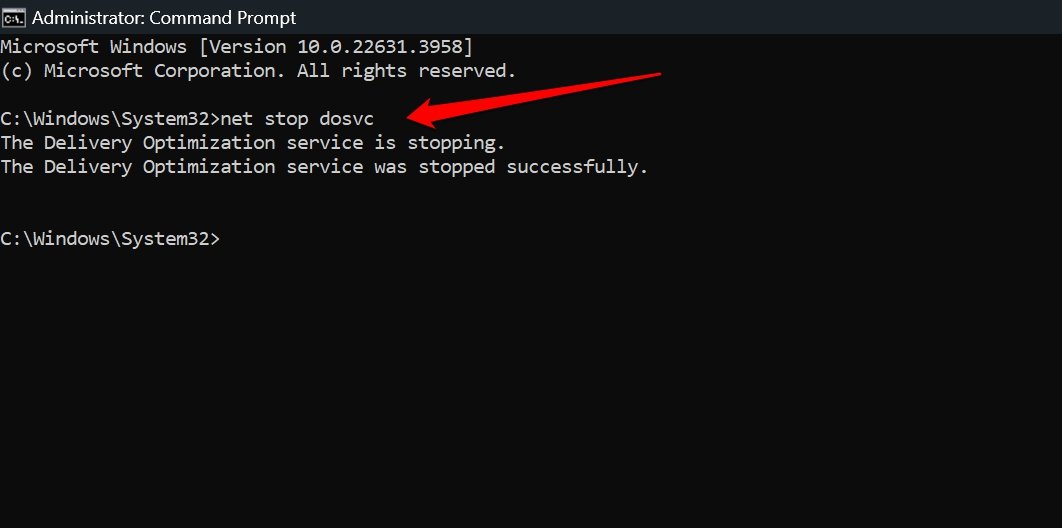
net stop dosvc

- Now, type this command.
del /s /q “C:\Windows\SoftwareDistribution\Download\*”


- Type this command to restart the caching process for future software updates.
net start dosvc
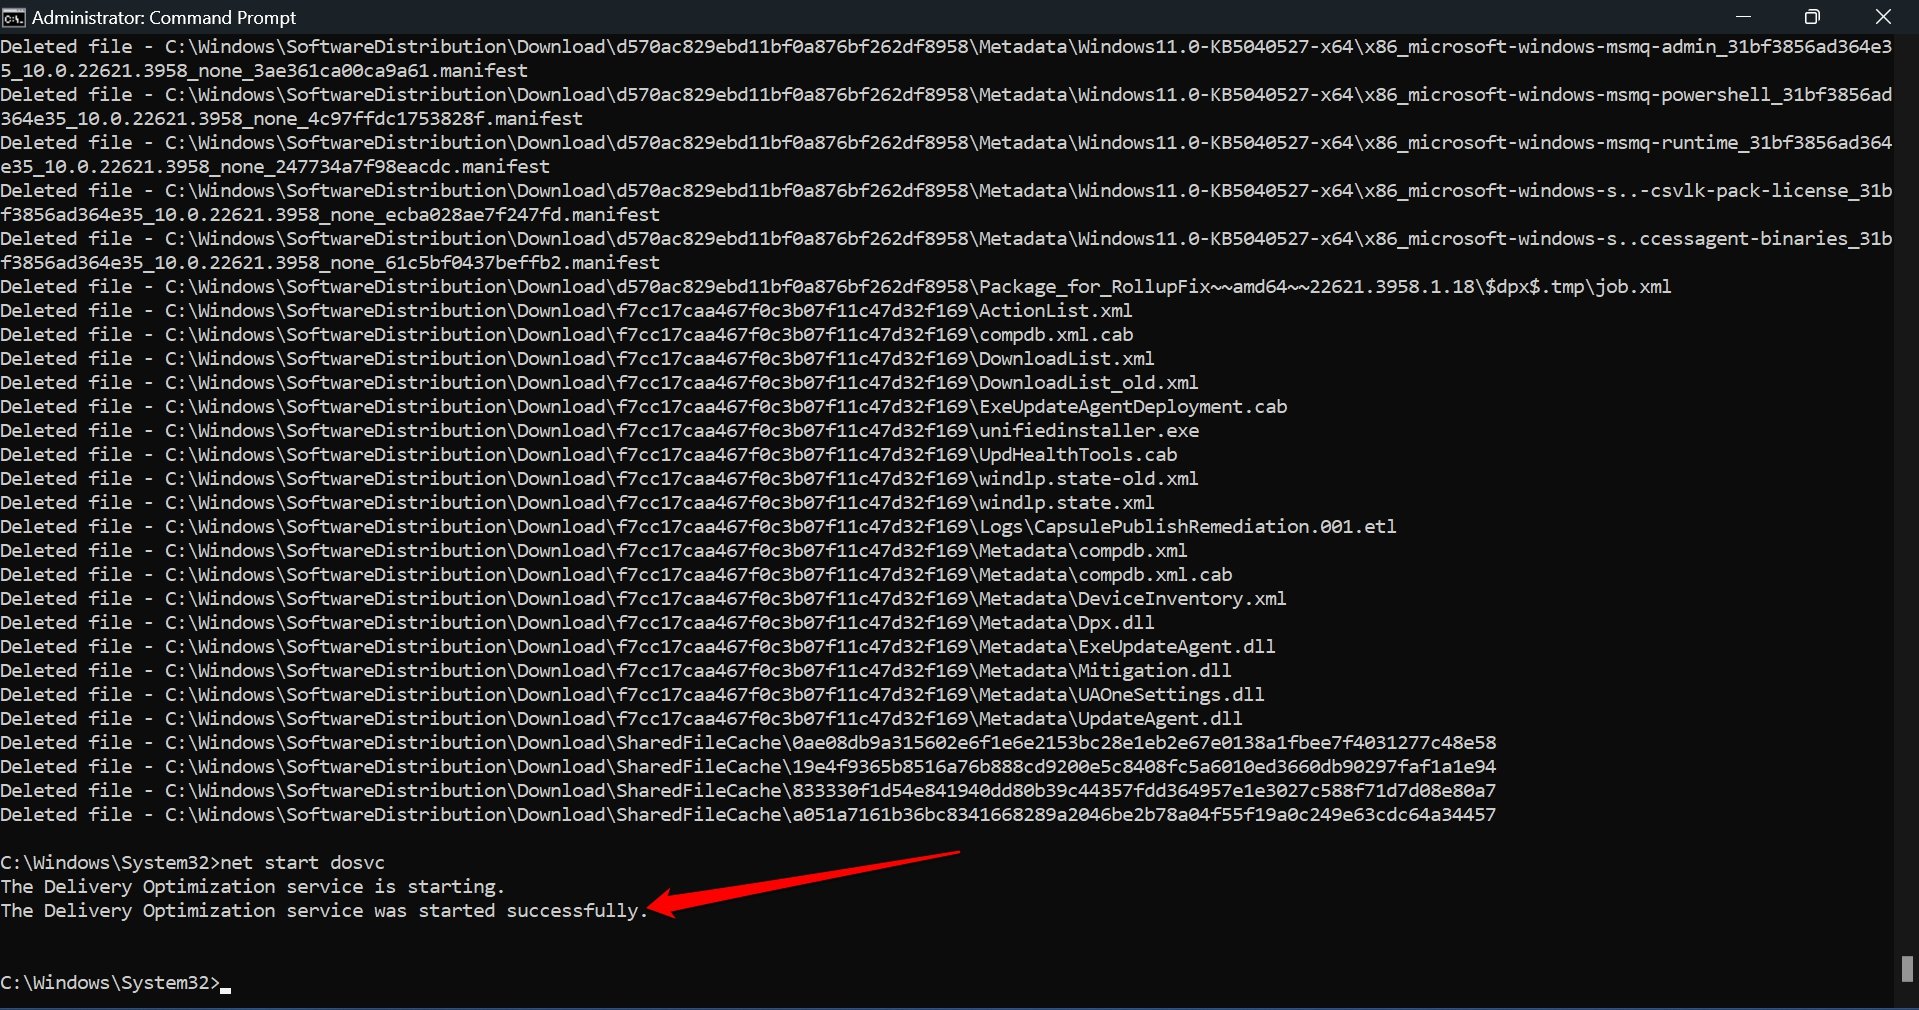

Restart the PC after you view the output “The Delivery Optimization was successfully started” on the command prompt.
Delete the Delivery Optimization Cache from File Explorer
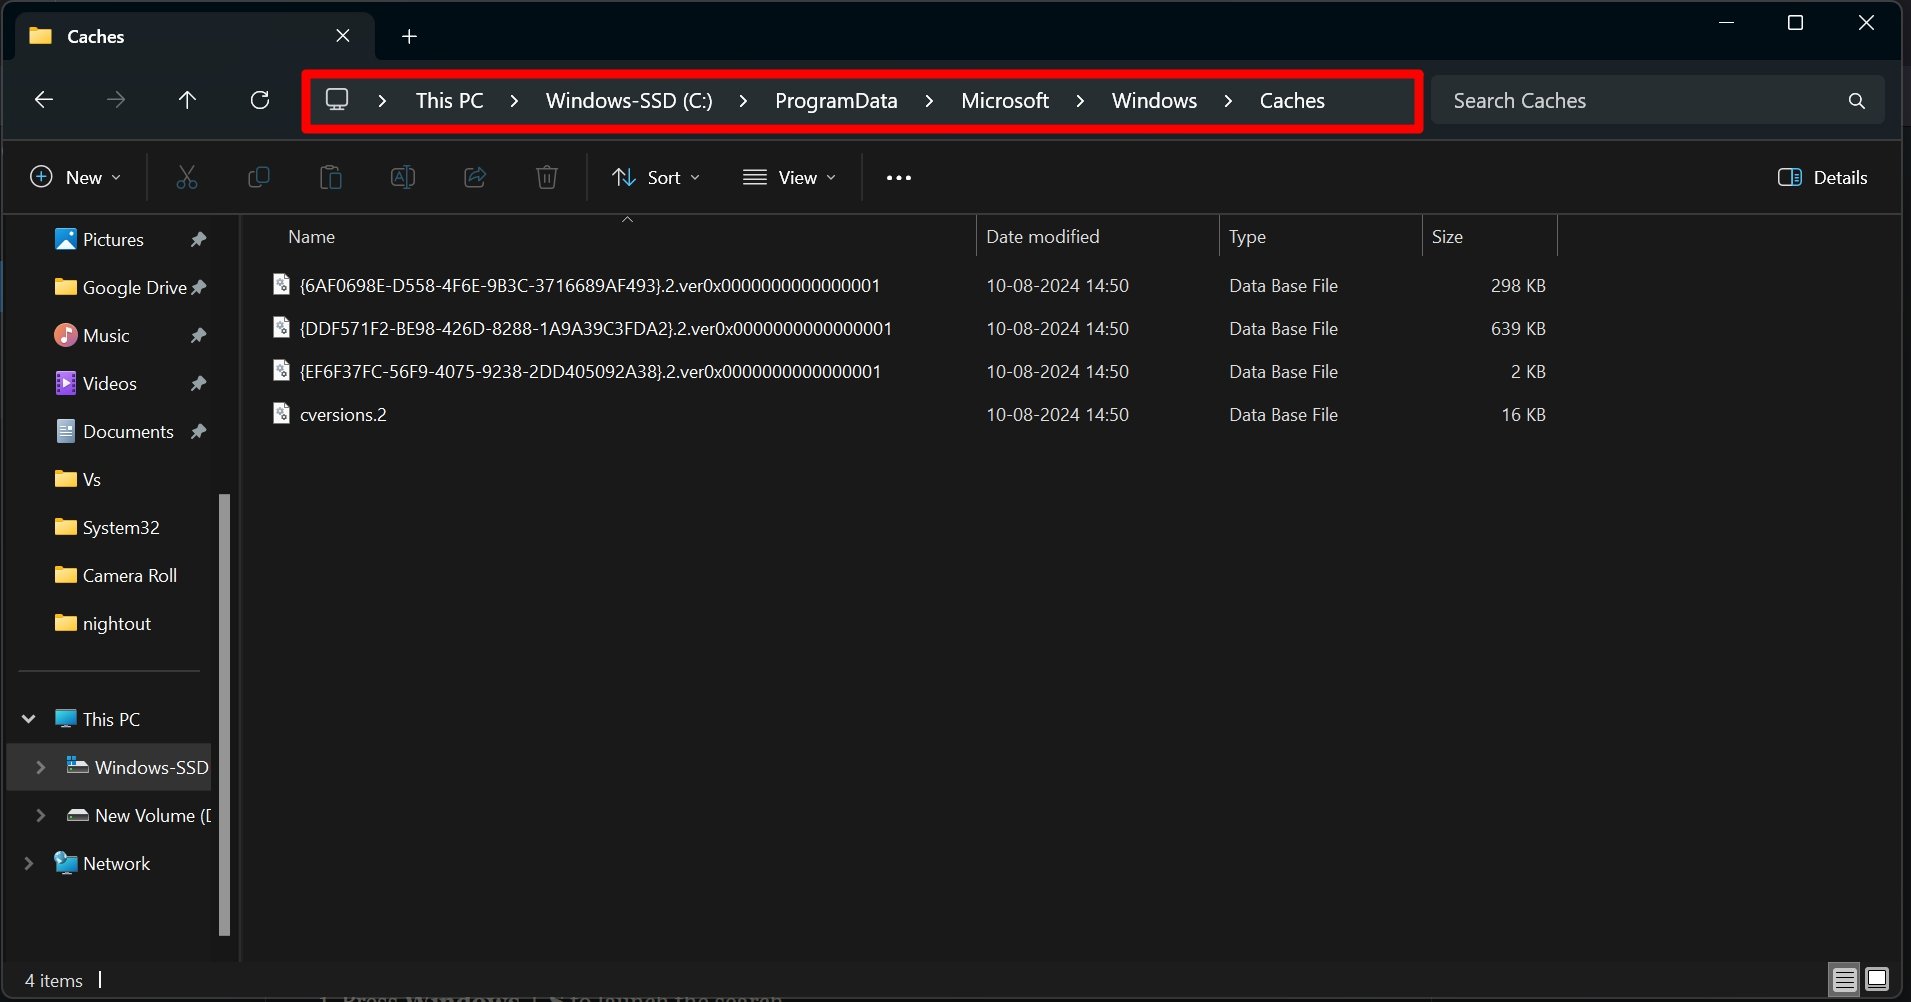
Manually access the Windows 11 File Explorer. Find the cache folder under the directory Delivery Optimization and delete all the data in it.
- Press Windows + E to launch Windows Explorer.
- In the File Explorer address bar navigate to the Delivery optimization cache using this path
C:\ProgramData\Microsoft\Windows\DeliveryOptimization\Cache
In some PCs, you may only find a subfolder named Caches. You can select the files in them and press the shortcut Shift + Delete for deletion.
NOTE: In case, you do not find the DeliveryOptimization or Cache folder due to some system issue, skip this method and use the other ways to clear the delivery optimization cache.
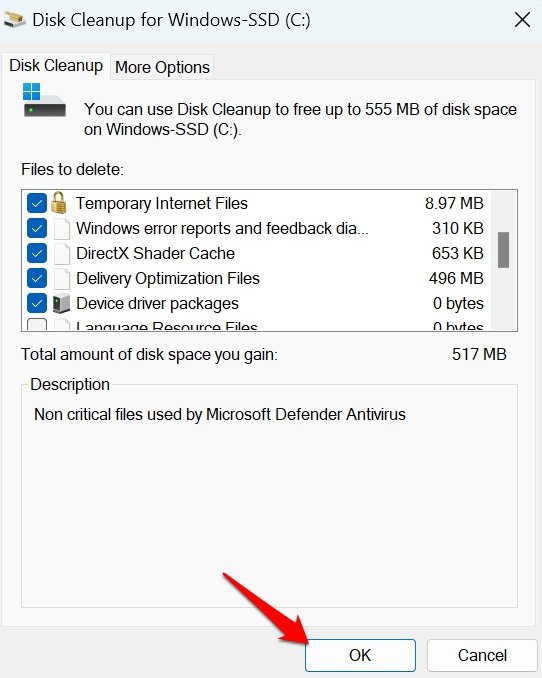
Clear Delivery Optimization Cache Using Disk Cleanup Tool
The Disk Cleanup tool also has an option to remove the data in the Delivery Optimization cache.
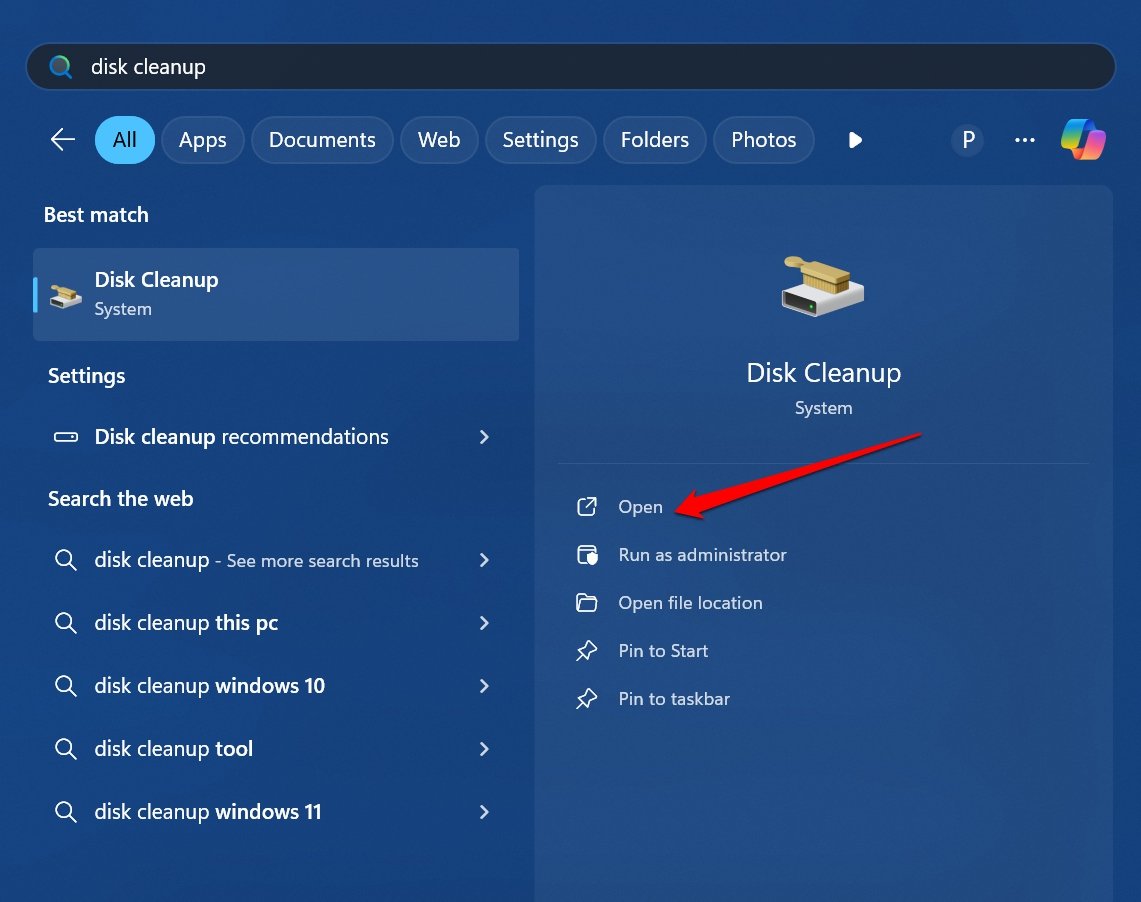
- Press Windows + S to launch the search.
- Type Disk Cleanup and press Open.

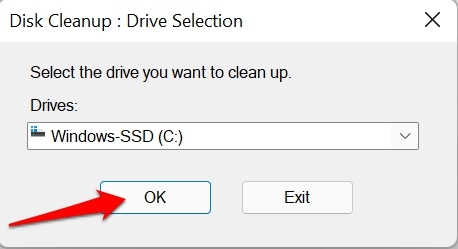
- Select the drive and click OK.

- Under Files to Delete, click the checkbox Delivery Optimization Files.
- Click OK to proceed.

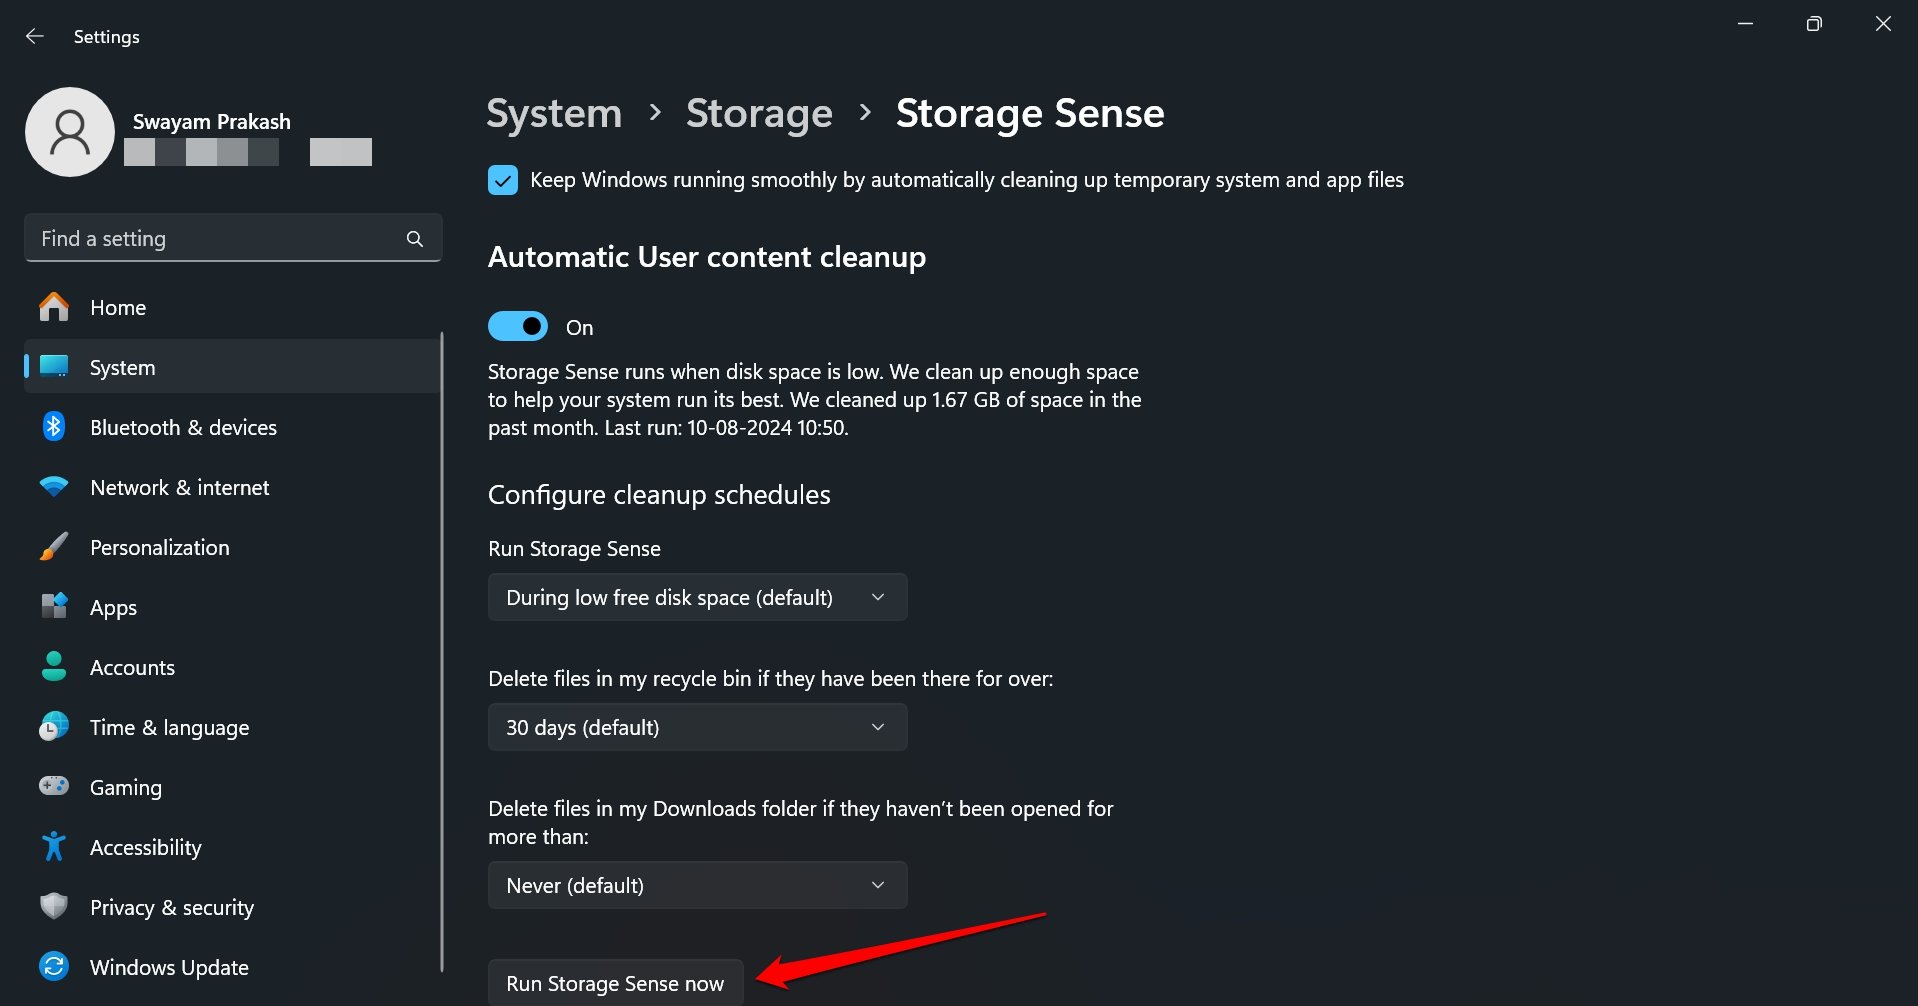
Enable Storage Sense in Windows 11 to Clear the Delivery Optimization Cache
In the Windows storage settings, turn on the Stoarge Sense feature. It will automatically clear the delivery optimization cache. This feature also manages the device storage and cleans up other unnecessary junk files from the system.
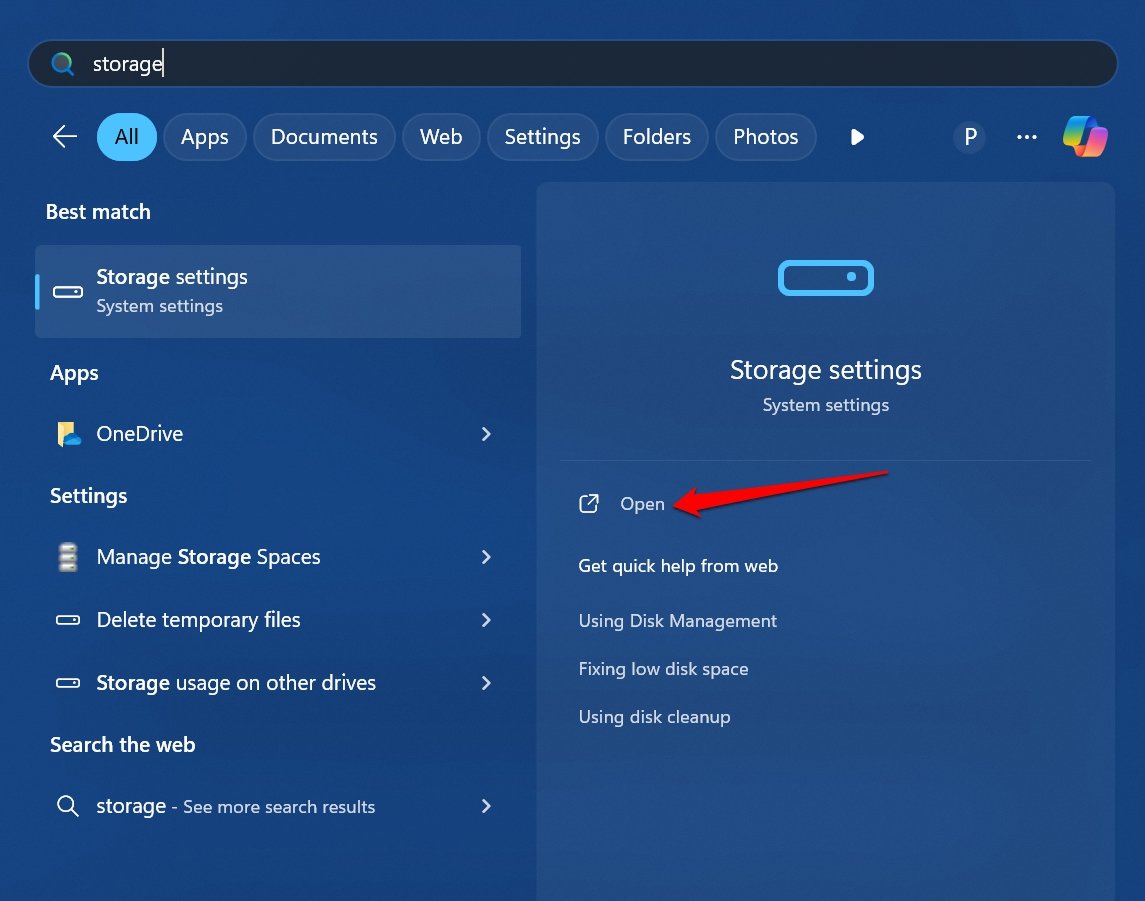
- Press the Windows key to launch the search.
- In the search panel type Storage.
- When you see Storage Settings, click Open.

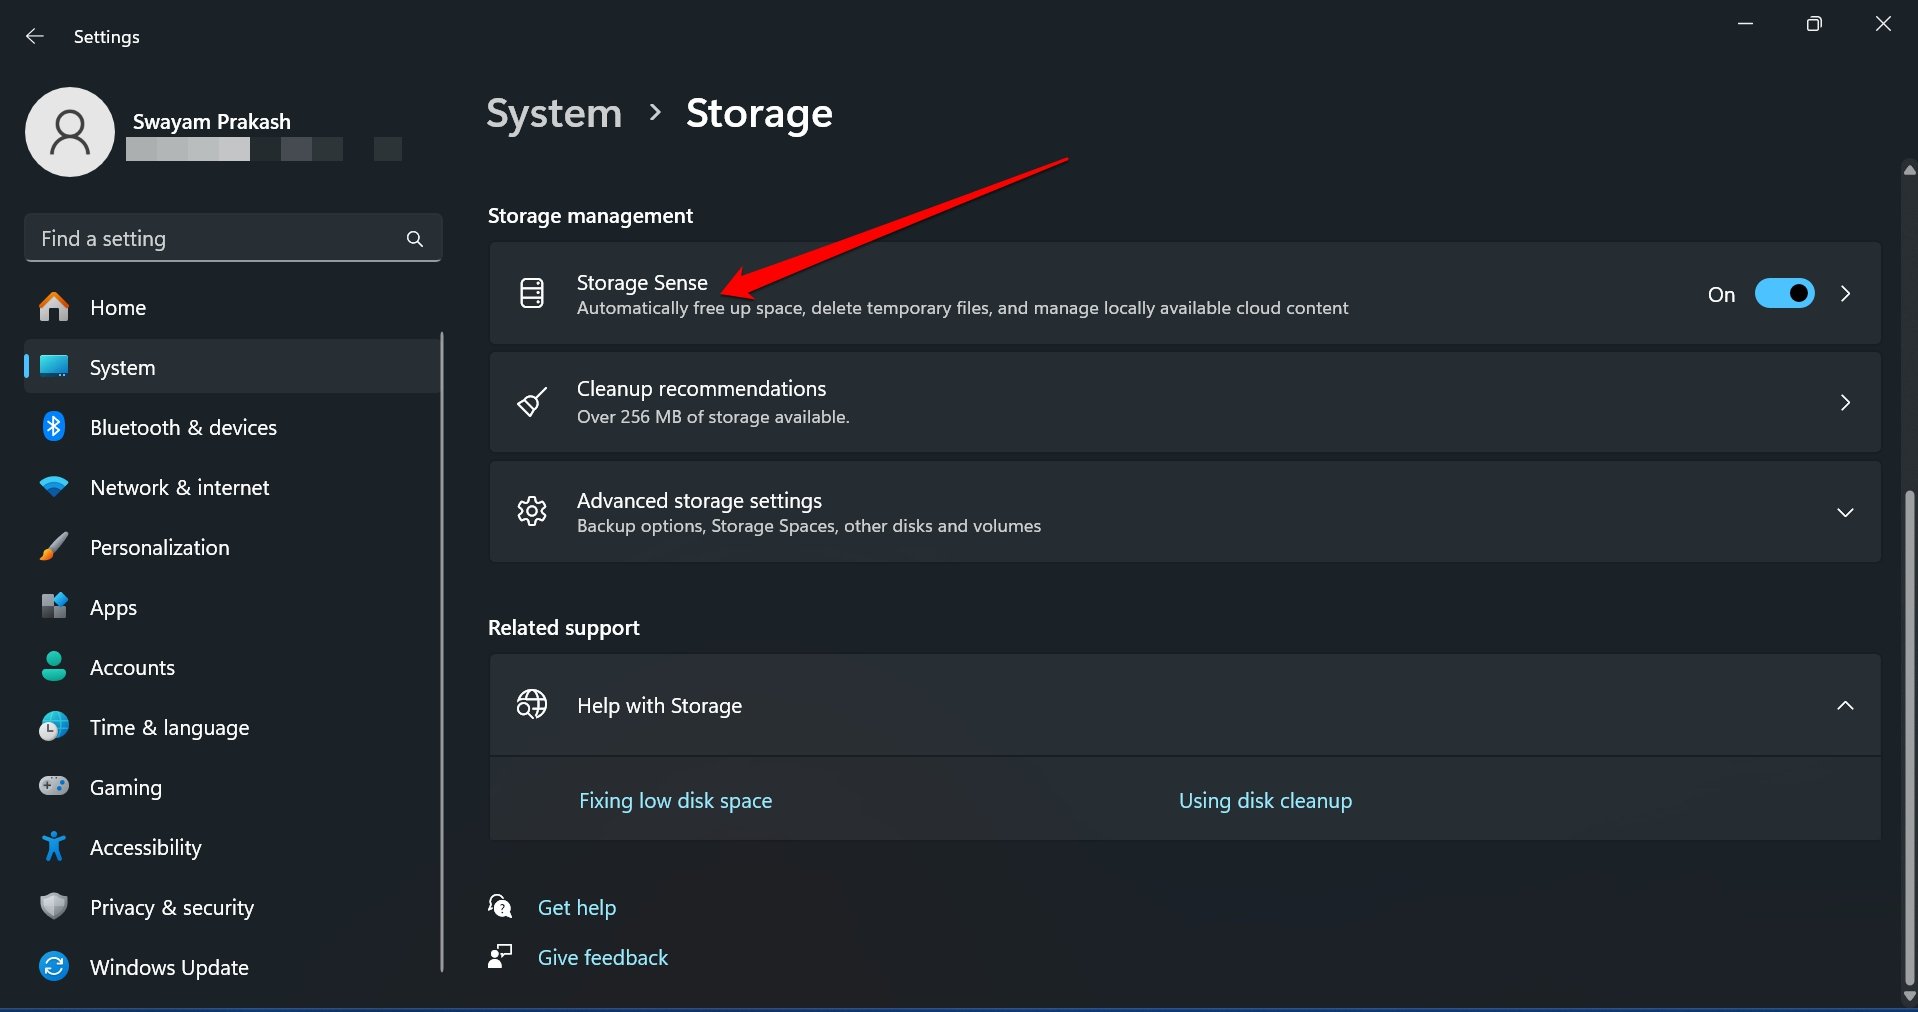
- Press the toggle next to Storage Sense to enable the feature.

- Access Storage Sense and click the checkbox “Keep Windows running smoothly by automatically cleaning up the temporary system and app files”
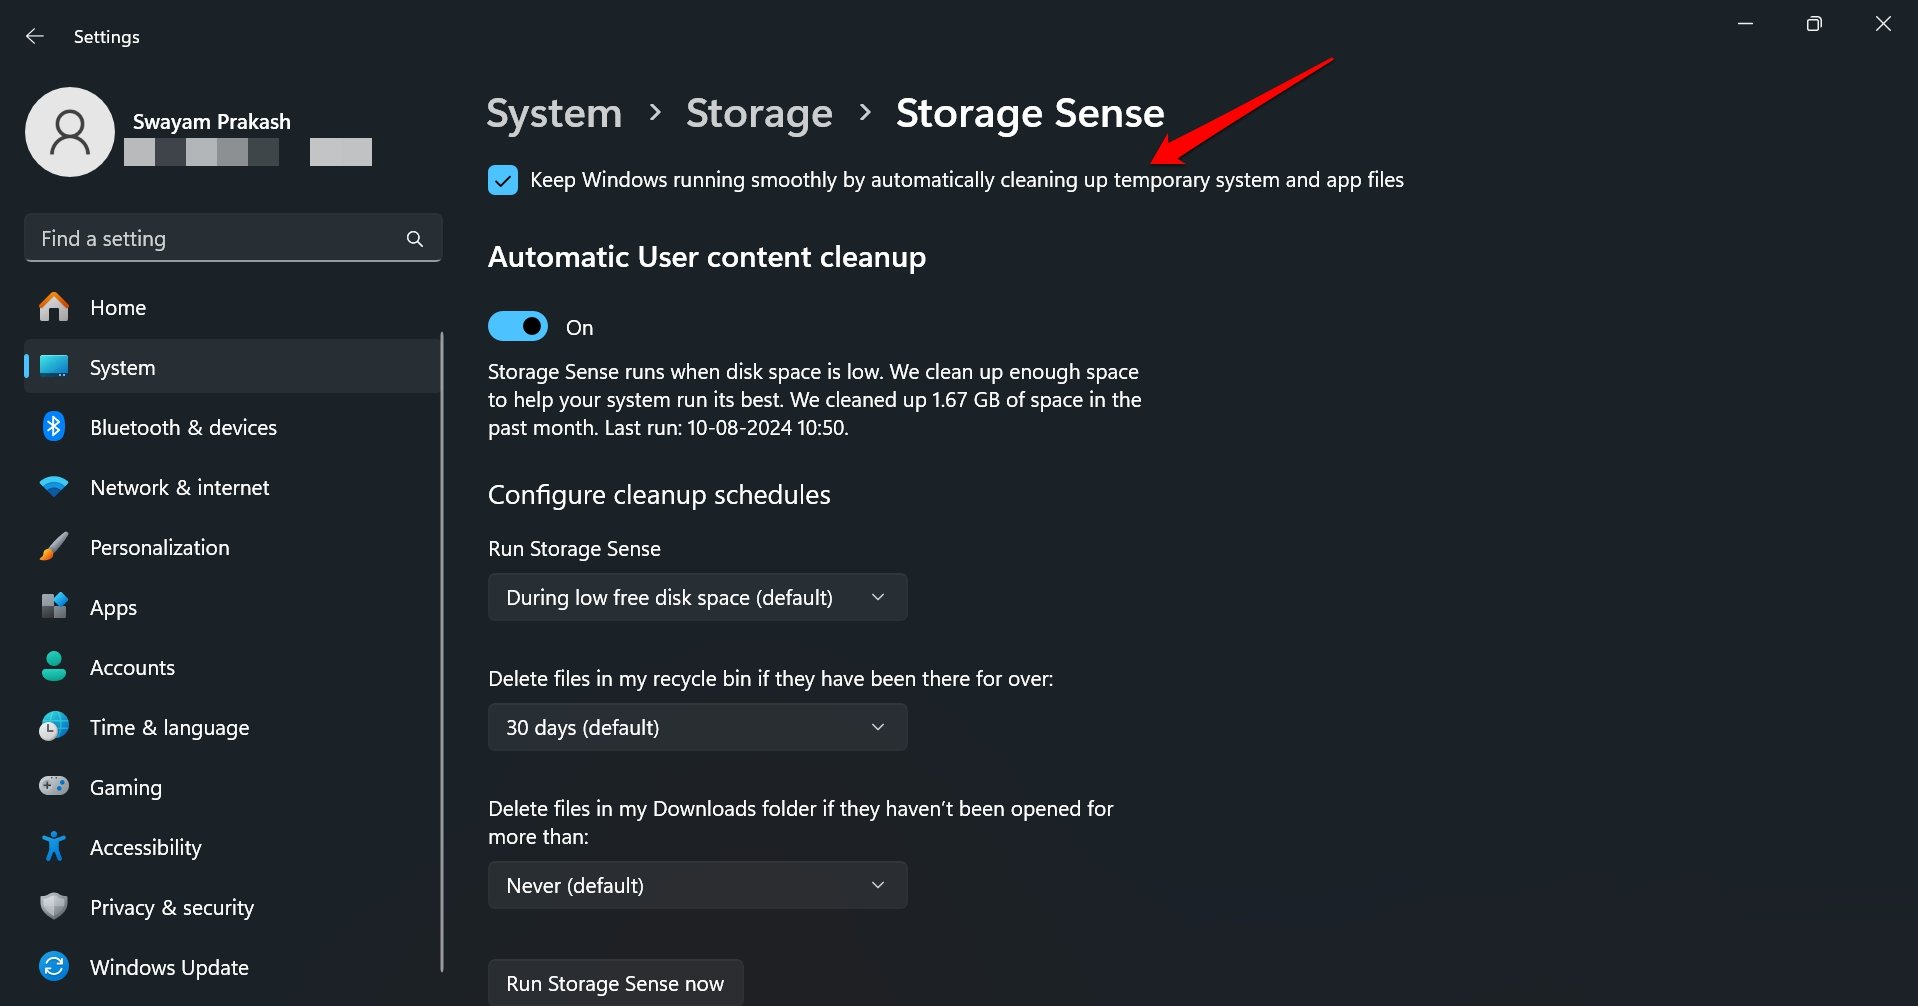

- Optionally, you may configure the Storage Sense to run when the system encounters low disk space.
- To immediately clear the delivery optimization cache and other temporary files, click Run Storage Sense Now.
Bottom Line
Clear the Delivery Optimization Cache to free up the storage on your PC and optimize its performance. You may follow the manual process or automate it via Storage Sense or Disk Cleanup. I hope the tips in this guide helped you out.
If you've any thoughts on How to Clear Delivery Optimization Cache in Windows 11, then feel free to drop in below comment box. Also, please subscribe to our DigitBin YouTube channel for videos tutorials. Cheers!