Are you having a problem accessing a specific website or webpage on Chrome browser? You may be seeing an older version of the site or receiving the classic 404 URL not found error. The site or some of its pages may load too slowly. You can fix all that by learning how to clear the DNS cache on Chrome.
This guide explains the DNS cache, why you should clear it, and how to do it. You can clear the DNS cache from the browser you primarily use or flush it from the Windows Command Prompt to browse websites smoothly.
What is DNS Cache?
The browser’s DNS cache saves the IP address of websites that you frequently visit, helping the browser load web pages faster.
I will explain how the DNS cache works to you with a simple example.
Suppose www.digitbin.com is a website you regularly visit on the Chrome browser.
When you type the site URL and press enter on the browser, you are technically requesting the IP address of the website(digitbin.com) from the web server that hosts it.
Now, every time you visit the site, the above process of requesting the IP address is carried out. However, it is a redundant process.
So, the browser utilizes the DNS cache to store the IP address of the site in it.
This helps the browser load the site swiftly without having to request for IP address from the web server every time you launch the site.
Not only DigitBin but the IP address of every other website you frequently access on the browser is saved in the cache.
Instead of requesting the IP from the DNS server, it can be accessed instantly from the DNS cache.
Why do you Clear the DNS Cache?
Now, the question is, why the need arises to clear the DNS cache?
A website may update a couple of its pages or its DNS server address. The same may not be reflected instantly on your browser’s DNS cache.
The Chrome DNS cache still uses the information saved in it to provide you access to an older version of the site.
Hence, to get the correct DNS address of a page, it is better to manually clear the DNS resolver cache of the host.
In some cases, cybercriminals may spoof the IP address in the DNS cache. They do it to replace the existing IP address in the cache with an IP of a fake site.
When you start browsing, the DNS cache loads the spoofed DNS address of the fake site and redirects you to it. You end up getting scammed or hacked further.
It is also suggested to regularly refresh the DNS cache to remove the entries on it. It safeguards your browsing history from getting tracked by data miners or cyber attackers.
How to Clear DNS Cache on Chrome?
It only takes three steps to flush the resolver host cache on the Chrome browser on a PC.
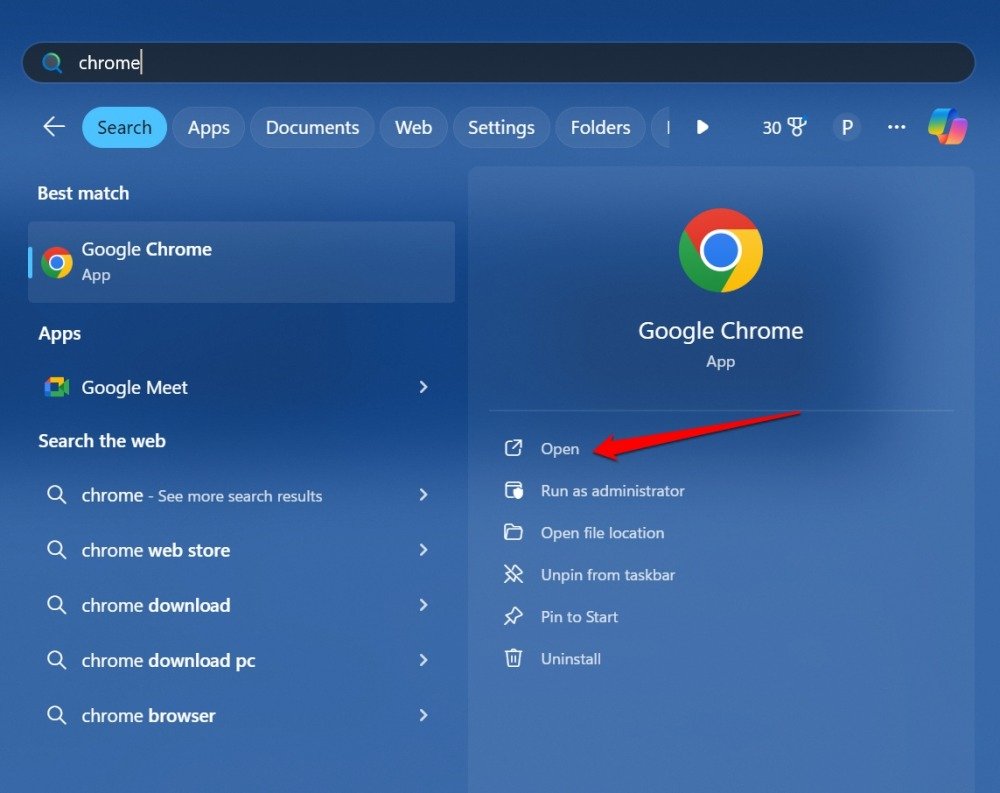
- Launch Google Chrome on your computer.
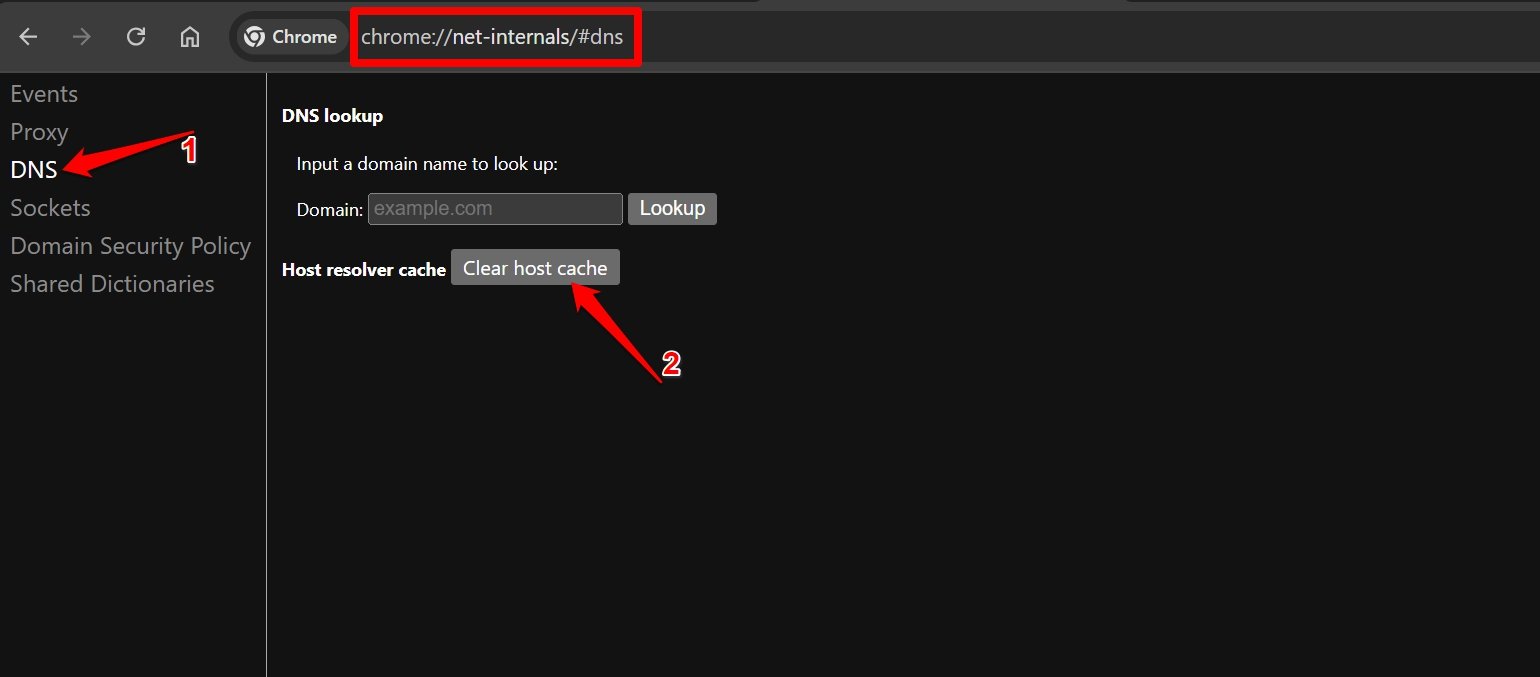
- In the address bar type the following.
chrome://net-internals/#dns
- On the Chrome Net Internals page, click on DNS which you will find on the left side panel.
- Press the button Clear Host Cache.
- Reload the webpage that was previously showing an error or not loading.
Clear Chrome DNS Cache on Android
Nowadays, everyone can browse websites right from their smartphones. However, if you use the Chrome browser app on your Android device, you may sometimes face difficulty browsing specific sites or their pages.
You can clear Chrome’s DNS resolver cache and fix the issue immediately. Follow the steps below.
- Launch the Chrome app on your Android device.
- Tap the URL bar and type the following.
chrome://net-internals/#dns
- Press the page load button to view the Chrome DNS settings.
- Tap the DNS tab on the left side of the page.
- Under the Host Resolver Cache, tap Clear Host Cache.
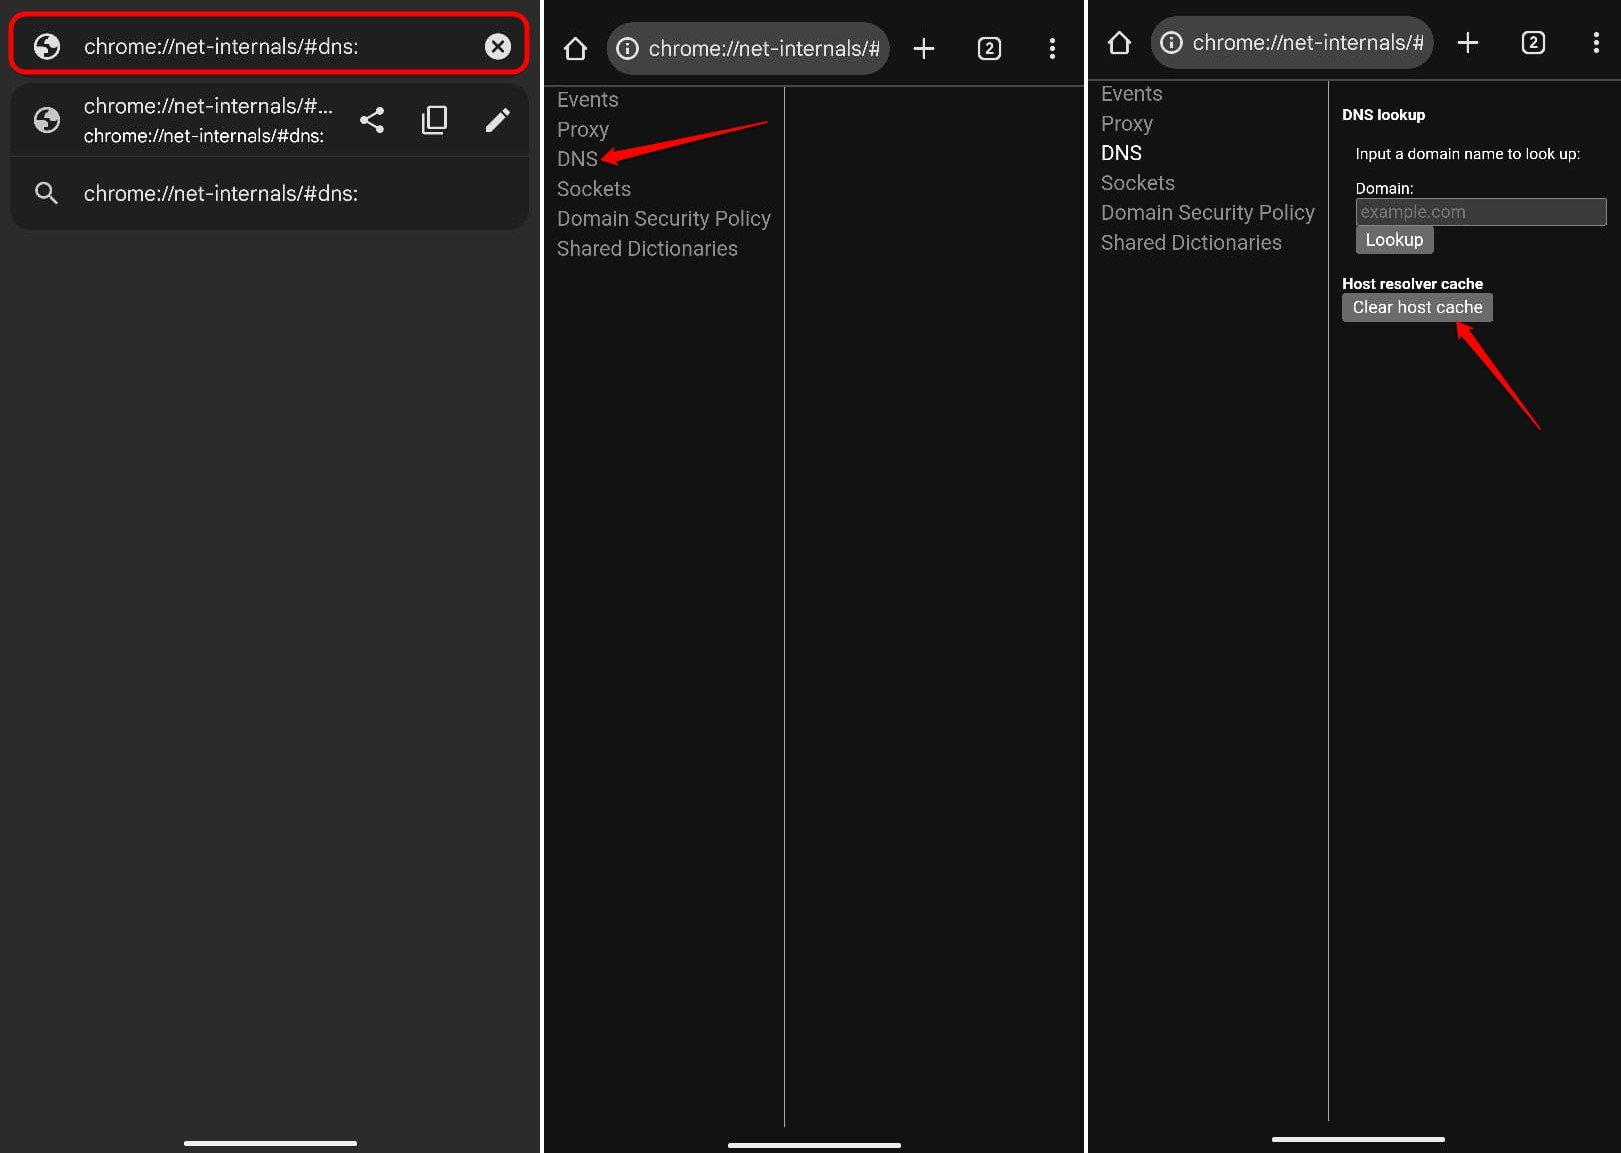
- Reload the affected webpage or you may relaunch Chrome as well.
If clearing the DNS cache did not fix the problem with web browsing, update the Chrome app to the latest version.
How do you Flush the DNS Cache on Windows 11?
Instead of clearing the DNS cache from the browser, you can flush the DNS using the Windows Command Prompt. Here are the steps for you to follow.
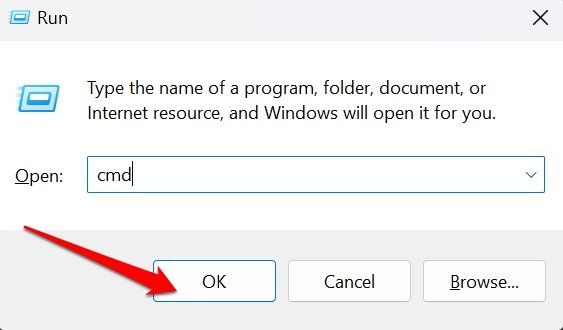
- Press Windows + R to launch the Run box.
- Type cmd and press the Enter key to load the command line interface.
- Type the following command.
ipconfig/flushdns
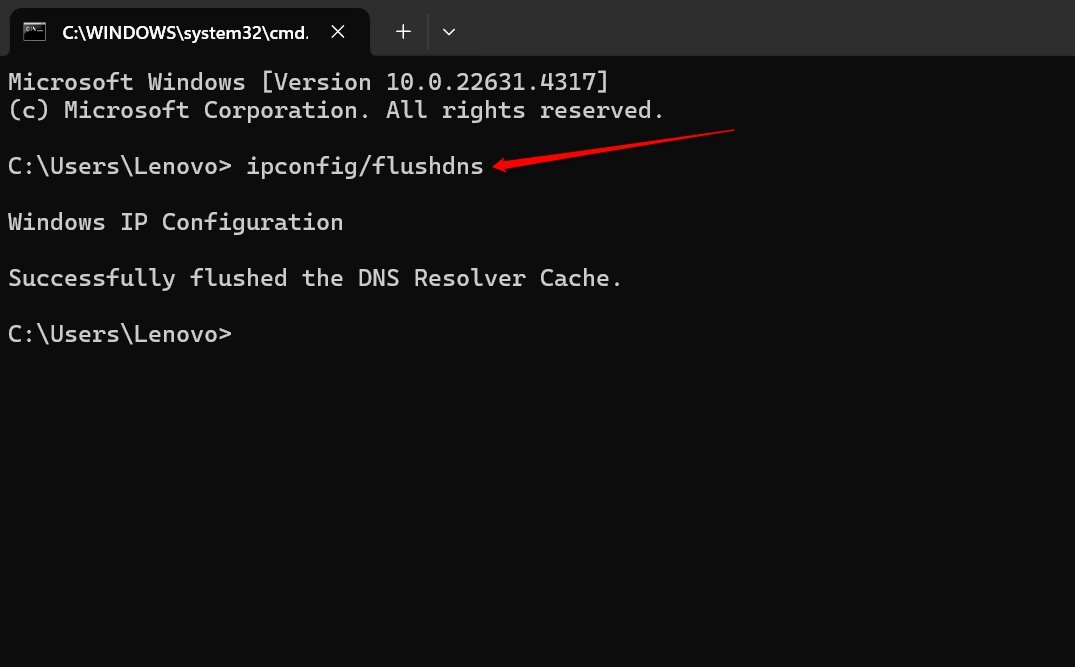
You will instantly see a message on the command line interface that says, “Successfully flushed the DNS Resolver Cache.”
Close the Command Prompt and launch your browser. Access your desired webpage and check if you can browse without any technical difficulties.
Frequently Asked Questions(FAQs)
How do I Clear the DNS Cache on Edge Browser?
In the Edge browser(for both the web and Android version of the browser) address bar enter edge://net-internals/#dns and clear the host cache in a similar way as Chrome.
How do I Clear the DNS Cache on Mozilla Firefox?
On Mozilla Firefox, visit the URL “about:networking#dns” through the browser address bar. Press the Clear DNS Cache button and reload the page/site you want to browse.
Do I get Logged Out of Sites After Clearing the DNS Cache?
NO. You can use the site on the browser without having to log out. You may have to reload the problematic page.
Bottom Line
Let us wrap up the article. Clear the DNS cache to facilitate a better browsing experience, view the latest version of a site, and stay safe from DNS attacks. While the process was demonstrated for Google Chrome, you can follow the info in the FAQ to easily flush the DNS resolver cache in Microsoft Edge and Mozilla Firefox as well.
If you've any thoughts on chrome://net-internals/#dns: Clear DNS Cache on Chrome, then feel free to drop in below comment box. Also, please subscribe to our DigitBin YouTube channel for videos tutorials. Cheers!
