The hard disk is the centralized storehouse of all the data you have on your Windows PC, which can be accessed easily whenever required. Hard disks are robust devices, but unfortunately, they are prone to damage that significantly affects their operation. With each passing day, the hard disk health deteriorates, hindering the smooth working of the component.
While this is inevitable, it is crucial to regularly monitor the hard disk health to avoid sudden data loss or complete system failure. Interestingly, Microsoft has provided a slew of methods by which you can examine the hard drive health on your Windows 11 PC. So, let’s check them out and understand their step-by-step process.
Top Ways to Check Hard Drive or SSD Health on PC
Here is the Simple Guide to Check Hard Drive and SSD Health on Windows 11
1. Using Windows CHKDSK Tool
CHKDSK is a handy command prompt utility that is used to diagnose and fix hard disk-related issues and errors. This mechanism built into all iterations of Windows, including Windows 11 scans the hard drive to identify the bad sectors and in some scenarios even fix them. Thus the CHKDSK command is a relevant tool for you to examine the health of your disk drive. Here is how you can utilize the Chkdsk command for your benefit.
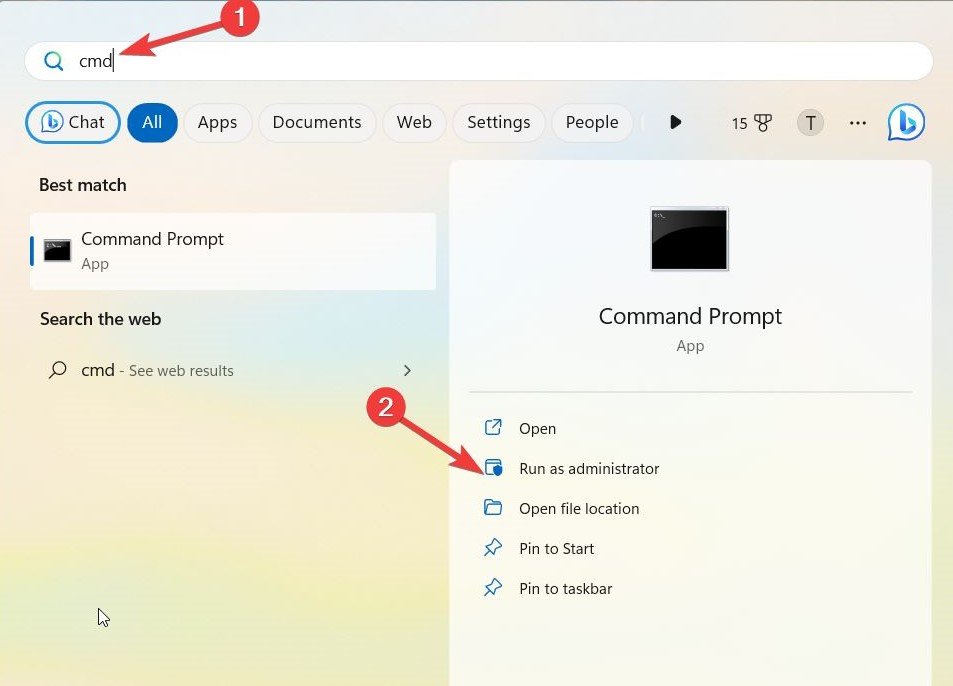
- Press the Windows key and type the cmd command. Choose Run as administrator from the search results section.

- Select Yes on the User Action Control panel to launch the command prompt with elevated permissions.
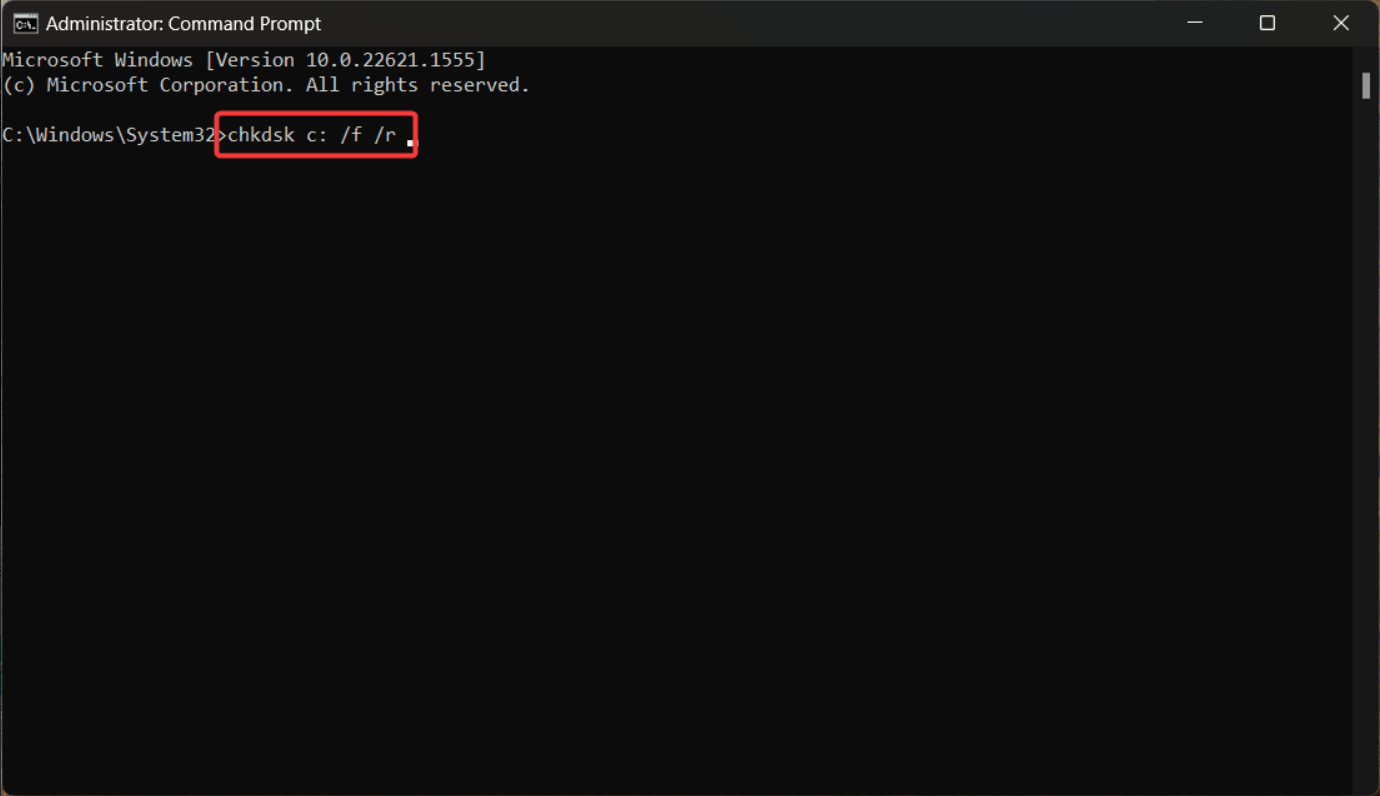
- Type CHKDSK in the command prompt window and press Enter to run the basic health scan. Next, type the CHKDSK/f /r command and press the Enter key to execute the command. This will help fix the bad sectors and recover data if possible.

Note:
- You can also run the chkdsk /f /r /x command, which will first dismount the hard disk drive.
- In case, you want to run the chkdsk command when the system reboots next, simply run the chkdsk /f command. Next, press the Y key followed by the Enter key.
That’s it! As soon as your PC powers up from the next reboot, the CHDSK scan will launch and will give you the state of your drive’s health.
2. Using the WMIC command
WMIC, or Windows Management Instrumentation Command, is another command-line tool that enables you to check and manage several Windows-related tasks, such as performing a health check of your hard disk. This is how the WMIC command lets you check the hard drive health on Windows 11.
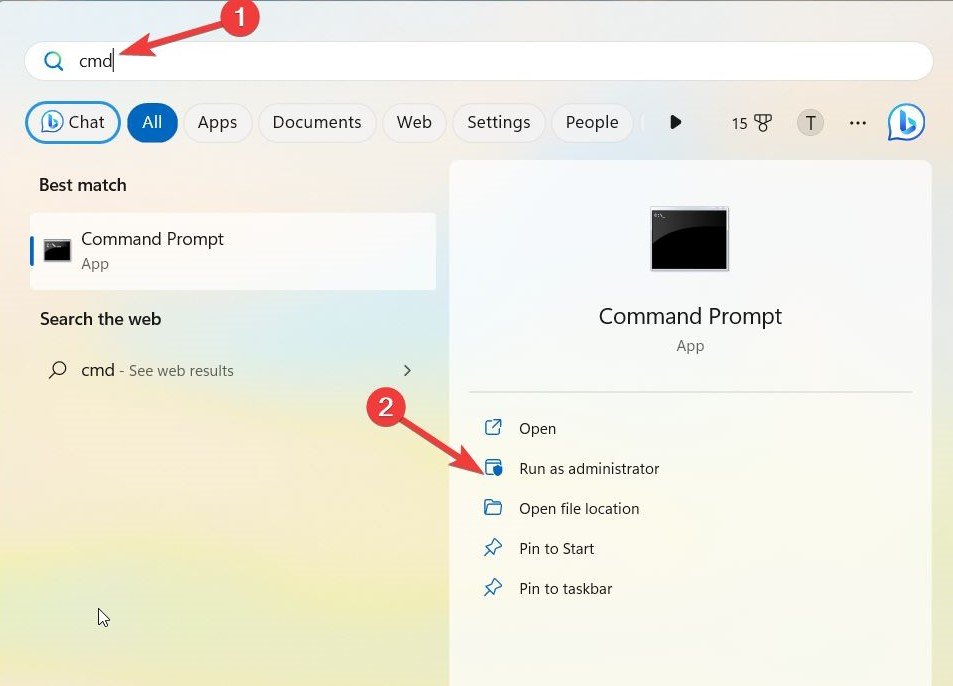
- Use the Windows key to launch the Start menu. Type the command prompt in the search box and select Run as administrator from the search results section.

- Press the Yes button on the User Action Control panel to launch the command prompt with Administrative Privileges.
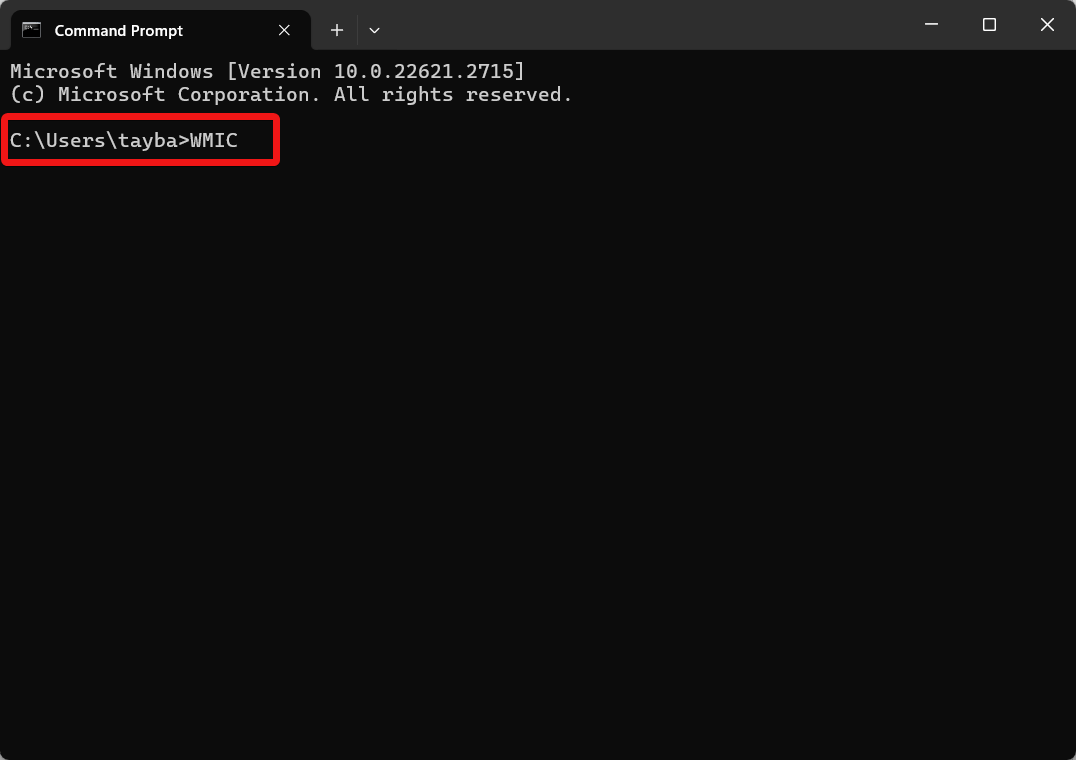
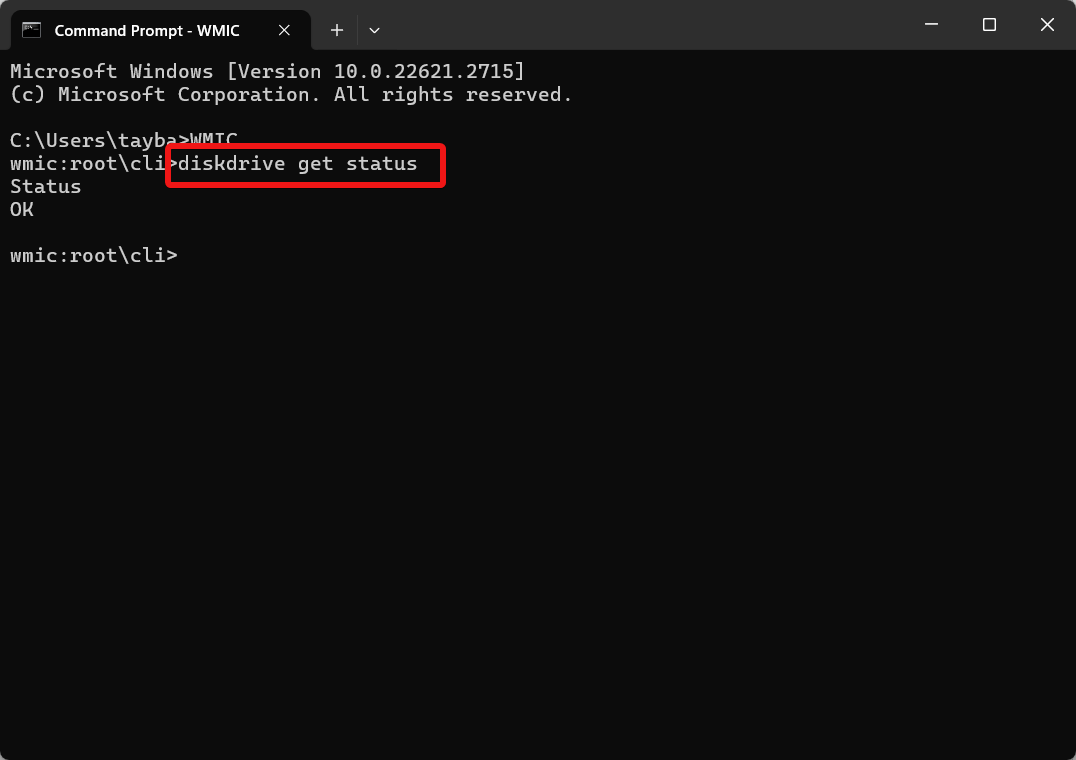
- Now, type WMIC in the command prompt window and press the Enter key to execute the command.

- This will bring up the WMIC interface. Now, type the following command and press the Enter key to execute it.
diskdrive get status

That’s it! The WMIC tool will now be launched. It will examine the hard disk and present the complete health status of your hard disk.
How to Check the Health of the Solid State Drives on Windows 11?
1. Check the health of modern SSDs using advanced Settings
You can easily determine the health status of your SSD drive using the inbuilt SSD settings section built onto your Windows 11 PC. Here is how you need to proceed.
- First of all, bring up the Windows Settings app using the Windows + I shortcut.
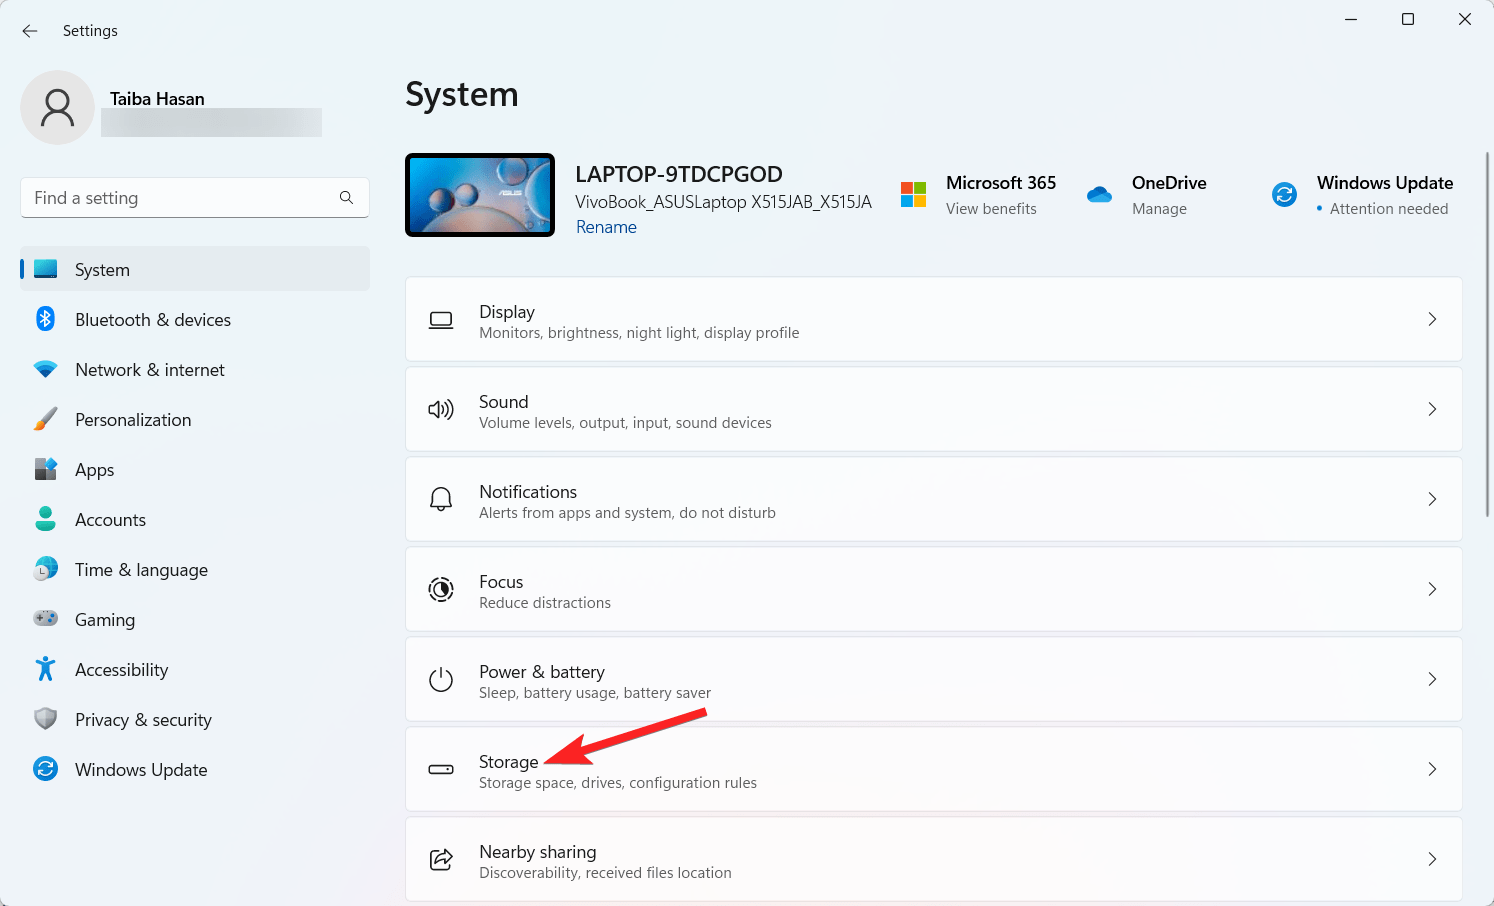
- Choose System from the left sidebar and then Storage from the right section.

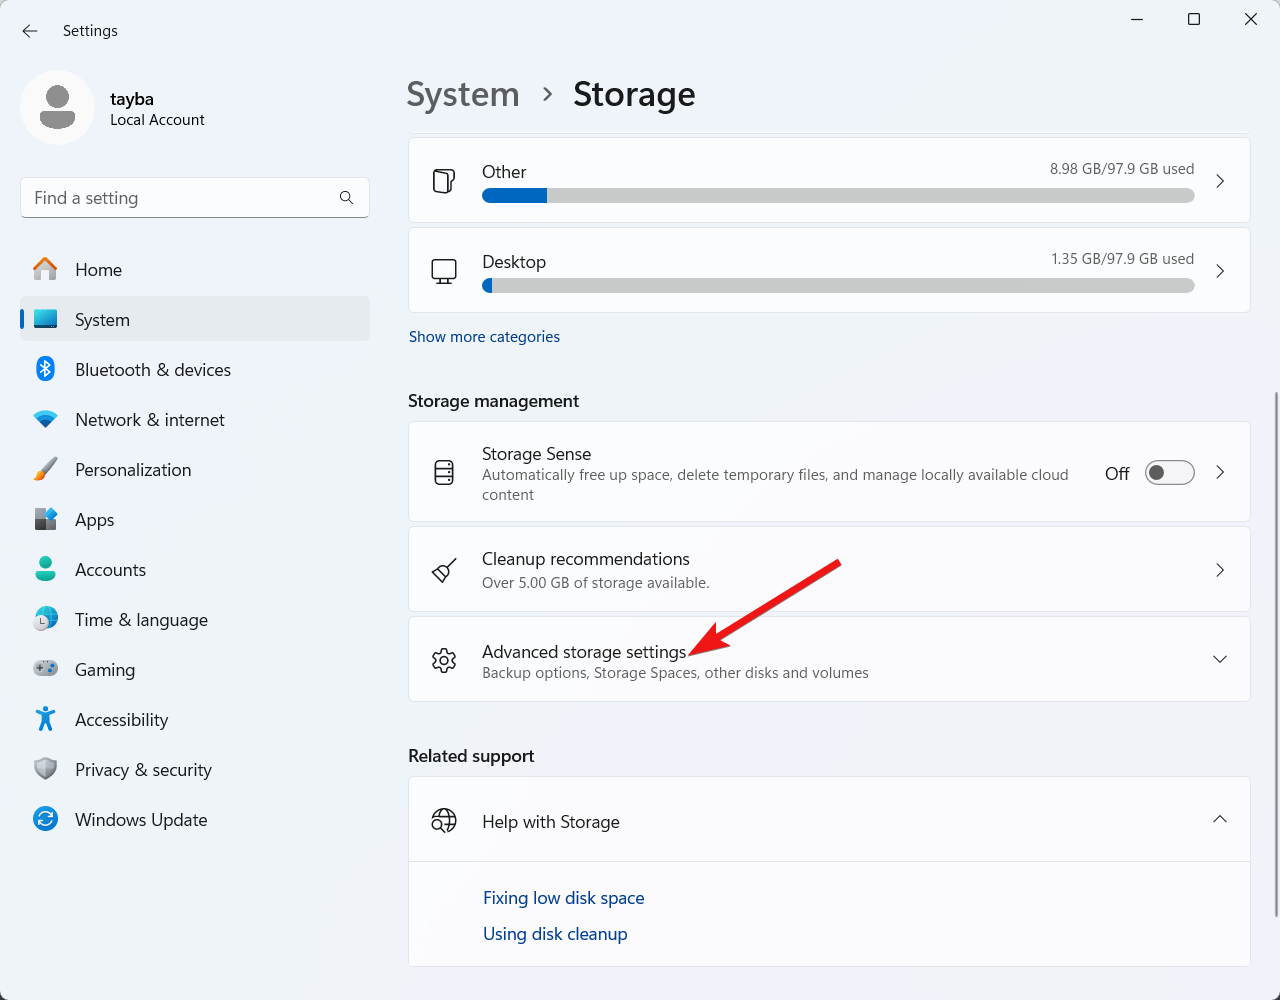
- Next, select Advanced Storage Settings located under the Storage Management section.

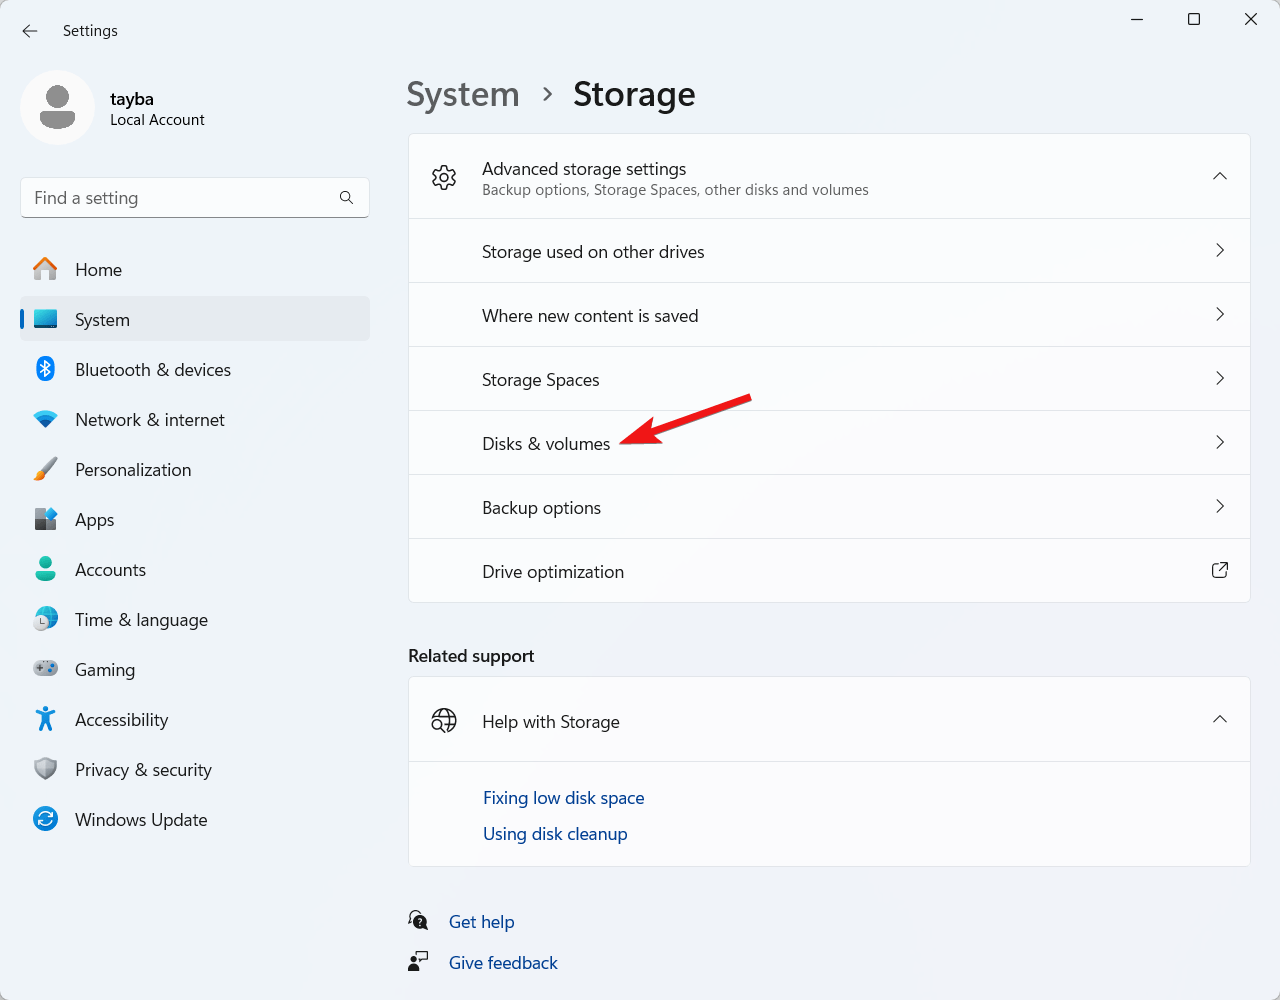
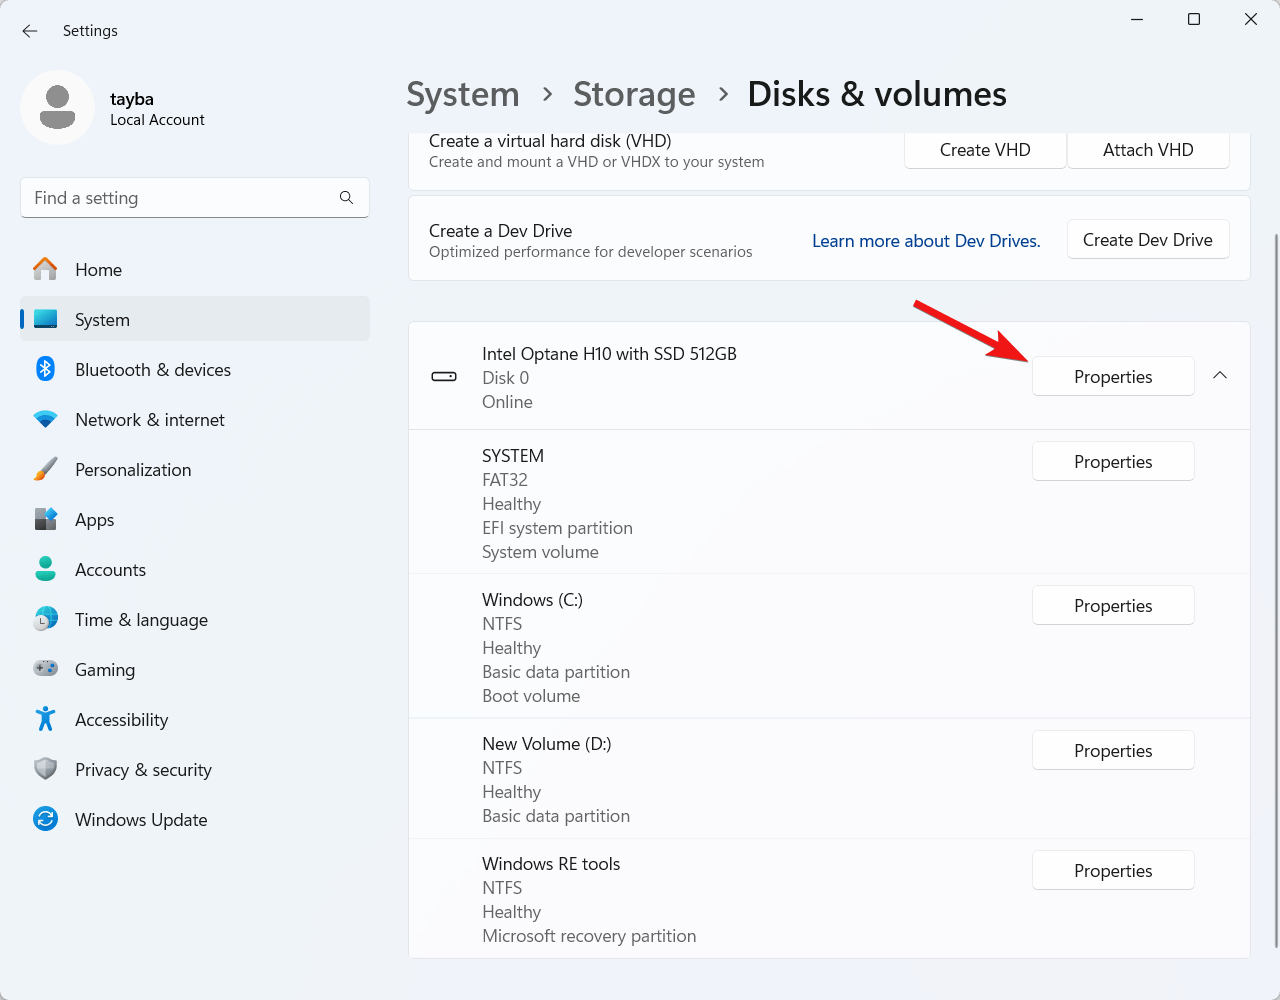
- From the list of expanded options, select Disks & volumes.

- Look for the SSD drive and click the Properties button, located next to it.

Now look for the Drive health section and examine the different properties that include remaining life span, available spare space, and temperature. These properties will help you understand the health status of your SSD if your system has one.
2. Check the health of traditional disk drives using the Performance Monitor
It isn’t possible to view the health of traditional hard disk drives using the advanced storage settings feature. Interestingly, you can leverage the Performance Monitor tool to use the SMART Self-Monitoring, Analysis, and Reporting Technology (SMART) feature to ensure that the disk drive is functioning in a healthy state.
Here are the steps to use the Performance Monitor to check the hard drive failure status:
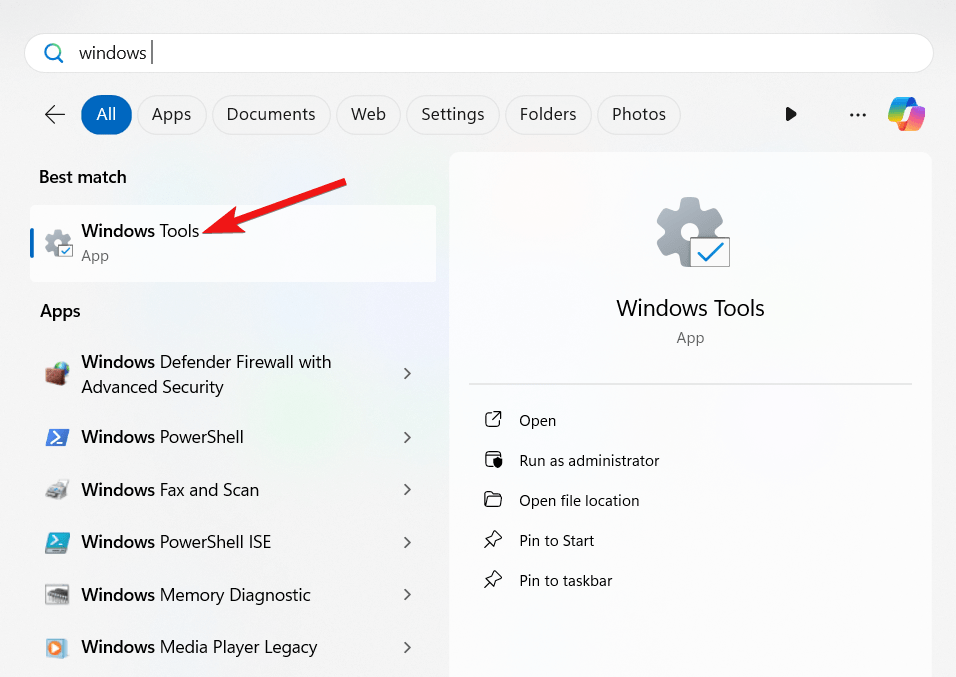
- Bring up the Start menu by pressing the Windows key. Type Windows tools in the search bar and choose the first search result.

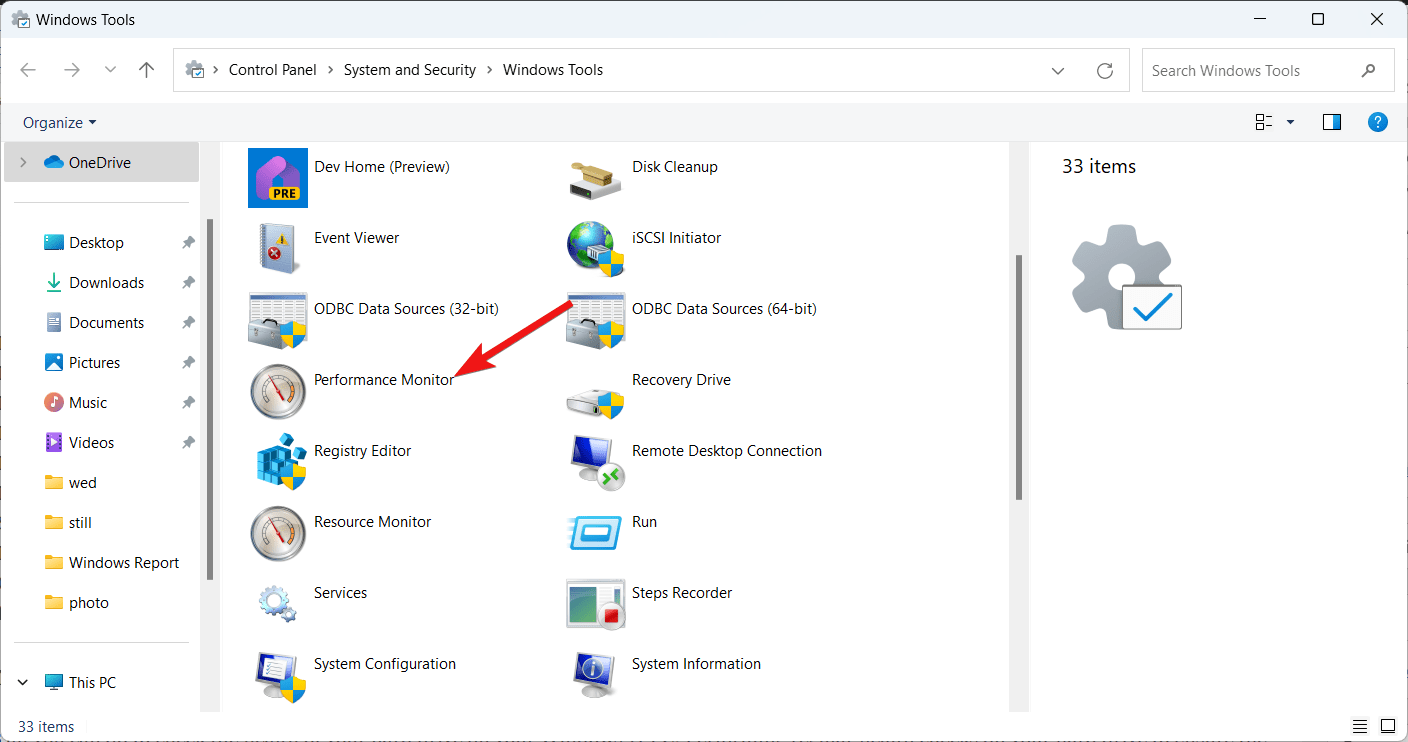
- In the list of tools displayed on the screen, double-click the Performance Monitor to launch it.

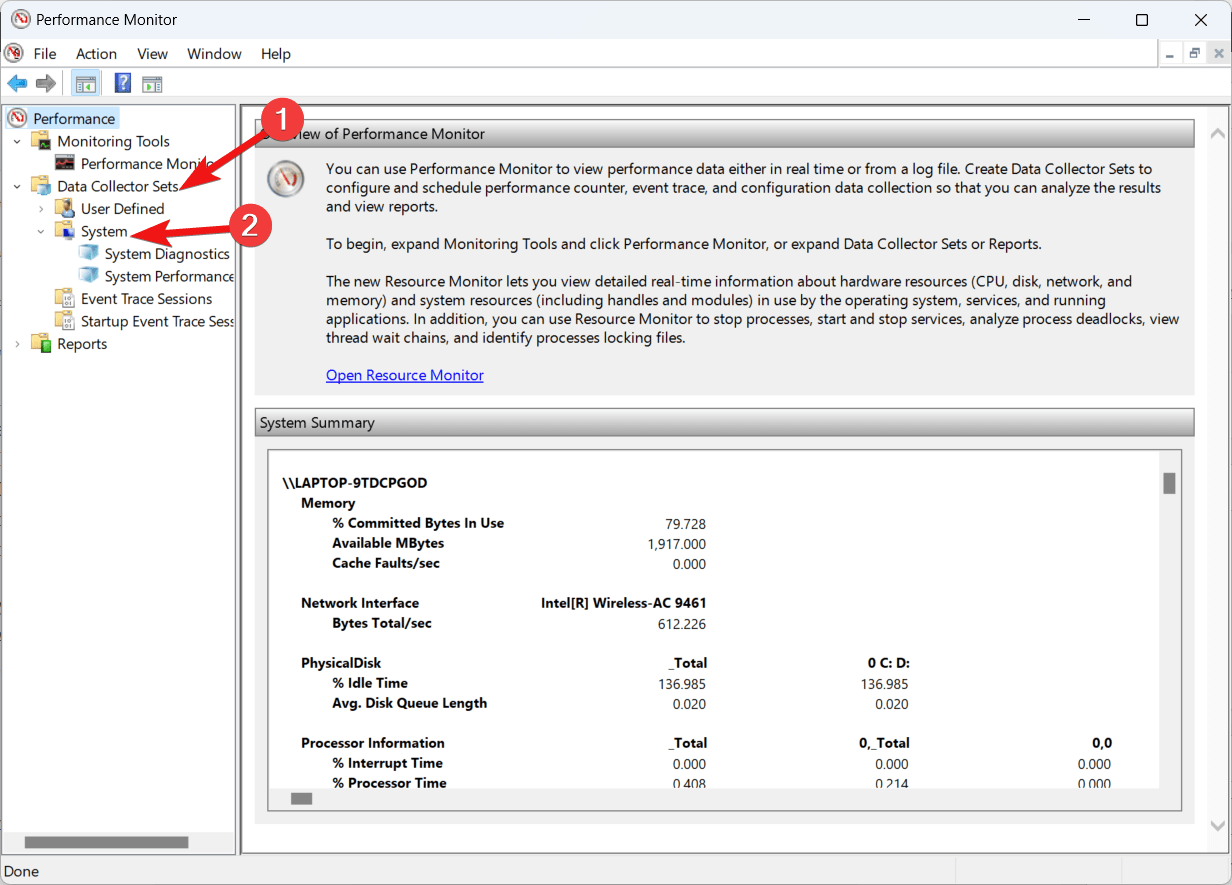
- Next, click Data Collector Sets to expand the list and select System from the sub-list.

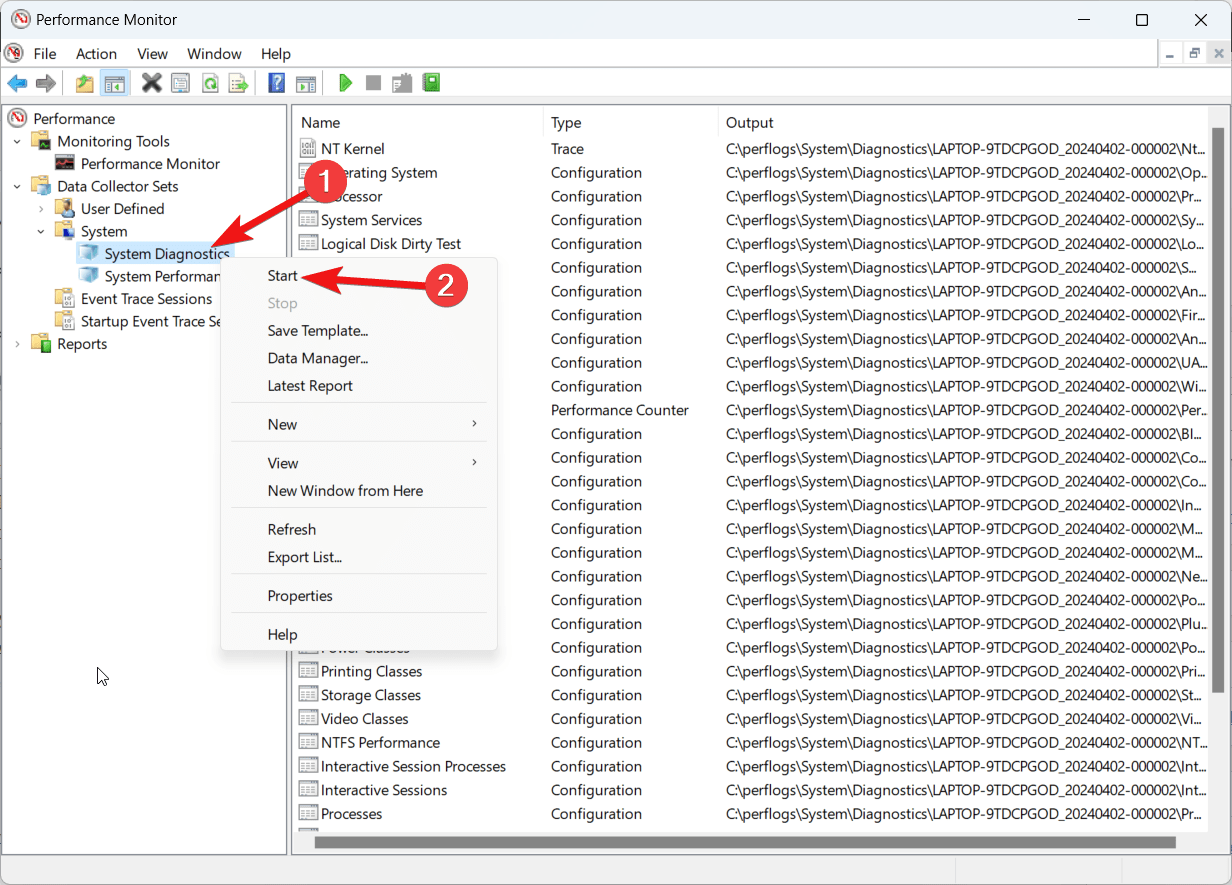
- Now right-click the System Diagnostics option and choose Start from the context menu.

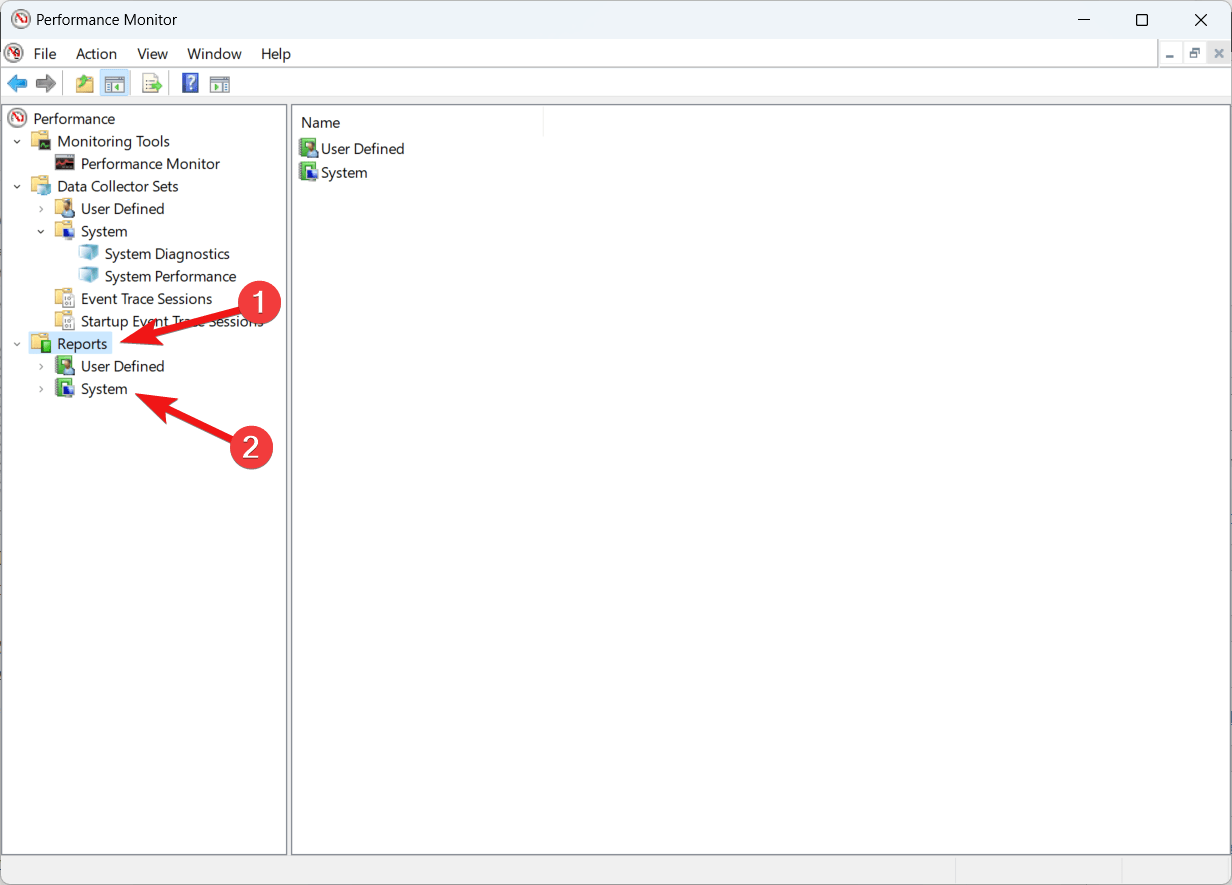
- Double-click to expand the Reports branch and then the System sub-branch.

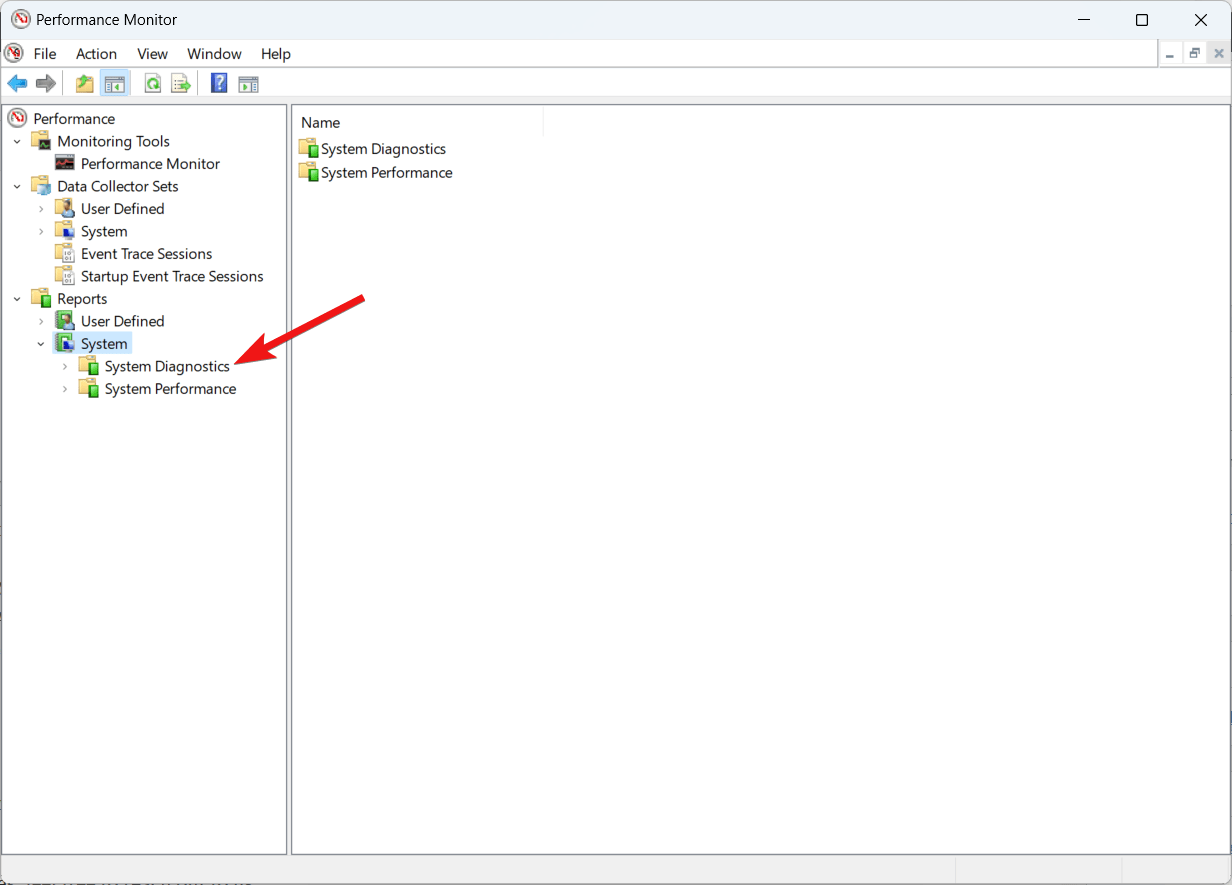
- Now select the System Diagnostics sub-branch.

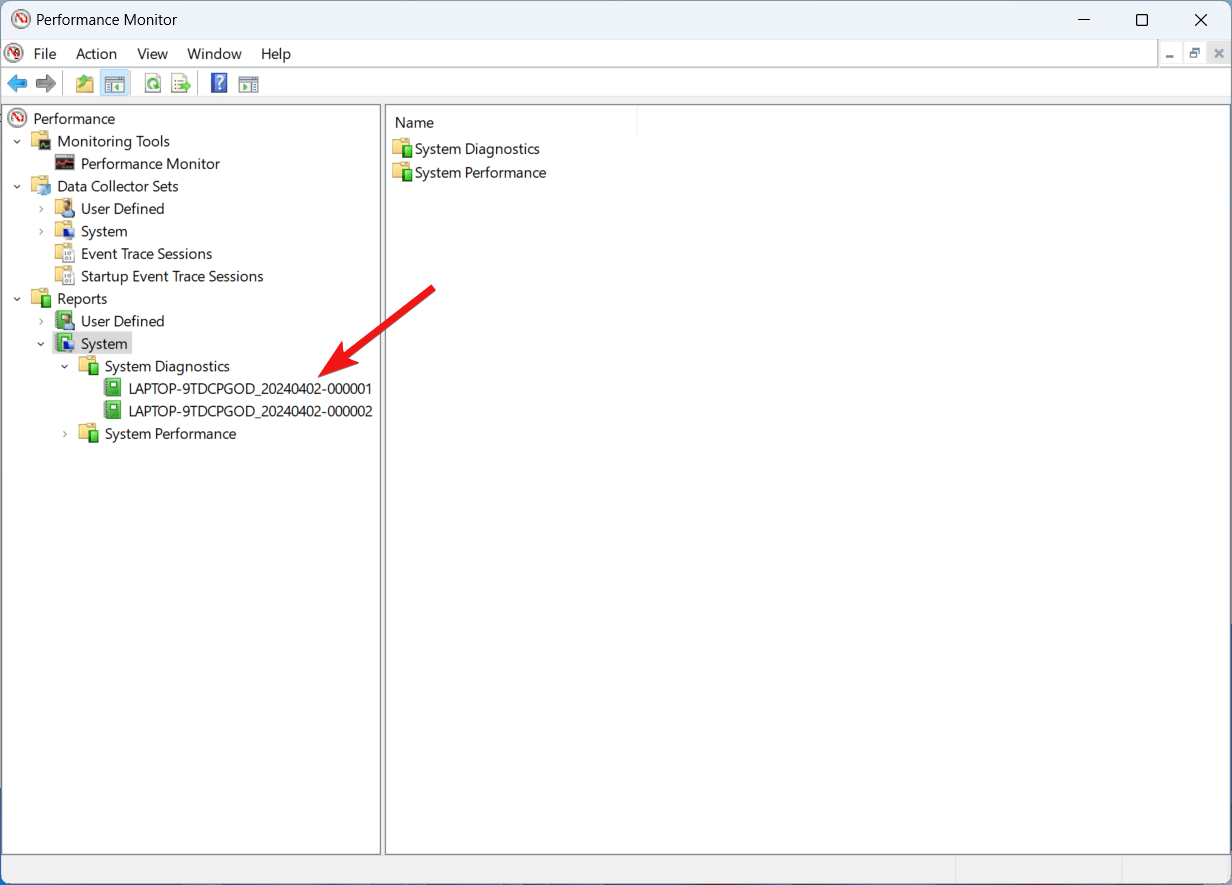
- Select the Diagnostic Report from the list.

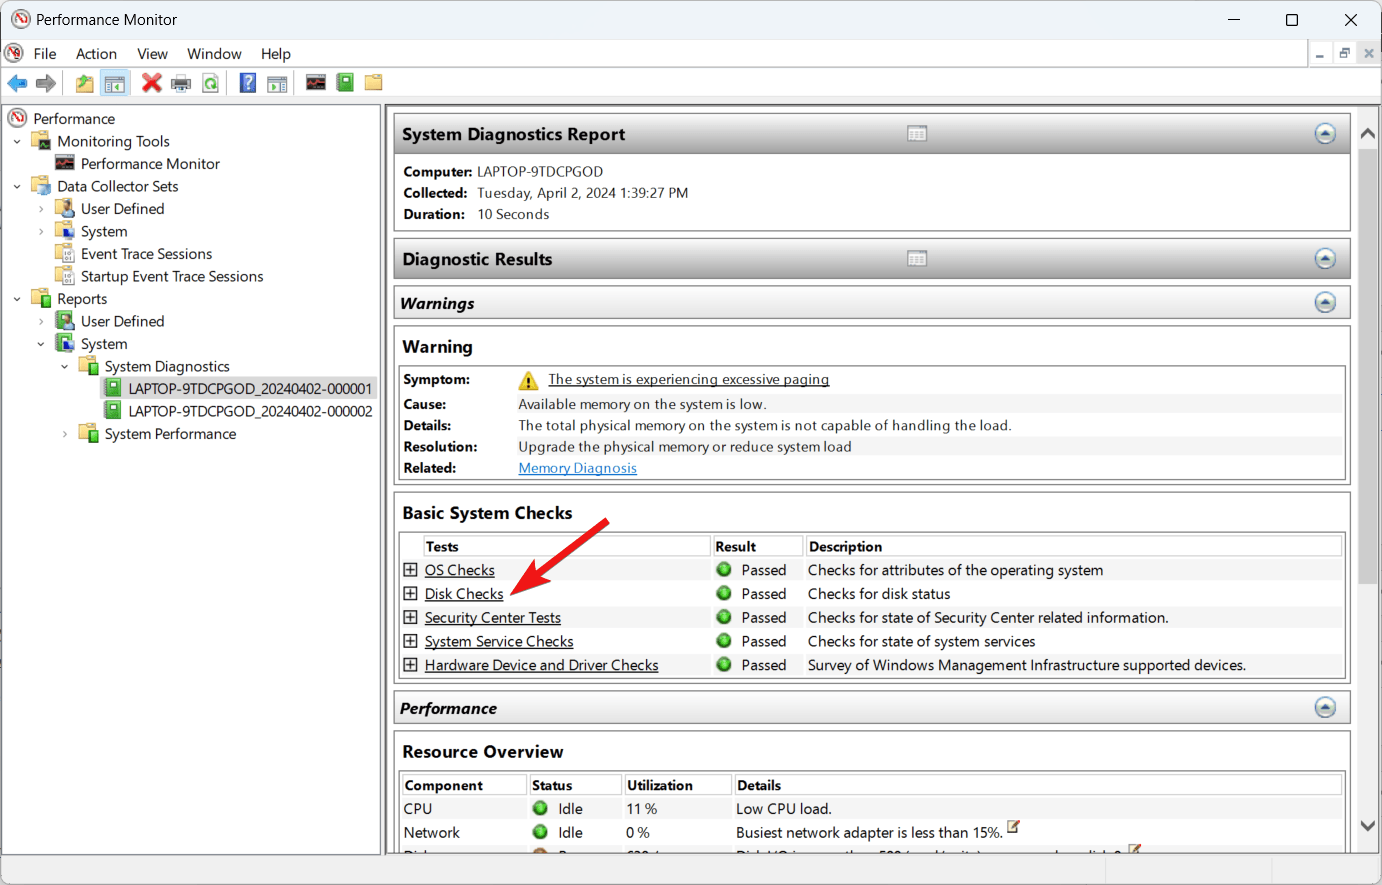
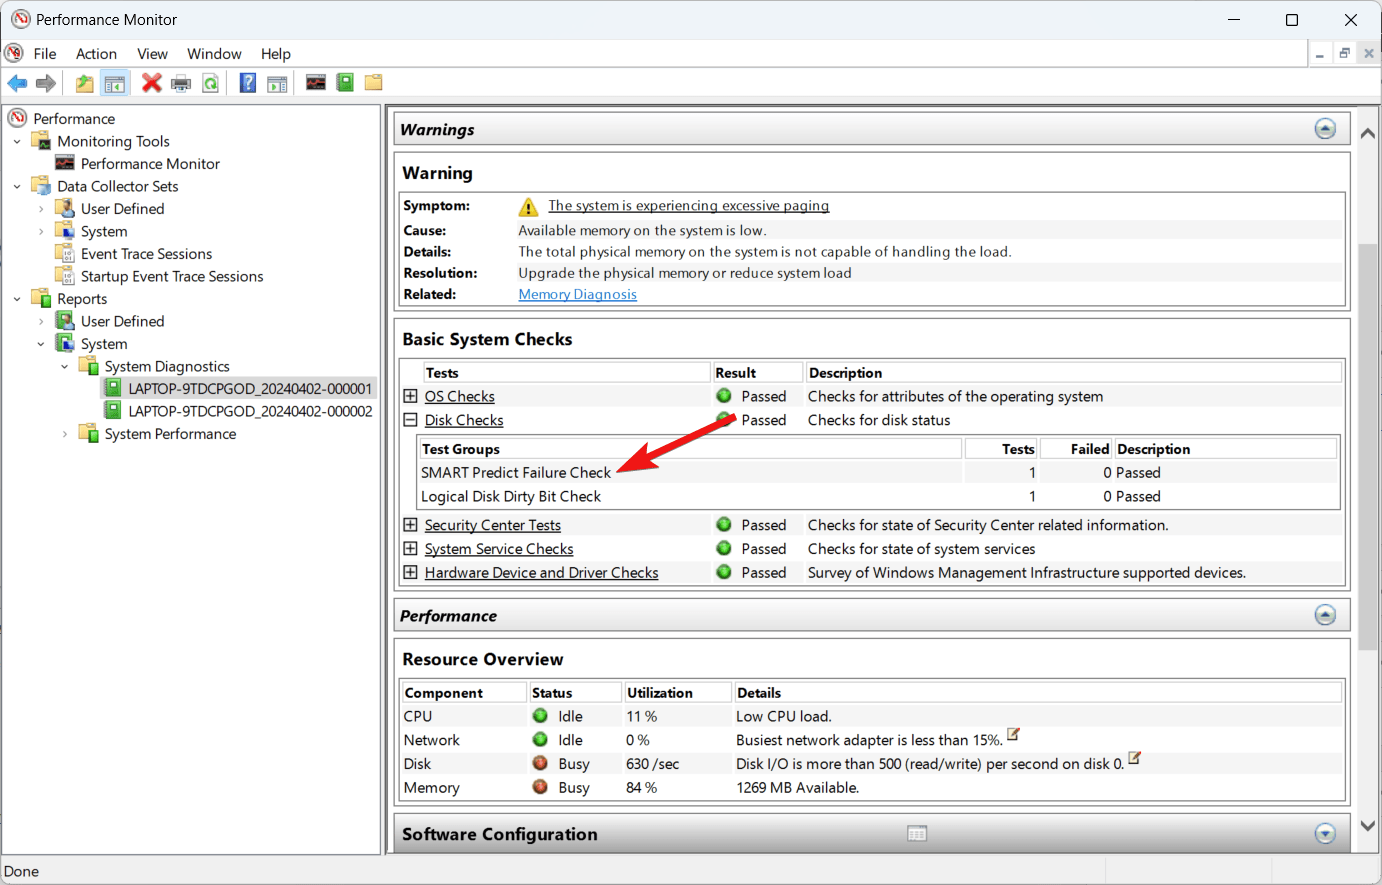
- Look for the Basic System Checks section in the System Diagnostic Report and click the plus icon for Disk Checks.

- Check the value for the SMART Predict Failure Check, and if the Failed section has a value of 0, it indicates that the hard drive is working flawlessly. In case, the Failed section has a value of 1, it means that the hard drive is facing issues and may fail at any moment.

Conclusion
That’s all you can do to check the health of your hard drive on your Windows 11 PC. Performing regular health checks on your hard drive to ensure the HDD is healthy and operating correctly. If the hard drive has some problem, employ a backup mechanism to avoid sudden data loss and get your hard drive checked by an expert.
In case, you have any other queries, feel free to reach out to us.
If you've any thoughts on How to Check Hard Drive Health on Windows 11, then feel free to drop in below comment box. Also, please subscribe to our DigitBin YouTube channel for videos tutorials. Cheers!

