There could be quite a few reasons why you would want to change your username in Windows 11. For example, some users prefer to have numerous accounts on their PC. Creating an additional account might come in handy if you are on a shared PC or if you prefer to test any new feature via your secondary account.
In this regard, you could make your accounts distinguishable by assigning them a unique name. However, if the name assigned to the account isn’t matching your requirement, then you may change easily it via the below-given instructions. Along the same lines, some users prefer to assign a nickname to their account rather than their actual identity.
This could be done by changing their current account name account and assigning them the desired new name. This again could be done via the instructions provided in this guide. So keeping all these points in mind, let’s make you aware of the different methods to change your username in Windows 11.
4 Methods to Change your Username in Windows 11
Given here are four different approaches through which you could carry out the aforementioned task. These include using the Control Panel, the User Account dialog box, the Command Prompt, and the PowerShell window. You may try out the one that you find most comfortable to deal with.
Using Control Panel
- Head over to the Start menu, search Control Panel, and open it.
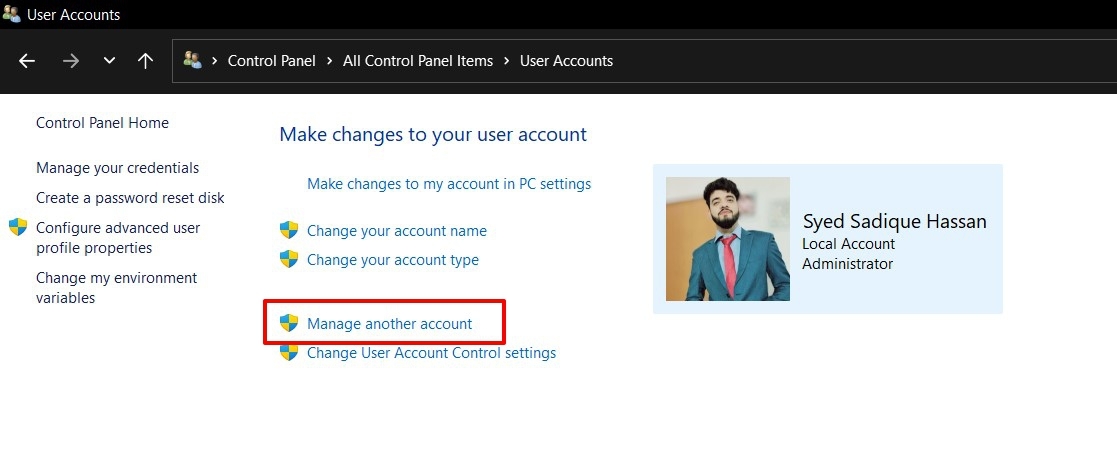
- Then go to the User Accounts section and click on Manage another account.

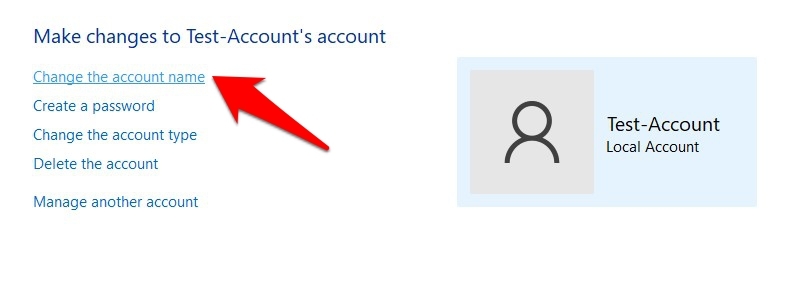
- Now select the account whose name you wish to change and click on Change the account name.

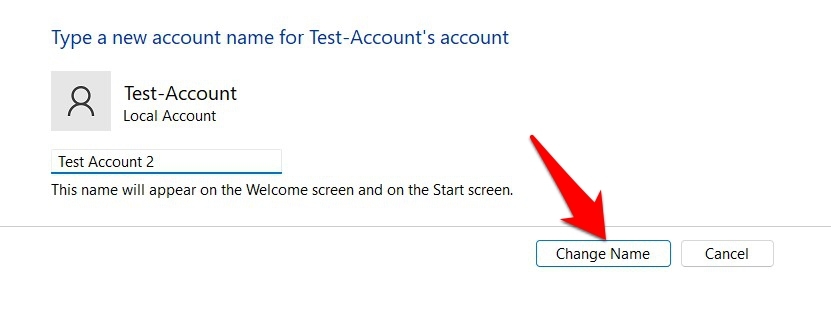
- Finally, type in the new name and click Change Name.

That’s it. These were the steps to change your username in Windows 11 via Control Panel.
Via User Account
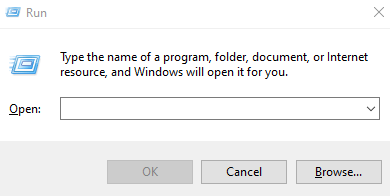
- Bring up the Run dialog box via Windows+R shortcut keys.

- Then type in netplwiz in this Run dialog box and hit Enter.
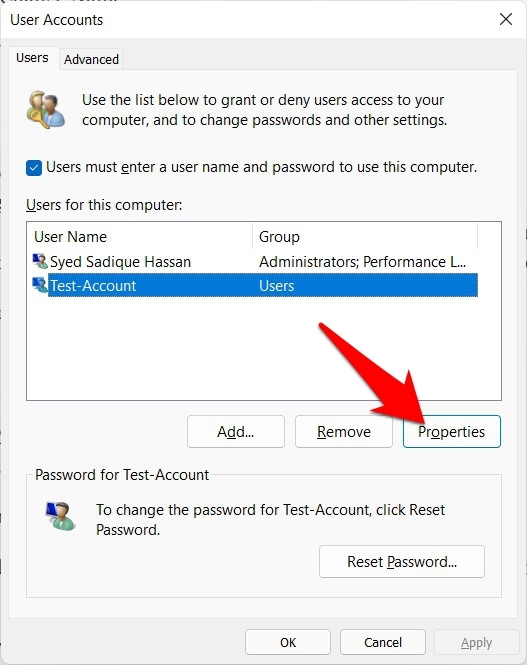
- It shall open the User Account window. Select your profile from there and click on the Properties button.

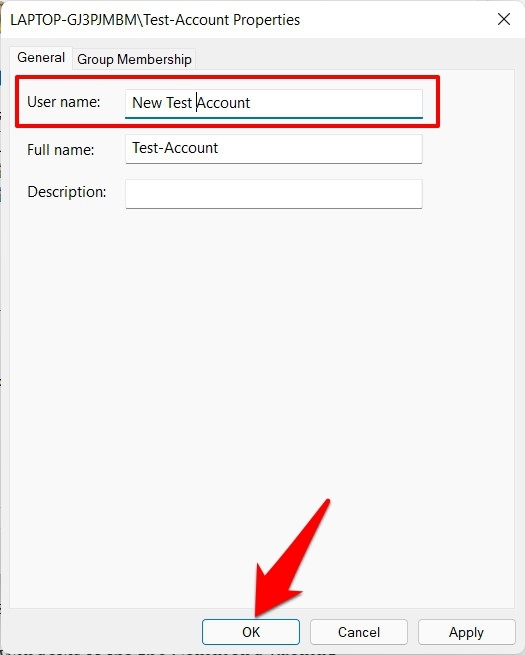
- Now go to the User name field, type in the new name, and hit OK. The change in name would be reflected right away.

So this is how you could change your username in Windows 11 via User Account
Using Command Prompt
- Head over to the Start Menu, search CMD, and launch Command Prompt as an administrator.
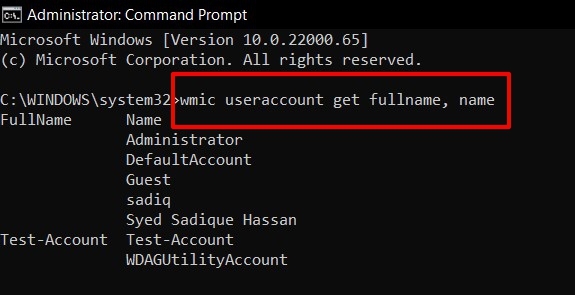
- Now type in the below command to get a list of all the accounts on your PC:
wmic useraccount get fullname, name

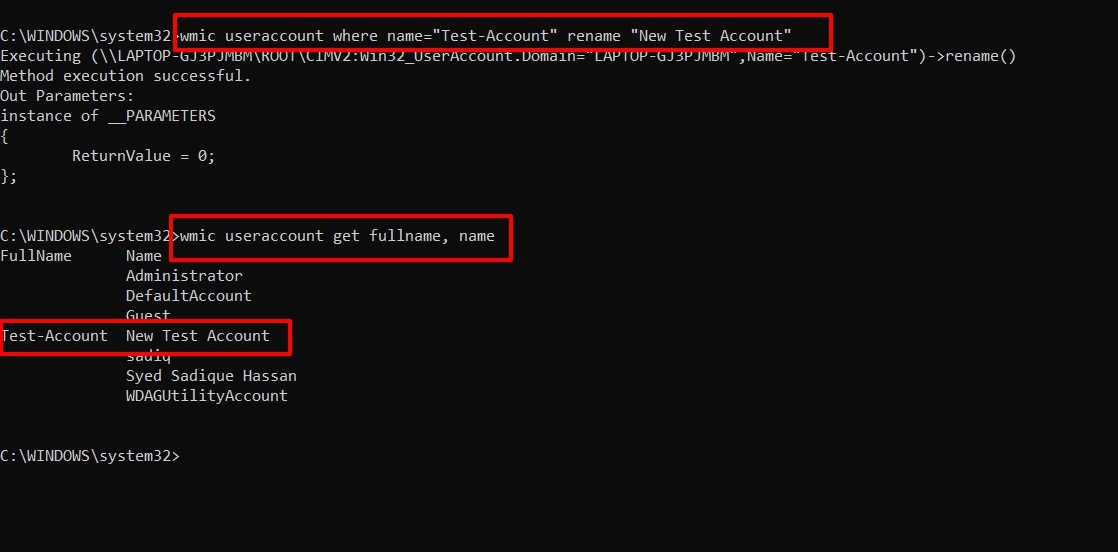
- Finally, execute the following command in the CMD window. Make sure to replace the Current Username and New Username fields accordingly and keep both these names under double inverted commas:
wmic useraccount where name="Current Username" rename "New Username"
- Once the commands have been executed, you shall get the Method execution successful message.

- If you wish to verify if the process has been successfully completed, bring up the list of all the accounts via the below command. This time you shall get the newly renamed user account (see above screenshot)
wmic useraccount get fullname, name
These were the steps to change your username in Windows 11 via the Command Prompt.
Via PowerShell
- Head over to the Start menu, search PowerShell and launch it as an administrator.
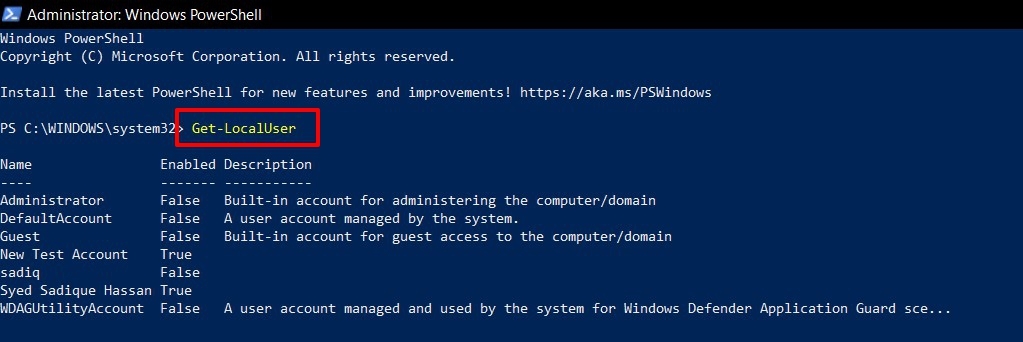
- Then copy-paste the below command to get a list of all local user accounts:
Get-LocalUser

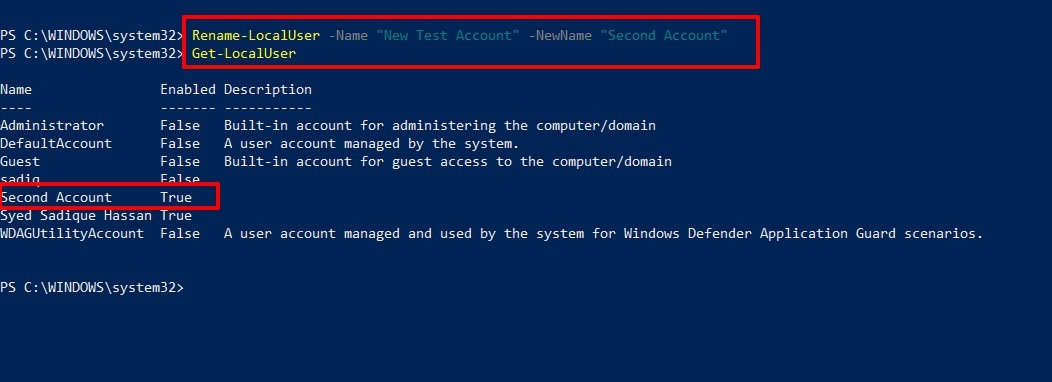
- Now type in the below command to change the name. As before, make sure to change the Current Username and New Username tags accordingly
Rename-LocalUser -Name "Current Username" -NewName "New Username"
- Finally, restart your PC and this will then change your username in Windows 11 via the PowerShell command that we had just input.

- To verify the same, use the below command to bring up the list of all the accounts. You shall now see the newly named account (see above screenshot).
Get-LocalUser
Conclusion
So with this, we round off the guide on how you could change your username in Windows 11. We have shared four different methods for the same. Do let us know in the comments section which one you ultimately settled for.
If you've any thoughts on 4 Methods to Change your Username in Windows 11, then feel free to drop in below comment box. Also, please subscribe to our DigitBin YouTube channel for videos tutorials. Cheers!

