Want to check or change the registered owner and organization name in Windows 11? In this guide, we have brought you the exact steps you need to follow to get that done. Sometimes, you may buy a PC that may be second-hand, and there is absolutely no problem with it. However, it had a previous owner in whose name the machine was registered. Now, that you own it, it is better to change the registered owner’s name for the sake of clarity.
While checking the registered owner name on Windows 11 is fairly easy, changing it is a bit tech-savvy. To change the registered owner and organization name in Windows 11, you must modify the registry. When you check the registered owner name of the computer, it also displays the version of the software(Windows OS) currently installed on the PC and what category of Windows OS it is.
Check the Registered Owner and Organization Name in PC
You can use the Run box to execute a command to get precise information regarding the registered owner of a computer. There is an alternate way that requires you to use the PowerShell tool to execute a command to know the registered owner of your Windows computer. I have described the steps using both methods. Check it out.
Use the Winver command in the Run box
As the name suggests, the Winver command will fetch the Windows version details.
- Press Windows + R to bring up the Run box.
- Type in winver and press enter. That’s it.
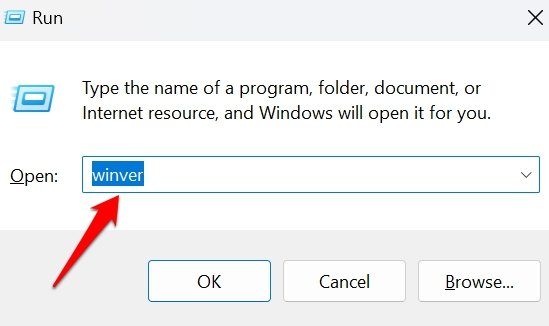
You see in the screenshot that the product under the Microsoft Software license has been licensed to Lenovo. That’s the brand of the PC I use, and during its purchase for convenience, its name was set to the brand name of the product.
How to Use PowerShell to Determine the Registered Owner Name and Other System Information About Your PC?
There are two simple commands you need to execute to retrieve the registered owner and organization along with other necessary system details using PowerShell.
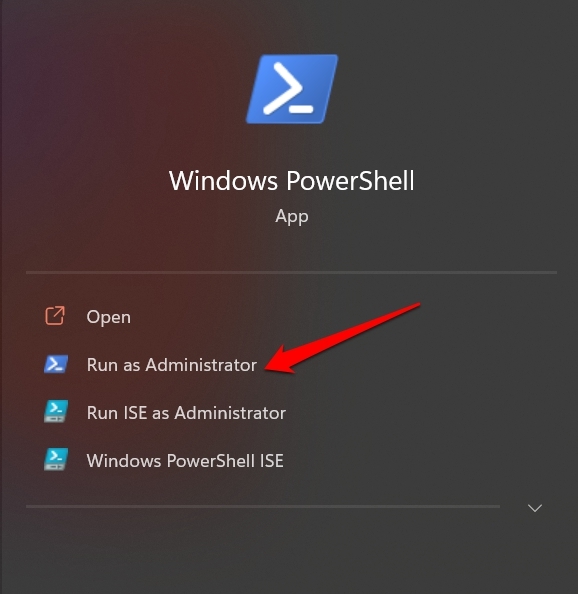
- Launch PowerShell on your Windows PC with administrator permissions.
- Enter the command
Get-ComputerInfo
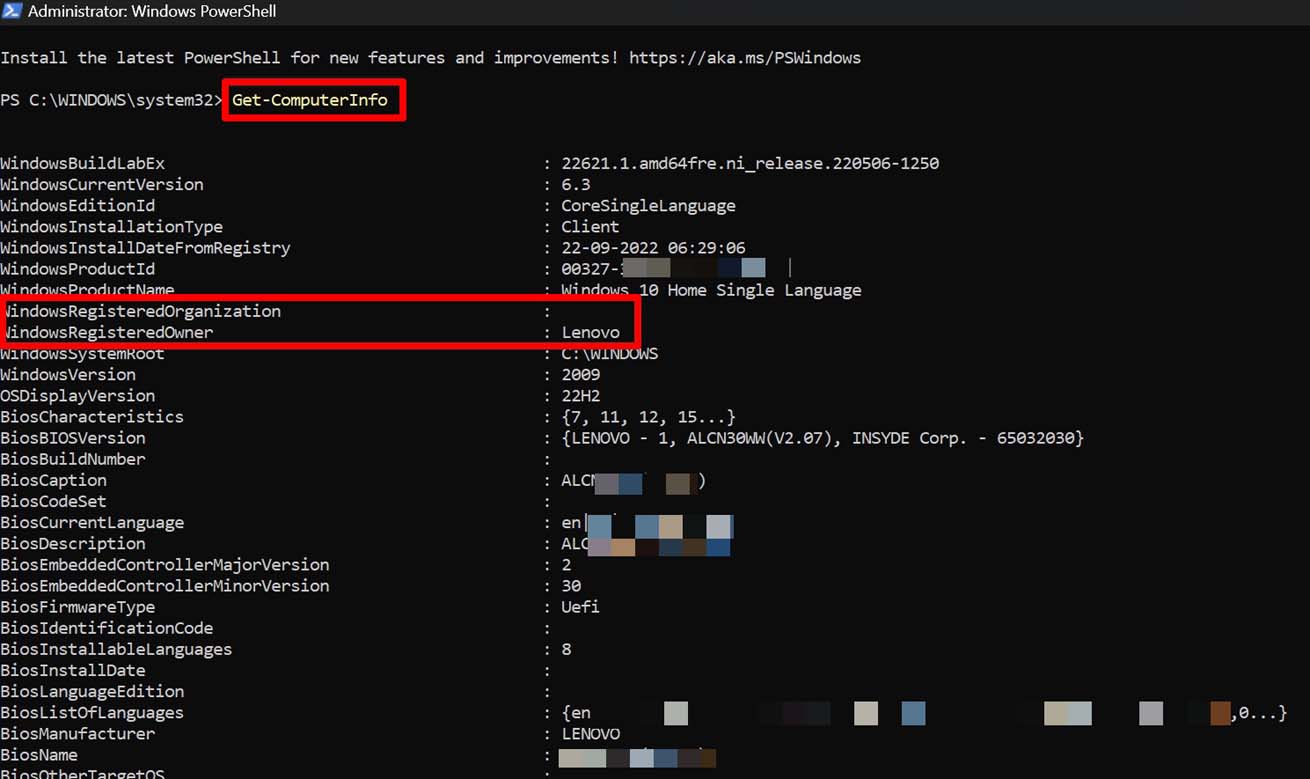
- Otherwise, enter the command below.
Get-ComputerInfo | Select WindowsRegisteredOrganization, WindowsRegisteredOwner
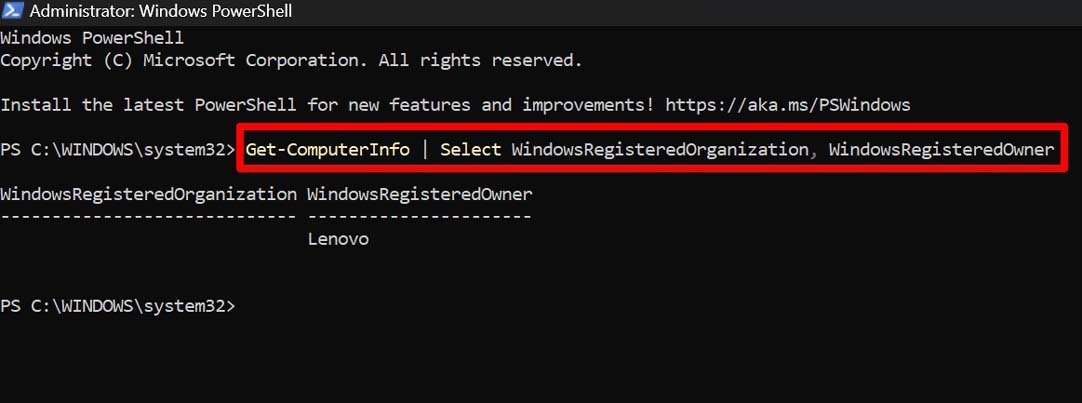
- The above command specifically fetches and displays the registered organization and the registered owner of the computer.
Change Registered Owner and Organization Name in Windows 11
Changing the registered owner name and organization name in Windows 11 will require you to modify the Windows registry. Such modifications may alter a few internal system settings of the PC and make cause some errors to show in case you execute the steps wrongly. So, before proceeding, take a backup of your device data.
Also, to modify the registry, you will require the administrator’s permission. Here are the detailed steps for you.
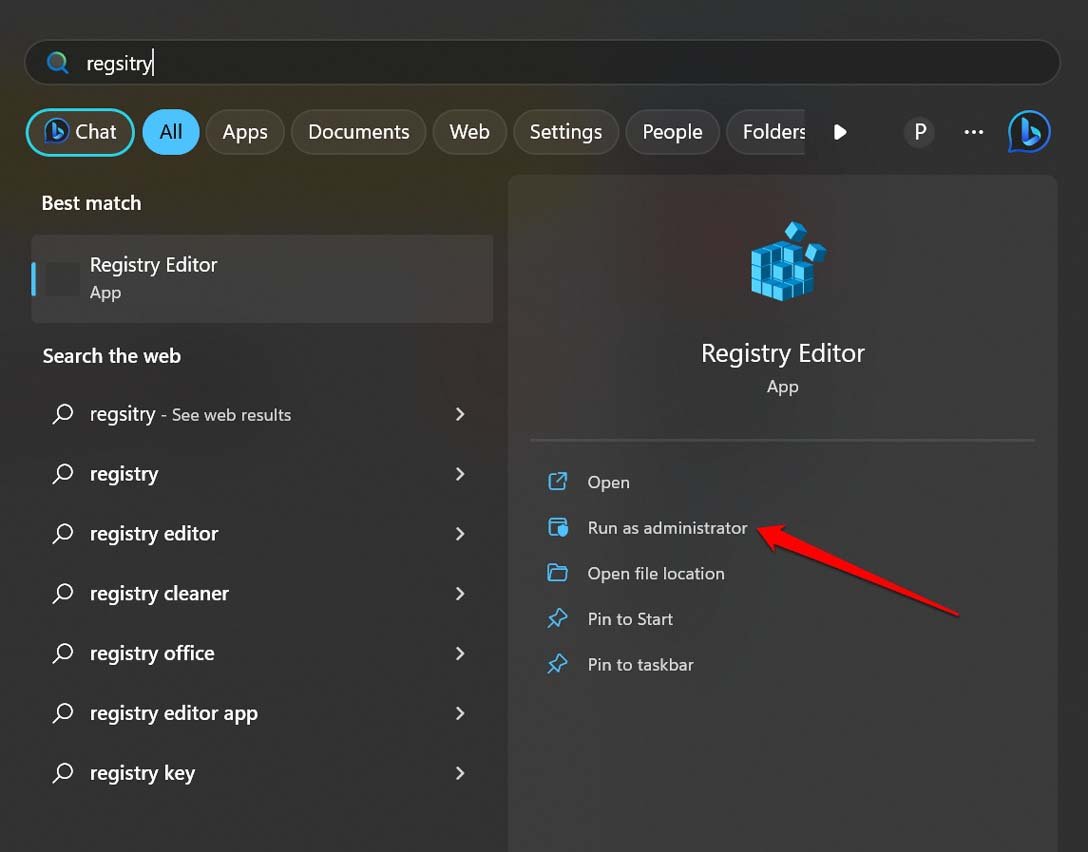
- Launch the Windows Registry on the PC using Windows + S.
- In the launch prompt, click on Run As Administrator.
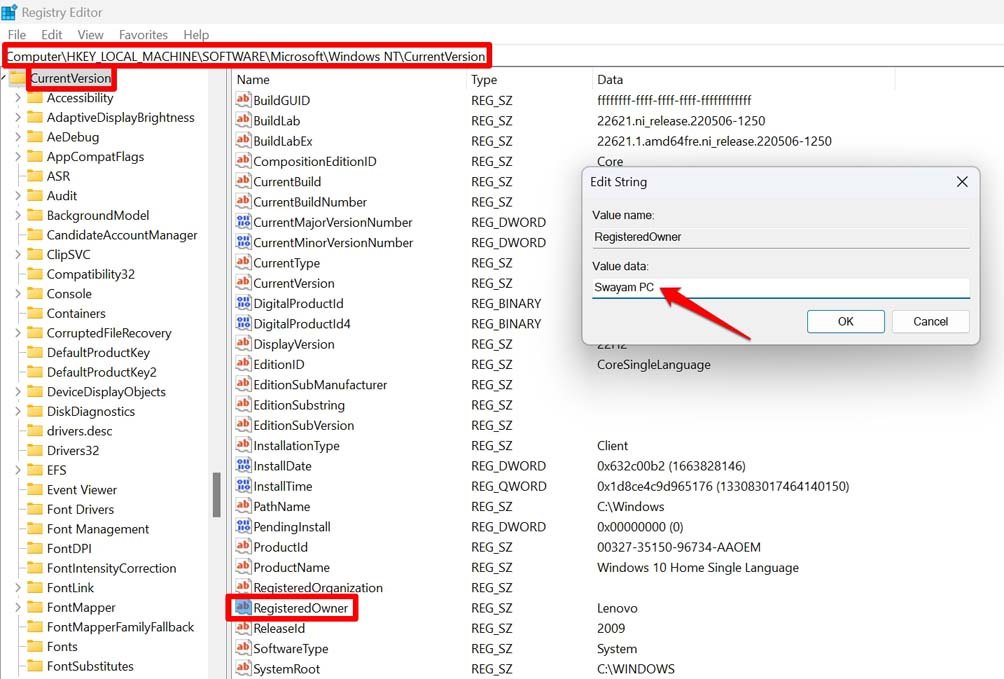
- Once you see the Registry, enter the following path in the address bar.
HKEY_LOCAL_MACHINE\SOFTWARE\Microsoft\Windows NT\CurrentVersion
- Inside the CurrentVersion key, double-click the string value RegisteredOwner.
- In the Value data field, type the new registered owner name that you have thought of.
- Click OK.
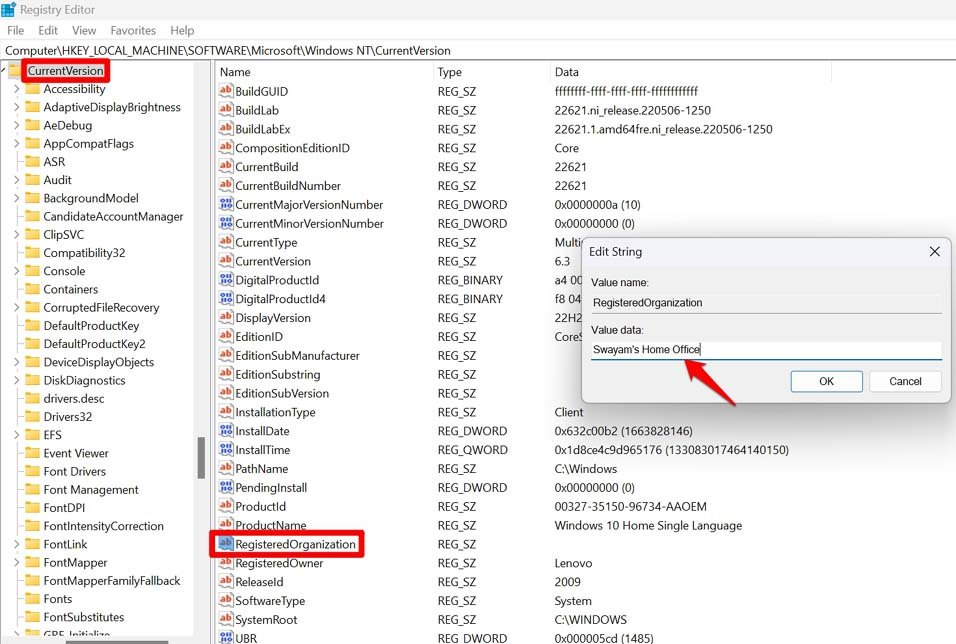
- Go back to the CurrentVersion key.
- Under that, navigate to the string value RegisteredOrganization and double-click on that.
- In the Value data field, type the new registered organization name as per your choice.
- Click OK to save the changes.
- Once you are done with both steps, close the Registry to implement the changes.
What to Do If You Cannot Find RegisteredOwner or RegisteredOrganization strings?
Some users may see a glitch where under the CurrentVersion key, the elements RegisteredOwner or RegisteredOrganization are not visible. If you do not see either of these two string values, generate them first and then follow the steps outlined from 4 to 11 in the previous section.
Here is how to generate either the RegisteredOwner or RegisteredOrganization string value in the Windows Registry.
- Get to the CurrentVersion key using the path mentioned below.
HKEY_LOCAL_MACHINE\SOFTWARE\Microsoft\Windows NT\CurrentVersion
- Right-click on the CurrentVersion key.
- Click on New > select String Value.
- Set the name as RegisteredOrganization or RegisteredOwner depending upon which string value is missing(or both missing in some cases).
Conclusion
Wrapping up this guide here, I hope now you know the methods to Check or Change the Registered Owner and Organization Name in Windows 11 PC. While it may not be extremely necessary but knowing the correct owner and organization details can be helpful at times.
If you've any thoughts on How to Check or Change Registered Owner and Organization Name in Windows 11?, then feel free to drop in below comment box. Also, please subscribe to our DigitBin YouTube channel for videos tutorials. Cheers!
