Windows 11’s Automatic Metrics feature assigns a metric number to each network adapter based on many variables, such as the speed limit. This metric is automatically set, even for virtual adapters, regardless of the number of adapters on a device. Which adapter your Windows PC prefers between Wi-Fi and ethernet depends on the metric number assigned to it.
Based on the different situations, you may need to alter the network adapter preferences that Windows has assigned to the different network adapter. Additionally, the priority of the networks you connect to via Wi-Fi may need to be adjusted based on your internet requirements.
To help you with this, in this guide, we have elaborated the procedure for changing the internet priority on a Windows 11 PC. But first, let’s understand a bit about internet priority and network interface metric priority.
What is Internet or Network Priority?
In simple terms, Network priority is when Windows prioritizes using a specific network over others when multiple networks are available. Using network priority, a fallback network is designated which is utilized when all networks with the higher priority are unavailable.
In general, Windows distributes priority amongst the machine’s network adapters as well as any of the Wi-Fi networks. Adapter prioritization, similar to network priority, ensures that one adapter is utilized more than the others based on their availability.
For determining the network priority, Windows assigns metrics to each network adapter.
What is Network Interface Metric Priority?
A metric is an integer number that is allocated to an IP route for a particular network interface. The metrics, attributes, and tags to depict the functionality of physical and virtual network adapters are provided by the network interface metric type. Windows takes into account the following factors to determine a network’s viability or cost and assigns a metric to every network adapter based on these factors.
- Speed of the link
- The number of hops needed to reach a particular place
- Duration of delay
As inferred, the network priority increases with decreasing metric numbers. It is helpful to prioritize network adapters, mainly when several adapters are linked to the same network.
Ways to Change Network Interface Metrics for Ethernet Connections in Windows 11
You can easily adjust the network adapter priority metric manually on your Windows 11 PC. Here are the different ways of doing so.
Via Control Panel
The procedures listed below can be used to modify the metric using Windows 11’s Graphical User Interface (GUI):
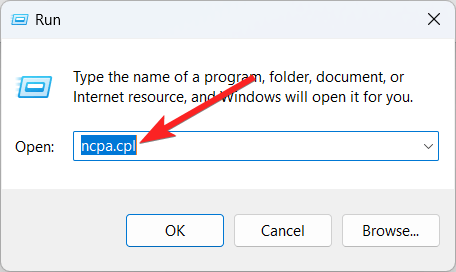
- Use the Windows + R shortcut key to launch the Run dialog box. Type ncpa.cpl in the text box and press the Enter key to launch the Network Connections window.

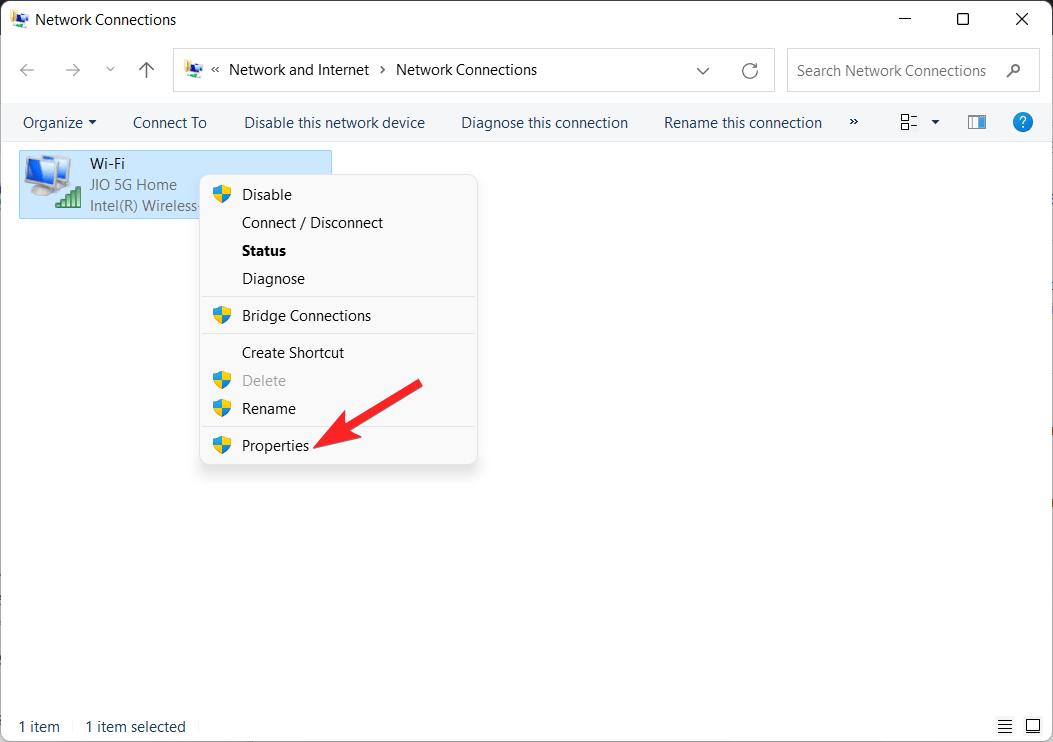
- Right-click the Network Adapter and select Properties from the context menu.

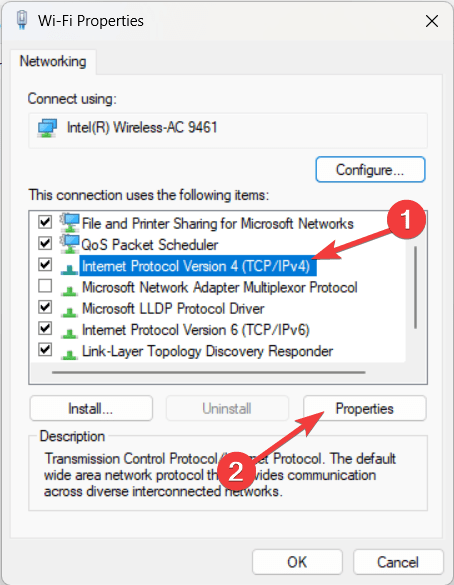
- In the Networking tab, select Internet Protocol version 4 (TCP/IPv4) from the drop-down and click Properties button.

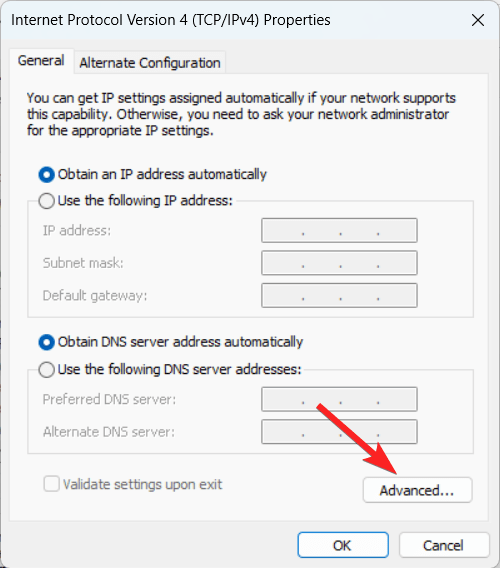
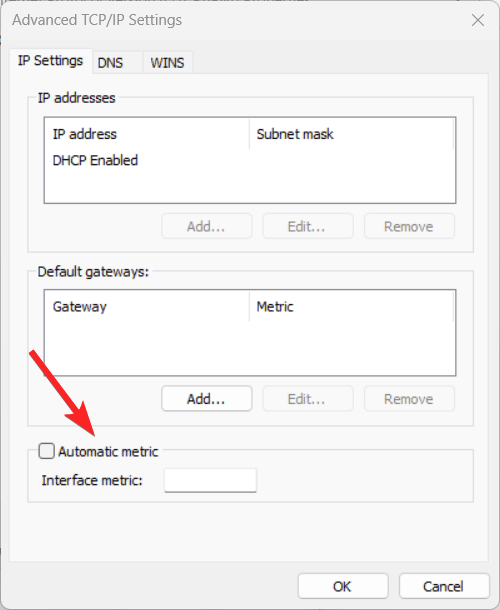
- Press the Advanced button located on the bottom right.

- Uncheck the checkbox preceding the Automatic Metric feature and enter the metric in the Interface metric text box. You can provide a metric value depending on the priority assigned to this network adapter.

- Now close the Network connections window by pressing the OK button.
- If you wish to assign priorities to additional network adapters, simply repeat steps 2 to 5 to modify their metrics.
Via Windows Powershell
You can also modify the network adapter metrics using the Windows PowerShell. Below are the steps for doing so.
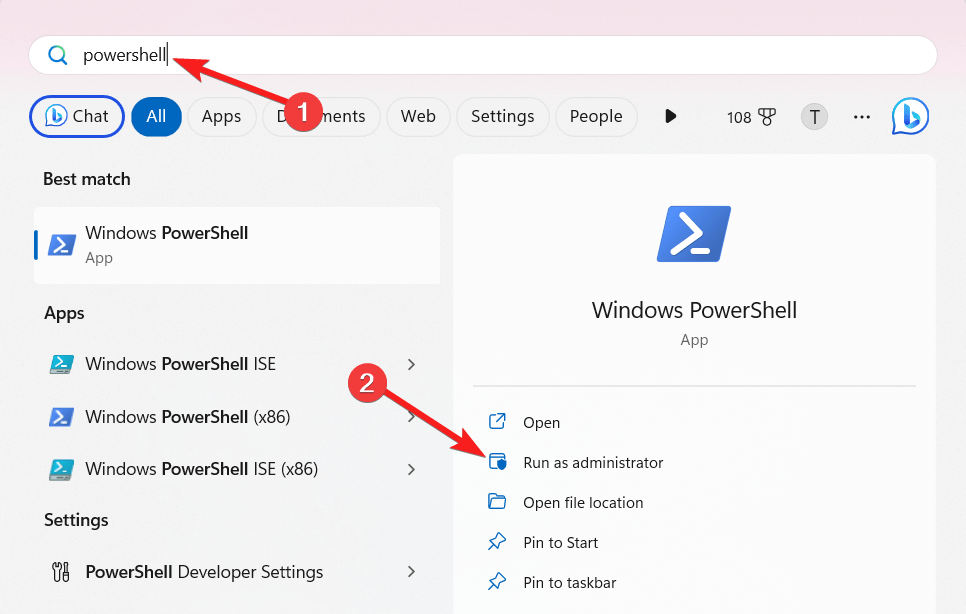
- Press the Windows key to launch the Start menu. Type PowerShell in the search bar on top and select Run as administrator from the search results.

- Press the Yes button to launch the Windows PowerShell with administrative privileges.
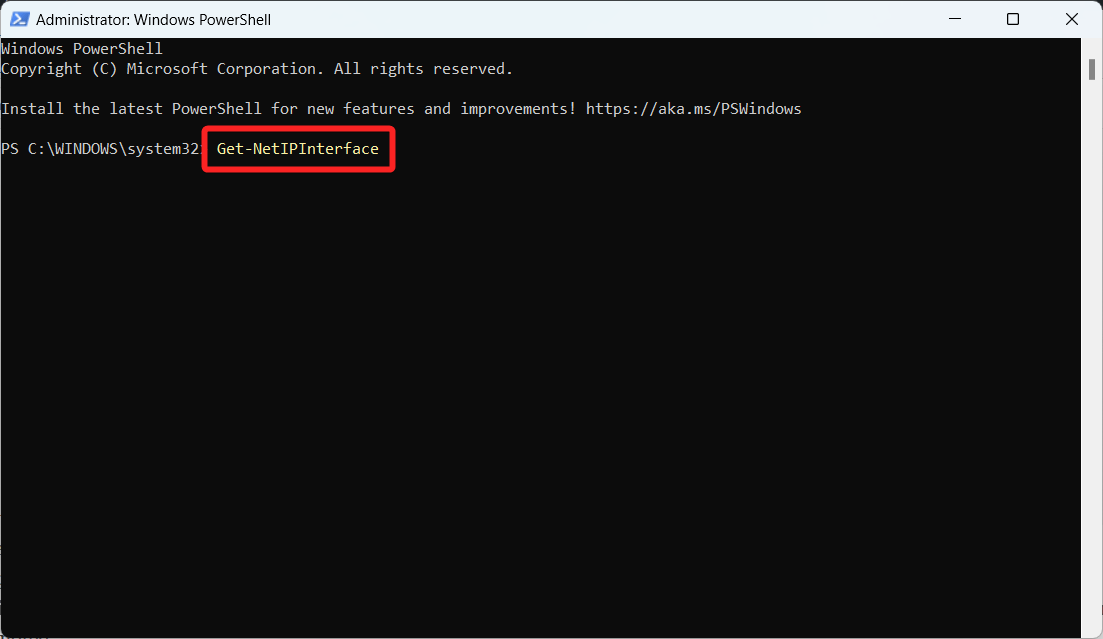
- Type the following command and press the Enter key to execute it. Get-NetIPInterface

- This cmdlet will show all network adapters’ details, including virtual and physical ones. The network adapter’s interface index should be noted.
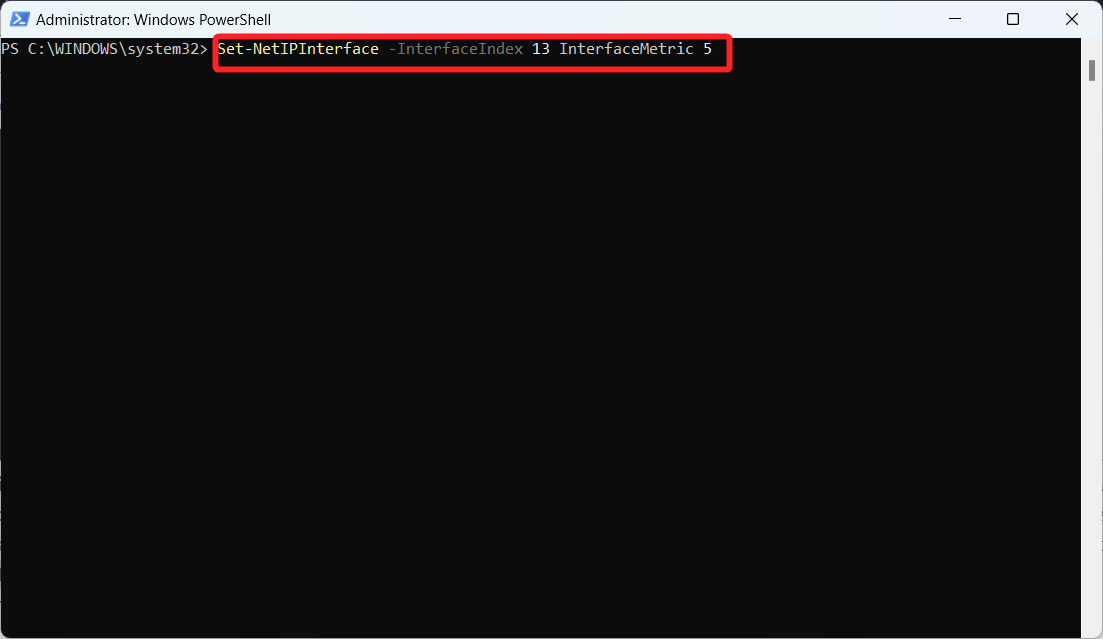
- Next, you need to execute the Set-NetIPInterface command to change the adapter’s interface metric. Replace [IFMetric] with the metric value you wish to apply to the network adapter and [IFIndex] with the interface index. Set-NetIPInterface -InterfaceIndex [IFIndex] -InterfaceMetric [IFMetric]

- Now execute the Get-NetIPInterface command once again to check if the network adapter interface index has been modified.
So that’s how you can modify the network interfaces on your device to have different priorities. In an ideal situation, Windows 11 prioritizes the LAN adapter over the wireless network adapter. However, it is possible for you to completely block the Wi-Fi adapter so that all the traffic is routed through the LAN adapter.
Steps to change the Wi-Fi Network Connection Priority in Windows 11
You can use the Command Prompt to assign priorities to the different Wi-Fi networks which allows you to choose which WiFi network to connect to when multiple Wi-Fi connections are available at the moment. Following is the step-by-step procedure of the same.
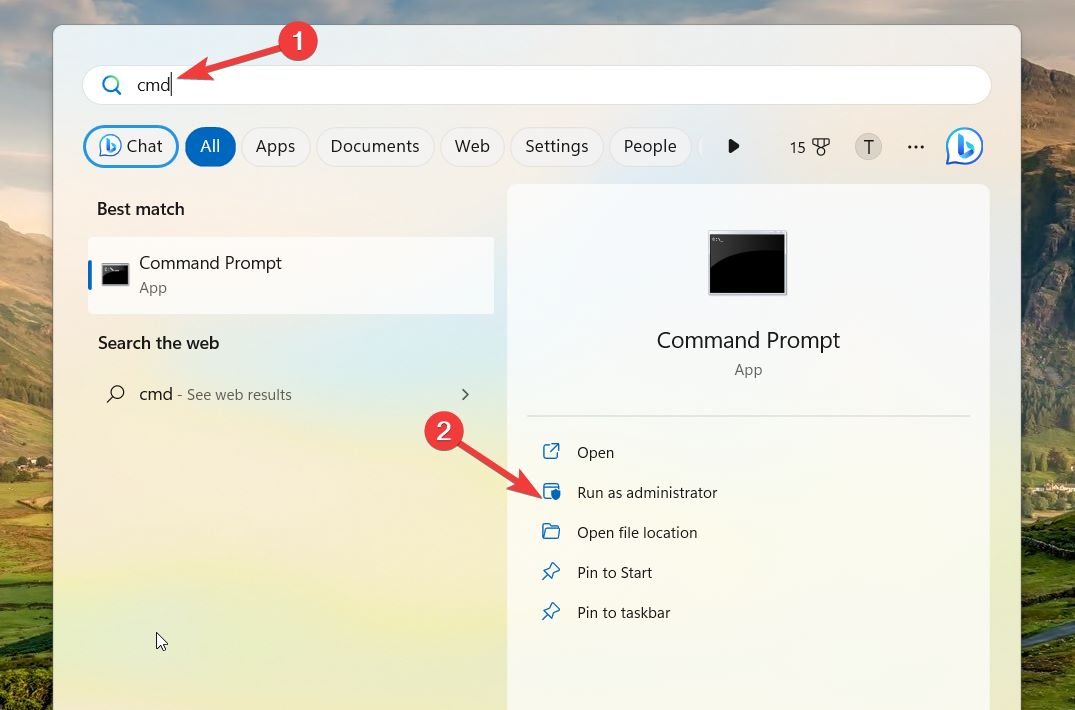
- Use the Windows key to launch the Start menu. Type cmd in the search box on top and choose Run as administrator from the search results section.

- Click Yes on the User Action Control dialog box to launch cmd with elevated permissions.
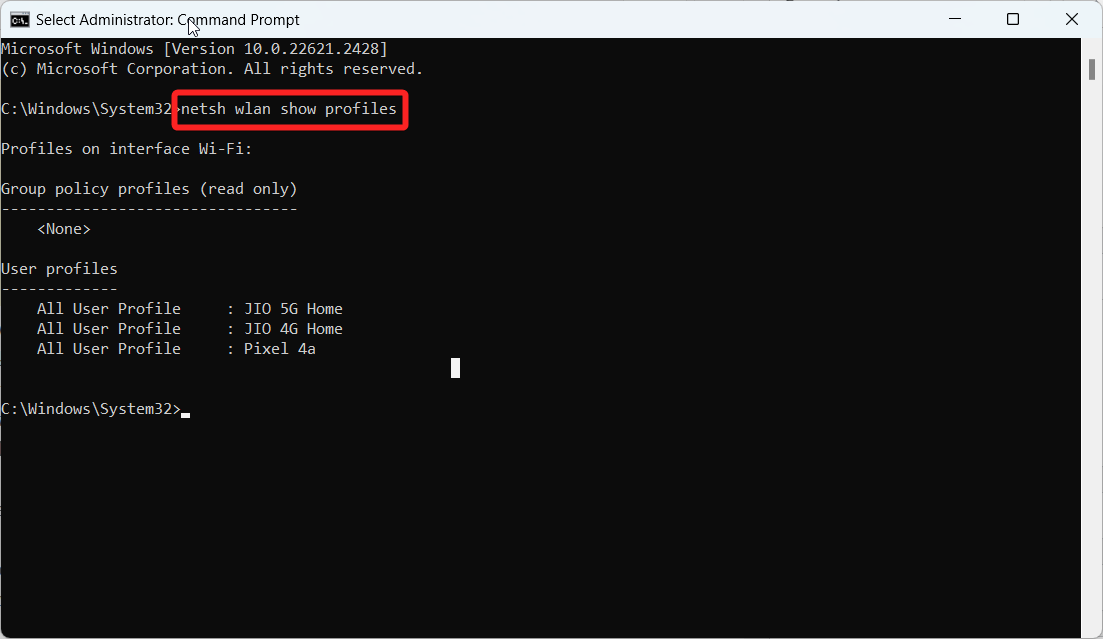
- Type netsh wlan show profiles command to view the list of known network profiles.

- Note down the profile name for the network whose priority you wish to change.
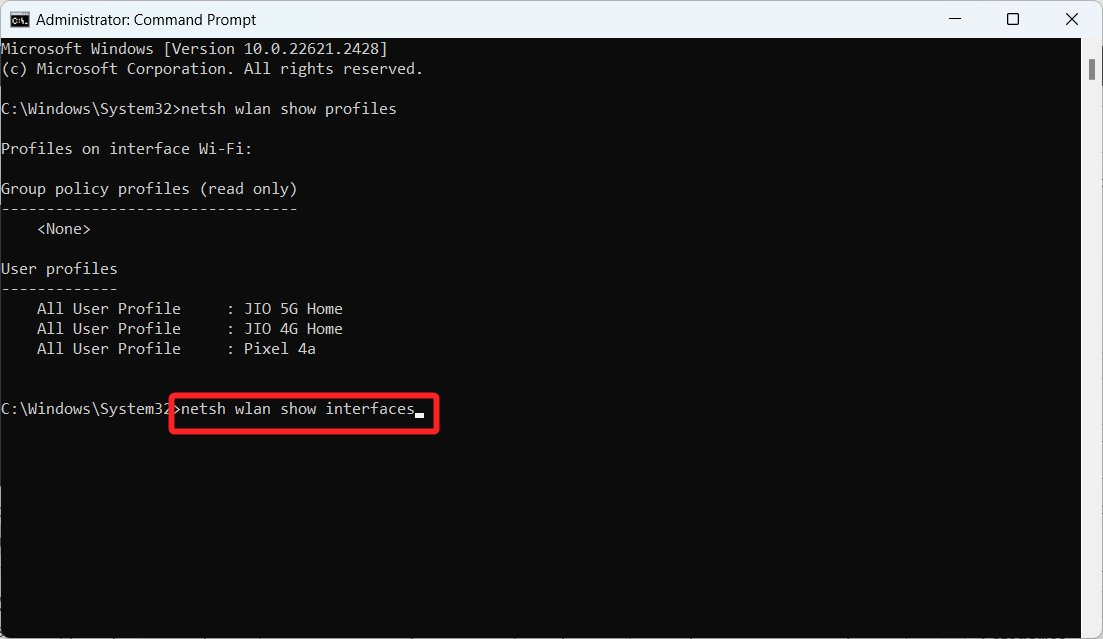
- Next, execute the netsh wlan show interfaces command to view the details of your wireless interfaces.

- Utilize the following command to set a new priority for the wireless network. netsh wlan set profileorder name=”[ProfileName]” interface=”[AdapterName]” priority=[PriorityValue]
- Replace [ProfileName] with the network’s name, [AdapterName] with your wireless adapter’s name, and [PriorityValue] with the desired priority (1 being the highest).
- Repeat step 5 to assign different priorities for various network profiles on the same adapter. Set the [AdapterName] constant while altering [PriorityValue] for different [ProfileNames] to assign distinct priorities to all known networks on your computer.
Automatically select the nearest network from Windows settings
You can configure Windows 11 to connect to the closest available wireless SSID network automatically when the network is within the range of transmission. This prioritizes one network over the other, but all the networks will have the same priority if the setting is enabled for more than one network.
To enable Windows to select between these networks automatically, you should ensure that Windows should be configured to connect to the available network when in range automatically. Here is the step-by-step procedure for the same.
- Launch the Settings app using the Windows + I shortcut key.
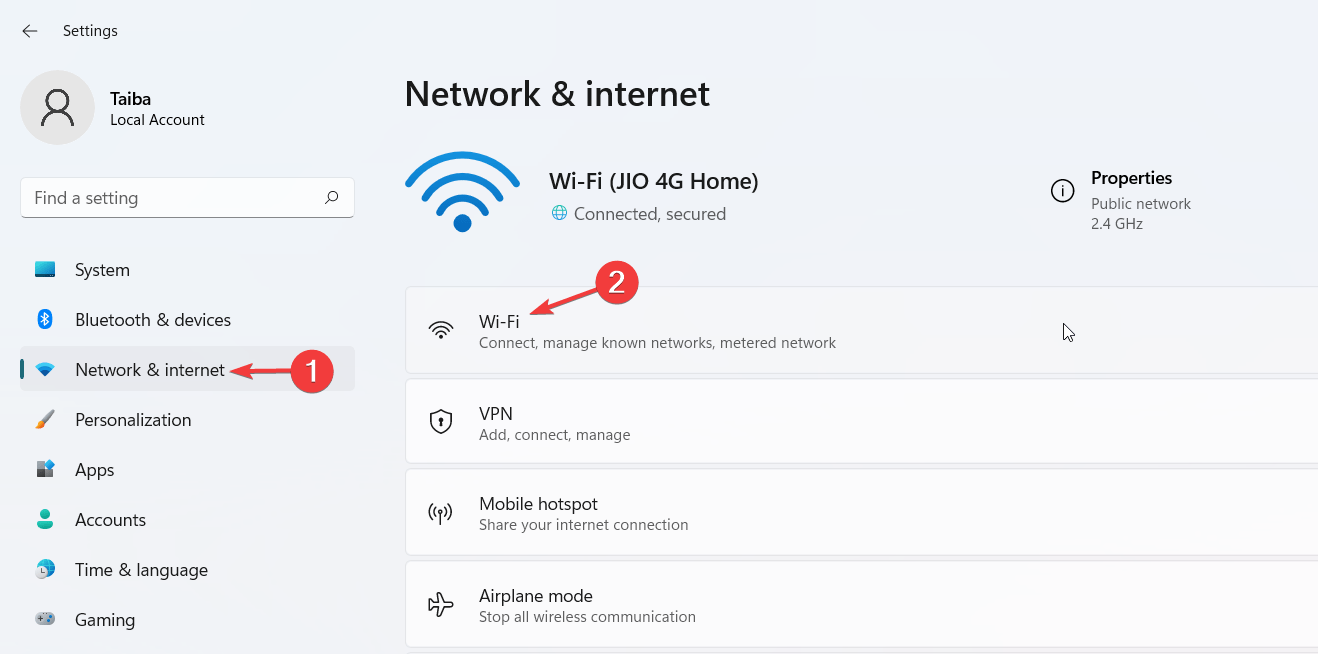
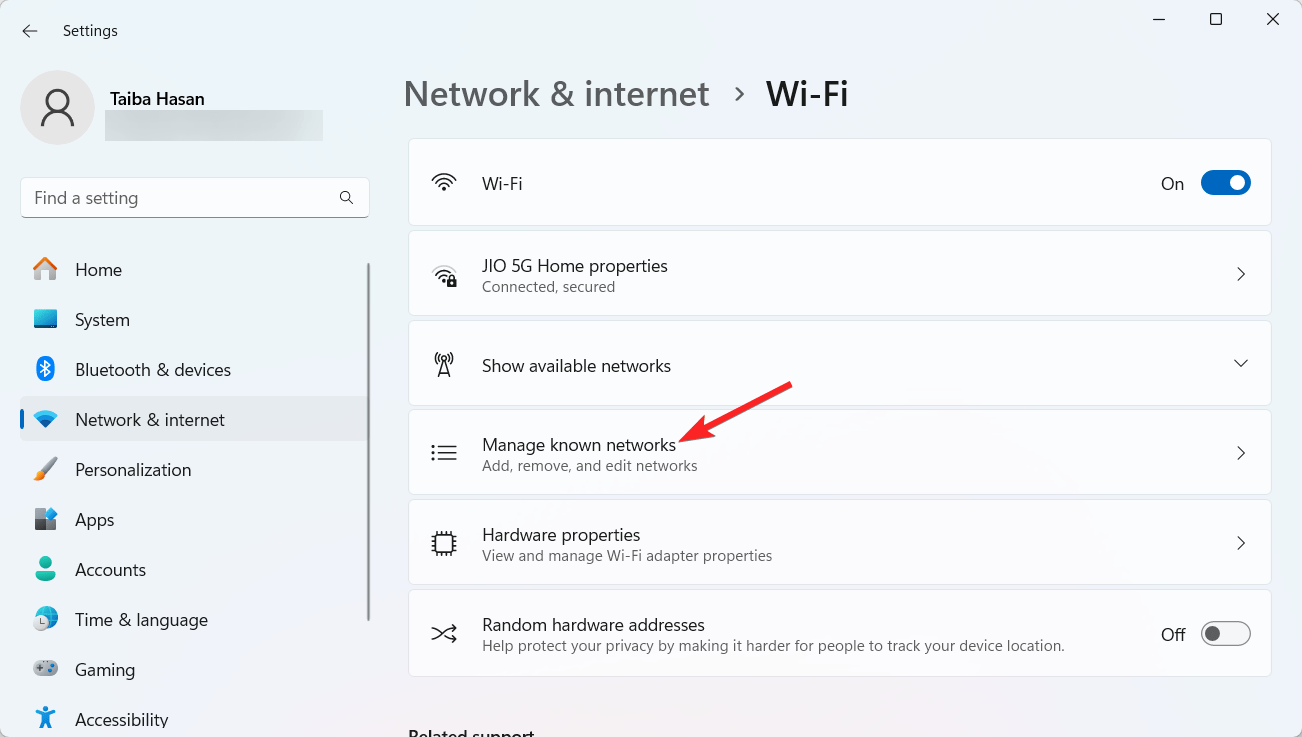
- Go to the Network & internet settings from the left sidebar of the Settings window.
- Choose Wi-Fi from the right sidebar.

- Next, click Manage Known Networks from the right section.

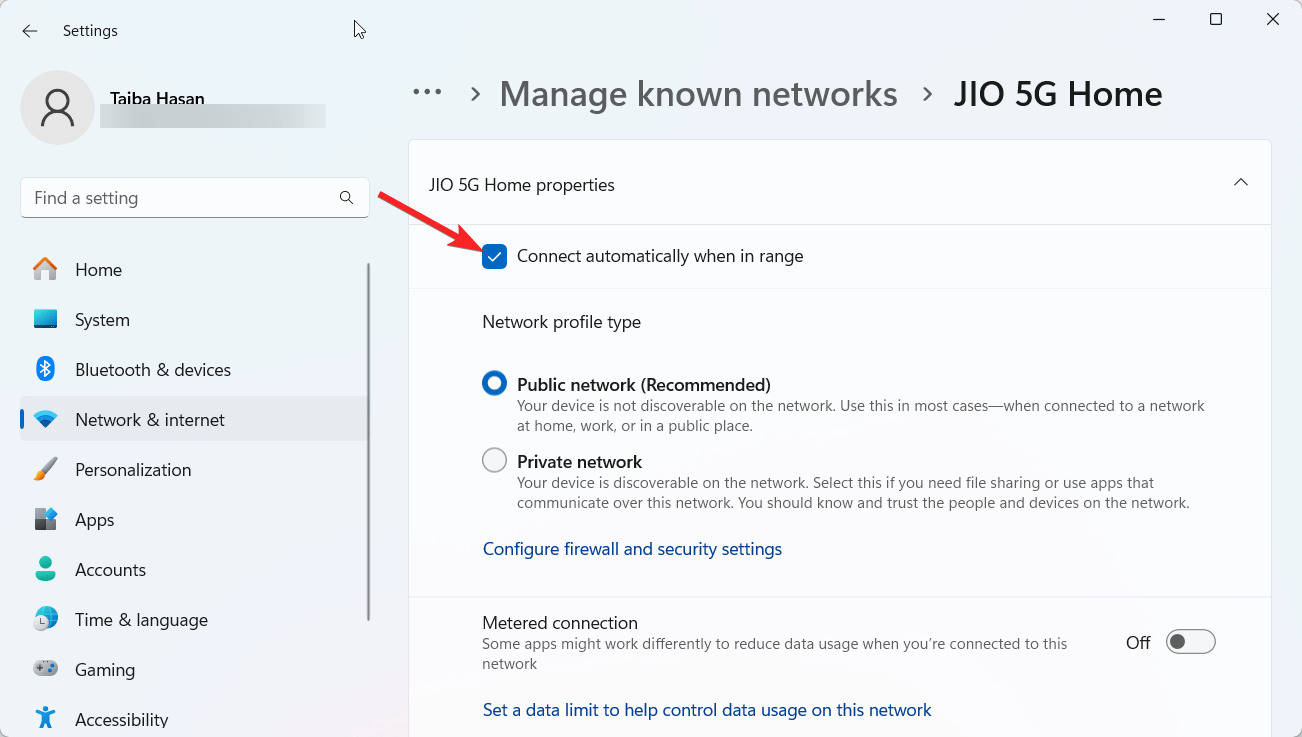
- Click one wireless network from the list to view the related settings.
- Enable the checkbox next to the Connect automatically when in the range option.

- Go back to the Manage Known Networks settings window from the settings hierarchy.
- Now select the next wireless network available in the list and enable the Connect automatically when in range option for it as well as the remaining wireless networks in the list.
- After completing the steps above, your computer will automatically join the wireless network you have set up.
Conclusion
We recommend that you review all of the network adapter metrics once you have successfully modified one to make sure the identical value is not inadvertently applied to another adapter.
Furthermore, by ensuring that your computer always has access to the most vital internet connection, network adapter priority in conjunction with Wi-Fi network prioritizing allows you to boost your internet performance significantly.
If you've any thoughts on How to Change Internet Priority in Windows 11 [ WiFi + Ethernet ], then feel free to drop in below comment box. Also, please subscribe to our DigitBin YouTube channel for videos tutorials. Cheers!

