Can you delete one or more files from a USB drive? I mean, when you try to remove the files, they do get deleted momentarily. However, when you revisit the folder in the USB drive or directly open the USB drive, the deleted files will be present again.
This is problematic when you want to delete a few files to make space in the USB drive for new files, but the older files do not get deleted. In this guide, I will explain to you why this issue happens with the USB drive and what you can do to fix the issue.
Why Files Are Not Deleted from the USB drive?
Here are the common reasons why you are not able to delete files.
- The files you are trying to delete are write-protected. It means you can only see and use them. You cannot modify them in any way, including deletion.
- The file you are trying to delete is open on any application.
- Those files you are trying to delete are corrupted.
- The USB drive is infected with malware. So, the files keep replicating and don’t get deleted.
- You may not have permission to modify the files or file system on all the USB drives you are connecting to a particular computer.
Here are the various troubleshooting methods you can implement to permanently delete the files from the USB drive.
1. Close the File from the Application before Deleting
Before deleting a file, ensure that it has been closed and it is not open in any application.
For example, if there is an image file of JPEG file name extension you wish to delete from a USB drive, make sure the image file is not open in Adobe Photoshop, Paint 3D, or similar apps meant for handling the image files.
Once you are sure that the file is not open anymore, open the USB drive, select the file you want to delete, and press Shift + Delete for permanent deletion.
2. Scan for Malware Presence in the UBS Drive
Most of the time, I have experienced that the USB drive, when subjected to malware attacks, the files within it start misbehaving. Either these files won’t open in the corresponding app meant for them, or they won’t be deleted directly from the USB drive.
Also, when you connect the USB drive to any computer, there are high chance that the virus will find its way into the computer. So, it is important to run a scan for malware right after you connect the USB drive to a computer.
- Connect the USB drive to the computer.
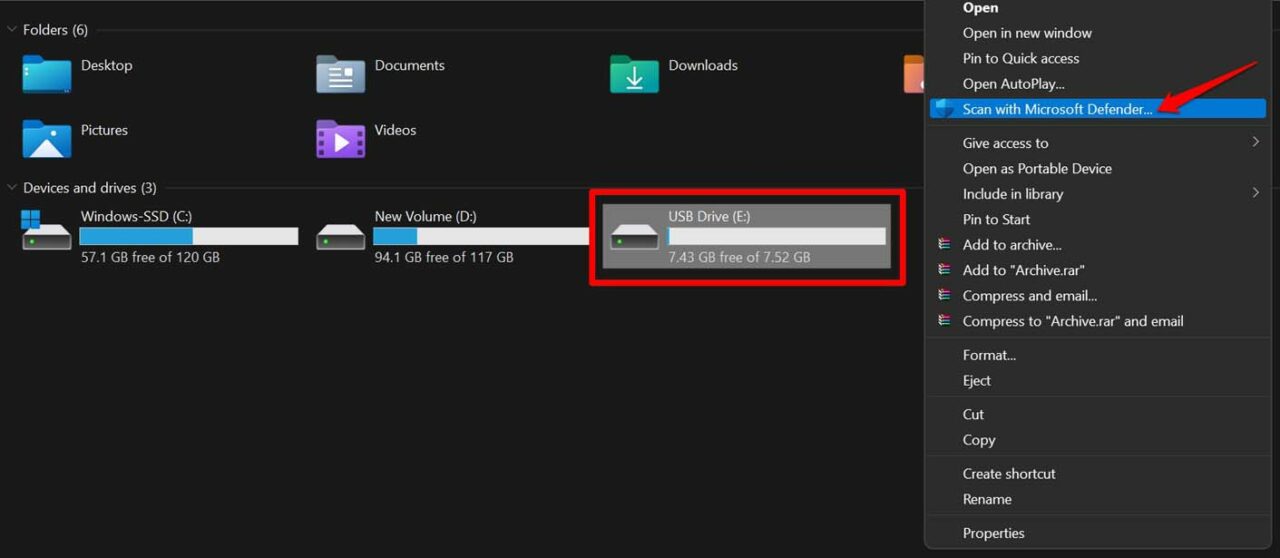
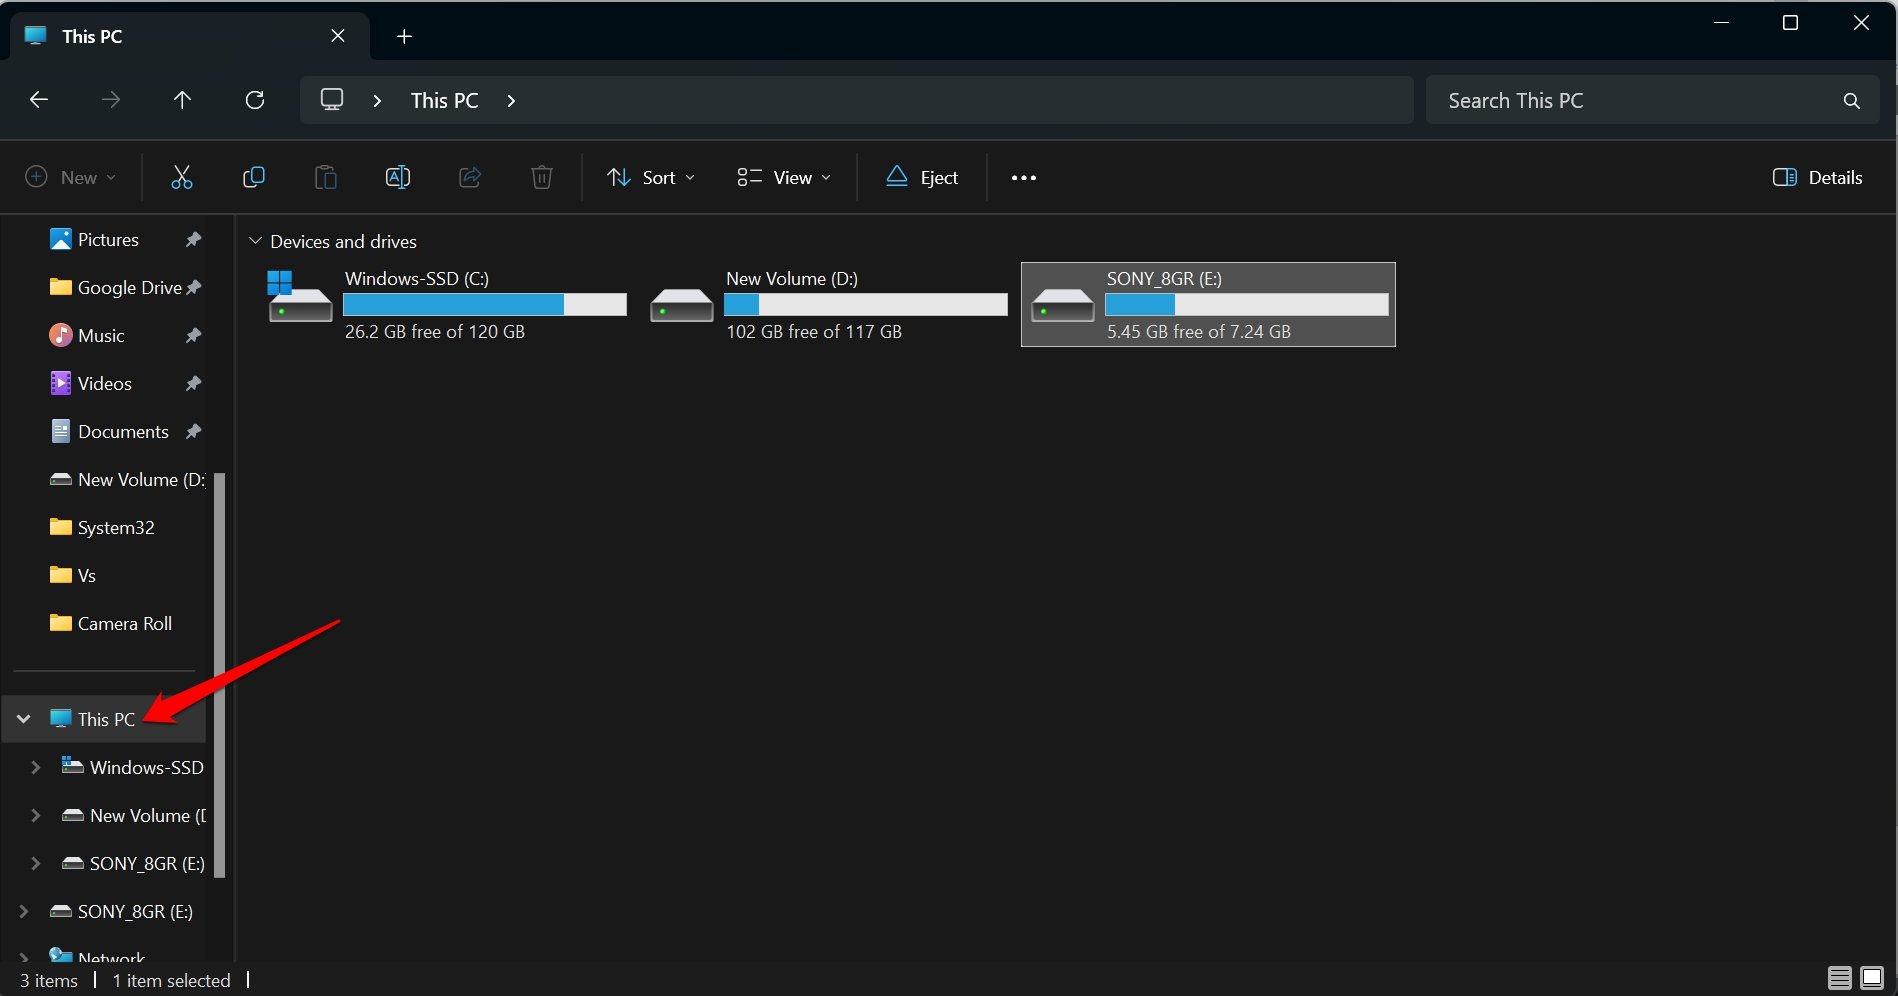
- Now, the USB Drive will be displayed in the This PC section.
- Right-click as shown in the screenshot and select the option Scan with Microsoft Defender.

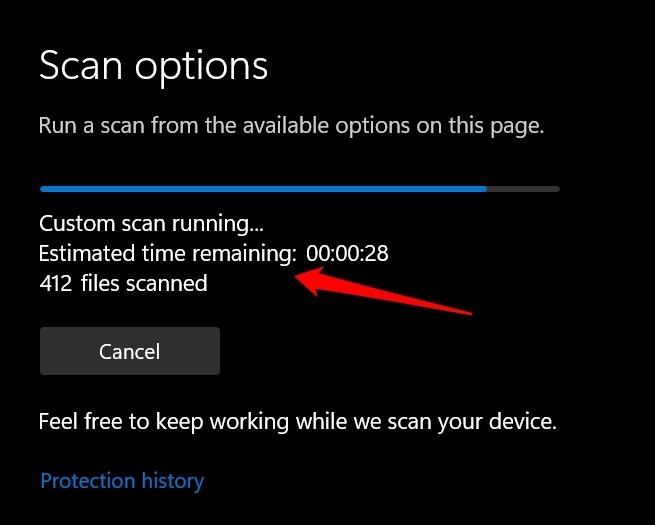
- After launching the scan, depending upon whether the USB drive has a lot of files or a few files the scan will be completed.

If there is any malware found on the USB drive, then the anti-virus app will remove it on its own. You may manually check and remove them.
Note that, if you have installed some other anti-virus application, you may also use that to perform a scan for the malware attack.
3. Format the USB Drive and Delete All the Files
This troubleshooting method will completely format the USB drive by permanently deleting all the files contained in the USB Drive. When you go for formatting you cannot selectively delete one or two files. All files present on the USB drive will be completely deleted.
- Insert the USB drive into the computer.
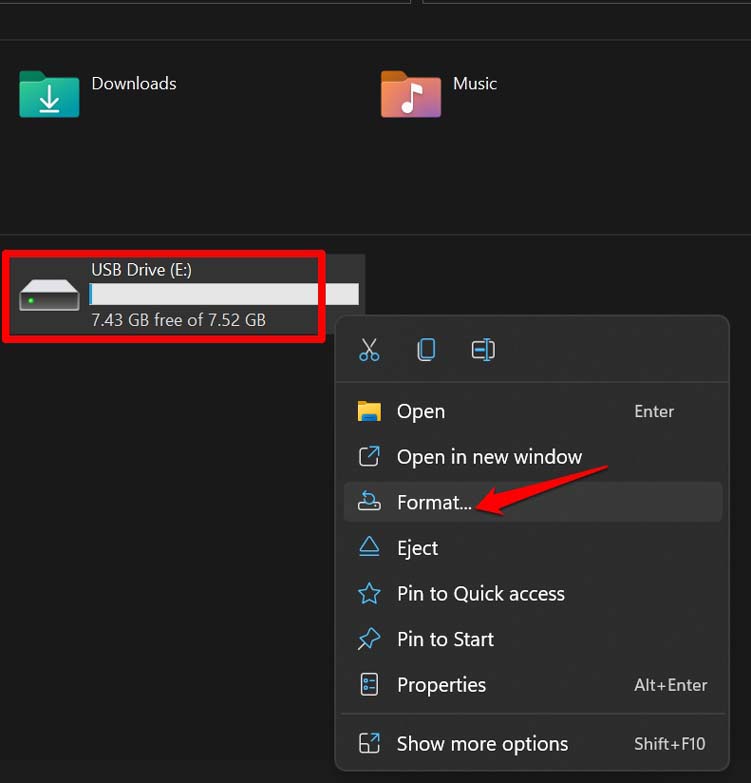
- On This PC section, right-click on the USB drive.
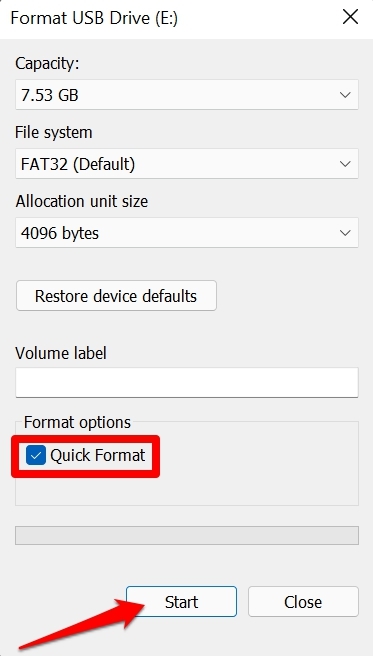
- From the menu, select Format.

- When the Format dialog box appears, click on the Quick format checkbox under Format options.
- Then click on the button Start.

4. Access the Computer in Safe Mode and Delete Files from the USB Drive
Users have reported that if they are not able to delete a file from the USB drive, then accessing the computer using Safe Mode and trying to remove the files from the USB stick was successful.
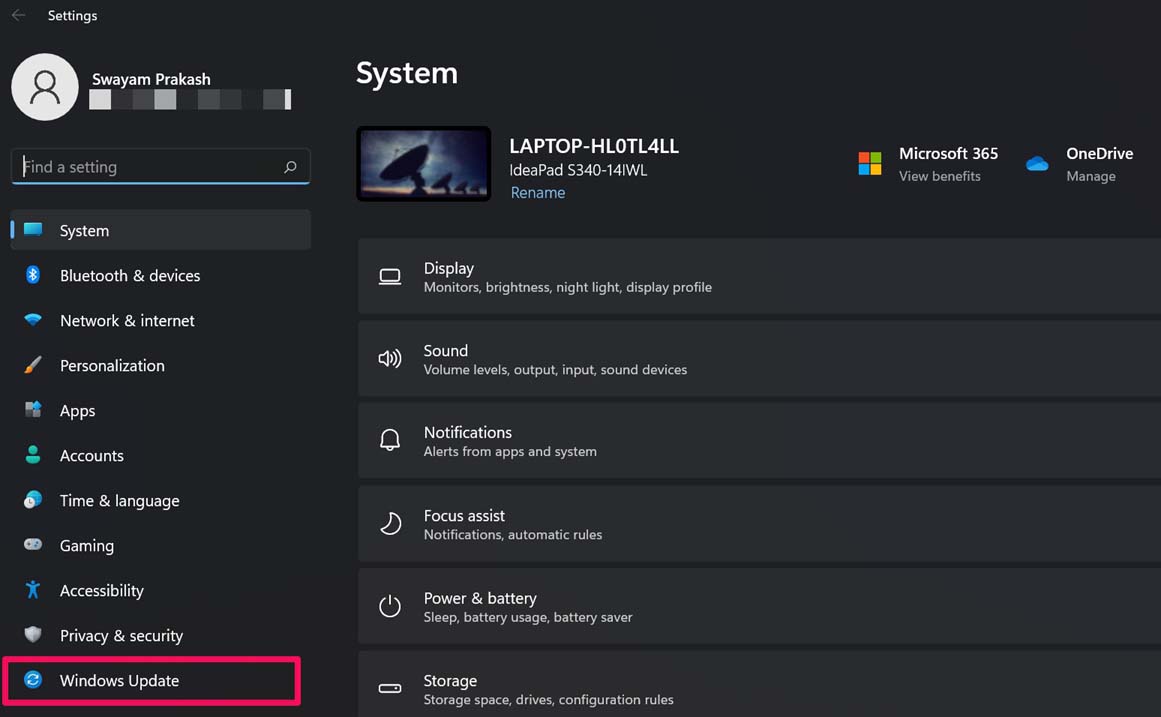
- Press Windows + I to access the settings.
- Click on Windows Update on the left-hand panel.

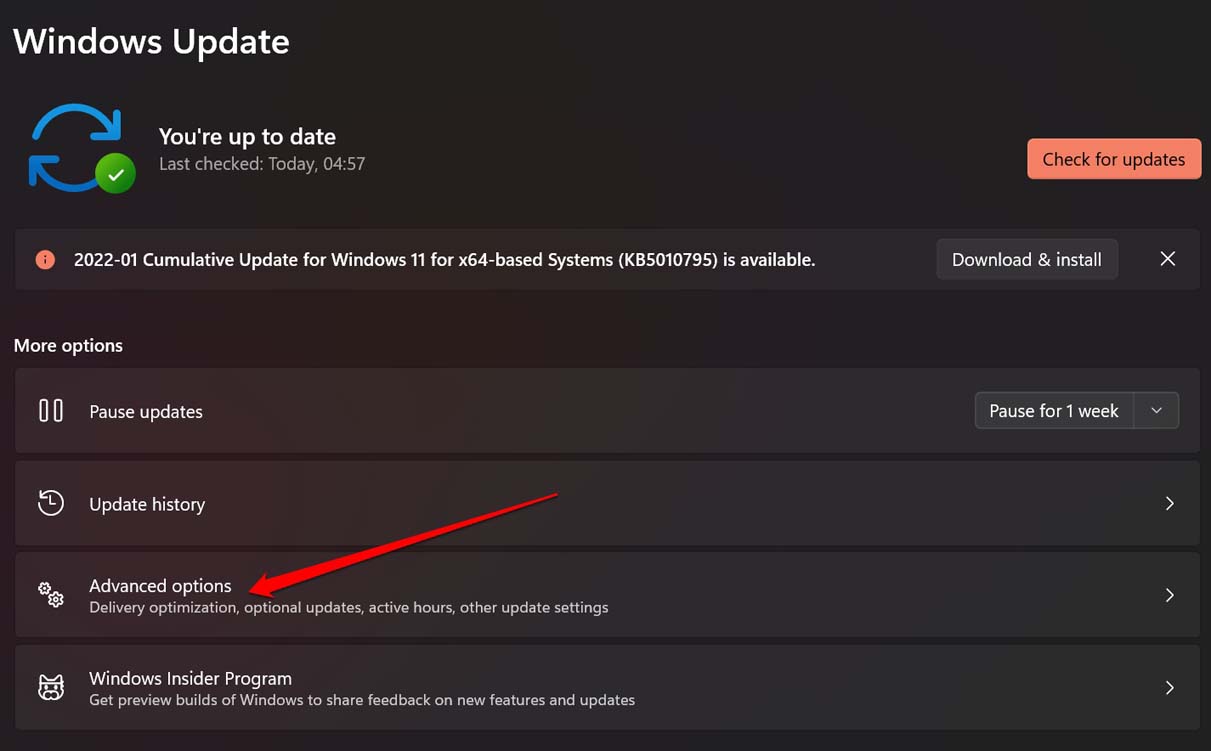
- Navigate to Advanced Options.

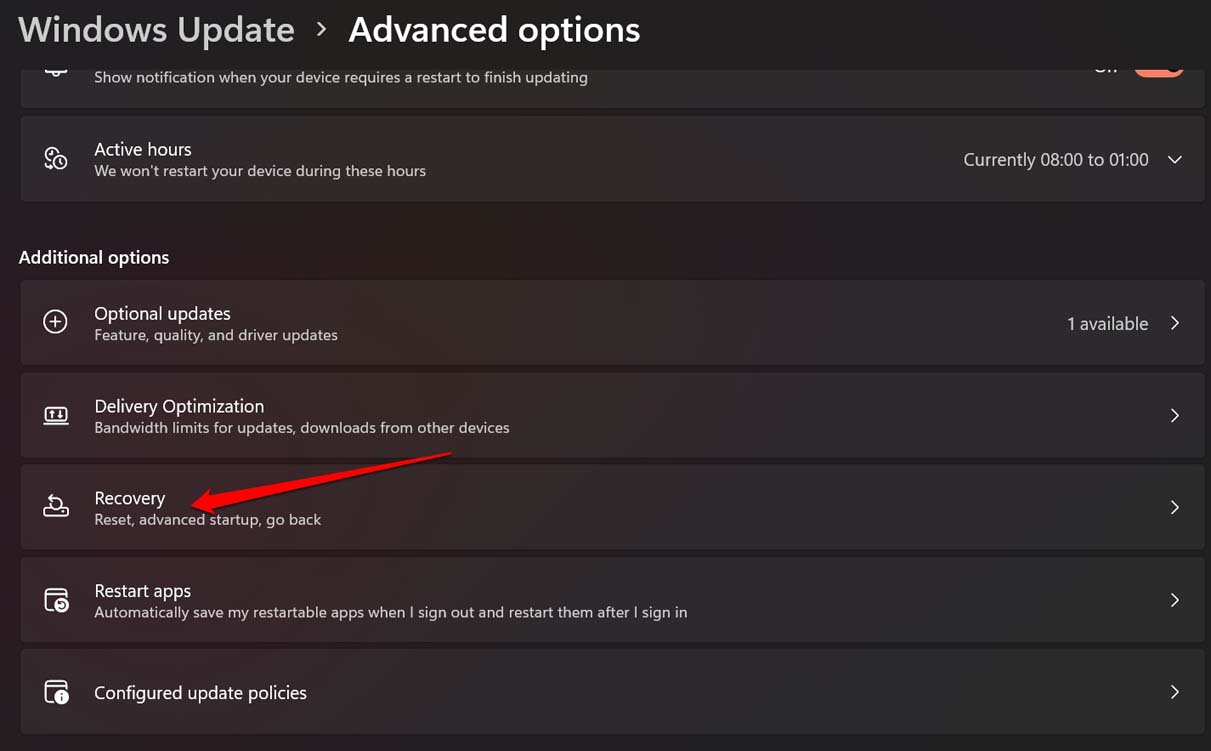
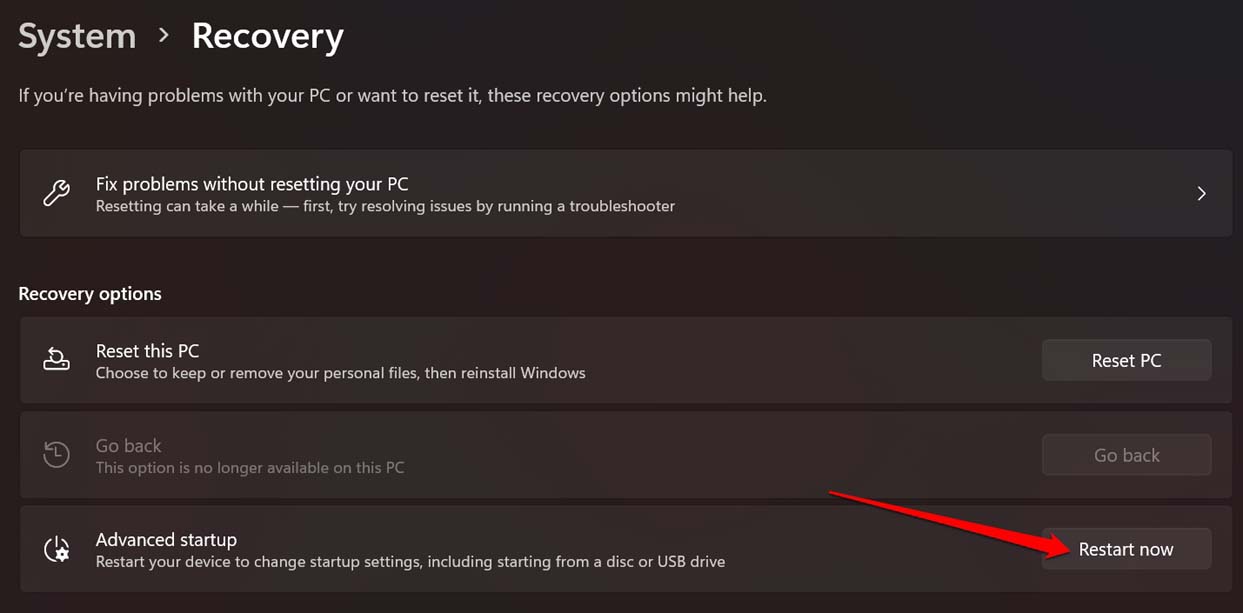
- Then click on Recovery.

- Click on the option Restart Now under Advanced Startup.

- When the PC restarts, press F4 to enter Safe Mode.
- Access the USB drive and delete the files.
- Once you’re done deleting the files from the USB drive, restart the computer to exit the Safe Mode.
5. Use the Command Prompt to Delete the Files from the USB Drive
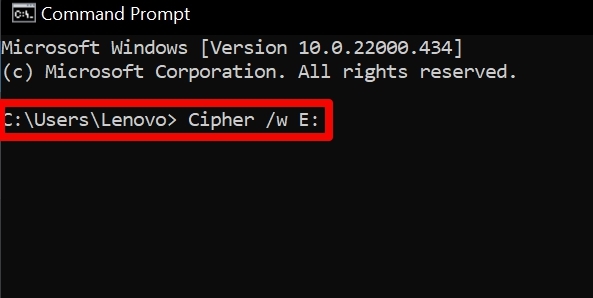
With the command prompt, you can use a command named Cipher to completely delete the files from the USB drive.
- Open Command Prompt on your computer.
- Then enter the following command.
Cipher /wE:\filename
- In the above command, “E” denotes the E Drive in my computer that represents the USB drive connected to it.
- Otherwise, you can simply enter Cipher /wE: and press the enter key to completely erase the drive and permanently delete all the files present on it.

6. Use the Check Disk Tool to Fix Corrupt Files on the USB Drive
Here is a free tool on Windows OS that you can use to check for issues with the files and fix them automatically.
- Insert the USB drive into the computer.
- Next, open Command Prompt.
- Enter the following command.
chkdsk e: /f /x
- You will get a message that Windows has checked for files for possible problems. As you may see from the screenshot, no problem was found on the USB drive that I have connected to my PC.

- If there is an issue with the files in the USB drive, then the system will fix it automatically. While that takes place wait and do not interrupt the process.
7. Clear the Attribute of the Files
This means you have to change the status of the files from read-only to make them writable. You can then modify the files. Then you will be able to delete the files completely from the USB drive.
- Open the command prompt.
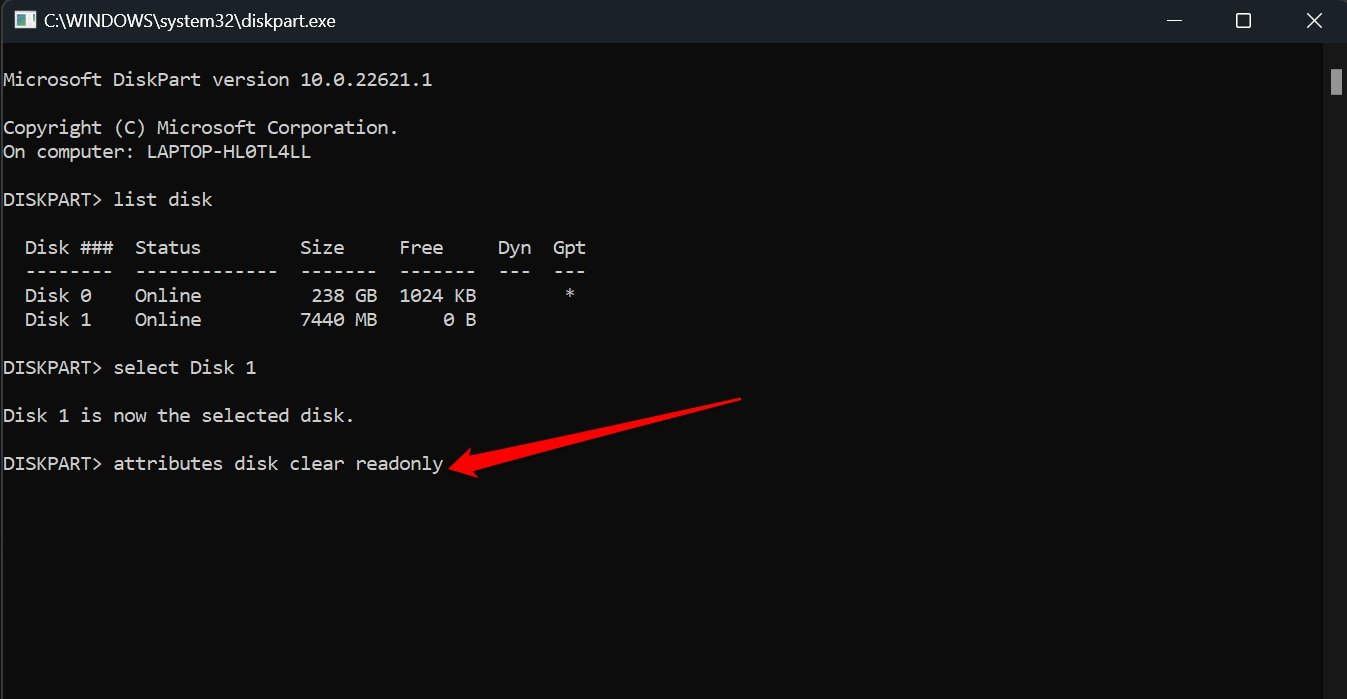
- Type the following command disk part and press enter
- Then type DISKPART list disk and press enter.
- This will list out all the available disks on the computer, including the USB drive.
- Type Select disk 1 and press enter.
Note that, Disk 1 or Disk 2 will vary from user to user depending upon how disks are listed on your PC. A good way to ensure the correct disk is by visiting This PC and checking out the storage occupied by the drive, which denotes the USB drive.
- Next, type the following command.
Attributes disk clear readonly
- Press Enter.

- Close the command prompt after the attribute is cleared by typing in exit and hitting enter.
- Now, access the contents of the USB drive and try to delete the files. They should be deleted successfully.
So, these are the various ways by which you can fix the issue of files not deleting on a USB drive connected to your computer.
8. Check for Errors on the USB Drive
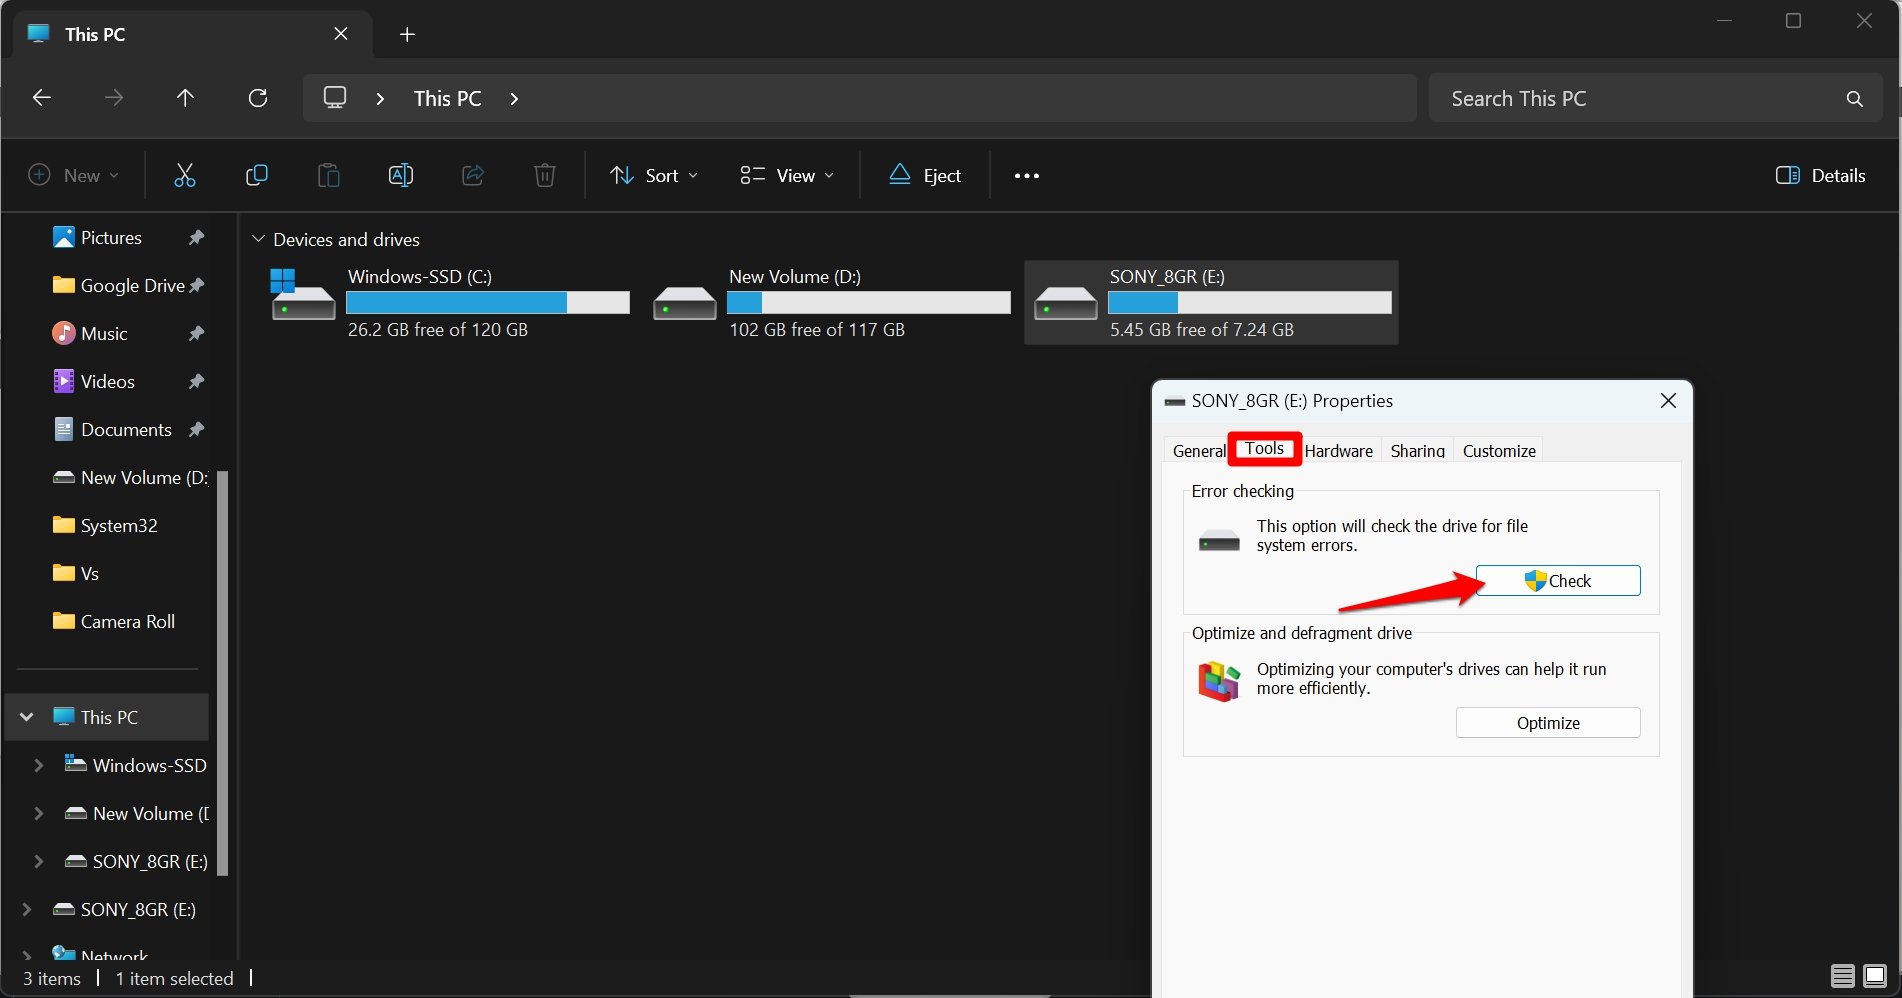
The flash drive connected to your PC may have some errors. It could be an issue with the file configuration or some field. Check for the error using the tool available in the USB drive properties.
Make sure the USB is connected to your PC.
- Press Windows + E and launch File Explorer.
- Click This PC.

- Right-click on the USB Drive and select Properties. [may also press Alt +Enter]
- Go to the tab Tools and press Check under the Error Checking section.

If there is any error, this tool should fix it. After completing this troubleshooting, try deleting the files on the USB drive.
9. Force Delete Files from the USB Drive
It is possible to forcibly chuck out files from the USB drive using the Command Prompt.
- Connect your USB Drive to the PC.
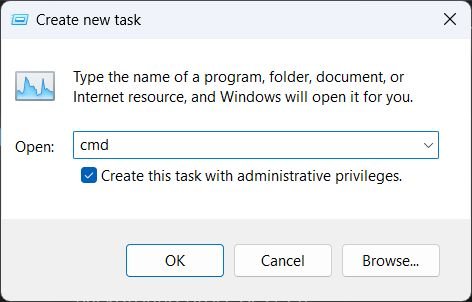
- Press the shortcut Windows + R to launch the Run box.
- Type cmd and press enter to launch the Command Prompt.

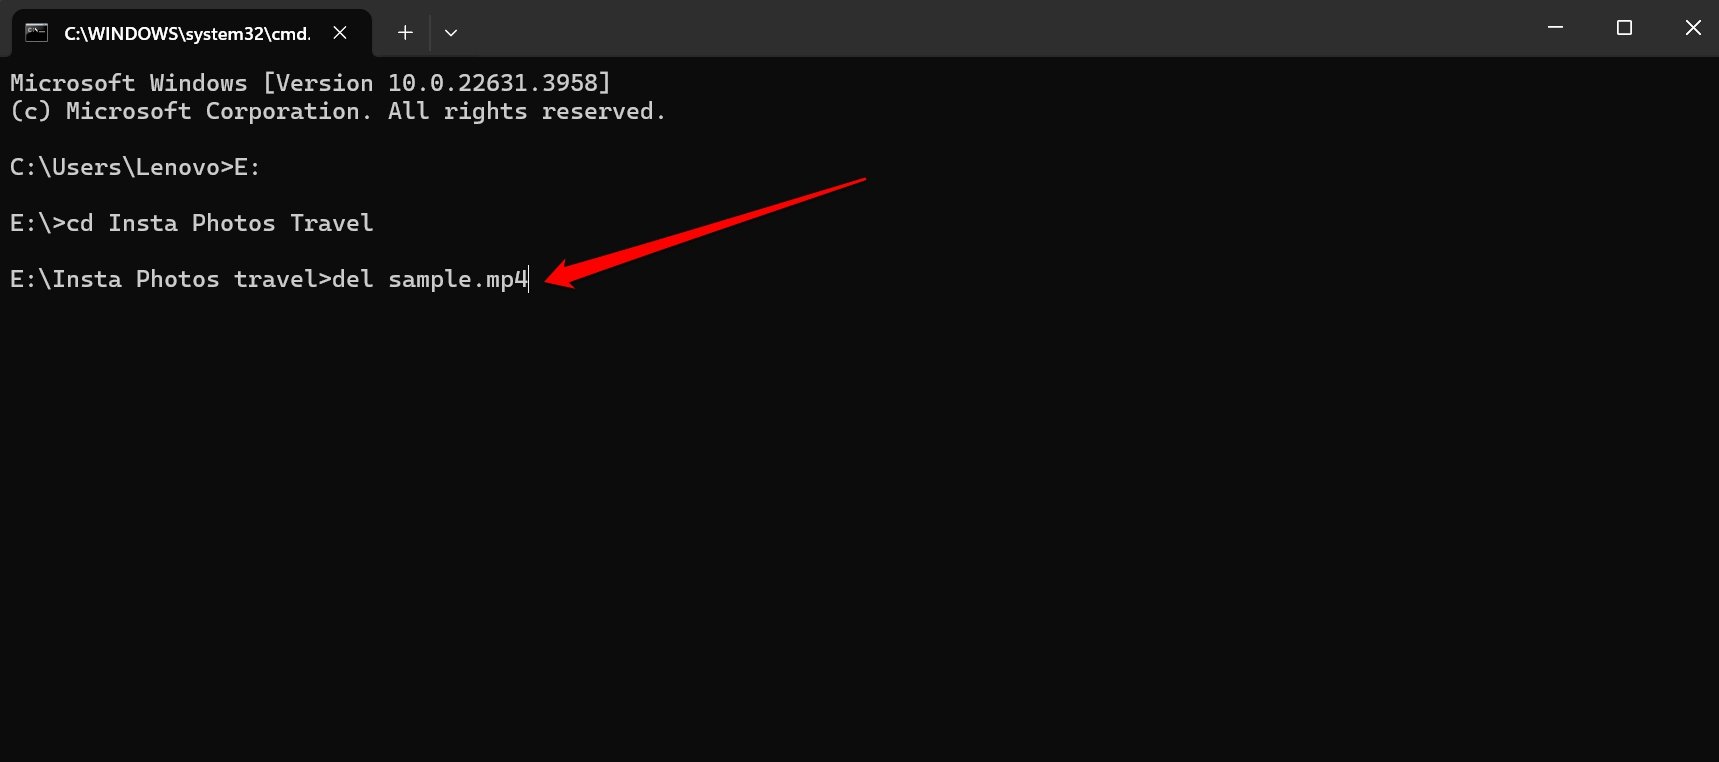
- Access the drive to delete the files in it. If your USB drive is in a drive named E, give this command and press enter.
E: - Now, access the folder in which you want to delete the file. Type this command.
cd Folder name
- In the command line screen, type this command
del filename.extension

- Repeat the above step for all the files present on the USB drive.
Replace “filename” with the name of the file and its corresponding extension.
NOTE: This is a time-consuming process. If you have a lot of files/folders and you cannot format the flash drive the classic way, consider following this method.
Conclusion
If you’re experiencing issues with deleting files from a USB drive, it could be due to write protection, open files in applications, file corruption, malware infections, or permission issues. To resolve these issues, you can implement several troubleshooting methods. By following these steps, you can address the issues and successfully delete files from the USB drive.
If you've any thoughts on How to Fix Files Not Deleting from USB Drive on PC, then feel free to drop in below comment box. Also, please subscribe to our DigitBin YouTube channel for videos tutorials. Cheers!
