Microsoft’s most recent operating system, Windows 11, tries to improve overall user experience and gaming. Due to its new features and tools, this operating system promises to improve gameplay while using less system resources. Games can now be played at more excellent frame rates and with better graphics quality than their predecessors. Microsoft has made significant financial investments to enhance Windows 11’s gaming capabilities and has added essential tools for optimizing performance on different hardware configurations.
As Windows 11 receives updates and improvements, it becomes a more gaming-friendly operating system. This article will look at how well Windows 11 plays games and offer suggestions for making the most of it.
Best Ways to Boost the Gaming Experience on Windows 11
The performance gains offered by Windows 11 might be insignificant to gamers using entry-level computers. It becomes essential in these situations to know how to optimize your system to get the most out of your gaming experience. To help you get the best possible gaming experience on Windows 11, consider the following advice and techniques:
1. Activate The Game Mode
There are noticeable gains in the game-playing experience when you enable Game Mode. The whole gaming enjoyment gets better by turning off warnings, cutting down on background activity, and redistributing more system resources to gaming apps. By following the steps described below, you can easily activate the game mode in Windows 11.
- Launch the Settings app using the Windows + I shortcut key.
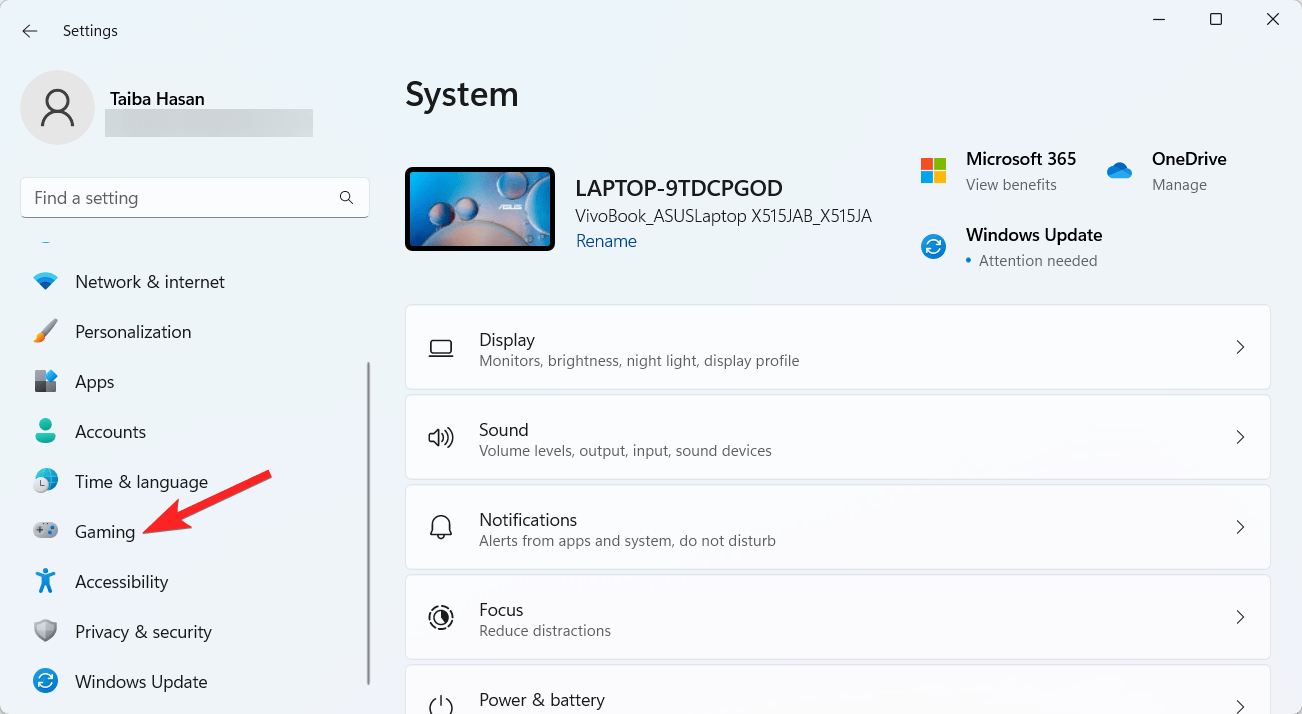
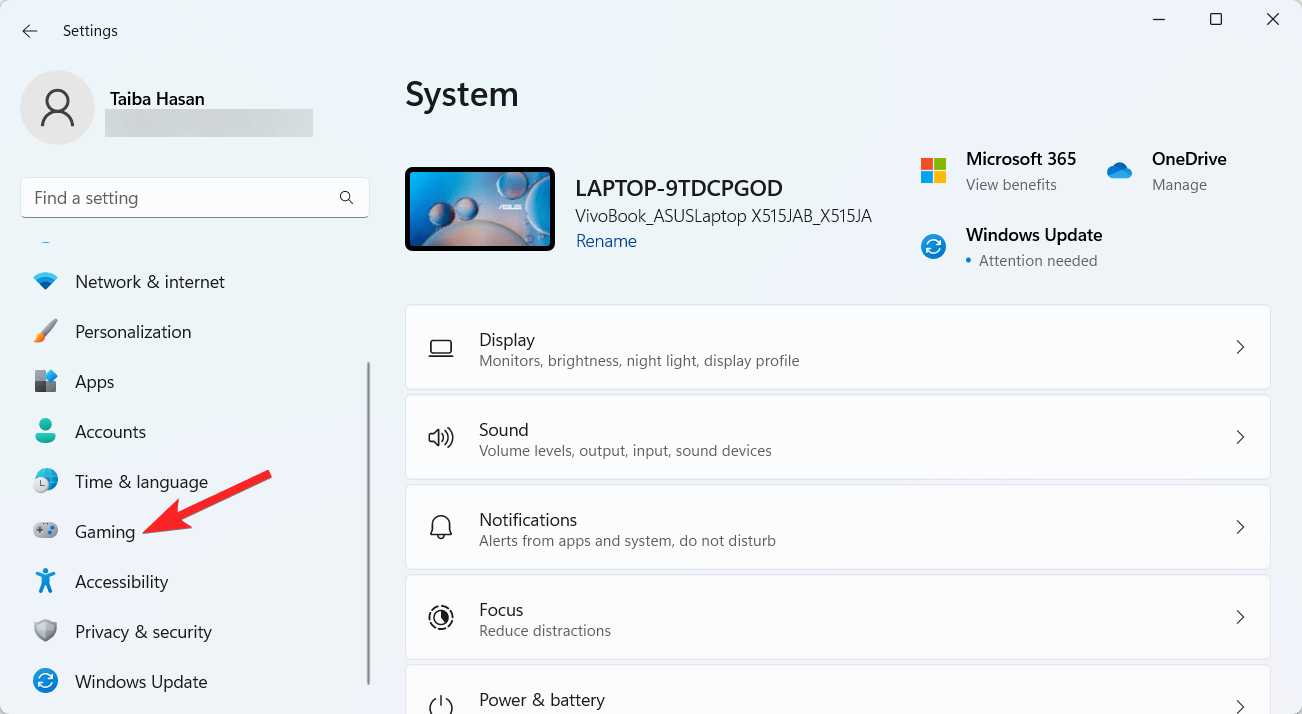
- Go to the sidebar on the left and select Gaming.

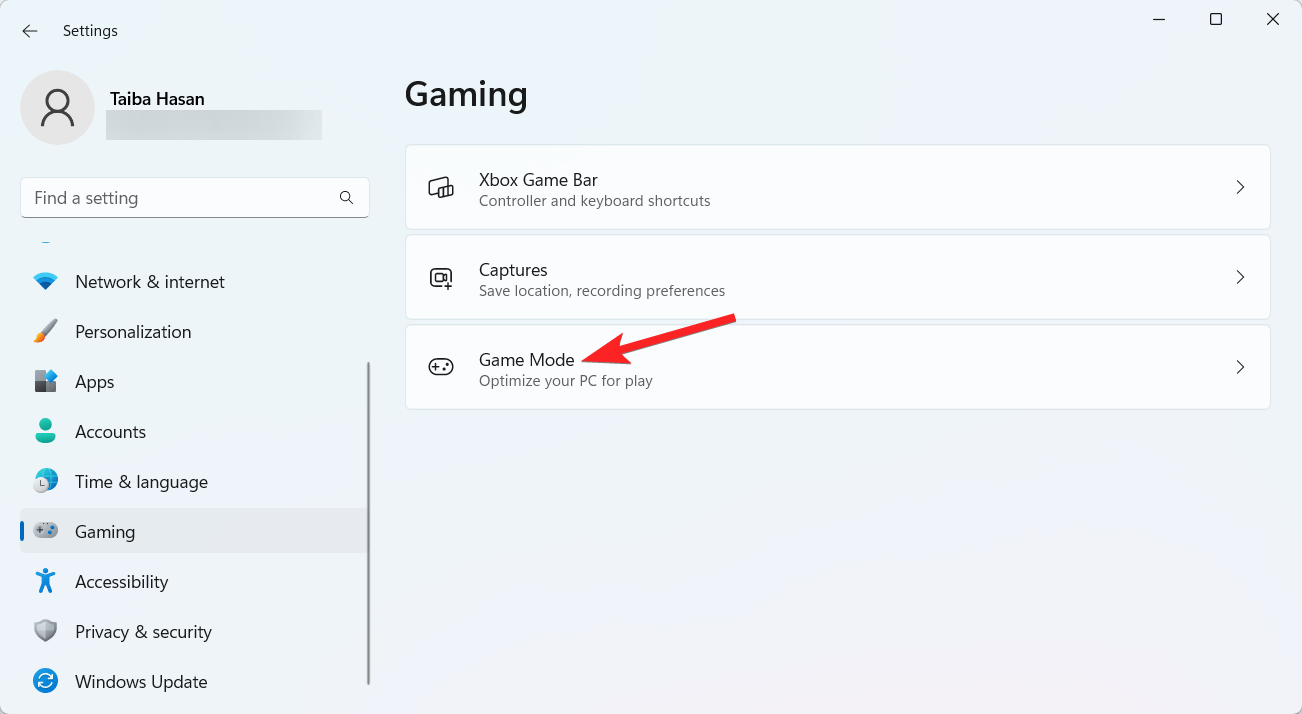
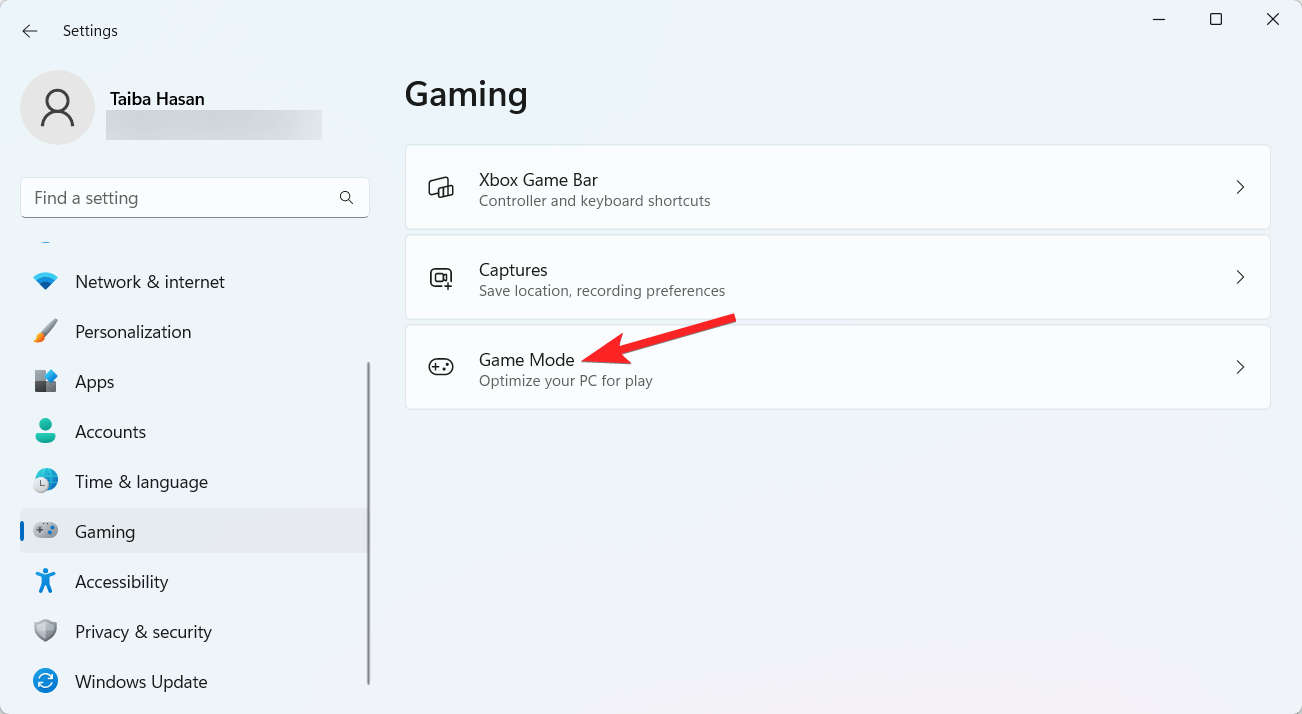
- Select Game Mode from the right section.

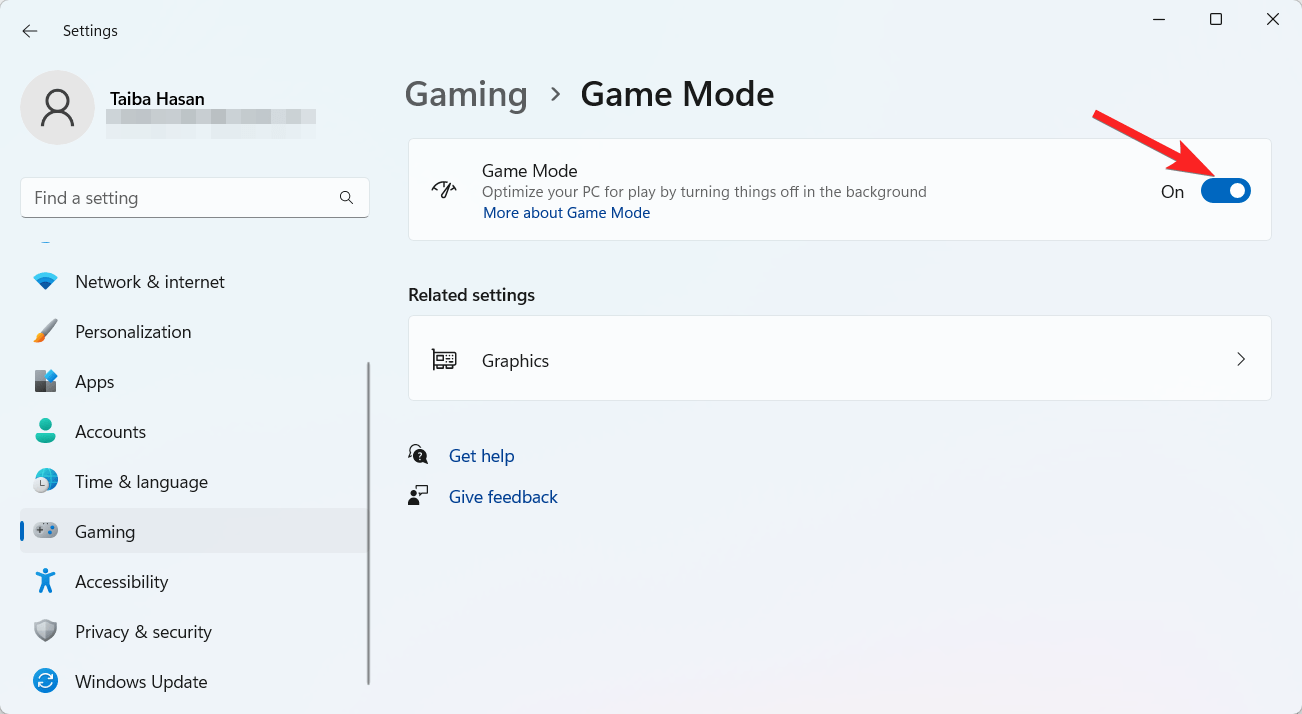
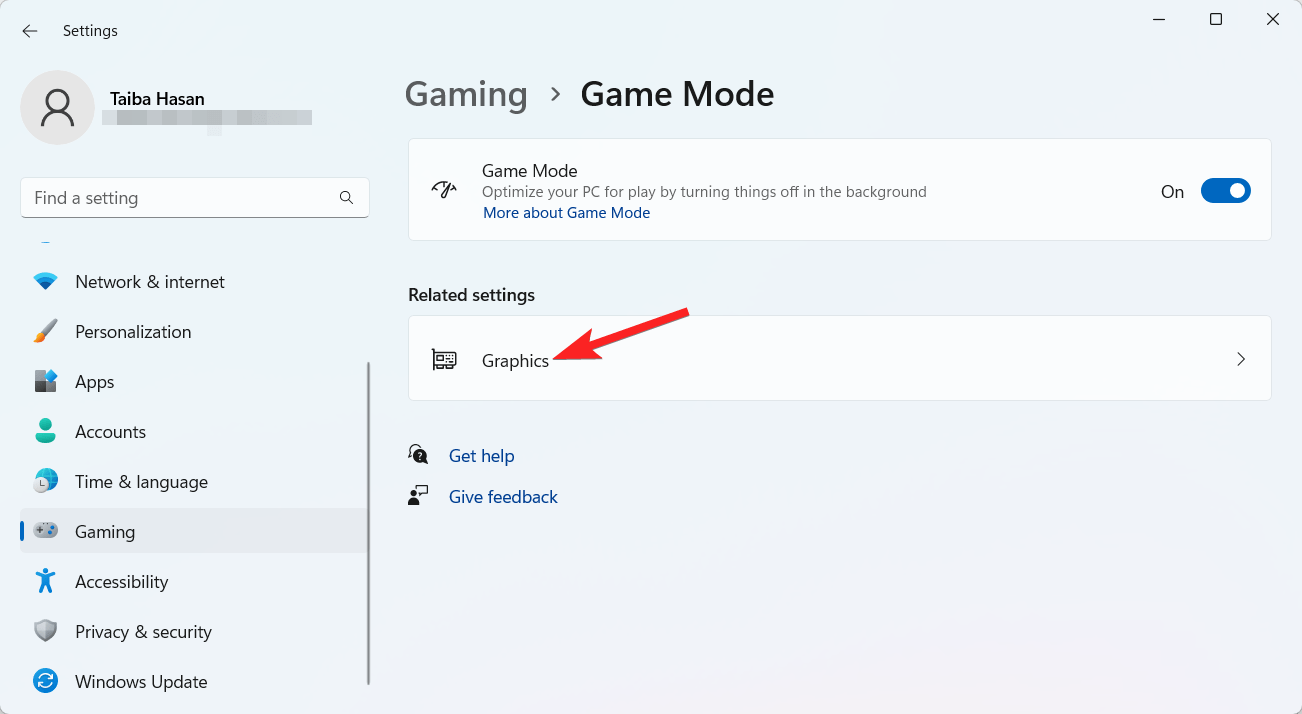
- Finally, enable the switch next to the Game Mode feature.

2. Optimize GPU Usage for Gaming Laptops with Per-App Selection Settings
You can choose which GPU each application utilizes if your gaming laptop has an integrated GPU (iGPU) and a dedicated GPU (dGPU). Here is what you need to do to alter the GPU settings in Windows 11 PC:
- Launch the Settings app using the Windows + I shortcut.
- Switch to the Gaming section from the left sidebar panel.

- Next, click on the Game Mode located in the right section.

- Choose Graphics located under the related settings section.

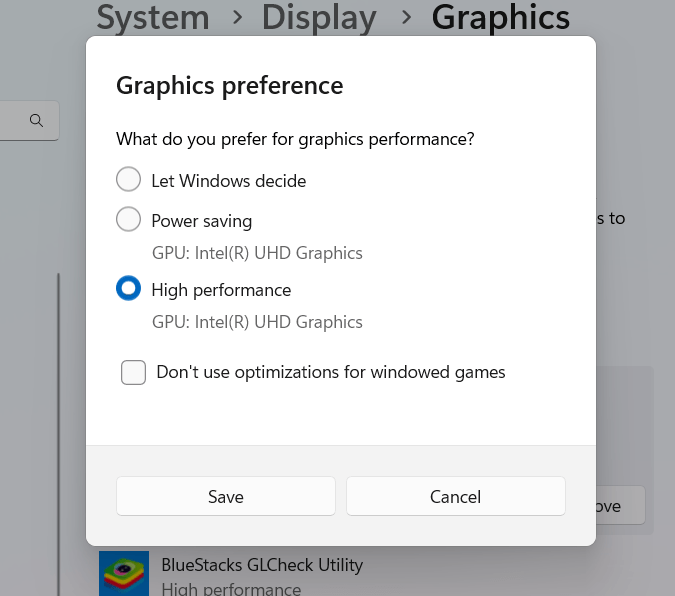
- You may manually designate GPUs for individual apps and add new ones to the list on the Graphics Performance page.
- Although Windows usually assigns GPUs to apps automatically, you can manually change this.
- Assign the High-Performance option to GPU-intensive programs and games and the Power Saving option to apps that don’t demand a lot of graphics power.

3. Turning Off Virtualization
In Windows 11, virtualization is an optional feature turned on by default that affects the gaming performance of your Windows device. You can turn it off to achieve improved game performance if you don’t use or require it. Here is what you need to do:
- Click the Start menu and then choose Settings from the Pinned section. Alternatively, you can launch the Settings app by using the keyboard shortcut Windows + I.
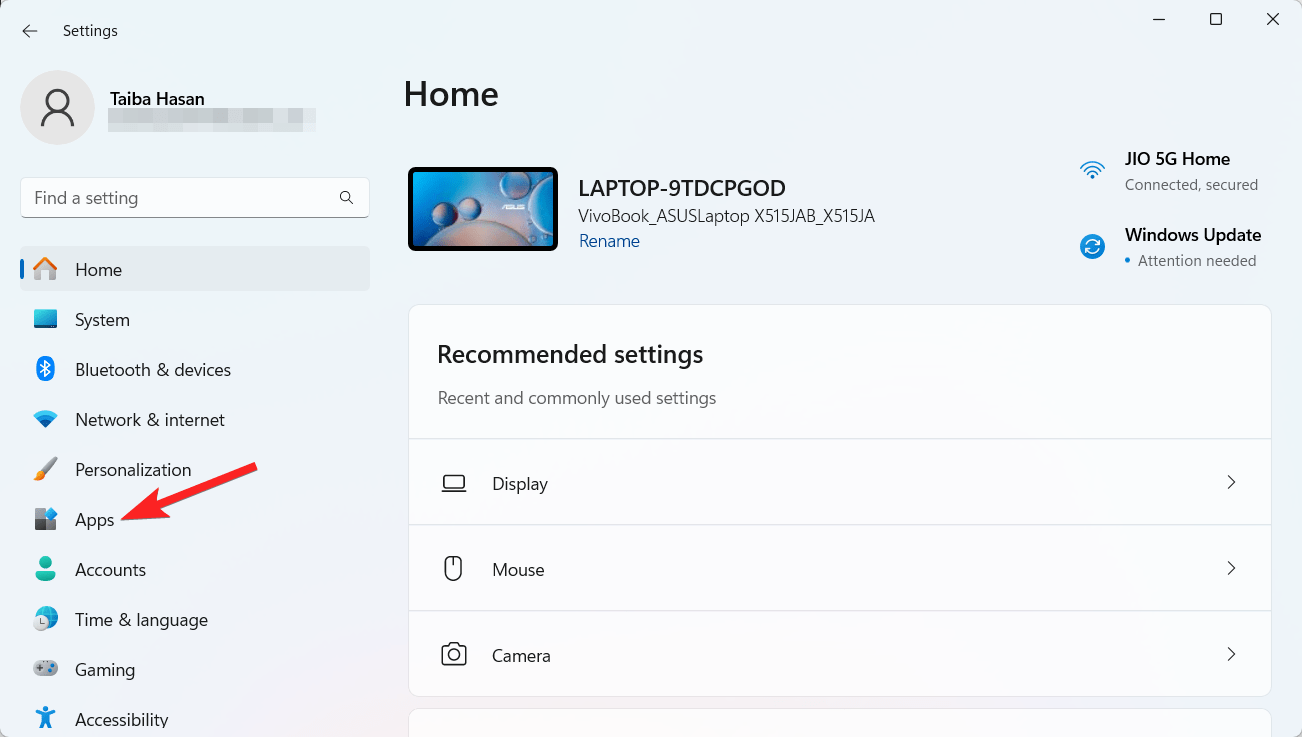
- Go to the Apps section from the left sidebar.

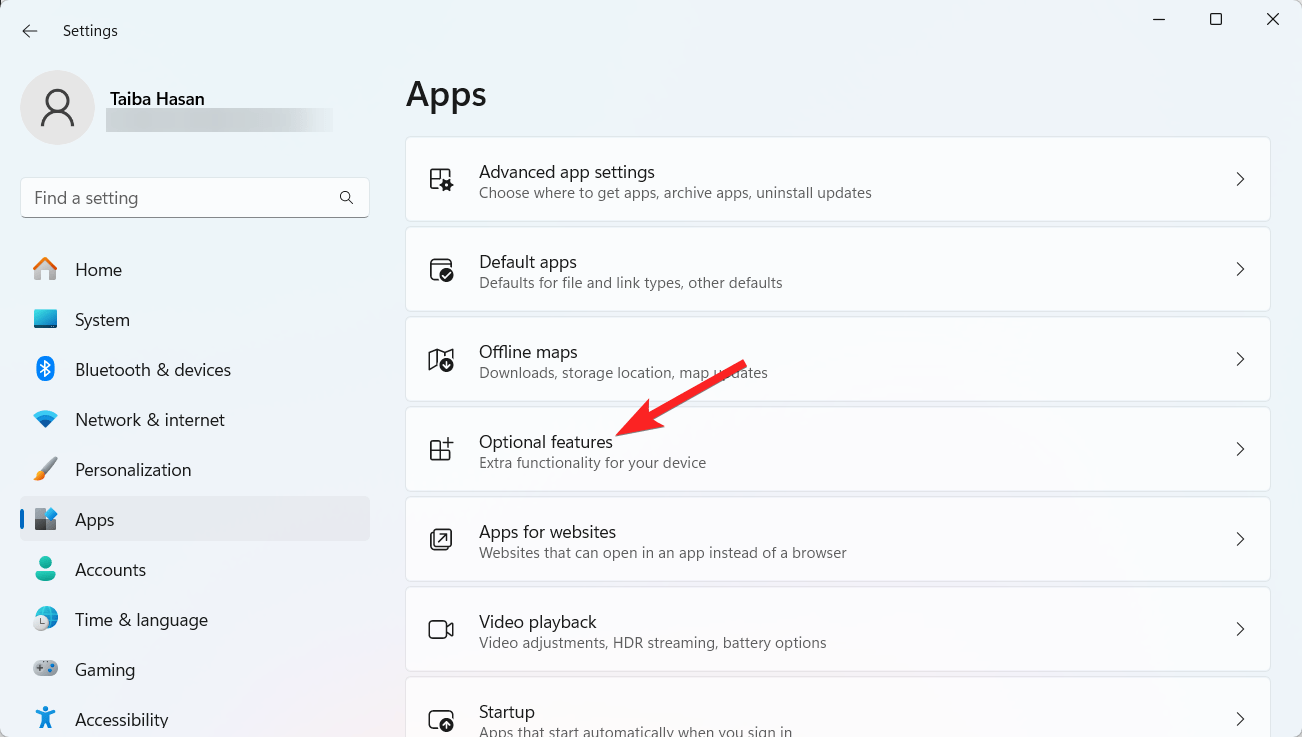
- Scroll down and choose Optional Features from the right sidebar.

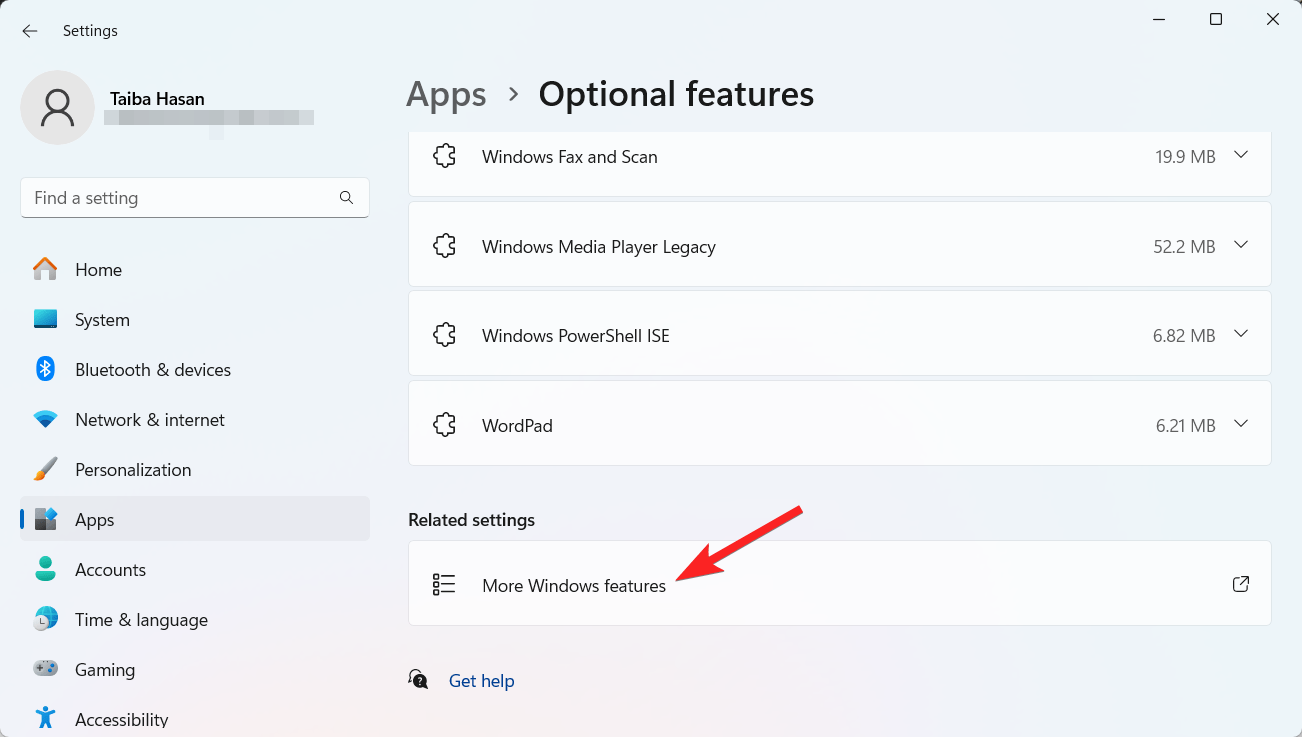
- Select the More Windows Features option located under the Related Settings section.

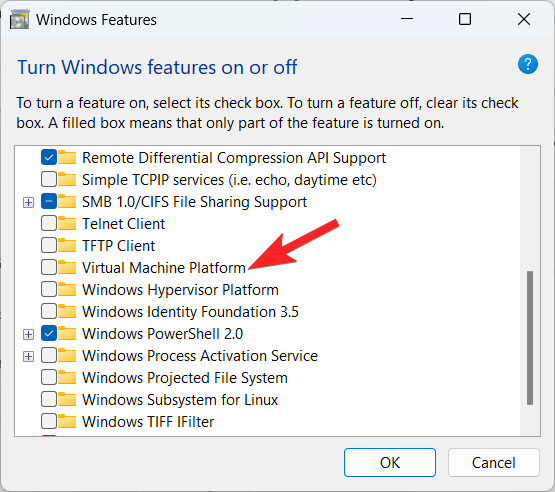
- Scroll down the dialog box and uncheck the checkbox next to the Virtual Machine Platform functionality.

- Once finished, press the OK button to save the changes.
4. Activating High-Efficiency
You can considerably improve the gaming experience on your Windows 11 PC by adjusting the power settings to high-performance mode. Below is the step-by-step process for it.
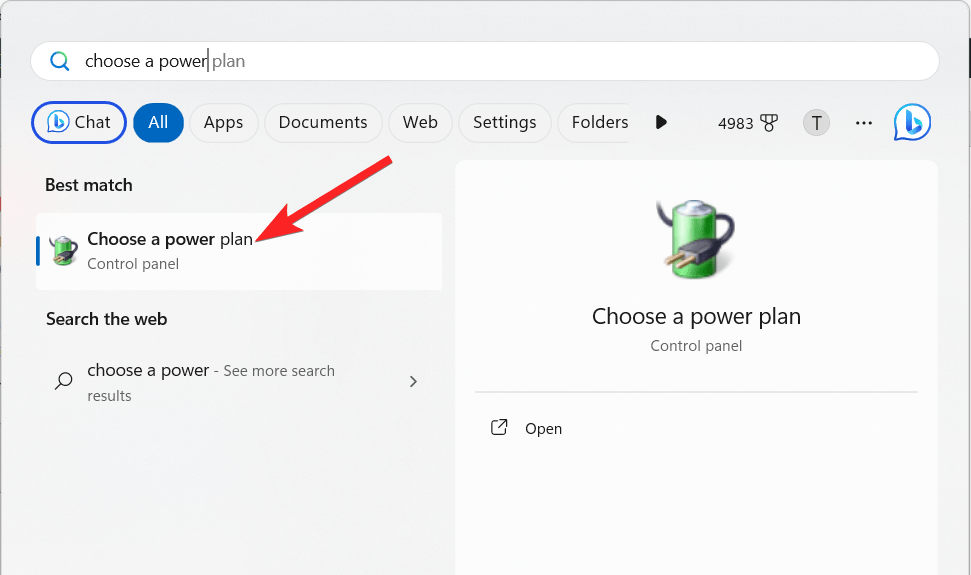
- Press the Windows key and type Power Plans in the search bar on top.
- Select Choose a power plan from the search results.

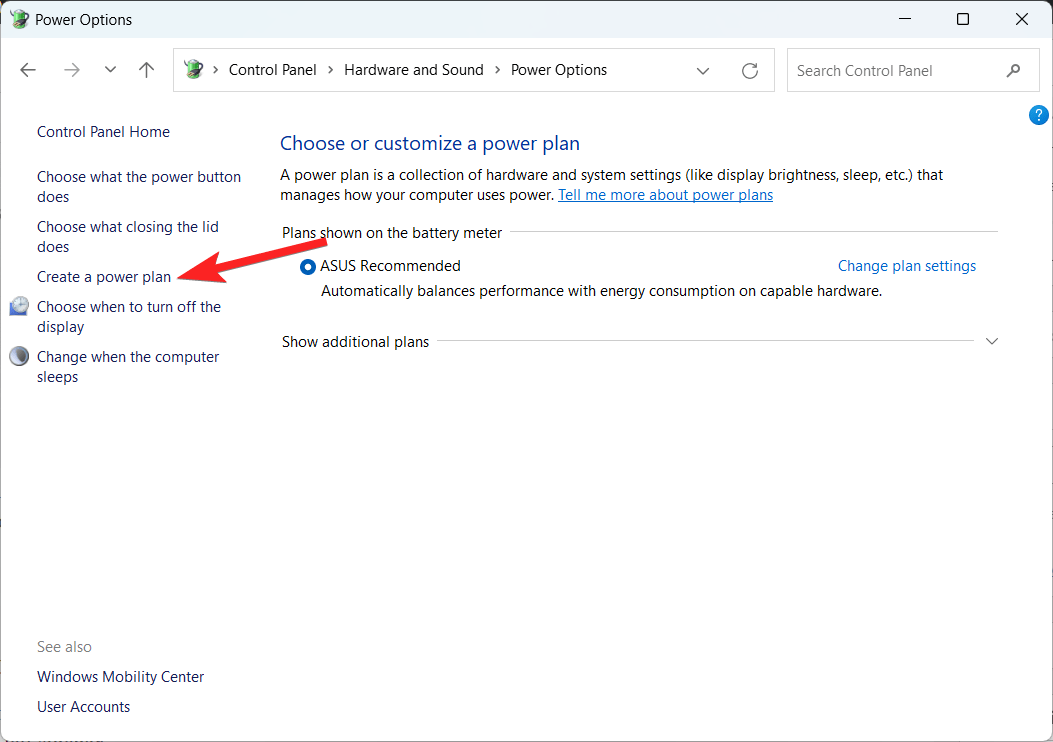
- Select Create a Power Plan from the left menu to edit plan settings.

- Choose the radio button next to High Performance and save the changes.
5. Turning off Memory Integrity
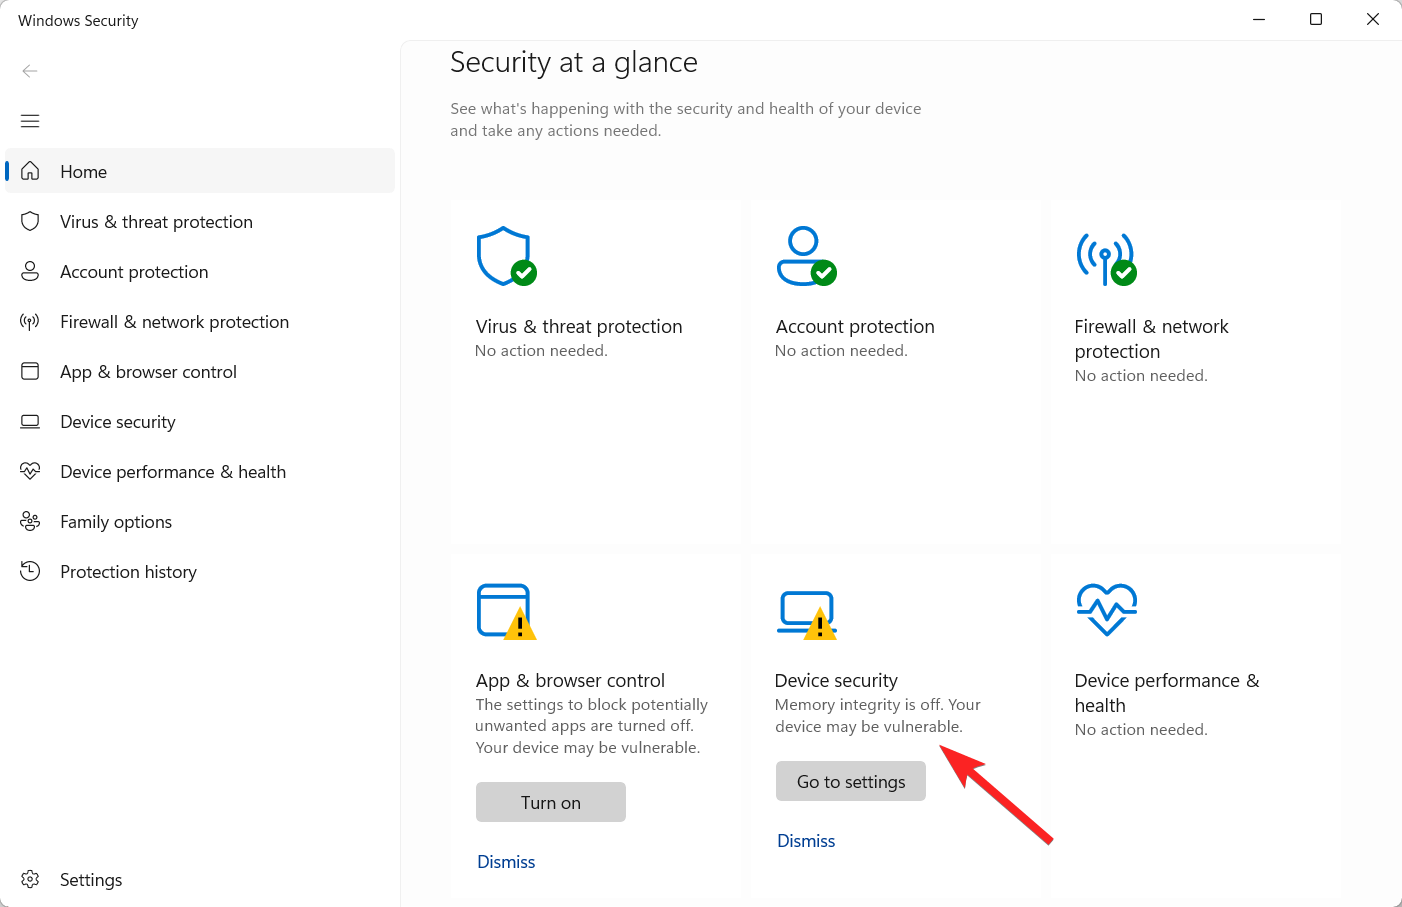
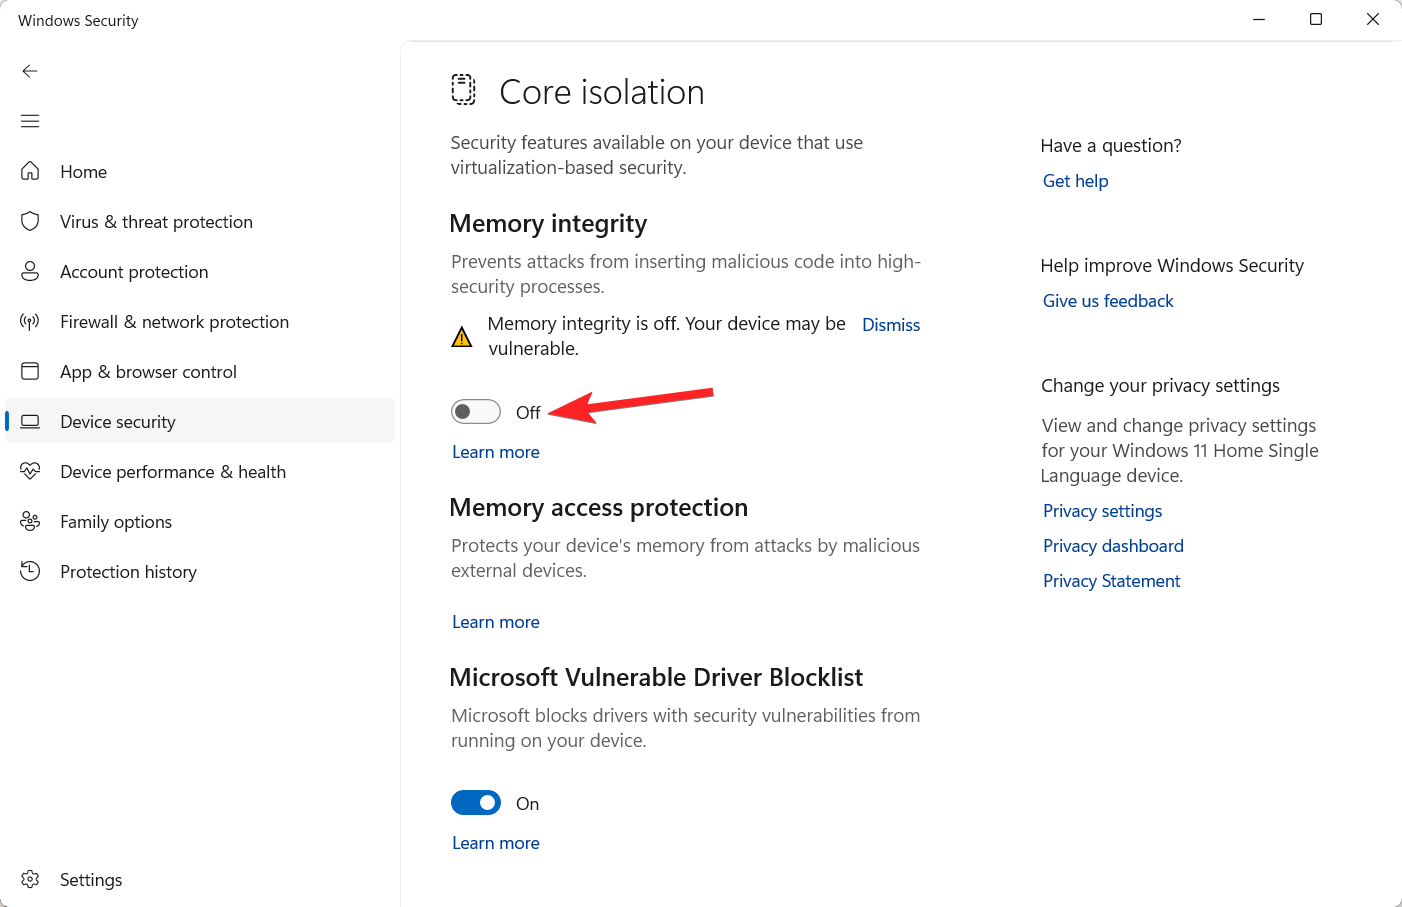
One Windows Defender feature that can hinder gaming performance is Memory Integrity. Try the instructions below to disable Memory Integrity if your gaming performance isn’t working correctly.
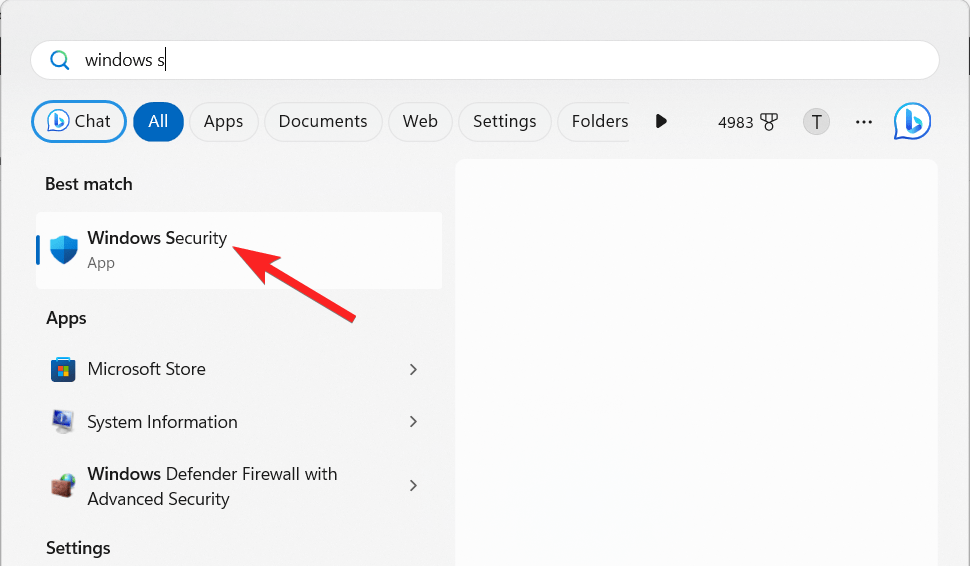
- Press the Windows key to launch the Start menu, type Windows Security in the search bar, and choose the relevant search results.

- Select the Device Security option from the left sidebar.

- Click the Core isolation details link located on the next window.
- Verify that there is no memory integrity setting enabled. If it is on, you only have to click the toggle once to turn it off.

6. Employ Auto HDR
Compared to Standard Dynamic Range (SDR), which is its older sibling, High Dynamic Range (HDR) is far better. Games now seem better because of HDR’s fantastic enhancements, which include improved color depth and brightness representation. Thus, consider activating Auto HDR to improve your gaming experience on Windows 11. Here is what you need to do.
- Launch the Settings app using the Windows + I shortcut.
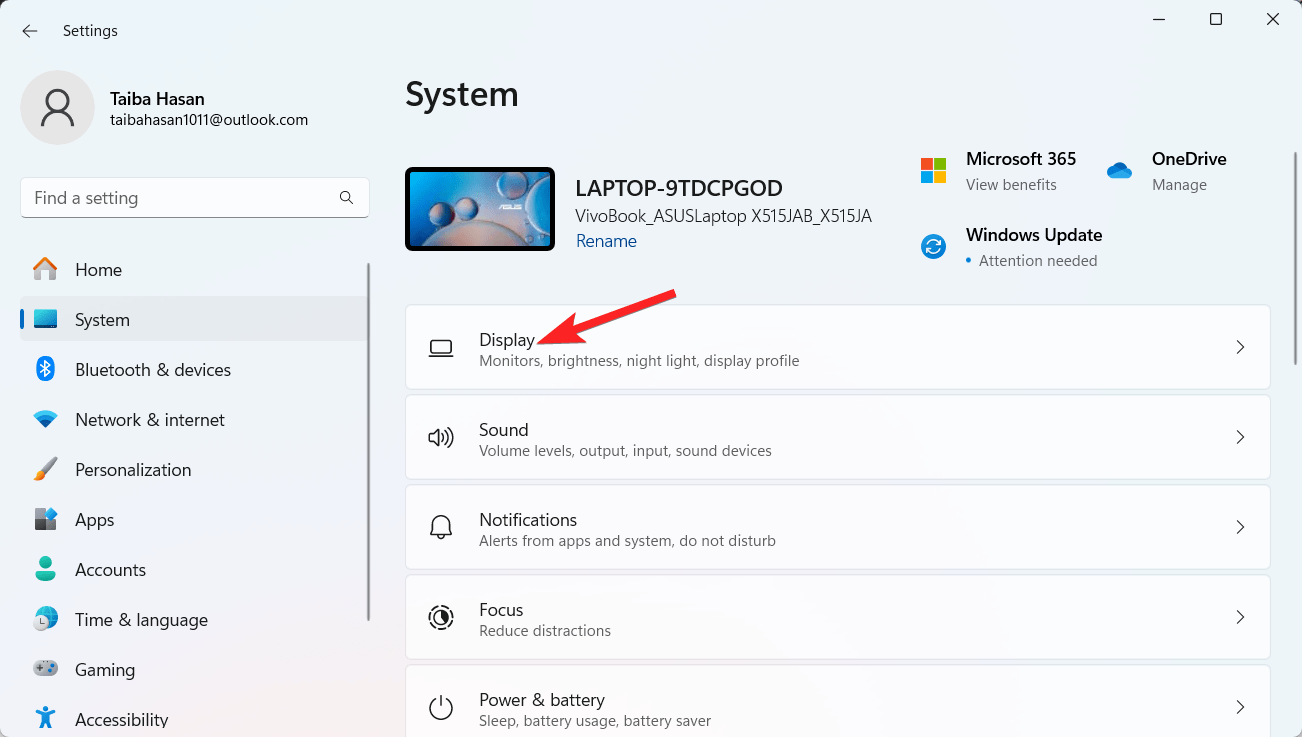
- In the System settings tab, scroll down and select the Display option.

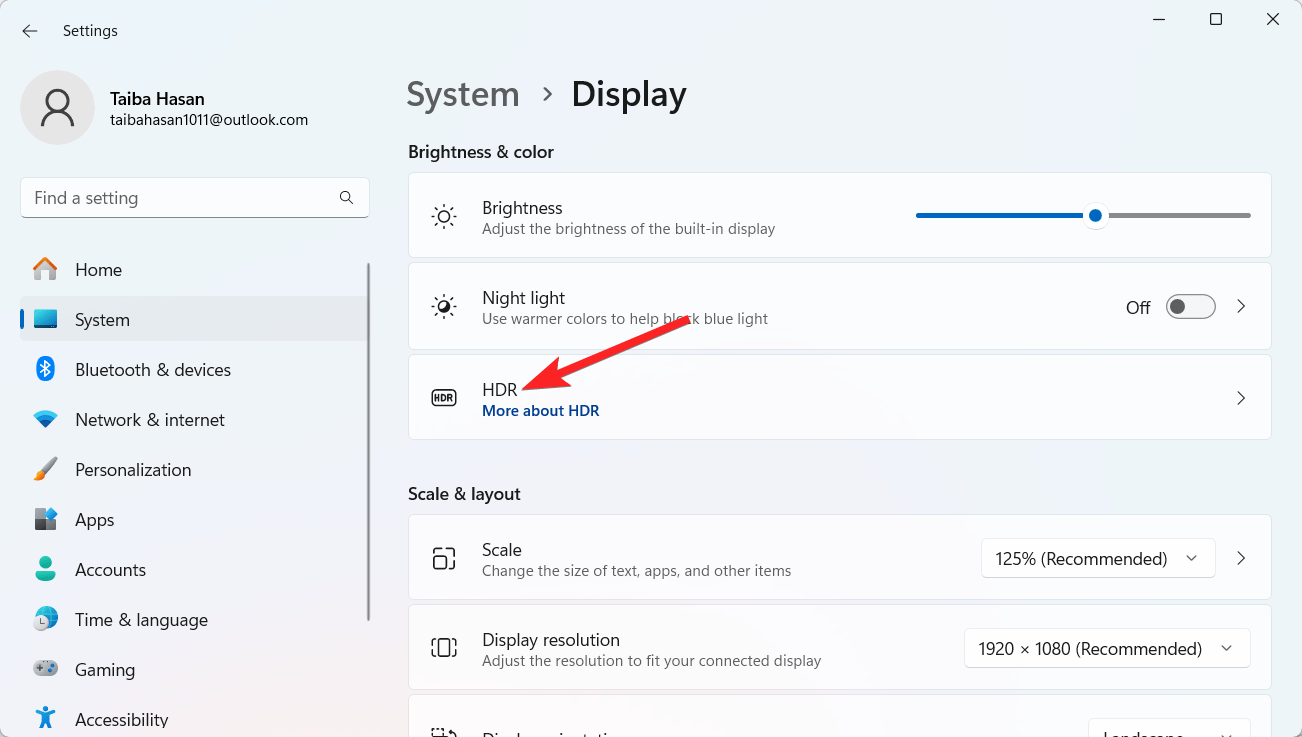
- Next, select the HDR option located under the Brightness & color section.

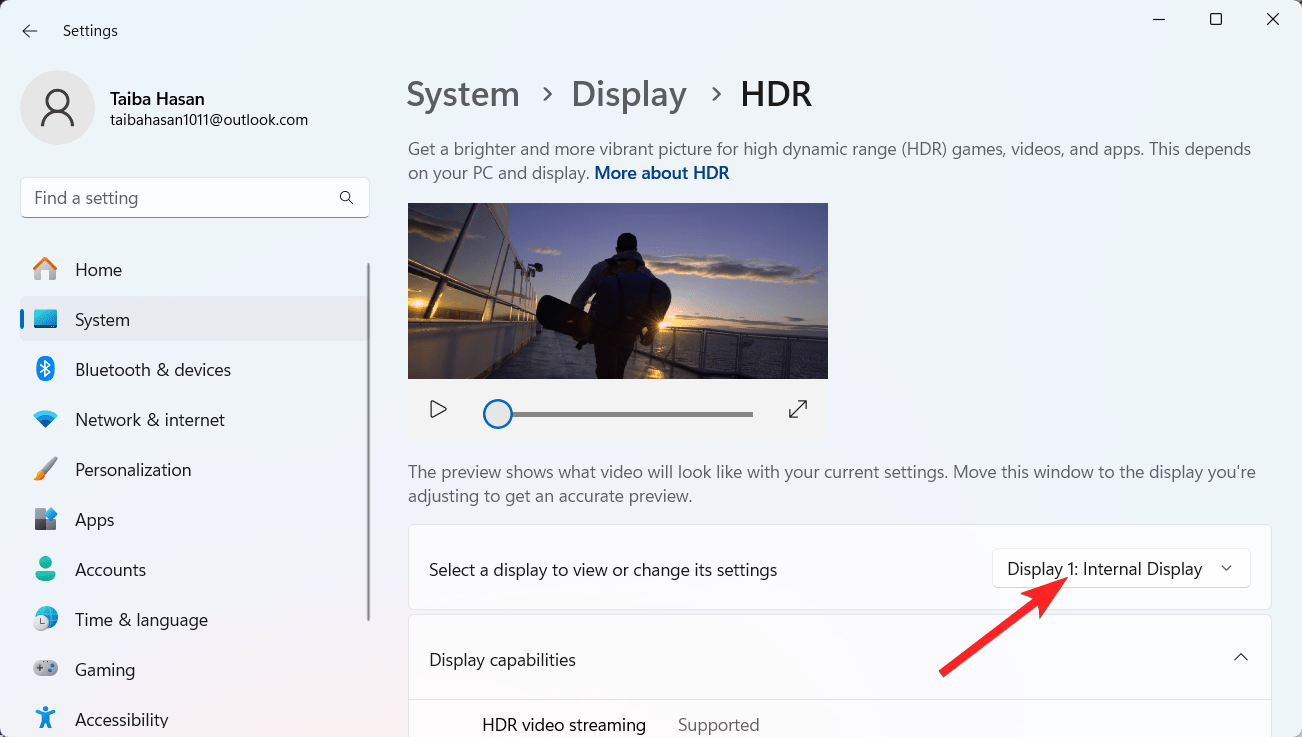
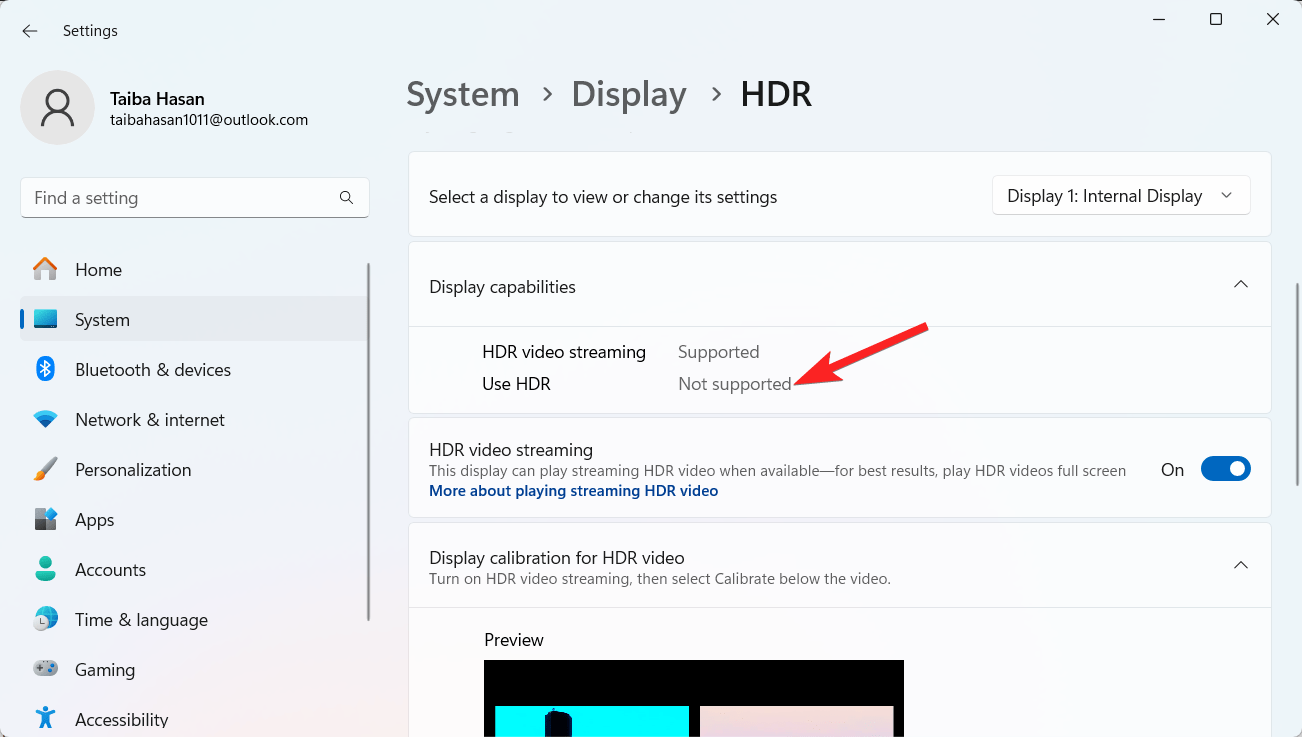
- Expand the drop-down next to the Select a display to view or change its settings option and select the display that you intend to use.

- Scroll down to view the Display Capabilities after that.
- Toggle the Use HDR and Auto HDR settings to the On positions if the Use HDR option is supported.

- You should be able to have an engaging gaming venture once they’re on.
7. Turn off the Improved Pointer Precision
Players need to be made aware of this gaming experience enhancement trick. Windows 11 has improved pointer precision to increase mouse movement and user experience.
Still, many games already have comparable settings built into their control schemes. As a result of the conflict between these two settings, the mouse cursor moves less effectively. This is the exact opposite of what the configuration was intended to accomplish. Turning off increased pointer precision is the best option for gaming PCs. To turn off this option, follow these detailed steps.
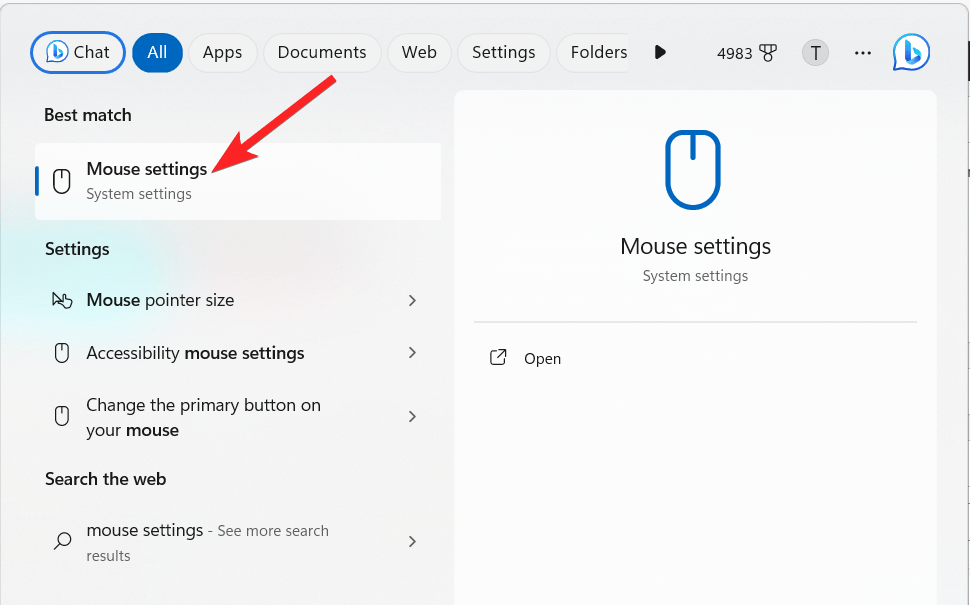
- Press the Windows key to launch the Start menu. Type Mouse Settings and choose the relevant search results.

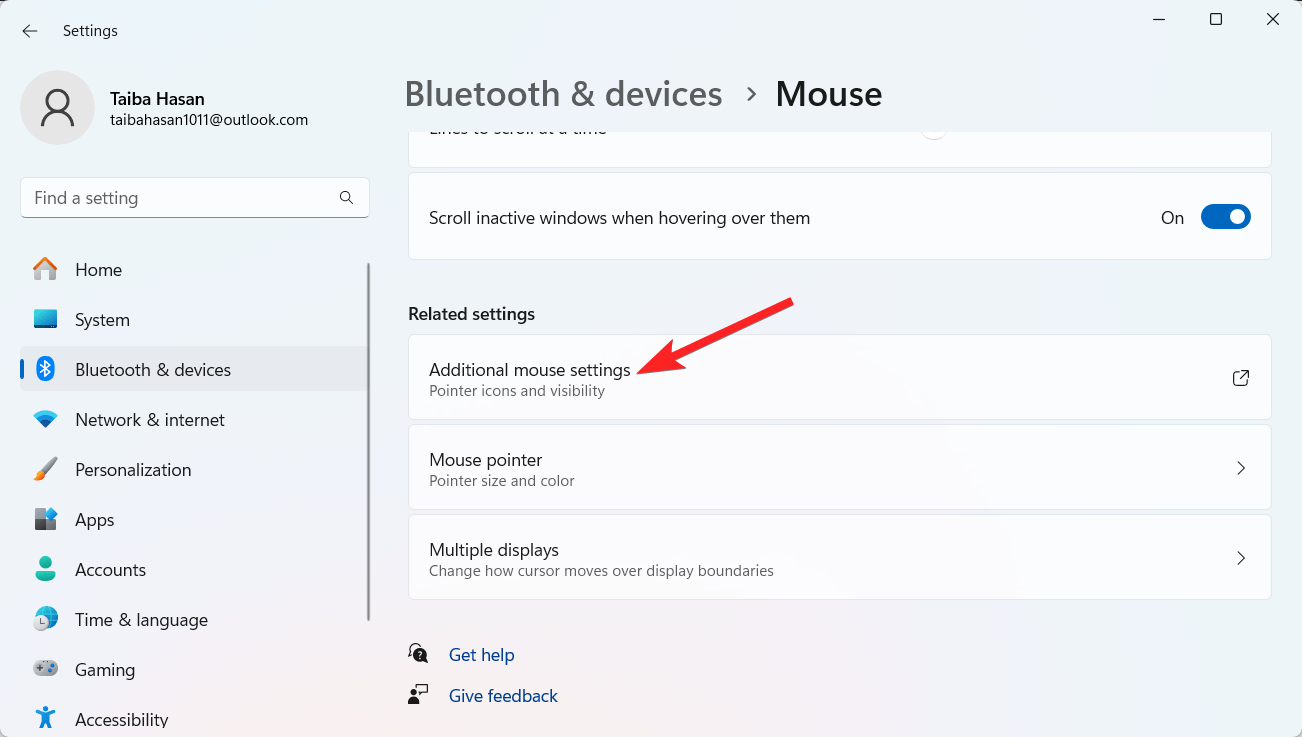
- Scroll down to the related settings and choose the Additional Mouse Settings option.

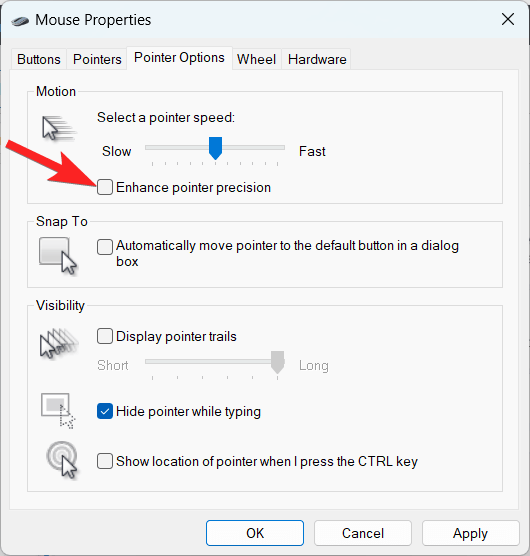
- This action opens the Mouse Properties menu. Next, switch to the Pointer Options tab and remove the checkbox preceding the Enhance Pointer Precision option.

- Click OK to save your changes.
Conclusion
This post has some excellent ideas that will improve your gaming experience. You should be aware that each device will experience different overall benefits.
To achieve the best results, consider additional aspects, such as obsolete processors, slow or full hard drives, specific driver problems, overheating, and ancient graphics cards. You can maximize your game sessions by doing this.
If you've any thoughts on How to Improve the Gaming Experience on Windows 11, then feel free to drop in below comment box. Also, please subscribe to our DigitBin YouTube channel for videos tutorials. Cheers!
