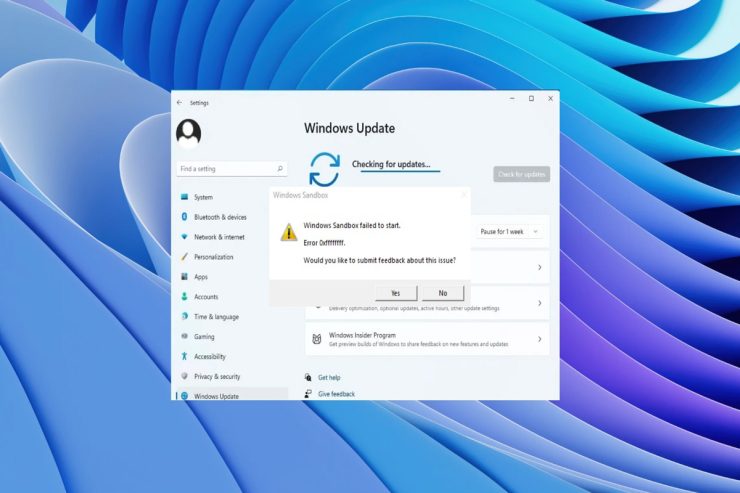
Windows updates are essential for keeping your operating system secure and up-to-date. Nevertheless, it is possible to experience unexpected errors when updating your Windows. You might encounter an error called 0xFFFFFFFF, which can prevent you from installing updates. In this article, we will discuss what causes this error and how to fix it.
Understanding the 0xFFFFFFFF error
Windows update errors such as 0xFFFFFFFF can occur when you attempt to install an update. A corrupted Windows update file, an outdated driver, or a problem with the Windows update service often causes this error. There are several symptoms you may experience when you encounter the 0xFFFFFF error:
- There is a possibility that the Windows update process will freeze or fail.
- Error message 0xFFFFFFFF may appear during the Windows update process.
- The Windows update process may take longer than usual, depending on your system.
What Are The Causes of the 0xFFFFFFFF error?
The 0xFFFFFF error can occur for a variety of reasons. Some of the most common causes are listed below:
- Corrupted Windows update files: Missing or corrupted update files can prevent an update from being successful.
- Outdated drivers: Old drivers can cause compatibility problems with Windows update, resulting in the 0xFFFFFF error.
- Windows update service issues: There can be problems with the Windows update service, preventing a successful update process.
- Malware or virus infections: There are many reasons why the 0xFFFFFFFF error occurs, including infection with malware or viruses.
Top Ways to Fix Windows Update Error 0xFFFFFFFF
The following are some solutions you can try to fix the 0xFFFFFFFF error:
Fix 1: Restart Your Computer
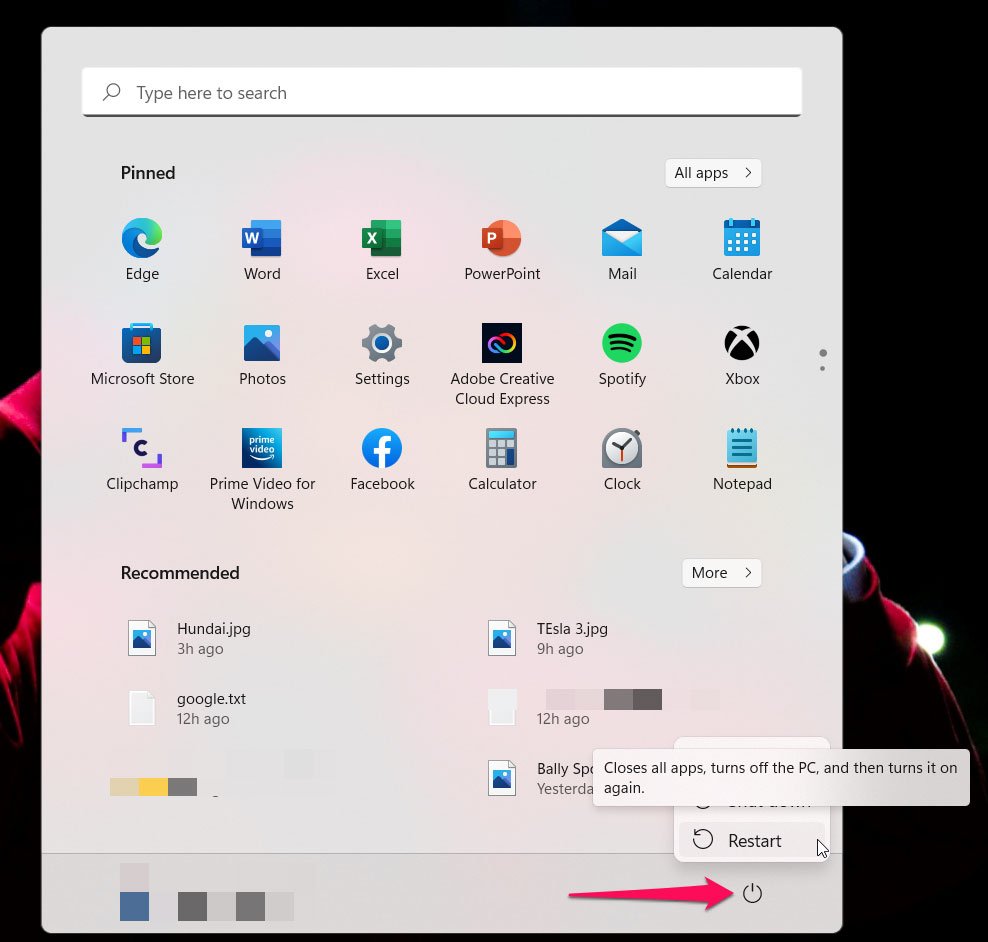
You can fix many computer problems by restarting your computer. This is a very easy and powerful way to fix many software and hardware issues. Your computer is restarted when you shut down and then restart the operating system. This allows all the programs on your computer to start fresh and potentially fix any issues that may have caused problems. Follow these steps to restart your computer:
- Close all open applications and files.
- On your computer, click on the Start menu button.
- Now, in the Start menu, click the power icon.
- From the menu that appears, select “Restart“.

- You’ll have to wait until your computer shuts down and restarts. Depending on your computer’s speed, this may take a few minutes.
Fix 2: Run the Windows Update Troubleshooter
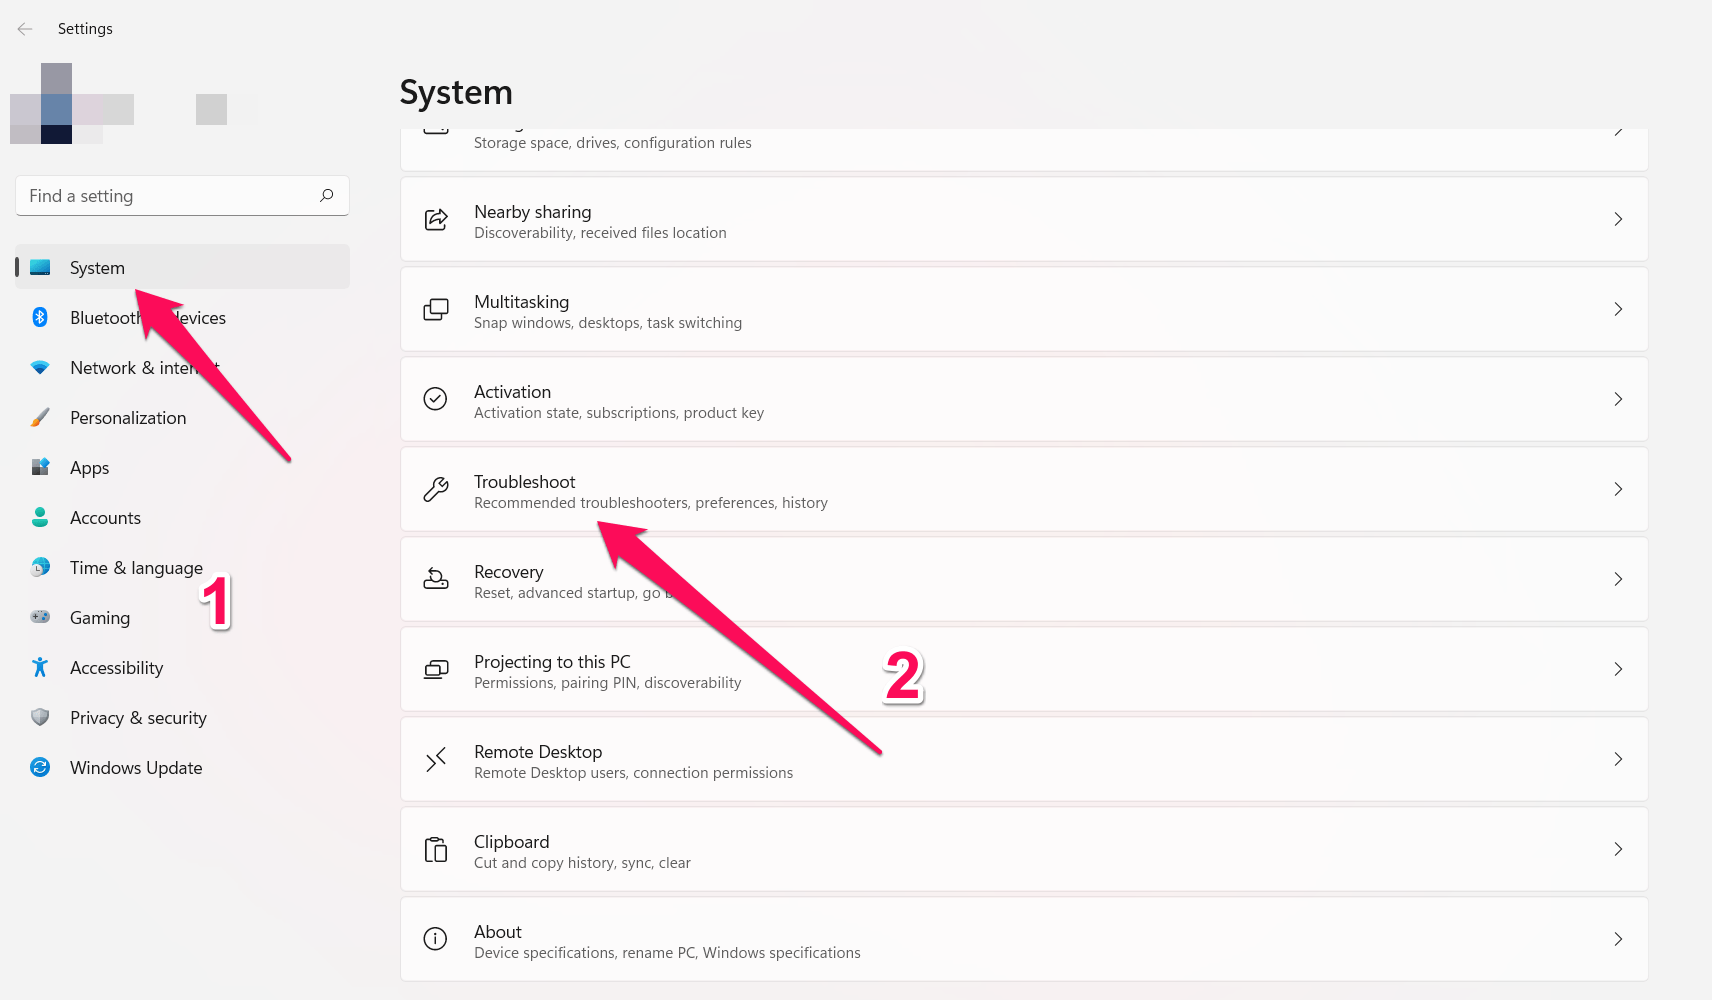
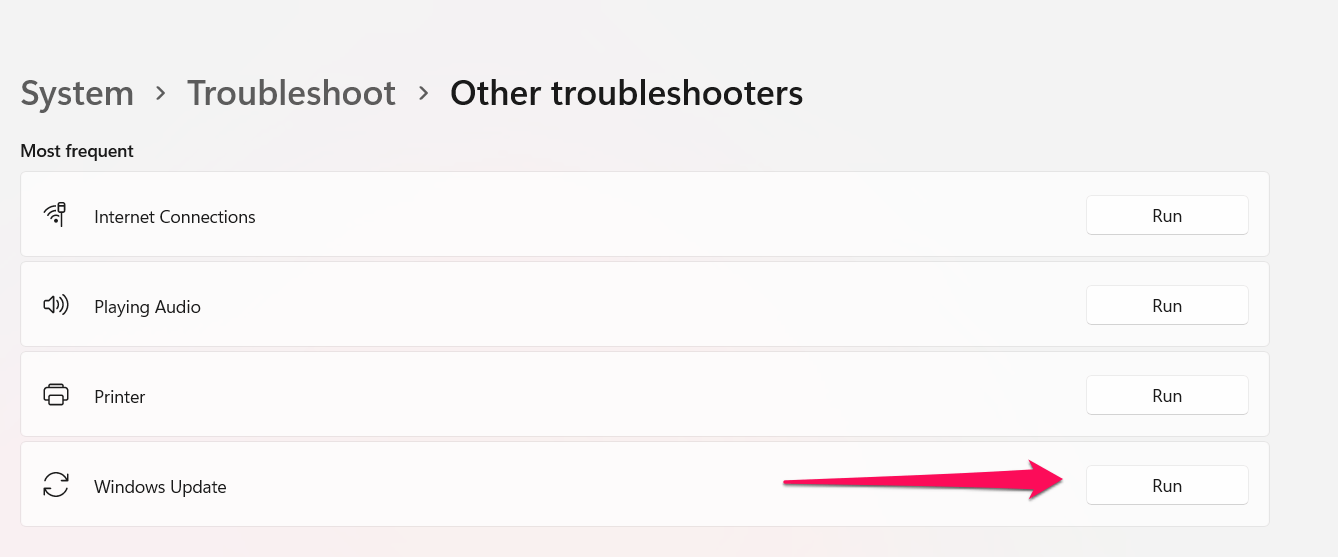
With Windows Update troubleshooter, you can automatically detect and fix a wide variety of common problems with the update process. This tool may help fix failed Windows updates, error messages, or stuck updates. Here’s how to run the Windows Update troubleshooter:
- To open the Settings app, press Windows + I on your keyboard.
- From the list of options, select “System“.
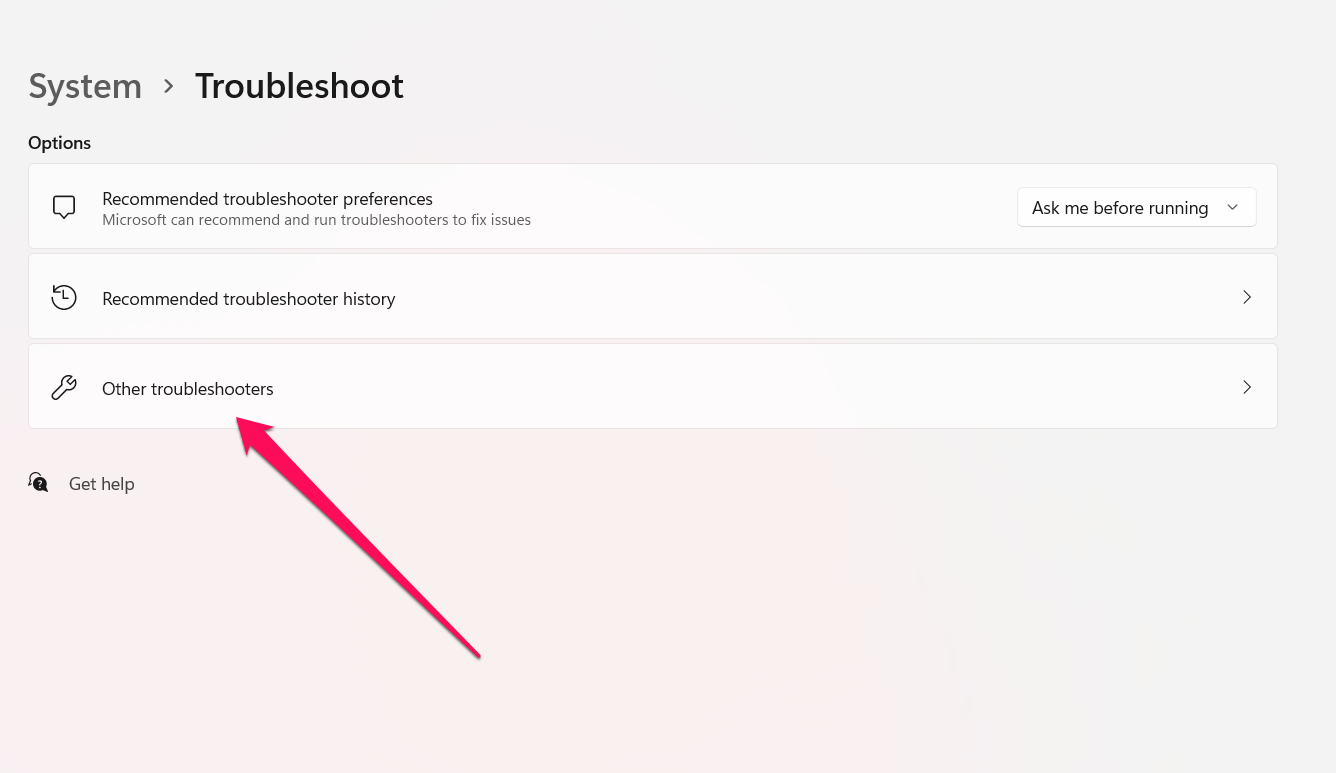
- From the left-hand menu, select “Troubleshoot“.

- To expand the list of options, click on “Other troubleshooters“.

- Locate “Windows Update” and click it.
- To run the troubleshooter, click “Run.”

- Let Windows Update troubleshooter detect any problems.
- If a problem has been detected, follow the instructions on the screen to fix it.
A message will appear after the troubleshooter has finished troubleshooting, stating whether any issues were discovered and whether they have been resolved. Check whether the issue with Windows Update has been resolved if any issues were found and fixed.
Fix 3: Delete the Software Distribution Folder
The system can store temporary files and data related to Windows Updates in the Software Distribution folder on your computer. In some cases, these temporary files can become corrupt or damaged, resulting in failed installations or errors with Windows Update. When you delete the Software Distribution folder, Windows Update will recreate the folder and its contents, thereby resolving these issues. Here’s how to delete the Software Distribution folder:
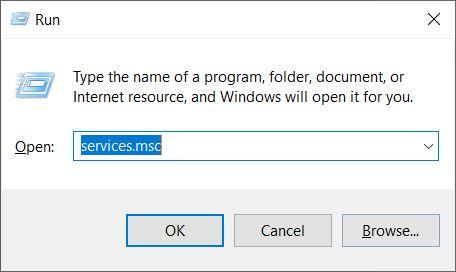
- Initially, open the Run box using Windows + R key combination.
- Now, in the Run dialog box, type “services.msc“.

- Then, look for “Windows Update” in the Services window.
- After that, right-click the “Windows Update” service and select “Stop“.
- Keep the Services window open and minimize it.
- Open File Explorer by pressing Windows + E.
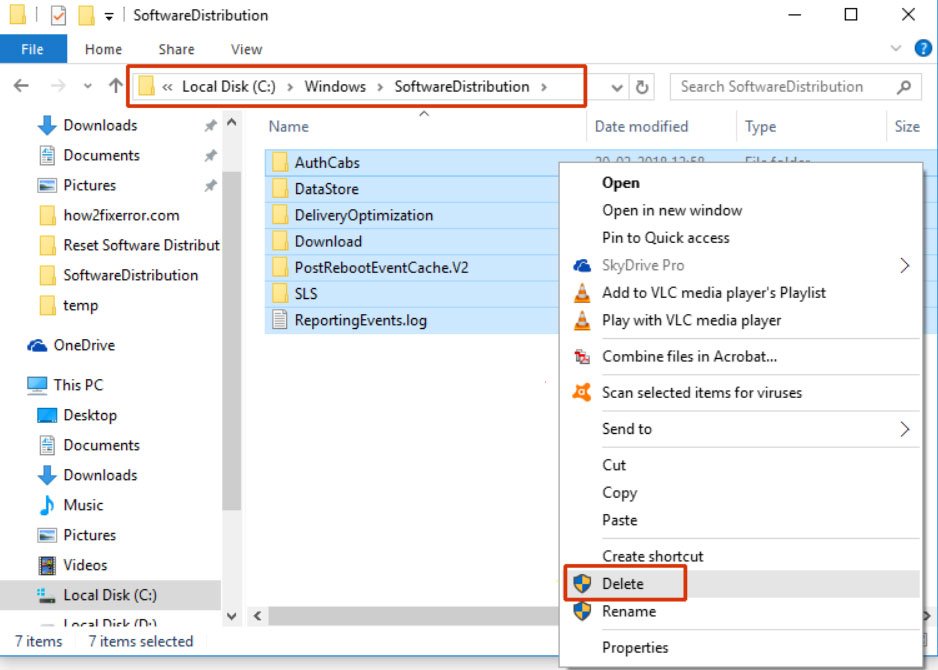
- Locate the following folder in File Explorer: C:/Windows/SoftwareDistribution (Note: If you have installed Windows on a different drive, replace “C:” with the letter of the drive where Windows is installed.)
- Using the Ctrl + A key combination, select all the files and folders in the Software Distribution folder.
- Press the Delete key on your keyboard or right-click and select Delete button if you wish to delete all the selected files and folders. When prompted for permission, click “Yes.”

- Maximize the Services window and right-click on the “Windows Update” service again.
- In the context menu, select “Start” to restart Windows Update.
Fix 4: Update Your Drivers
Keeping your drivers up-to-date is another important step in troubleshooting Windows Update issues. It is recommended that you update your drivers regularly to ensure that your hardware devices work with the latest Windows updates. You can update your drivers in Windows 10 by following these steps:
- To open Device Manager, press the Windows key + X on your keyboard and select it.
- Locate the hardware device you want to update the drivers for in Device Manager.
- To update the driver, right-click the hardware device and select “Update driver“.

- If any driver updates are available, select “Search automatically for updated driver software”. Then, follow the on-screen instructions.
- In case you want to update the driver for another hardware device, repeat steps 3-4.
Fix 5: Scan Your Computer For Malware
You may encounter problems with Windows Update if you have malware such as viruses, spyware, or other types of malicious software on your computer. There are several types of malware that can go undetected by traditional antivirus software, causing your computer to perform poorly. Here’s how to scan your computer for malware using Windows Security (formerly Windows Defender) in Windows 10:
- On your keyboard, press the Windows key + I to open the Settings app.
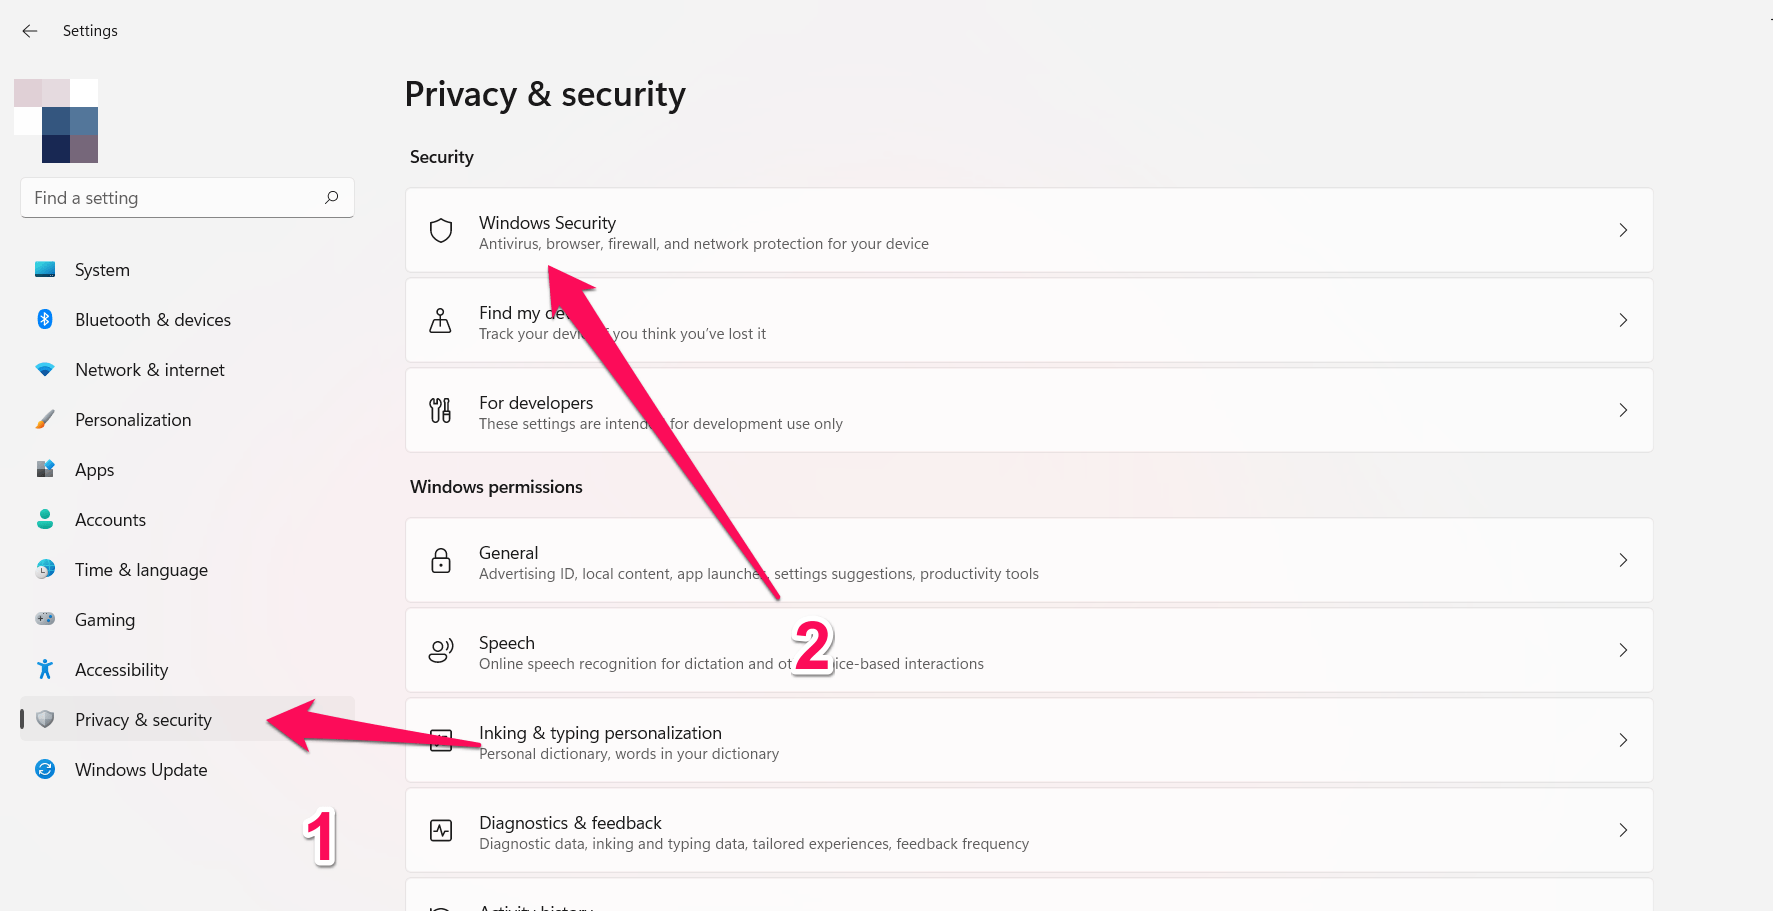
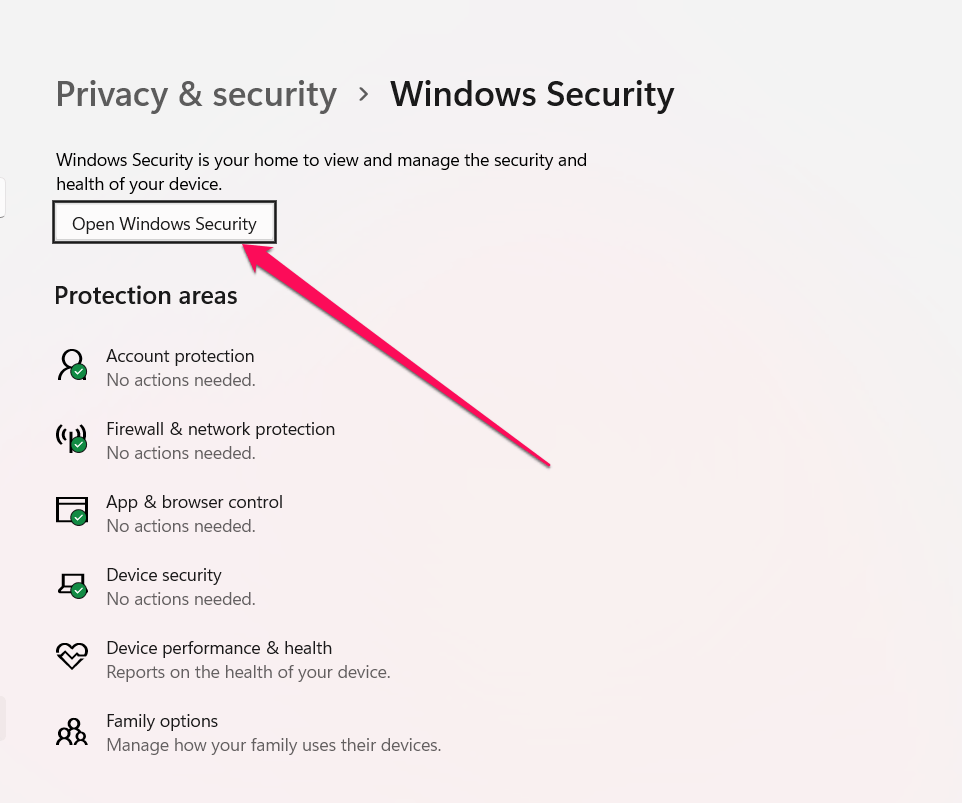
- Choose “Privacy & Security” from the options.

- From the left-hand menu, select Windows Security > Open Windows Security.

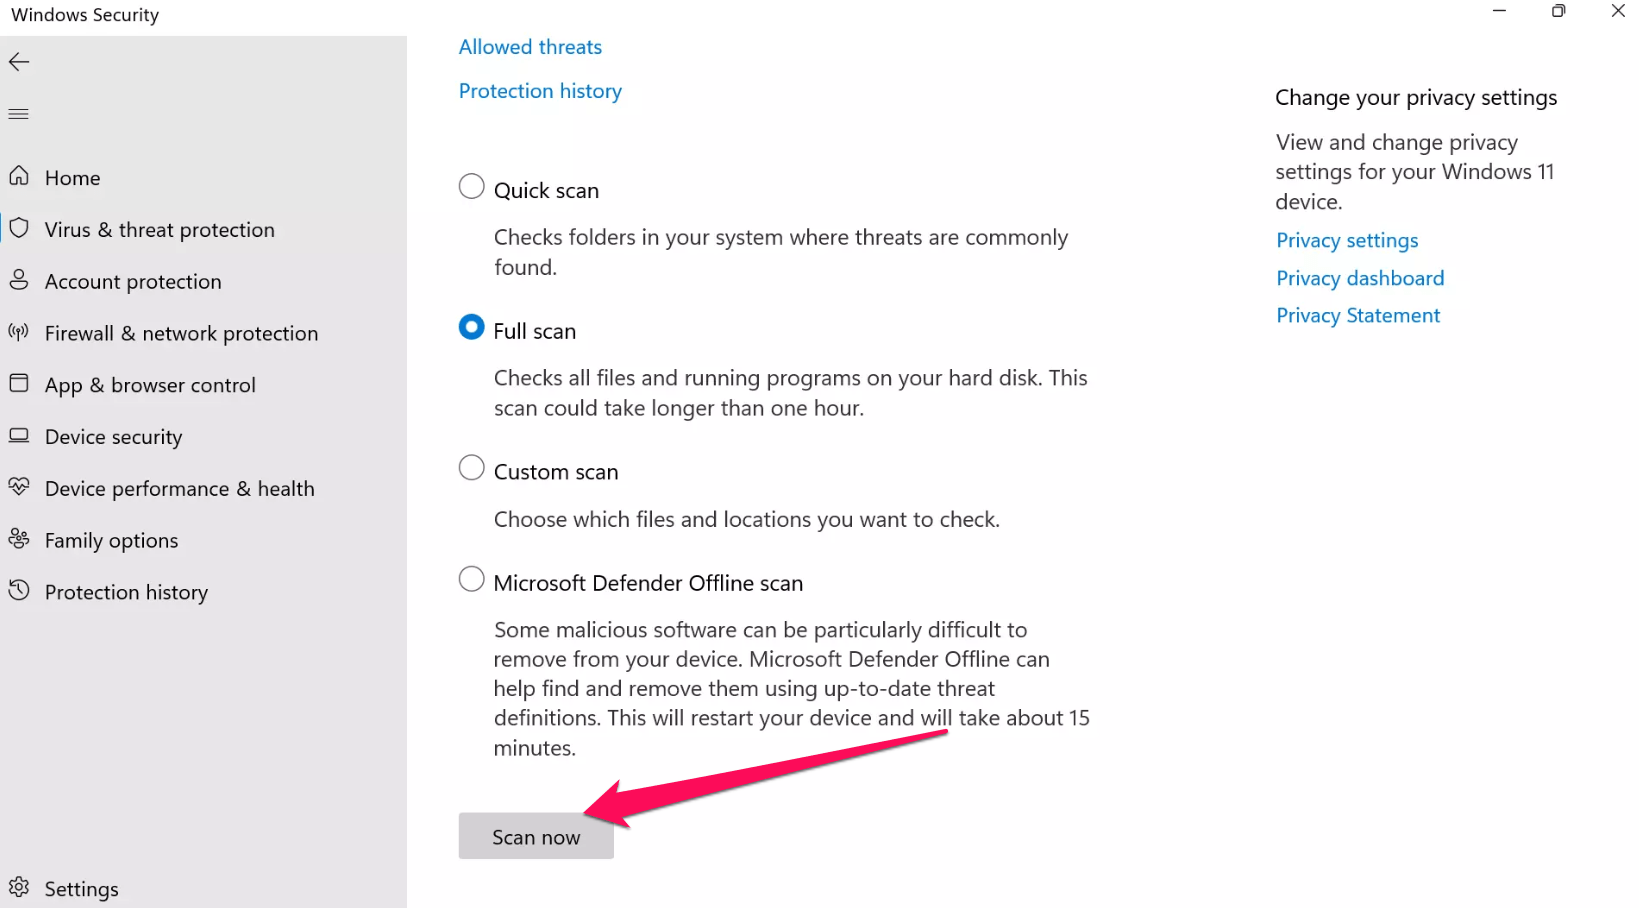
- Select “Virus & threat protection.”
- Select “Scan options.”
- Now, you can run a quick scan or a full scan.
- Then click “Scan now.”

- Let the scan finish. It will prompt you to remove any malware found by Windows Security.
Fix 6: Reset the Windows Update Components
In more complex Windows Update issues, resetting the Windows Update components can help you fixing this problem. Follow these steps if none of the above solutions work:
- Press the Windows key + X on your keyboard, then choose “Command Prompt (Admin)” or “Windows PowerShell (Admin)” from the menu that appears.
- Type the following commands into the Command Prompt or Windows PowerShell window, pressing Enter after each:
net stop wuauserv
net stop cryptSvc
net stop bits
net stop msiserver

- To rename the Software Distribution folder, type the following command:
ren C:\Windows\SoftwareDistribution SoftwareDistribution.old
- To rename Catroot2, type the following command:
ren C:\Windows\System32\catroot2 catroot2.old
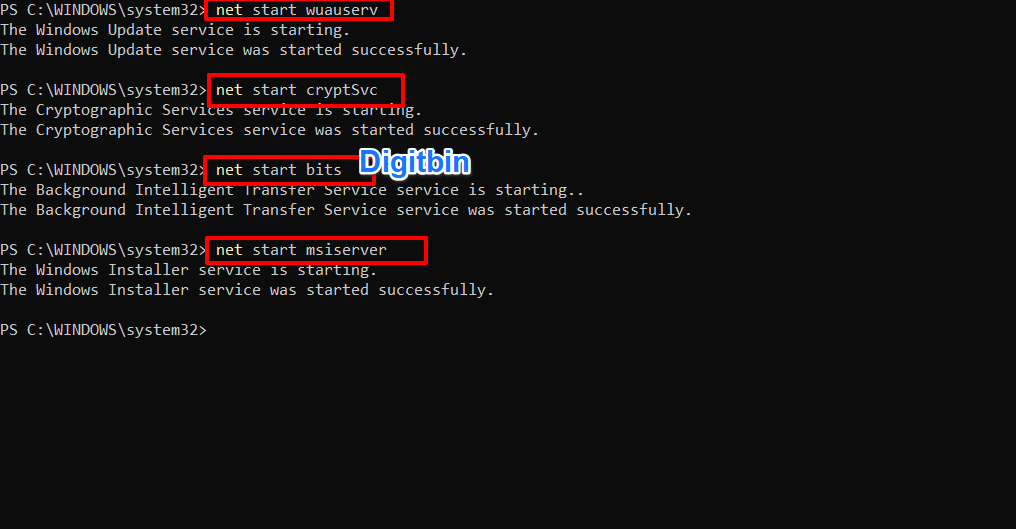
- Type the following commands to restart the necessary services:
net start wuauserv
net start cryptSvc
net start bits
net start msiserver

- That’s it. Now, you can close the Command Prompt or Windows PowerShell window now.
That’s it with this simple guide, you can fix 0xFFFFFFFF Windows Error.
If you've any thoughts on 0xFFFFFFFF: Top 6 Ways to Fix Windows Error, then feel free to drop in below comment box. Also, please subscribe to our DigitBin YouTube channel for videos tutorials. Cheers!
